Table of Contents
Advertisement
Quick Links
Advertisement
Chapters
Table of Contents

Summary of Contents for Smarteh MX (V2) Series
- Page 1 SMART Board MX (V2) series interactive displays USER GUIDE SBID-MX255-V2 SBID-MX265-V2 SBID-MX275-V2 SBID-MX286-V2 SBID-MX255-V2-PW SBID MX265-V2-PW SBID-MX275-V2-PW SBID-MX286-V2-PW Was this document helpful? smarttech.com/docfeedback/171554...
- Page 2 Learn more This guide and other resources for SMART Board MX (V2) and MX (V2) Pro series interactive displays are available in the Support section of the SMART website (smarttech.com/support). Scan this QR code to view these resources on your mobile device. Trademark notice SMART Board, smarttech, the SMART logo and all SMART taglines are trademarks or registered trademarks of SMART Technologies ULC in the U.S.
-
Page 3: Important Information
Important information ENERGY STAR® NOTE Refer to the SMART Board MX (V2) and MX (V2) Pro series ENERGY STAR is the government-backed symbol interactive displays installation and maintenance guide for energy efficiency, providing simple, credible, (smarttech.com/kb/171555) for important information about and unbiased information that consumers and installing and maintaining the display. - Page 4 Important information Innovation, Science and Economic NOTE Development Canada statement This equipment has been tested and found to comply with the limits for a Class A digital device, pursuant to part 15 of the This device complies with RSS-247 of the Innovation, Science FCC Rules.
- Page 5 Important information Cet équipement est conforme aux limites d’exposition aux rayonnements ISED établies pour un environnement non contrôlé. Cet équipement doit être installé et utilisé avec un minimum de 20 cm de distance entre la source de rayonnement et votre corps. Cet émetteur ne doit pas être co- implantés ou exploités conjointement avec une autre antenne ou émetteur.
-
Page 6: Table Of Contents
Contents Important information Chapter 1: Welcome viii About this guide viii About the display viii Identifying your specific model Accessories xiii More information Chapter 2: Using basic features Waking up the display and putting it back in to an energy saving mode Using the Home button Using the front control panel Using the remote control... - Page 7 Contents The screen is blank or there’s a problem with the image on the screen xxxviii There’s no sound or there’s a problem with the sound Touch isn’t working as expected The pens and erasers aren’t working as expected xlii iQ apps aren’t working as expected xlii SMART software on connected computers isn’t working as expected...
-
Page 8: Chapter 1: Welcome
Chapter 1 Welcome About this guide viii About the display viii Touch Writing, drawing, and erasing iQ experience Display Audio Network connectivity Room computers and guest laptops Accessory slot Front control panel Front connector panel Ambient light sensor Power status light Remote control and IR sensor Identifying your specific model Accessories... - Page 9 Chapter 1 Welcome The display includes an extensive set of features and components: Touch You can do everything on the display that you can do at your computer—open and close applications, meet with others, create new documents or edit existing ones, visit websites, play and manipulate videos, and so on—by touching the display’s surface.
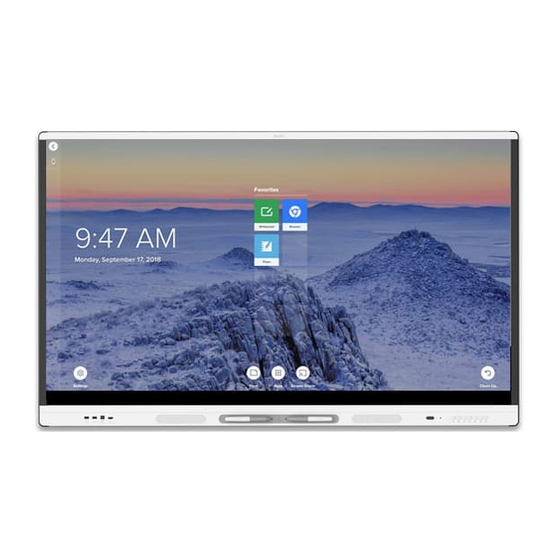
- Page 10 Chapter 1 Welcome iQ experience The display’s iQ experience provides one-touch access to collaborative tools, including a whiteboard, wireless screen sharing, and a web browser. With minimal network integration, there’s no need for wires, cables, or manual software and firmware updates. Tap the Home button on the display’s front control panel or the remote control to open the Home screen.
- Page 11 Chapter 1 Welcome Room computers and guest laptops You can connect room computers and guest laptops and use the display to view and interact with them. The display comes with SMART software that you can install on connected computers to take full advantage of the display’s features while using the connected computers.
-
Page 12: Identifying Your Specific Model
Chapter 1 Welcome Power status light The power status is located in the bottom-right corner of the display’s frame. The power status light indicates the display’s status. Power status Display status light Energy saving mode For information about the display's power saving modes, see energy-saving- modes.htm. -
Page 13: Accessories
Chapter 1 Welcome Model Screen size (approximate) SBID-MX286-V2 86" (218 cm) SBID-MX255-V2-PW 55" (140 cm) SBID-MX265-V2-PW 65" (165 cm) SBID-MX275-V2-PW 75" (190 cm) SBID-MX286-V2-PW 86" (218 cm) Accessories Accessories for the SMART product include: SMART OPS PC module Stands USB extenders NOTE For more information about these and other accessories, see smarttech.com/accessories. -
Page 14: More Information
Chapter 1 Welcome USB extenders As noted in the display’s specifications, there is a maximum length for USB cable connections between the display and computer. When using USB 2.0, the cable should be no longer than 16' (5 m). When using USB 3.0, the cable should be no longer than 9' (3 m). Use one of the following USB extenders if you need a longer USB connection: Extender Specifications... -
Page 15: Chapter 2: Using Basic Features
Chapter 2 Using basic features Waking up the display and putting it back in to an energy saving mode Using the Home button Using the front control panel Using the remote control xvii Using touch Writing, drawing, and erasing Writing and drawing in digital ink Using the SMART Ink dynamic (floating) toolbar xxii Changing a pen’s default color, thickness, and other properties... -
Page 16: Using The Home Button
Chapter 2 Using basic features Using the Home button You can use the Home screen to open and use iQ apps, view the input of connected computers, and more. You can also change the background and personalize other features of the Home screen. To learn more about the Home screen, see Understanding the Home screen. -
Page 17: Using The Remote Control
Chapter 2 Using basic features Name Procedure Volume decrease Press to turn down the volume (see Adjusting the volume on page xxiii). Volume increase Press to turn up the volume (see Adjusting the volume on page xxiii). Power Press to wake the display (see Waking up the display and putting it back in to an energy saving mode on page xv). - Page 18 Chapter 2 Using basic features smarttech.com/kb/171554 xviii...
-
Page 19: Using Touch
Chapter 2 Using basic features Name Procedure Press to enter or exit an energy saving mode (see Waking up the Power display and putting it back in to an energy saving mode on page xv). NOTE Touch is not available right after waking up the display or turning it on. - Page 20 Chapter 2 Using basic features You can use a variety of gestures within applications, including panning, scaling, rotating, and zooming in and out. The display’s support for up to 20 simultaneous interaction points enables you and other users to interact with objects on the screen at the same time.
-
Page 21: Writing, Drawing, And Erasing
Chapter 2 Using basic features Rotate Flick Erase with palm Erase with fist Writing, drawing, and erasing The display includes two pens, which you can use to write or draw in digital ink. You can erase digital ink using gestures or the eraser tool in the apps. Writing and drawing in digital ink To write or draw in digital ink 1. -
Page 22: Using The Smart Ink Dynamic (Floating) Toolbar
Chapter 2 Using basic features Using the SMART Ink® dynamic (floating) toolbar When you start drawing on the screen while viewing a connected computer’s input, the SMART Ink® dynamic (floating) toolbar for SMART Ink appears on the screen. You can use this toolbar to temporarily change the pen’s color, thickness, or other properties, and you can also access SMART Ink’s tools, such as screen capture, spotlight, screen shade, and so on. -
Page 23: Adjusting The Volume
Chapter 2 Using basic features Adjusting the volume Use the buttons on the convenience panel or the remote control to increase, decrease, or mute the SMART product’s volume. NOTE See There’s no sound or there’s a problem with the sound on page xl if you encounter issues with the SMART product’s sound. -
Page 24: Showing And Hiding The Screen Shade
Chapter 2 Using basic features You can write or draw over the screen while it is frozen (seeWriting, drawing, and erasing on page xxi). If the iQ experience is enabled, you can then save the screenshot of your writing or drawing to the Files Library (see Using the iQ experience Files Library). -
Page 25: Chapter 3: Using The Iq Apps
Chapter 3 Using the iQ apps The SMART product comes with the following iQ apps: SMART Whiteboard Browser Input Screen Share kapp Whiteboard You can use these apps along with the Files Library and Apps Library to deliver lessons in a classroom or coordinate meetings and other collaborative activities. -
Page 26: Using The Files Library
Chapter 3 Using the iQ apps Using the Files Library The Files Library contains kapp Whiteboard sessions, SMART Notebook files, SMART Whiteboards, PDFs, and screenshots. If a USB drive is connected to the display, the files on the USB drive are also available in the Files Library. -
Page 27: Using Screen Share
Chapter 3 Using the iQ apps Using Screen Share You can share the screens from computers and mobile devices on the SMART product wirelessly using Screen Share. Screen Share supports: Chromebook™ laptops, using the Chrome™ browser Windows computers, using Miracast , Chrome browser, or AirParrot Mac computers and iOS devices, using AirPlay Android™... -
Page 28: Cleaning Up The Smart Product
Chapter 3 Using the iQ apps Cleaning up the SMART product After you’ve finished using the display, tap Clean Up on the Home screen to clean up the display for the next user. Tapping the Clean Up button does the following: Signs out of everything in the Browser app. -
Page 29: Chapter 4: Connecting Computers And Other Devices
Chapter 4 Connecting computers and other devices Installing and using SMART software xxix Downloading and installing SMART software Using SMART software Connecting room computers and guest laptops xxxi Viewing a connected computer’s input xxxiii Setting a connected computer’s resolution and refresh rate xxxiii Connecting USB drives, peripherals, and other devices xxxiv... - Page 30 Chapter 4 Connecting computers and other devices Software Description Notes SMART Ink Software that enables you to write and draw in Included with digital ink over applications, files, folders, SMART Learning Suite websites, and any other open window. You can purchase additional licenses or subscriptions to SMART software to install on other computers. The following software is also available but sold separately: Software Description...
-
Page 31: Connecting Room Computers And Guest Laptops
Chapter 4 Connecting computers and other devices SMART Product Drivers SMART Ink SMART Remote Management SMART Product Drivers and Ink are installed and used on the computer input of the SMART product to enable touch and digital inking features. This supporting software is included with SMART’s software products, such as SMART Notebook, SMART Meeting Pro, and SMART TeamWorks, or is available for free... - Page 32 Chapter 4 Connecting computers and other devices Side and bottom connector panel Front connector panel NOTES Install SMART software on any computers you connect to the display (see Installing and using SMART software on page xxix). Your organization’s installers might have connected cables to the display and run the cables behind a wall or under the floor to a desk or table where you can place your computer.
- Page 33 Chapter 4 Connecting computers and other devices Viewing a connected computer’s input To view a connected computer’s input 1. Connect the computer to the display. 2. Press the Input button on the front control panel or the remote control. The display shows thumbnails of the devices that are connected to the display’s inputs: NOTE A thumbnail with Touch enabled indicates a USB cable is connected between the display and...
- Page 34 Chapter 4 Connecting computers and other devices Resolution Input source aspect ratio Mode Refresh rate 1280 × 720 16:9 HD / 720p 59.94 Hz / 60 Hz 50 Hz 29.97 Hz / 30 Hz 25 Hz 23.98 Hz / 24 Hz 720 ×...
-
Page 35: Connecting A Smart Ops Pc Module
Chapter 4 Connecting computers and other devices Connecting a SMART OPS PC module If your organization has purchased a SMART OPS PC module, you or your organization’s installers can install the OPS PC module in the display’s accessory slot following the OPS PC module’s installation instructions (smarttech.com/kb/171544). - Page 36 Chapter 4 Connecting computers and other devices Input source USB 3.0 Type-A receptacle on the side USB 2.0 Type-A receptacle on the front connector panel connector panel (SuperSpeed) (Hi-Speed) HDMI 1 (SuperSpeed) (Hi-Speed) HDMI 2 (SuperSpeed) (Hi-Speed) HDMI 3 (SuperSpeed) (Hi-Speed) (SuperSpeed) (Hi-Speed)
-
Page 37: Chapter 5: Troubleshooting
Chapter 5 Troubleshooting The display isn’t turning on xxxvii The screen is blank or there’s a problem with the image on the screen xxxviii There’s no sound or there’s a problem with the sound Touch isn’t working as expected The pens and erasers aren’t working as expected xlii iQ apps aren’t working as expected xlii... -
Page 38: The Screen Is Blank Or There's A Problem With The Image On The Screen
Chapter 5 Troubleshooting The screen is blank or there’s a problem with the image on the screen NOTE If the issue occurs on the Home screen, the issue may be with the display. See Contacting your reseller for additional support on page xliii. If the issue doesn’t occur on the Home screen, examine the connected computers or devices. - Page 39 Chapter 5 Troubleshooting Symptom Troubleshooting steps Colors don’t appear correctly. Be aware that if two or more SMART products are mounted side-by-side, there could be minor differences in colors across the SMART products. This issue is not unique to SMART products. If the screen is completely lacking one color on the screen or the color problems occur on the Home screen, see Contacting your reseller for additional support on page xliii.
-
Page 40: There's No Sound Or There's A Problem With The Sound
Chapter 5 Troubleshooting There’s no sound or there’s a problem with the sound Symptom Troubleshooting steps There’s no sound. If you’re using an external audio system, make sure it is turned on. Make sure the cables connecting the SMART product to the computer are securely fastened. -
Page 41: Touch Isn't Working As Expected
Chapter 5 Troubleshooting Touch isn’t working as expected Symptom Troubleshooting steps The SMART product doesn’t respond Touch is not available right after waking up the display or turning it on. Wait a few to touch. seconds and then the display will respond to touch. Make sure SMART Product Drivers 12.14 or later are installed and running on any... -
Page 42: The Pens And Erasers Aren't Working As Expected
Chapter 5 Troubleshooting The pens and erasers aren’t working as expected Symptom Troubleshooting steps The SMART product doesn’t respond Touch is not available right after waking up the display or turning it on. Wait a few to touch or writing with a pen. seconds and then the display will respond to touch. -
Page 43: Smart Software On Connected Computers Isn't Working As Expected
Chapter 5 Troubleshooting SMART software on connected computers isn’t working as expected Symptom Troubleshooting steps SMART Notebook software isn’t Troubleshooting SMART Notebook. working as expected. Lumio isn’t working as expected. Troubleshooting common issues in Lumio by SMART. SMART TeamWorks software isn’t Troubleshooting SMART TeamWorks. - Page 44 Chapter 5 Troubleshooting TIPS Scan the QR code on the label to view the SMART Board MX (V2) or MX (V2) Pro series interactive display support pages on the SMART website. You can also find the serial number in the iQ settings. Refer to the SMART Board MX (V2) and MX (V2) Pro series interactive displays installation and maintenance guide (smarttech.com/kb/171555) for more information.
- Page 45 SMART TECHNOLOGIES smarttech.com/support smarttech.com/contactsupport smarttech.com/kb/171554...
Need help?
Do you have a question about the MX (V2) Series and is the answer not in the manual?
Questions and answers