Dexter Power PC1300RT Original Instructions Manual
Hide thumbs
Also See for PC1300RT:
- Assembly, use, maintenance manual (12 pages) ,
- Assembly, use, maintenance manual (12 pages)

Related Manuals for Dexter Power PC1300RT


Summary of Contents for Dexter Power PC1300RT
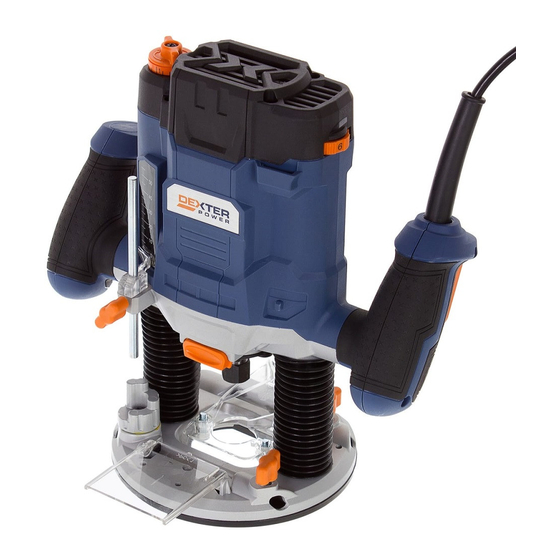
- Page 1 Router PC1300RT EAN CODE: 3 276000 256373 Instruções originais / Original Instructions...
- Page 3 SÍMBOLOS Para reduzir o risco de lesões, o usuário deve ler este manual de instruções Máquina classe II - Isolamento duplo - Você não precisa de nenhum plugue com aterramento Apresenta risco de acidente pessoal, morte ou danos à ferramenta no caso de não observação das instruções deste manual Indica perigo de choque elétrico.
- Page 4 1. ÁREA DE APLICAÇÃO DA FRESADORA Este produto destina-se a fresar ranhuras, arestas, perfis e furos alongados, bem como para cortes de moldes em madeira, plástico e materiais de construção leves, apoiando-se firmemente sobre a peça de trabalho. Não utilize máquinas, ferramentas e acessórios para aplicações adicionais (veja as instruções do fabricante) em outros trabalhos que não aqueles para os quais foram projetados.
- Page 5 2. INSTRUÇÕES DE SEGURANÇA 2. SEGURANÇA ELÉTRICA a) Os plugues de ferramentas elétricas devem corresponder à tomada. Nunca modifique o plugue de maneira alguma. Não use nenhum plugue adaptador com ferramentas elétricas aterradas (ligadas à terra). O uso de plugues não modificados e de tomadas correspondentes reduzirá o risco de choque elétrico.
- Page 6 2. INSTRUÇÕES DE SEGURANÇA d) Remova qualquer chaveta ou chave de ajuste antes de ligar a ferramenta elétrica. Uma chave ou chaveta que permaneça conectada a uma parte giratória da ferramenta elétrica pode resultar em lesão pessoal. e) Não se incline sobre a pistola. Mantenha os pés no chão e o equilíbrio o tempo todo.
- Page 7 2. INSTRUÇÕES DE SEGURANÇA f) Mantenha as ferramentas cortantes afiadas e limpas. As ferramentas de corte apropriadamente mantidas, com pontas de corte afiadas, têm menor probabilidade de engripar e são mais fáceis de controlar. g) Use a ferramenta elétrica, acessórios e pontas etc. em conformidade com estas instruções, levando em consideração as condições de trabalho e a tarefa a ser realizada.
- Page 8 2. INSTRUÇÕES DE SEGURANÇA • O limite máximo indicado de velocidade de rotação da broca não deve ser excedido. • A fresa deve sempre ser conduzida para o lado oposto da direção de rotação da broca (rotação da broca). • A broca deve estar trabalhando à velocidade total antes de abaixar na peça de trabalho.
- Page 9 3. DESCRIÇÃO Interruptor Liga/Desliga Botão de travamento Ajustador de velocidade Alavanca de botão serra de fresagem Botão de travamento da ponta do eixo Porca da pinça Amortecedor para parada de profundidade Parada de profundidade Botão de ajuste fino Adaptador de extração de pó Parafuso de travamento Parafuso para a guia de margem Placa de base...
- Page 10 4. DADOS TÉCNICOS Designação do tipo PC1300RT Tensão nominal 127V~ 60Hz Entrada de potência nominal 1300W Velocidade, n 11000-30000/min Tamanho da pinça 6/8mm Profundidade máxima de corte 55 mm 5. ANTES DE LIGAR O EQUIPAMENTO ADVERTÊNCIA: O aparelho deve ser desligado da alimentação antes de entrar em funcionamento.
- Page 11 5. ANTES DE LIGAR O EQUIPAMENTO Para remover a broca 1. Mantenha o botão de bloqueio do eixo abaixado. 2. Afrouxe a porca das pinças usando uma chave e remova a broca. 3. Aperte a porca e solte o bloqueio do eixo. Instalando a guia de margem A guia de margem é...
- Page 12 5. ANTES DE LIGAR O EQUIPAMENTO Se várias profundidades diferentes de corte são necessárias para trabalhar na peça, estas também podem ser pré-ajustadas utilizando o amortecedor de etapa. Direção de avanço O movimento de avanço da fresa deve ser sempre realizado contra a direção de rotação desta (moagem). Ao efetuar a moagem na direção da rotação de fresa (corte baixo), a fresa pode perder o controle, eliminando, assim, o controle pelo usuário.
- Page 13 6. OPERAÇÃO ADVERTÊNCIA: Antes de ligar a ferramenta na tomada, sempre verifique se o gatilho e o botão de trava funcionam corretamente. Para ligar, pressione o botão de trava e aperte o gatilho. Para desligar, solte o botão de gatilho. PROCESSOS DE FRESA Ajuste a profundidade de corte como descrito previamente.
- Page 14 7. MANUTENÇÃO Sempre desligue o equipamento antes de realizar qualquer operação de ajuste ou manutenção. Se o cabo de alimentação estiver danificado, ele deve ser substituído pelo fabricante ou o seu representante de serviço, a fim de evitar riscos. Desconecte da fonte de alimentação imediatamente se o cabo de alimentação estiver danificado. Tome cuidado para não expor essa ferramenta à...
- Page 15 8. RESOLUÇÃO DE PROBLEMAS Problema Causa possível Solução O produto não liga Não conectado à fonte de alimentação Conectado à fonte de alimentação O cabo de alimentação ou o plugue estão com defeito Verifique com um eletricista. Outros defeitos elétricos no produto Verificar com um eletricista especializado O produto não chega Cabo de extensão não adequado para...
- Page 16 VISÃO DETALHADA...
- Page 17 SYMBOLS To reduce the risk of injury, user must read instruction manual Class II machine – Double insulation – You don’t need any earthed plug Denotes risk of personal injury, loss of life or damage to the tool in case of non- observance of the instructions in this manual Indicates electrical shock hazard.
- Page 18 1. AREA OF APPLICATION OF ROUTER This product is intended for routing grooves, edges, profiles and elongated holes as well as for template cuts in wood, plastic and light building materials, while resting firmly on the workpiece. Do not use machines, tools and accessories for additional applications (see manufacturer’s instructions) for works other than those for which they are designed for.
- Page 19 2. SAFETY INSTRUCTIONS c) Do not expose power tools to rain or wet conditions. Water entering a power tool will increase the risk of electric shock. d) Do not abuse the cord. Never use the cord for carrying, pulling or unplugging the power tool.
- Page 20 2. SAFETY INSTRUCTIONS 4. POWER TOOL USE AND CARE a) Do not force the power tool. Use the correct power tool for your application. The correct power tool will do the job better and safer at the rate for which it was designed. b) Do not use the power tool if the switch does not turn it on and off.
- Page 21 2. SAFETY INSTRUCTIONS 2. USE CLAMPS OR ANOTHER PRACTICAL WAY TO SECURE AND SUPPORT THE WORKPIECE TO A STABLE PLATFORM. Holding the work by your hand or against the body leaves it unstable and may lead to loss of control. •...
- Page 22 2. SAFETY INSTRUCTIONS • Never stop the router by applying lateral pressure to the bit. • Do not force the router. Your router will do a better job if you take it slowly. • Avoid cutting nails and screws. Inspect timber and remove all nails and screws before cutting.
- Page 23 4. TECHNICAL DATA Type designation PC1300RT Rated voltage 127V~ 60Hz Rated power input 1300W Speed, n 11000-30000/min Collet size 6/8mm Max. cutting depth 55mm 5. BEFORE PUTTING THE EQUIPMENT INTO OPERATION WARNING: The device should be disconnected from the mains before putting into operation.
- Page 24 5. BEFORE PUTTING THE EQUIPMENT INTO OPERATION To remove the bit 1. Keep the spindle lock button depressed. 2. Loosen the collets nut using the wrench and remove the bit. 3. Tighten the collect nut and release the spindle lock. Installing edge guide The edge guide is an effective aid to cutting in a straight line when chamfering or grooving.
- Page 25 5. BEFORE PUTTING THE EQUIPMENT INTO OPERATION Direction of feed The feed motion of the router must always be carried out against the rotation direction of the router bit (up-grinding). When milling in the direction with the rotation of the router bit (down-cutting), the router can break loose, eliminating control by the user. 6.
- Page 26 6. OPERATION ROUTING PROCESS Adjust the depth-of-cut as previously described. Place the router on the workpiece and switch on. Push down the plunge lock lever and slowly lower the router until the depth stop runs against the depth stop buffer. Lock the router in position by release plunge lock lever, carry out the cutting procedure with uniform feed.
- Page 27 7. MAINTENANCE Always disconnect the device before performing any adjustment or maintenance operation. If the supply cord is damaged, it must be replaced by the manufacturer or its service agent in order to avoid a hazard. Disconnect from the power supply immediately if the supply cord is damaged. Take care not to expose this tool to the rain.
- Page 28 8. TROUBLE SHOOTING Problem Possible cause Solution Product does Not connected to power supply Connect to power supply not start Power cord or plug is defective Check by a specialist electrician. Other electrical defect to the product Check by a specialist electrician Product does not Extension cord not suitable for Use a proper extension cord...
- Page 29 DETAILED VIEW...
- Page 30 Serial No.: 20171400DDMMYY01XXXXXX Importado e distribuído por LEROY MERLIN CIA BRASILEIRA DE Número de série.: 20171400DDMMYY01XXXXXX BRICOLAGEM - CNPJ 01.438.784/0001-05 * Garantia de 2 anos / 2-years guarantee Made in China 2017...
Need help?
Do you have a question about the PC1300RT and is the answer not in the manual?
Questions and answers