Table of Contents
Advertisement
Quick Links
INSTALLATION
INSTRUCTIONS
2650-1314-00 Rev. A
Installation Instructions.....................
Pro/Full Feature..............................
Button Use & Programming................
Types Of Delay Boxes.......................
Setting Transbrake Delay..................
INSTALLATION
Using #8 screws through the rubber grommets in the base, mount the
the ignition system.
Make sure the driver can reach the buttons when strapped in and angle the unit, if needed, so the display can be
read straight on.
THUNDER
Wire the
as shown on page 7&8. Make sure the power lead comes straight from the master switch and
the ground goes to a solid chassis ground, not sheet metal panels.
BUTTON QUICK REFERENCE
PRO/FULL
INDICATOR
PRO/FULL
BUTTON
RESET /
RECALL
MODE
SELECTION
BUTTON
413 W. Elm Street, Sycamore, 60178 • (866) 248-6357 • www.autometer.com • service@autometer.com
T H U N D E R
Inst. Orig. 10/04 Rev. 8/16
T H U N D E R
INSTALLATION & OPERATION MANUAL
pg 1
pg 2
pg 2
pg 2
pg 3-4
BACKLIT
DISPLAY
LED
P/F
R
P
S
/
E
F
T
B
M
T
A
O
B
C
D
R
K
E
K
BACK
TRANSBRAKE
SET-UP
INDEX
Setting Parameters.........................
General Info / Definitions...................
Delay Box Theory & Operation...........
Transbrake Wiring...........................
Remote Display Wiring.....................
THUNDER
CURSOR
BUTTON
T H U N D E R
SCROLL
ARROWS
MODEL NUMBER
T1
away from heat, vibration and
TB
OUTPUT
INDICATOR
LED
PAGE 1
pg 4
pg 5
pg 6
pg 7
pg 8
Advertisement
Table of Contents

Subscribe to Our Youtube Channel
Summary of Contents for Dedenbear Thunder T1
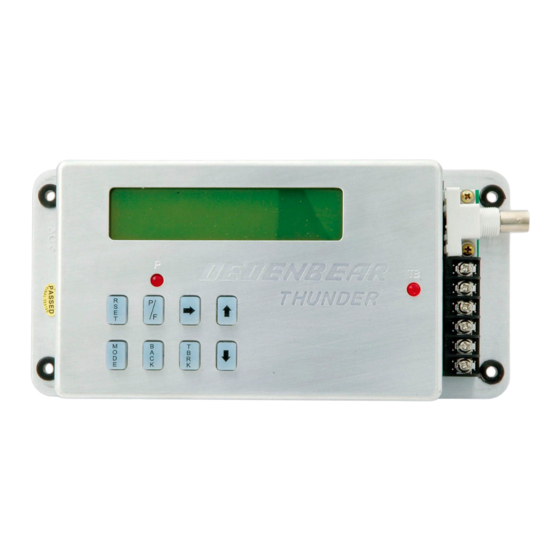
- Page 1 INSTALLATION MODEL NUMBER INSTRUCTIONS 2650-1314-00 Rev. A T H U N D E R INSTALLATION & OPERATION MANUAL INDEX Setting Parameters……………………. Installation Instructions………………… pg 1 pg 4 Pro/Full Feature………………………… pg 2 General Info / Definitions…………..….. pg 5 Delay Box Theory & Operation……….. Button Use &...
- Page 2 PROGRAMMING BUTTONS Arrow (scroll) Buttons: These buttons are used for making small changes to your settings. You can add to a setting by pressing the up arrow or subtract with the down. If you push and hold an arrow key, the set- ting will continue to change faster and faster.
- Page 3 SETTING TRANSBRAKE DELAY To set your transbrake delay, you must first choose which delay box type you wish to run by pressing the MODE THUN DER button. The will only ask for the settings required for that particular mode. Example: When you are in RUN (DELAY) it will not ask you for THEIR ET setting since you are not crossing over.
- Page 4 SETTING TRANSBRAKE DELAY (continued) CROSS COMP: Crossover compensation time is used to compensate SETUP MODE for late lights when crossing over. When you cross over and leave off your opponent’s tree, you get an indirect view of his top bulb instead of a CROSS COMP .015 direct view like on your side.
- Page 5 GENERAL INFORMATION AND DEFINITIONS OF FEATURES T H U N D E R Reset/Recall Button: Used to cancel the transbrake lockout and return the to a ready to run condition. If pressed after the run, the RSET button will recall the “How Late” information and how many times you “Skipped”. ARP (Accidental Release Protection): Occasionally you may anticipate the lights and release the button too early.
- Page 6 OPERATION Set the T H U N D E R with all your settings. Shallow stage the car. Press the transbrake button to set the transbrake. Release the transbrake button at the flash of all three amber bulbs (pro tree) or at the flash of the top amber bulb (full tree).
- Page 7 To any accessories that require a transbrake 18 GAUGE trigger signal. This includes starting line ignition rev limiters (MSD 2 & 3 Steps), external throttle stop controllers and shift timers (Dedenbear TSC-2A,TSC-4 & ST-1), and some other timers, TRANSBRAKE RPM switches, data loggers, playback tachs, etc.
- Page 8 12 month warranty period will be repaired or replaced at DEDENBEAR’s option, when determined by DEDENBEAR that the product failed due to defects in material or workmanship. This warranty is limited to the repair or replacement of parts in the DEDENBEAR Product and the necessary labor done by DEDENBEAR to effect the repair or replacement of the DEDENBEAR product.
Need help?
Do you have a question about the Thunder T1 and is the answer not in the manual?
Questions and answers