Table of Contents

Related Manuals for Bestron APC4603

Summary of Contents for Bestron APC4603
- Page 1 APC4603 Handleiding tondeuse Instruction manual trimmer Gebrauchsanweisung Haarschneidemaschine Istruzioni per l’uso rasoio Mode d’emploi tondeuse Manual del usuario cortapello 7W, 230V ~ 50Hz...
- Page 3 Handleiding VeIlIGHeIdsVoorsCHrIften - Algemeen • Lees de gebruiksaanwijzing goed door en bewaar deze zorgvuldig. • Gebruik dit apparaat alleen zoals beschreven in deze gebruiksaanwijzing. • G ebruik uitsluitend toebehoren die door de leverancier worden aanbevolen.Door gebruik van andere toebehoren kan er schade optreden aan het apparaat waardoor gevaar voor de gebruiker kan ontstaan. • D it apparaat mag worden gebruikt door kinderen ouder dan 8 jaar en personen met verminderde lichamelijke, zintuiglijke of geestelijke vermogens of gebrek aan ervaring en kennis, maar alleen onder toezicht of als ze instructie hebben gekregen over het veilig gebruik van het apparaat en de mogelijke gevaren ervan begrijpen.
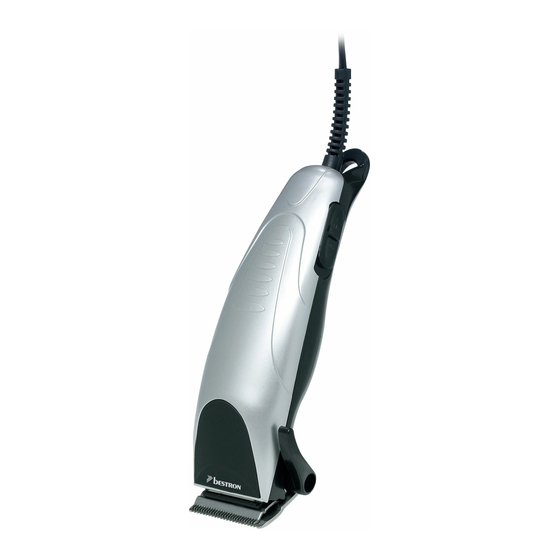
- Page 4 Handleiding WerkInG - Algemeen Het apparaat is alleen bedoeld voor huishoudelijke doeleinden, niet voor professioneel gebruik. 1. Opzetkam 1 (3 mm) 2. Opzetkam 2 (6 mm) 3. Opzetkam 3 (9 mm) 4. Opzetkam 4 (12 mm) 5. Stekker en snoer 6. Olie 7. Kleine borstel 8. Snijkam 9. Verstelhendel snijkammen 10. Kam 11. Schaar 12. Tondeuse 13. Aan/uit-schakkelaar 14. Beschermkap snijkammen WerkInG - Voor het eerste gebruik 1. Z org ervoor dat de aan/uit-schakelaar in de stand 0 (uit) staat.
- Page 5 Handleiding trIMMen - nek 4. Bevestig de gewenste opzetkam, bijvoorbeeld kam 1 (3 mm) of 2 (6 mm). 5. Houd de snijkam omhoog gericht en begin onderaan de nek met trimmen. 6. Trim het haar in stroken van onder tot boven. 7. B eweeg de tondeuse langzaam door het haar om de snijkammen de kans te geven al het haar te trimmen. Als u langzaam trimt verkrijgt u een beter resultaat. trIMMen - Achterhoofd 8. Plaats de gewenste opzetkam, bijvoorbeeld kam 3 (9 mm) of kam 4 (12 mm). 9. T rim de achterkant van het hoofd met langzame bewegingen van onder naar boven, tegen de haargroeirichting in.
-
Page 6: Ce-Conformiteitsverklaring
9. D e garantie geeft geen enkel recht op vergoeding van eventuele schade, buiten de vervanging respectievelijk reparatie van de defecte onderdelen. De importeur kan nooit aansprakelijk gesteld worden voor eventuele vervolgschade of enigerlei andere consequenties die door of in relatie met de door hem geleverde apparatuur zijn ontstaan. 10. O m aanspraak te maken op garantie kunt u zich wenden tot uw winkelier. Bestron biedt ook de mogelijkheid om het apparaat rechtstreeks ter reparatie aan te bieden aan de Bestron Service Dienst. Stuur echter nooit zomaar iets op. Het pakket kan dan namelijk geweigerd worden en eventuele kosten zijn voor uw rekening. Neem contact op met de Service Dienst en zij zullen u vertellen hoe u het apparaat moet inpakken en verzenden. - Page 7 Gebrauchsanweisung sICHerHeItsBestIMMunGen - Allgemein • L esen Sie die Bedienungsanleitung gut durch und bewahren Sie diese sorgfältig auf. • V erwenden Sie dieses Gerät nur so wie in dieser Bedienungsanleitung beschrieben. • K inder oder Personen, denen es an Wissen oder Erfahrung im Umgang mit dem Gerät mangelt, oder die in ihren körperlichen, sensorischen oder geistigen Fähigkeiten eingeschränkt sind, dürfen das Gerät nicht ohne Aufsicht oder Anleitung durch eine für ihre Sicherheit verantwortliche Person benutzen. • Kinder müssen beaufsichtigt werden, damit sie nicht mit dem Gerät spielen. • U m Brandgefahr zu verhindern, muss das Gerät seine Wärme abgeben können. Sorgen Sie also dafür, dass das Gerät ausreichend frei steht und nicht in Kontakt mit brennbarem Material kommen kann. Das Gerät darf nicht abgedeckt werden. Benutzen Sie das Gerät nicht in der Nähe von entzündlichen Materialien.
- Page 8 Gebrauchsanweisung funktIon - Allgemein Das Gerät ist nur für den Hausgebrauch vorgesehen und nicht für die professionelle Verwendung. 1. Aufsatz 1 (3 mm) 2. Aufsatz 2 (6 mm) 3. Aufsatz 3 (9 mm) 4. Aufsatz 4 (12 mm) 5. Stecker und Kabel 6. Öl 7. Kleine Bürste 8. Schneidekamm 9. Verstellgriff Schnittkämme 10. Kamm 11. Schere 12. Haarschneidemaschine 13. Ein/Aus-Schalter 14. Schutzkappe Schneidekämme VerWendunG - Vor der ersten Verwendung 1 . S orgen Sie dafür, dass der Ein/Aus-Schalter auf 0 (aus) steht.
-
Page 9: Reinigung Und Wartung
Gebrauchsanweisung sCHneIden - nacken 4. Befestigen Sie den gewünschten Aufsatz, zum Beispiel Kamm 1 (3 mm) oder 2 (6 mm). 5. H alten Sie den Schneidekamm so, dass er nach oben zeigt und beginnen Sie im unteren Nackenbereich mit dem Schneiden. 6. Schneiden Sie das Haar in Streifen von unten nach oben. 7. B ewegen Sie die Haarschneidemaschine langsam durch das Haar, damit die Schneidekämme das ganze Haar schneiden können. Wenn Sie langsam schneiden, erhalten Sie ein besseres Ergebnis. sCHneIden - Hinterkopf 8. B efestigen Sie den gewünschten Aufsatz, zum Beispiel Kamm 3 (9 mm) oder 4 (12 mm). 9. S chneiden Sie die Rückseite des Kopfes mit langsamen Bewegungen von unten nach oben, gegen die Haarwuchsrichtung. -
Page 10: Ce-Konformitätserklärung
Verbindung mit dem von ihm gelieferten Gerät entstanden sind. 10. U m Garantieleistungen in Anspruch zu nehmen, wenden Sie sicht direkt an Ihren Händler. Bestron bietet auch die Möglichkeit direkt mit dem Werkskundendienst abzuwickeln. Voraussetzung hierfür ist, dass Sie sich zunächst telefonisch, per Fax oder Mail an den Werkskundendienst wenden. Bitte schicken Sie keine Geräte unaufgefordert. Insbesondere dürfen Pakete niemals unfrei eingesendet werden. Sprechen Sie daher zuerst mit uns. Wir sagen Ihnen wie Sie Ihr Gerät an uns einsenden sollen. 11. Das Gerät eignet sich nicht für die professionelle Verwendung. kundendIenst Sollte unerwartet eine Störung auftreten dann können Sie sich mit dem BESTRON-Kundendienst in Verbindung setzen: www.bestron.com/service Ce-konforMItätserklärunG Dieses Produkt entspricht auf dem Gebiet der Sicherheit den Bestimmungen der folgenden europäischen Richtlinien: • EMC-Richtlinie 2014/30/EU •... -
Page 11: Consignes De Sécurité - Généralités
Mode d’emploi ConsIGnes de séCurIté - Généralités • Lisez soigneusement le mode d’emploi et conservez-le précieusement. • U tilisez cet appareil uniquement suivant les instructions décrites dans le mode d’emploi. • C et appareil ne peut être utilisé par des enfants ou des personnes avec des capacités physiques, mentales ou sensorielles limitées, manquant d’expérience ou de connaissance; à moins qu’elles n’aient eu des instructions et ne soient encadrées par des personnes responsables de leur sécurité. • C et appareil n’est pas un jouet. En présence d’enfants, il est important de s’assurer qu’ils ne jouent pas avec l’appareil. • F aites effectuer les réparations par un technicien qualifié. Ne tentez jamais de réparer vous-même l’appareil. - Page 12 Mode d’emploi fonCtIonneMent - Généralités L’appareil est destiné uniquement à l’utilisation domestique, et non à l’usage professionnel. 1. Peigne de coupe 1 (3 mm) 2. Peigne de coupe 2 (6 mm) 3. Peigne de coupe 3 (9 mm) 4. Peigne de coupe 4 (12 mm) 5. Fiche et cordon 6. Huile 7. Petite brosse 8. Peigne de taille 9. L evier de réglage des peignes de taille 10. Peigne 11. Ciseaux 12. Tondeuse 13. Interrupteur marche/arrê 14. Protection des peignes de taille fonCtIoneMent - Avant la première utilisation 1. L’interrupteur marche/arrêt doit être en position 0 (arrêt).
-
Page 13: Nettoyage Et Entretien
Mode d’emploi tondeuse - nuque 4. Fixez le peigne de coupe voulu, par exemple le peigne 1 (3 mm) ou 2 (6 mm). 5. Dirigez le peigne de taille vers le haut et commencez à couper au bas de la nuque. 6. Passez la tondeuse de bas en haut, en lignes parallèles. 7. F aites avancer la tondeuse lentement, pour que le peigne de taille puisse couper tous les cheveux. Un mouvement lent donne un meilleur résultat. tondeuse - Arrière de la tête 8. Fixez le peigne de coupe voulu, par exemple le peigne 3 (9 mm) ou 4 (12 mm). 9. P assez la tondeuse sur l’arrière de la tête, d’un mouvement lent de bas en haut, contre le sens dans lequel poussent les cheveux. tondeuse - Côtés 10. F ixez le peigne de coupe voulu, par exemple le peigne 1 (3 mm) ou 2 (6 mm), et passez la tondeuse sur les tempes. 11. P our les favoris, vous utiliserez un peigne de coupe court. Passez la tondeuse de haut en bas, le peigne de taille dirigé vers le bas. -
Page 14: Conditions De Garantie
10. P our pouvoir faire appel à la garantie, vous pouvez vous adresser à votre revendeur. Bestron offre aussi la possibilité de faire réparer l’appareil directement par le service après-vente de Bestron. Toutefois, n’envoyez jamais rien sans avoir reçu d’instructions au préalable. Le colis pourrait en effet être refusé et les frais éventuels seraient à votre charge. Prenez contact avec le service après-vente qui vous expliquera comment vous devez emballer et expédier l’appareil. - Page 15 Instruction manual sAfety InstruCtIons - General • Please read these instructions carefully and retain them for future reference. • Use this appliance solely in accordance with these instructions. • T his appliance is not intended for use by persons (including children) with reduced physical,sensory or mental capabilities, or lack of experience and knowledge, unless they have been given supervision or instruction concerning use of the appliance by a person responsible for their safety. • C hildren should be supervised to ensure that they do not play with the appliance • C leaning and maintenance must not be done by children. • H ave any repairs carried out solely by a qualified electrician. Never try to repair the appliance yourself. sAfety InstruCtIons - electricity and heat • Always remove the plug from the wall socket when you have finished. • Always remove the plug from the wall socket by pulling on the plug, not the power cord. • A damaged cord must be replaced by a qualified electrician. • Make sure that the appliance do not come in contact with water.
-
Page 16: Operation - General
Instruction manual oPerAtIon - General The appliance is intended only for domestic use, not for professional use. 1. Comb attachment 1 (3 mm) 2. Comb attachment 2 (6 mm) 3. Comb attachment 3 (9 mm) 4. Comb attachment 4 (12 mm) 5. Power cord and plug 6. Oil 7. Small brush 8. Cutting comb 9. Adjusting lever for cutting comb 10. Comb 11. Scissors 12. Trimmer 13. On/Off switch 14. Protective cover for cutting comb oPerAtIon - Before use for the first time 1. M ake sure the On/Off switch is set to 0 (Off). -
Page 17: Cleaning And Maintenance
Instruction manual trIMMInG - neck 4. Fit the required comb attachment, for example comb 1 (3 mm) or 2 (6 mm). 5. Keep the cutting comb face upwards, and trim the hair in your neck from the bottom. 6. Trim the hair in successive widths, and from bottom to top. 7. M ove the clippers slowly so that the cutting comb trims all the hair. Slow trimming gives the best result. trIMMInG - Back of the head 8. Fit the required comb attachment, for example comb 3 (9 mm) or 4 (12 mm). 9. T rim the hair on the back of the head by slowly moving the trimmer from the bottom to the top, against the direction of growth. trIMMInG - sides 10. F it the required comb attachment, for example comb 1 (3 mm) or 2 (6 mm) and trim the hair on the temples. -
Page 18: Guarantee Terms
Losses incurred during transport. b. The removal or changing of the appliance’s serial number. 8. The guarantee does not cover power cords, lamps or glass parts. 9. N o claims can be submitted under this warranty for damage other than the repair or replacement of faulty parts. The importer can never be held responsible for any consequential loss or damage or any other consequences, resulting either directly or indirectly from the appliance supplied by the importer. 10. I n case of claims under guarantee you can contact your dealer where the appliance is purchased. Bestron offers you also the possibility to send the appliance directly to our Service Department. Do not send your appliance without consulting us. The package may be refused and any any costs will be for your account. Please contact the Service Department and they will tell you how to pack and send the appliance. 11. This appliance is not suitable for professional use. serVICe If a fault should occur please contact the BESTRON service department: www.bestron.com/service Ce deClArAtIon of ConforMIty This product conforms to the essential requirements of the following EU safety directives: • EMC Directive... -
Page 19: Istruzioni Per L'uso
Istruzioni per l’uso PresCrIZIonI dI sICureZZA - Generalità • Leggere attentamente le istruzioni d’uso e conservarle con cura. • U tilizzare questo apparecchio unicamente secondo le modalità descritte nelle presenti istruzioni. • Q uesto apparecchio non può essere utilizzato da bambini e da persone che, a causa di una limitazione fisica, sensoriale o mentale, o per mancanza di esperienza e conoscenza, non siano in grado di utilizzare l’apparecchio in modo sicuro, a meno che non abbiano ricevuto delle istruzioni sull’uso dell’apparecchio da una persona che sia responsabile della loro sicurezza. • P ulizia e manutenzione non deve essere fatto da bambini. • F ar eseguire le riparazioni da un tecnico qualificato. Non cercare di riparare da soli l’apparecchio. PresCrIZIonI dI sICureZZA - elettricità e calore • S collegare sempre la spina dalla presa non è in uso. • Quando si toglie la spina dalla presa, esercitare la trazione sulla spina stessa e non sul cavo. - Page 20 Istruzioni per l’uso funZIonAMento - Avvertenze general l’apparecchio è inteso soltanto per consumo interno, non per uso professionale. 1. Pettine guida 1 (3 mm) 2. Pettine guida 2 (6 mm) 3. Pettine guida 3 (9 mm) 4. Pettine guida 4 (12 mm) 5. Cavo e spina di alimentazione 6. Olio 7. Spazzola piccola 8. Lama 9. L evetta di regolazione delle lame 10. Pettine 11. Forbici 12. Rasoio 13. I nterruttore di accensione/spegnimento 14. Coprilama funZIonAMento - Primo utilizzo 1. A ssicurarsi che l’interruttore di accensione/spegnimento si trovi in posizione “0” (spento).
-
Page 21: Pulizia E Manutenzione
Istruzioni per l’uso Il dispositivo non deve superare i 10 minuti ad un tratto essere utilizzato. tAGlIo e ModellAturA - nuca 4. Inserire sulla lama il pettine guida desiderato, ad esempio il pettine 1 (3 mm) o 2 (6 mm). 5. Mantenere la lama rivolta verso l’alto e iniziare il taglio partendo dalla base della nuca. 6. Tagliare i capelli in sezioni lineari dal basso verso l’alto. 7. A ssicurarsi di muovere lentamente il modellatore tra i capelli per permettere alle lame di eseguire un taglio completo. Per ottenere risultati migliori, si raccomanda di eseguire il taglio in modo lento. tAGlIo e ModellAturA - Parte posteriore della testa 8. Inserire sulla lama il pettine guida desiderato, ad esempio il pettine 3 (9 mm) o 4 (12 mm). 9. T agliare i capelli sulla parte posteriore della testa procedendo con movimenti lenti dal basso verso l’alto e in contropelo. tAGlIo e ModellAturA - Parti laterali della testa 10. I nserire il pettine guida desiderato, ad esempio il pettine 1 (3 mm) o 2 (6 mm) e tagliare i capelli presenti nella zona delle tempie. -
Page 22: Dichiarazione Di Conformità Ce
10. Per reclamare la garanzia, potete rivolgervi al vostro negoziante. Bestron offre anche la possibilità di far riparare l’apparecchio direttamente dal Centro assistenza Bestron. Tuttavia, non spedite mai l’apparecchio senza aver fatto le dovute considerazioni. Il pacco può infatti essere respinto e le eventuali spese sono a vostro carico. Contattate il Centro assistenza e vi diranno come imballare e spedire l’apparecchio. -
Page 23: Manual Del Usuario
Manual del usuario norMAs de seGurIdAd - General • Lea las instrucciones de uso con detenimiento y guárdelas cuidadosamente. • U tilice este aparato únicamente en la forma que se describe en las instrucciones. • E ste aparato no puede ser utilizado por niños ni por personas que, debido a alguna limitación física, sensorial o mental, o por falta de experiencia y conocimientos, no puedan manejarlo de forma suficientemente segura, a menos que hayan recibido instrucciones sobre el uso del aparato de una persona que se haga responsable de su seguridad. • L impieza y mantenimiento no deben ser hechos por los niños. • H aga reparar el aparato únicamente por personal cualificado. No intente nunca repararlo usted mismo. norMAs de seGurIdAd - electricidad y calor • C uando haya terminado de retire siempre el enchufe de la toma de pared. - Page 24 Manual del usuario funCIonAMIento - Generalidades Este aparato está concebido únicamente para uso doméstico, no para uso profesional. 1. Peine de altura 1 (3 mm) 2. Peine de altura 2 (6 mm) 3. Peine de altura 3 (9 mm) 4. Peine de altura 4 (12 mm) 5. Cuchilla de corte 6. Enchufe y cable 7. Aceite 8. Cepillo pequeño 9. P alanca de ajuste de las cuchillas de corte 10. Peine 11. Tijeras 12. Cortapelo 13. I nterruptor de encendido/apagad 14. Tapa de las cuchillas de corte funCIonAMIento - Antes del primer uso 1. Asegúrese de que el interruptor de encendido/apagado está en la posición 0 (apagado).
-
Page 25: Limpieza Y Mantenimiento
Manual del usuario CortAr el Pelo - Cuello 4. Fije el peine de altura deseado, p.e. el peine 1 (3 mm) o el 2 (6 mm). 5. S ostenga la maquinilla en posición vertical y empiece a cortar desde abajo el pelo de la zona del cuello. 6. Corte el pelo por partes, de abajo hacia arriba. 7. M ueva la maquinilla lentamente por el cabello para darle al peine la oportunidad de cortar todo el pelo. Si corta el pelo despacio obtendrá un mejor resultado. CortAr el Pelo - Parte de atrás de la cabeza 8. Fije el peine de altura deseado, p.e. el peine 3 (9 mm) o el 4 (12 mm). 9. C orte el pelo de la parte posterior de la cabeza con movimientos lentos, de abajo hacia arriba, en sentido contrario a la dirección de crecimiento del pelo. -
Page 26: Disposiciones De Garantía
9. L a garantía no concede derecho a reclamar indemnización alguna por daños, diferente a la sustitución o reparación, respectivamente, de las partes defectuosas. El importador no podrá ser responsabilizado por daños consecuenciales o por cualquier otra clase de efectos causados por el aparato suministrado por él o que guarden relación con el mismo. 10. Para hacer valer la garantía. Puede acudir a la tienda donde compró el producto. Bestron también ofrece la posibilidad de entregar el aparato directamente al servicio técnico Bestron para su reparación. Pero no podrá enviarlo de cualquier manera. El paquete podría ser rechazado y los costes asociados correrían de su cuenta. Póngase en contacto con el servicio técnico, donde le indicarán cómo debe embalar y enviar el aparato. - Page 28 Bestron Customer Service WhatsApp bestron.com/whatsapp...
Need help?
Do you have a question about the APC4603 and is the answer not in the manual?
Questions and answers