Table of Contents
Advertisement
Advertisement
Table of Contents

Subscribe to Our Youtube Channel
Summary of Contents for Matica MC-L2
- Page 1 MC-L2 Lamination Unit User Manual...
-
Page 2: Table Of Contents
Load/Unload Card Stacker to Laminator Load Card Stacker to Laminator Remove Cards after Taking Out Card Stacker Remove Cards without Taking Out Card Stacker Connect Power & Communication Cables Connect Power Cable Connect Communication Cable ⓒ2021 Matica Technologies Group. All rights reserved... - Page 3 ① Size ② Thickness ③ Acceptable Cards ④ Unacceptable Cards Clean the Laminator Clean the Exterior Clean Roller Using Cleaning Card Clean the Blue Cleaning Roller Troubleshooting Error Messages & Solutions Remove Jammed Card Matica Lamination Module MC-L2 User Manual...
- Page 4 ⑧ Film Patch Capacity Optional Speci cations Laminator Speci cations ① Product Dimensions (Width X Length X Height) and Weight 1) MC-L2 (Standard) 2) MC-L2 (Standard, Card Stacker) ② Power Supply ③ Interface Regulatory ⓒ2021 Matica Technologies Group. All rights reserved...
-
Page 5: Safety Precautions
Indicate a hazardous action which must be avoided at all times. Electrical Hazard Indicates a potentially hazardous situation which may result in electric shock. Fire Hazard Indicates a potentially hazardous situation which may result in re. High Temperature Indicates a warning about high temperatures. Matica Lamination Module MC-L2 User Manual... - Page 6 15 minutes before making any contact. Cleaning Keep the power plug clean, away from dust and water. Unplug when cleaning, and do not spray water or use benzene or thinner. ⓒ2021 Matica Technologies Group. All rights reserved...
- Page 7 Do not remove any cover or protective device that is attached with screws. Do not operate the Lamination Module while your hand is placed inside. Clean and maintain the Lamination Module according to the instructions Matica Lamination Module MC-L2 User Manual...
-
Page 8: Getting Started
The MC-L2 also comes with a 4 Line display panel which shows a step by step process of the lamination so end users have an easy out of box user experience. The MC-L2 supports 0.76mm(30mil) to 1.0mm(40mil) CR-80 Cards. -
Page 9: In The Box
Important Please make sure that all the components and accessories are included in the box. MC-L2 (Lower Single-sided Laminate) If there are any missing or damaged items, then please contact your dealer for assistance. Matica Lamination Module MC-L2 User Manual... -
Page 10: Names Of Parts
OK Button Used to con rm your choice on the menu or to issue the card. Used to enter or exit the menu. Menu Button (press once: enter, press once on the menu: exit) ⓒ2021 Matica Technologies Group. All rights reserved... - Page 11 Used to load the lms in the upper side. Cartridge Load/Eject Button Used to remove or replace the cartridge. Lower Film Cartridge Used to load the lms in the lower side. Card Slot Insert the cards to be laminated. Matica Lamination Module MC-L2 User Manual...
-
Page 12: Mc-L2/In/Uc (Upper Single-Sided Laminate)
OK Button Used to con rm your choice on the menu or to issue the card. Used to enter or exit the menu. Menu Button (press once: enter, press once on the menu: exit) ⓒ2021 Matica Technologies Group. All rights reserved... - Page 13 Used to load the lms in the upper side. Cartridge Load/Eject Button Used to remove or replace the cartridge. Lower Cartridge Cover Used to protect the lower cartridge when not in use. Card Slot Insert the cards to be laminated. Matica Lamination Module MC-L2 User Manual...
-
Page 14: Mc-L2/In/Lc (Lower Single-Sided Laminate)
OK Button Used to con rm your choice on the menu or to issue the card. Used to enter or exit the menu. Menu Button (press once: enter, press once on the menu: exit) ⓒ2021 Matica Technologies Group. All rights reserved... - Page 15 Used to load the lms in the lower side. Cartridge Load/Eject Button Used to remove or replace the cartridge. Upper Cartridge Cover Used to protect the upper cartrigde when not in use. Card Slot Insert the cards to be laminated. Matica Lamination Module MC-L2 User Manual...
-
Page 16: Open Front Cover
Open Front Cover 1. Press the Front Cover Button. 2. Once the cover opens slightly, pull the cover by the handle to open it completely. ⓒ2021 Matica Technologies Group. All rights reserved... -
Page 17: Close Front Cover
- Cards will not be laminated properly if the Front Cover is not fully closed. (Make sure it is closed.) - If the Front Cover is not closed completely, the LCD Display Panel indicates the message: “COVER OPEN”. Matica Lamination Module MC-L2 User Manual... -
Page 18: Load Upper Cleaning Roller & Films
1. Pull the cartridge out while pressing the Cartridge Load/Eject Button to remove it from the laminator. 2. Align the Cleaning Roller with its hole and push it down until it clicks. C leaning roller hole After installation of cleaning roller ⓒ2021 Matica Technologies Group. All rights reserved... - Page 19 Caution - Make sure that it is fully inserted into the Cleaning Roller Hole before pushing the indicated area. Matica Lamination Module MC-L2 User Manual...
-
Page 20: Load Films To Upper Cartridge
Caution Supply spool (White) the cartridge. RFID Tag - Check the position of the RFID tag. Caution RFID Tag Reader RFID Tag position ⓒ2021 Matica Technologies Group. All rights reserved... - Page 21 2. Check the position of the Upper Film Cartridge and rewinding and push the cartridge in until it clicks. Matica Lamination Module MC-L2 User Manual...
-
Page 22: Load Lower Cleaning Roller & Films
2. Align the Cleaning Roller with its hole and push it up until it clicks. C leaning roller hole After installation of cleaning roller ⓒ2021 Matica Technologies Group. All rights reserved... - Page 23 Caution - Make sure that it is fully inserted into the Cleaning Roller Hole before pushing the indicated area. Matia Lamination Module MC-L2 User Manual...
-
Page 24: Load Films To Lower Cartridge
RFID Tag Caution Supply spool (White) core guide. damage the cartridge. - Check the position of the RFID tag. Caution RFID Tag position RFID Tag Reader ⓒ2021 Matica Technologies Group. All rights reserved... - Page 25 2. Check the position of the Lower Film Cartridge and lms for rewinding and push the cartridge in until it clicks. Matica Lamination Module MC-L2 User Manual...
-
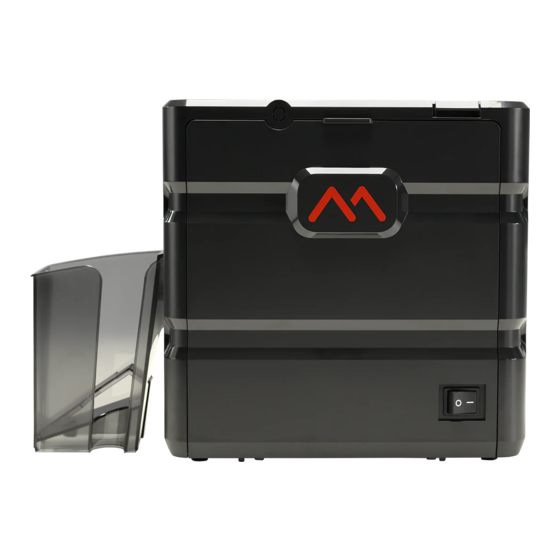
Page 26: Load/Unload Card Stacker To Laminator
(Max. 150 cards can be loaded at once.) -Remove Cards after Taking Out Card Stacker Hold the side of Card Stacker and pull it up to remove as shown in the image. ⓒ2021 Matica Technologies Group. All rights reserved... -
Page 27: Remove Cards Without Taking Out Card Stacker
-Remove Cards without Taking Out Card Stacker Use your thumb and index er to take out 60 or fewer cards from the Card Stacker without removing it from the laminator. Matica Lamination Module MC-L2 User Manual... -
Page 28: Connect Power & Communication Cables
- Check whether the Power Cable is plugged in before use. -Connect Communication Cable To download the rmware, connect the laminator to a PC using either USB Port or RS232C. USB Port RS232C Port ⓒ2021 Matica Technologies Group. All rights reserved... -
Page 29: Power On
Power ON -> OFF Power OFF -> ON Electrical Hazard / Fire Hazard If the product is exposed to rain or liquid, please turn d unplug the cable, and contact an authorized service representative. Matica Lamination Module MC-L2 User Manual... -
Page 30: Front Cover Lock
Turn the key clockwise to lock the Front Cover. The key cannot be pulled out if the Front Cover is not closed. Do not force it out as it can damage the Front Cover. Unlocked -> Locked Locked -> Unlocked ⓒ2021 Matica Technologies Group. All rights reserved... -
Page 31: Button Control & Menu
When card is being inserted from card input hopper to Laminator. The lm life is reduced to 40 cards or less, or requires cleaning Clean Lam inside of Laminator. The laminator needs to be cleaned inside. Clean Lam Matica Lamination Module MC-L2 User Manual... -
Page 32: Laminate Side Setting(Pass Mode)
Function : Set pass mode 1. Press ‘MENU’ to enter the menu mode. UP 500 / LO 500 W30 / READY 2019.07.29(V0XX) 2. Press ‘OK’ when ‘1. Pass mode’ appears on the LCD display. ⓒ2021 Matica Technologies Group. All rights reserved... - Page 33 - In the Alone Upper Mode, an error occurs if any lm is loaded in the lower cartridge Both Select this option to laminate both upper and lower sides. Bypass Select this option to pass without laminating either upper or lower side. Matica Lamination Module MC-L2 User Manual...
- Page 34 3. After selecting the pass mode, press ‘OK’ to go back to the previous step. 4. Press ‘MENU’ to go into the standby mode. 5. If any changes have been made, you will be prompted to save the changes. Press ‘OK’ to save the new settings or ‘MENU’...
-
Page 35: Lamination Temperature (Temper_Set)
- Card jam error or card bending issue can be occurred if the lamination temperature is higher than the recommended temperature. 1. Press ‘MENU’ to enter the menu mode. UP 500 / LO 500 W30 / READY 2019.07.29(V0XX) 2. Press the menu navigation button to select ‘2. Temper_set’ and press ‘OK’ . Matica Lamination Module MC-L2 User Manual... - Page 36 6. If any changes have been made, you will be prompted to save the changes. Press ‘OK’ to save the new settings or ‘MENU’ if you do not want to save them. UP 500 / LO 500 W30 / READY 2019.07.29(V0XX) ⓒ2021 Matica Technologies Group. All rights reserved...
-
Page 37: Film Position (Start Pos Set)
2. Press the Menu Navigation Button to select ‘3. Start POS set’ and press ‘OK’ . 3. Use the Menu Navigation Button to adjust the position to laminate. (It can be set between -1.0mm ~+1.5mm +/- increments of 0.1mm.) Matica Lamination Module MC-L2 User Manual... - Page 38 6. If any changes have been made, you will be prompted to save the changes. Press ‘OK’ to save the new settings or ‘MENU’ if you do not want to save them. UP 500 / LO 500 W30 / READY 2019.07.29(V0XX) ⓒ2021 Matica Technologies Group. All rights reserved...
-
Page 39: Power Saving Mode
2. Press the Menu Navigation Button to select ‘4. Power saving’ and press ‘OK’ . 3. Use the Menu Navigation Button to set the power saving mode. (It can be set between 5 and 60 minutes +/- increments of 5 minutes.) Matica Lamination Module MC-L2 User Manual... - Page 40 6. If any changes have been made, you will be prompted to save the changes. Press ‘OK’ to save the new settings or ‘MENU’ if you do not want to save them. UP 500 / LO 500 W30 / READY 2019.07.29(V0XX) ⓒ2021 Matica Technologies Group. All rights reserved...
-
Page 41: Path Sensor
2. Press the Menu Navigation Button to select ‘5. Path sensor’ and press ‘OK’ . 3. Insert a blank card into the Card Slot. (Make sure to hold the card until the operation starts.) Matica Lamination Module MC-L2 User Manual... - Page 42 1st sensor turns on when a card is inserted through the feeding slot. #2,#3,#4,#5 Note Laminator. When you have a card jam issue, please check the status of all path sensors. 6. The laminator releases the card upon completion. ⓒ2021 Matica Technologies Group. All rights reserved...
- Page 43 7. Press 'MENU' to go back to the previous step. 8. Press ‘MENU’ to go into the standby mode. UP 500 / LO 500 W30 / READY 2019.07.29(V0XX) Matica Lamination Module MC-L2 User Manual...
-
Page 44: Serial No. (Product_Infor)
2. Press the menu navigation button to select 3. Check the serial number. The rst 4 digits indicate the year and month of manufacture and the last 4 digits mean production lot number. ⓒ2021 Matica Technologies Group. All rights reserved... - Page 45 4. Press 'MENU' to go back to the previous step. 5. Press ‘MENU’ to go into the standby mode. UP 500 / LO 500 W30 / READY 2019.07.29(V0XX) Matica Lamination Module MC-L2 User Manual...
-
Page 46: Factory Reset (Factory Init)
UP 500 / LO 500 W30 / READY 2019.07.29(V0XX) 2. Press the Menu Navigation Button to select ‘8. Factory init’ and press ‘OK’ . 3. Press ‘OK’ and ‘Setting init?’ appears on the screen. ⓒ2021 Matica Technologies Group. All rights reserved... - Page 47 4. Press ‘OK’ to proceed or ‘MENU’ to cancel the action. (You will be directed to the previous step when you press either ‘OK’ or ‘MENU’ .) 5. Press ‘MENU’ to go into the standby mode. Matica Lamination Module MC-L2 User Manual...
- Page 48 2. Press the Menu Navigation button to select ‘9. Hopper set ‘ press ‘OK’ . 3. Use the Menu Navigation Button to select card input setting. 3-3 Set Count ( Designate the numbers of cards to be laminated) ⓒ2021 Matica Technologies Group. All rights reserved...
- Page 49 4. Press ‘OK’ button on ‘Set Count’ step. When press 'OK' button on Set Count menu 5. Use the Menu Navigation button to adjust quantity of card Matica Lamination Module MC-L2 User Manual...
- Page 50 If any changes have been made, you will be prompted to save the changes. Press ‘OK’ to save the new settings or ‘MENU’ if you do not want to save them. UP 500 / LO 500 W30 / READY 2019.07.29(V0XX) ⓒ2021 Matica Technologies Group. All rights reserved...
-
Page 51: Card Issuance And Cancel
2. Press ‘MENU’ button to cancel the laminating during the issuance. UP 500 / LO 500 W30 / Warm up 2019.07.29(V0XX) Note You can cancel the laminating during the 'Warming-up'. You can't cancel the laminating job when the laminating is operated. Matica Lamination Module MC-L2 User Manual... - Page 52 ⓒ2021 Matica Technologies Group. All rights reserved...
-
Page 53: Maintenance Instructions
- Static Free ④ Unacceptable Cards - Heavily damaged - Stained or contaminated - Scratched - Bent or deformed - Embossed Caution Do not use cards considered unacceptable as they may damage the parts. Matica Lamination Module MC-L2 User Manual... -
Page 54: Clean The Laminator
1. Press ‘MENU’ to enter the menu mode. UP 500 / LO 500 W30 / READY 2019.07.29(V0XX) 2. Press the menu navigation button to select ‘6. Path cleaning’ and press ‘OK’ . ⓒ2021 Matica Technologies Group. All rights reserved... - Page 55 Please be sure to use Adhesive cleaning card. Alcohol type cleaning card may caus 4. Press ‘OK’ while holding the card and it goes in. 5. The card will move back and forth 3-4 times while cleaning the roller. Matica Lamination Module MC-L2 User Manual...
- Page 56 Alcohol type cleaning card may caus 7. Press 'MENU' to go back to the previous step. 8. Press ‘MENU’ to go into the standby mode. UP 500 / LO 500 W30 / READY 2019.07.29(V0XX) ⓒ2021 Matica Technologies Group. All rights reserved...
-
Page 57: Clean The Blue Cleaning Roller
400 cards are laminated within a month, it is recommended to clean it every 200 times of use. 1. Remove the cleaning roller from the laminator 2. Wash it under running water. 3. Make sure that it is fully dried before installing it into the laminator. Matica Lamination Module MC-L2 User Manual... -
Page 58: Troubleshooting
Turn o the power, remove the cartridge and eject the card rotating knob on the Jam occurs during the lamination process backside. If the problem persists, please contact the service representative for assistance. ⓒ2021 Matica Technologies Group. All rights reserved... -
Page 59: Remove Jammed Card
Jam occurs during the lamination process backside. If the problem persists, please contact the service representative for assistance. 1. Turn the power Matica Lamination Module MC-L2 User Manual... - Page 60 500 Prints/Roll Generic Hologram Patch (0.5 and 1.0 mil) 500 Prints/Roll Customized Hologram Patch (0.5 and 1.0 mil) 500 Prints/Roll Clear Overlay 1,000 Prints/Roll Generic Hologram Overlay 1,000 Prints/Roll Customized Hologram Overlay 1,000 Prints/Roll ⓒ2021 Matica Technologies Group. All rights reserved...
- Page 61 - 8mm/s (for both Dual and single sided lamination) ④ Laminating Temperature -120 ~ 185 (248 ~ 365 ) ⑤ Operating Temperature - 0 to 40 (0 to 104 ) ⑥ Supported Card Size - CR-80(Default) Matica Lamination Module MC-L2 User Manual...
- Page 62 - Dimensions : 216.5mm(W) x 443.4mm(L) x 313.5mm(H) - Weight : 9.65kg ② Power Supply - AC 100-240 Vac, 50/60 Hz, 10 A - Single 600W / Dual 600W ③ Interface - USB 2.0 - RS-232 ⓒ2021 Matica Technologies Group. All rights reserved...
- Page 63 Matica Lamination Module MC-L2 User Manual...
- Page 64 - Reorient or relocate the receiving antenna. - Increase the separation between the equipment and receiver. ⓒ2021 Matica Technologies Group All rights reserved...
- Page 65 -RoHS - Directive 2002/95/EC - Directive 2005/717/EC - Directive 2005/747/EC (I.T.E) E516966 Matica Lamination Module MC-L2 User Manual...
Need help?
Do you have a question about the MC-L2 and is the answer not in the manual?
Questions and answers