Table of Contents
Advertisement
Quick Links
LIMITED WarranTy
OSP Designs Warrants, to the original purchaser its products to be free from defects in material and workmanship for a period of 90 days. Defects
and damage from misuse, abuse, negligence, alteration, accident, vandalism, rusting, acts of nature or any other event beyond the control of OSP
Designs is not covered. The warranty does not cover cosmetic damage that may result from normal use. Liability for incidental or consequential
damages is excluded. The user assumes all risk of injury resulting from use of this product. This warranty gives you specific legal rights, and you
may also have other rights which vary from state to state.
To make a warranty claim, contact Customer Service, provide model number, sales receipt and description of the problem. It is the customer's
responsibility to prepay freight on any components returned to the factory. OSP Designs will pay return freight on components covered under
terms of warranty.
Our quality standards are among the highest in the industry. Sometimes, no matter how hard we try, there are times when hardware is missing.
Our Parts Department will do everything possible to promptly remedy the problem. Contact us via email parts@officestar.net, by Fax
1-909-930-5629, or toll free parts number 1-800-950-7262, Monday through Friday 8:00 a.m. - 5:00 p.m. Pacific Time. OSP Designs P.O. Box
3520 Ontario, California 91761 USA
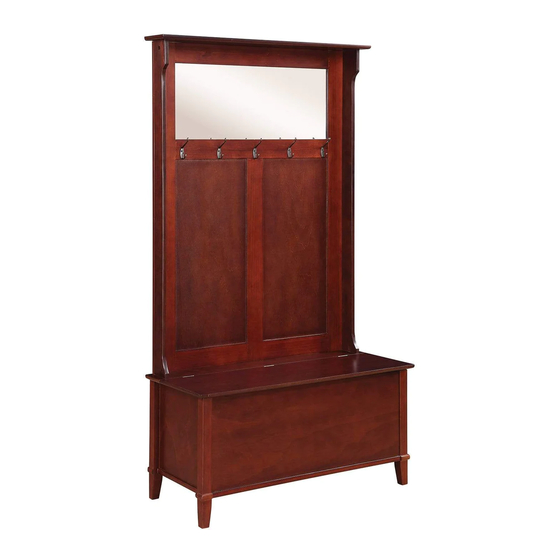
METRO STORAGE HALL TREE BENCH
WarnInG
1. Do not use this product unless all screws and bolts are securely
tightened.
2. Check that all screws and bolts are tight every three months or as
needed.
3. Dispose of packing material properly. Do not use plastic cover as
head covering. It may cause suffocation.
4. Do not use this product as a stepladder.
5. Use this product for its intended purpose only.
6. Intended for residential use only
MET44
Advertisement
Table of Contents

Related Manuals for OSP Designs MET44


Summary of Contents for OSP Designs MET44
- Page 1 LIMITED WarranTy OSP Designs Warrants, to the original purchaser its products to be free from defects in material and workmanship for a period of 90 days. Defects and damage from misuse, abuse, negligence, alteration, accident, vandalism, rusting, acts of nature or any other event beyond the control of OSP Designs is not covered.
- Page 2 Seat Panel Left Frame Right Frame Back Panel Front Panel Bottom Panel Left Verticle Panel Right Verticle Panel Frame with Mirror Top Panel...
- Page 3 Short Bolt Screw Wood Dowel Allen Wrench Screw Cam Bolt Cam Lock Long Bolt Hook Left / Right Saftey Hinge Medium Bolt NOTE: Phillips screwdriver also needed for assembly (not provided).
- Page 4 STEP 1 Insert four Wood Dowels (3) into both Left Frame (B) and Right Frame (C). Attach Back Panel (D) and Front Panel (D) between Left Frame (B) and Right Frame (C) and secure Back Panel (D) using four Medium Bolts (12). FULLY TIGHTEN ALL MEDIUM BOLTS (12). STEP 2 Insert five Wood Dowels (3) into both Left Verticle Panel (G) and Right Verticle Panel (H).
- Page 5 STEP 3 Fasten four Cam Bolts (6) to Top Panel (J). FULLY TIGHTEN CAM BOLTS (6). Attach Top Panel (J) to top of Frame with Mirror (I) and secure using four Cam Locks (7). FULLY TIGHTEN ALL CAM LOCKS (7) USING PHILLIPS SCREWDRIVER (not provided). STEP 4 Insert seven Nuts (8) into bottom of Frame with Mirror (I), attach Seat Panel (A) and secure using seven Long Bolts (9).
- Page 6 STEP 5 Fasten six Cam Bolts (6) into bottom of Seat Panel (A). FULLY TIGHTEN CAM BOLTS (6). STEP 6 Secure Frame with Mirror (A) assembly seat assembly and secure using six Cam Locks (7). FULLY TIGHTEN ALL CAM LOCKS (7) USING PHILLIPS SCREWDRIVER (not provided).
- Page 7 STEP 7 Carefully place Bottom Panel (F) into assembly. Attach Hooks (5) to assembly using two Screws (2) for each Hook (5). FULLY TIGHTEN ALL SCREWS (2) USING PHILLIPS SCREWDRIVER (not provided). STEP 8 Secure Left/Right Safety Hinges (11) to assembly using four Screws (5) for each Safety Hinge (11). FULLY TIGHTEN ALL SCREWS (5) USING PHILLIPS SCREWDRIVER (not provided).
Need help?
Do you have a question about the MET44 and is the answer not in the manual?
Questions and answers