Advertisement
Available languages
Available languages
English Quick Installation guide LAE thermostat
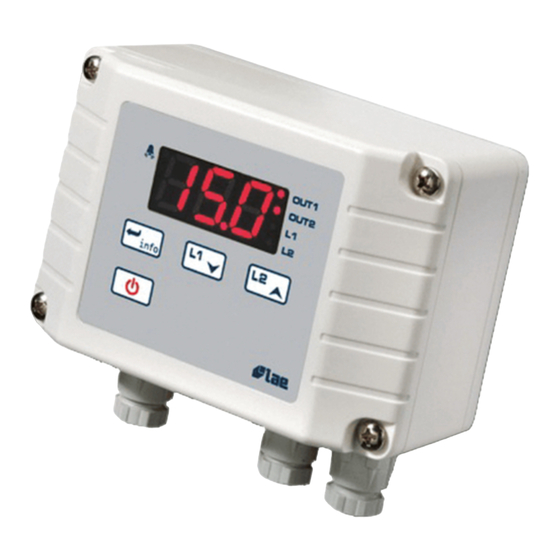
Description
1. Control panel
a.
: Temperature Relay 1 & arrow down
b.
: Arrow up
c.
: Info & Enter button
d.
: Stand-by button
2. Electrical connections
a.
3 & 4 = Temperature probe
b.
6 & 7 = 230V AC for the thermastat
c.
8 & 9 = Relay 1 to switch ON/OFF the heating
Configuration
1.
+
press both for 5 seconds to enter the parameter menu.
2.
Press UP (
set the value to HEA while still pressing info. When you release the buttons, the value is stored. (the thermostat is set for
heating applications)
3.
Press UP (
set the temperature differential as desired while still pressing info. (This parameter activates the relay when the difference
between the actual & set temperature is higher than the differentials . When you set the diffferential to 1, than the
differential will shut on the heating if it's 27°C if you set the temperature to 28°)
4.
Press UP (
set the value to ST1 while still pressing info. When you release the buttons, the value is stored. (the thermostat is set for
the right temperature probe – PTC1000)
Set desired temperature
1.
Press L1 (
2.
Use the arrows
3.
Press Enter (
Your thermostat has been configured.
) until you reach parameter 1CH. Keep Info (
) until you reach parameter 1HY. Keep Info (
) until you reach parameter INP. Keep Info (
). LED L1 blinks, the display shows '1SP' and the preset temperature.
&
to change the temperature as you desire.
) to confirm.
) pressed to display the value and use the arrows to
) pressed to display the value and use the arrows to
) pressed to display the value and use the arrows to
1
Advertisement
Table of Contents

Summary of Contents for LAE RS485
- Page 1 English Quick Installation guide LAE thermostat Description 1. Control panel : Temperature Relay 1 & arrow down : Arrow up : Info & Enter button : Stand-by button 2. Electrical connections 3 & 4 = Temperature probe 6 & 7 = 230V AC for the thermastat 8 &...
- Page 2 Nederlandse Snelle installatiegids LAE thermostaat Omschrijving 3. Bedieningspaneel : Temperatuur Relais 1 & pijl omlaag : pijl omhoog : Info & Enter knop : Stand-by knop 4. Elektrische aansluiting 3 & 4 = Temperatuur sensor 6 & 7 = 230V AC voeding voor thermostaat 8 &...
- Page 3 Mode d’emploi rapide thermostat LAE Description 5. Control panel : Relais température 1 & diminution : Augmentation : Touche Info & Enter : Touche Stand-by 6. Connections électrique 3 & 4 = Sonde de température 6 & 7 = 230V AC alimentation 8 &...
Need help?
Do you have a question about the RS485 and is the answer not in the manual?
Questions and answers