Table of Contents
Advertisement
Quick Links
Advertisement
Table of Contents

Related Manuals for Teradyne Neptune


Summary of Contents for Teradyne Neptune
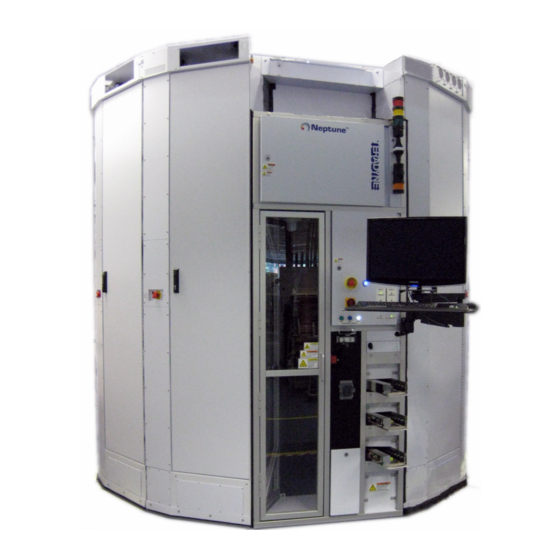
- Page 1 Neptune Operator Manual Version 1.1, March 8, 2011...
-
Page 2: Table Of Contents
7 Verifying Compressed Air Pressure 8 System Power Down/Up 8.1 Powering the System Down 8.2 Powering the System Up 8.3 Unexpected System Power Down 9 Clean/Inspect the Atrium 10 Appendix A - Terms, Acronyms and Abbreviations - i - Teradyne Confidential... - Page 3 Date: March 8, 2011 Section Page Comments Added new Safety Information Safety Information section. Added new Unexpected System System Power Up Down Power Down sub-section. Added new Appendix for Acro- Acronyms and Abbreviations nyms and Abbreviations. - ii - Teradyne Confidential...
-
Page 4: Safety Information
All hazardous voltages are covered and warning labels attached per international standards and circuit breaker 30A meets factory main DB requirements. The Neptune system, as designed, has an IP2X degree of protection to IEC 60529. Regarding robot safety compliance and guidelines: the KUKA documentation includes extensive safety information. -
Page 5: Use Of Genie Lift For System Maintenance
Table 1-1: Safety Labels Symbol Description IEC yellow CAUTION label. Iden- tifies a specific area of hardware that has important servicing operating requirements described in the accom- panying documentation - 2 - Teradyne Confidential... - Page 6 Typ- ically, this symbol is near coaxial con- nections. WARNING, RISK OF ELECTRIC SHOCK. Indicates presence of dan- gerous voltages and risk of electric shock. - 3 - Teradyne Confidential...
-
Page 7: Product And Safety Compliance Labels
Product and safety compliance labels may include one or more of the following: Table 1-3: Safety Compliance Labels Label Comments Neptune 2 product label (conveyer load- ing system). Located on feeder and racks. TUV Rheinland - T Mark TUV Rheinland - NRTL Mark... - Page 8 FUSE REPLACEMENT. Indicates that a fuse must be replaced by one of the same type and rating to ensure safe and proper operation. Located on feeder high voltage box. HAND CRUSH LABEL near tote drawer. Apply to manual feeder. - 5 - Teradyne Confidential...
- Page 9 Located on feeder NEMA box. Electric and pneumatic power sources present. Disconnect services before serv- icing. Located on feeder NEMA box. Uninterruptible Power Supply (UPS) volt- age present when power is off. Located on feeder NEMA box. - 6 - Teradyne Confidential...
-
Page 10: Warnings And Cautions
UPS supply outputs. 1.5 Warnings and Cautions The following are listings of warnings and cautions associated with the use of the Neptune system. Specific warnings and cautions are repeated in every procedure to which they apply. The categories are: General... -
Page 11: Physical Warnings And Cautions
Possible airborne particles and pro- jectiles when drilling into floor. Wear approved eye protection or safety glasses. Pressurized device. Possible airborne par- ticles and projectiles. Wear approved eye protection or safety glasses. - 8 - Teradyne Confidential... -
Page 12: Electrical Warnings And Cautions
Learn the areas containing high voltage in each piece of equipment. Do not con- tact high voltage connections when install- ing or operating this equipment. - 9 - Teradyne Confidential... -
Page 13: Chemical Warnings And Cautions
High-current (greater than 10 A) system power supplies. High voltage is present in the AC vaults (certain sections of the wedges) of the Neptune system. Serious injury or death may result if personnel fail to observe safety precautions. Before performing any electrical task, lock- out/tagout procedures should be used to ensure safety. -
Page 14: Electrostatic Discharge Guidelines
Operator Manual / 1 Safety Information Symbol Description Do not use toxic or dangerous sub- stances for cleaning the Neptune system equipment. If specific cleaning instruc- tions are not presented, use the mildest method (e.g. small quantity of detergent and water on external cabinets) 1.6 Electrostatic Discharge Guidelines... -
Page 15: Static-Producing Materials
Contact between paper and ESD-sensitive hardware. Do not enclose paper in the same ESD container holding the hardware. Enclose doc- umentation in its own static shielding bag when storing or transporting the hardware. Contact between your clothing or hair and electrical devices. - 12 - Teradyne Confidential... -
Page 16: Hardware Handling And Shipping
ESD-safe location (grounded cart or table mat). 1.6.4 Humidity in the Work Area A relative humidity of at least 40-50% is required in all Neptune work areas. Less than 40% humidity increases the generation of static electricity, making ESD protection more difficult to accomplish. -
Page 17: Types Of Esd Equipment Failures
An accumulation of soft failures can also cause a catastrophic failure. Soft failures can be difficult to identify and repair because the equipment can continue to operate correctly most of the time. - 14 - Teradyne Confidential... -
Page 18: Entering And Exiting The System
STOP button can be pressed again to unlock the door for another short duration. Once the door has opened, it will remain unlocked. 2. Open the service access door and flip down the lockout/tagout latch. - 15 - Teradyne Confidential... - Page 19 4. If the door locks while an operator is inside of the system, the door can be man- ually unlocked by flipping the override switch. Note: It is not necessary to flip this switch when entering the system under normal circumstances. - 16 - Teradyne Confidential...
-
Page 20: Exiting The System And Restarting Automation
3. Remove the lockout/tagout tag and flip the latch into the up position. Figure 2-5: Lockout Latch in Upright Position 4. Firmly close the door and verify that the manual override latch is in the locked position. - 17 - Teradyne Confidential... - Page 21 7. Once the buzzer stops and the START button illuminates, press the RUN button. The robot will now be activated and automation will begin to run. Figure 2-7: Start and Run Buttons - 18 - Teradyne Confidential...
-
Page 22: Check Or Reset Host And System Pc
PCs. Figure 3-1: Status LEDs on Front of Feeder Wedge The host PC is the lower PC located on the inside of the feeder wedge. The System PC is the upper PC. - 19 - Teradyne Confidential... - Page 23 The following table defines the functions of each button. Table 3-1: Button Functions Button PC Powered ON PC Powered OFF Start Shuts PC Down Boots PC Up Reset Reboots PC Nothing - 20 - Teradyne Confidential...
- Page 24 Locate the reset and start buttons in the lower left side of the panel. Figure 3-4: Reset and Start Buttons Press the corresponding button to perform the desired task on either of the PCs. Close and lock the low voltage panel door when finished. - 21 - Teradyne Confidential...
-
Page 25: Misaligned Drives On The Conveyor Events
During normal operation, an event may occur that causes a drive to seat improperly on the conveyor. If the Neptune software has determined that a conveyor is jammed, an alert will be given to the customer. The following steps should be taken to recover from such an event. -
Page 26: Exception Drawer Events
2. To open the drawer, firmly press the black button on the exception drawer and pull on the handle until the drawer is fully extended. Note: The "EXC DOOR CLOSED" light will turn off as soon as the drawer is opened. Figure 5-2: Exception Drawer Button - 23 - Teradyne Confidential... - Page 27 Operator Manual / 5 Exception Drawer Events Figure 5-3: Exception Drawer, Extended 3. To pull the drive into view, pull the black knob up and out towards you. Figure 5-4: Drive Knob - 24 - Teradyne Confidential...
- Page 28 5. Push on the drawer until it clicks and locks closed. Verify that the "EXE DOOR CLOSED" light is illuminated. 6. Dispose of the drive and/or sled according to customer procedure. - 25 - Teradyne Confidential...
-
Page 29: Sled Garage Replenishment
Figure 6-1: Sled Garage 3. Firmly slide sleds into each location. Push both wedges of the sled in so that the sled is locked into place. 4. Follow steps to exit the system and safely restart automation. - 26 - Teradyne Confidential... -
Page 30: Verifying Compressed Air Pressure
5.85 and 11.0 BAR (85-160 PSI). The regulator is set prior to system installation and should not need to be adjusted. If the pres- sure is too low, verify that the facility air pressure input is within spec- ification. - 27 - Teradyne Confidential... - Page 31 Operator Manual / 7 Verifying Compressed Air Pressure Figure 7-2: Pressure Reading Indicator - 28 - Teradyne Confidential...
-
Page 32: System Power Down/Up
2. Flip the rotary power switch to the "OFF" position to power down the system. Pressing any of the red EMO buttons will also power down the system in the same fashion. If necessary, power down the UPS and/or facility breakers. Figure 8-1: Main Power Disconnect Button - 29 - Teradyne Confidential... -
Page 33: Powering The System Up
4. Follow steps to safely restart automation. 8.3 Unexpected System Power Down The Neptune’s EMO loop can be triggered by any of its several safety features. If a system shuts down unexpectedly, visually inspect the system and its immediate surroundings for signs of any abnormal conditions such as smoke or water on the factory floor. - Page 34 EMO loop and will alert the factory’s internal alarm system. Once the issue has been resolved, the atrium will need to be cleared of all smoke before the EMO loop can be reset. - 31 - Teradyne Confidential...
-
Page 35: Clean/Inspect The Atrium
Inspect the EOAT and energy chain for frayed or damaged wires. 3. Once inspection is complete and the state of the atrium is satisfactory, follow steps to exit the atrium and safely restart automation. - 32 - Teradyne Confidential... -
Page 36: Appendix A - Terms, Acronyms And Abbreviations
International Electro-technical Commission KUKA Control Panel MOSFET Metal-Oxide Semiconductor Field-Effect Transistors OSHA Occupational Safety and Hazard Administration Sled A plastic tray that holds a drive. Sled Garage A container for spare sleds. Uninterruptible Power Supply - 33 - Teradyne Confidential...
Need help?
Do you have a question about the Neptune and is the answer not in the manual?
Questions and answers