Advertisement
Available languages
Available languages
Quick Links
H-1086, H-1087
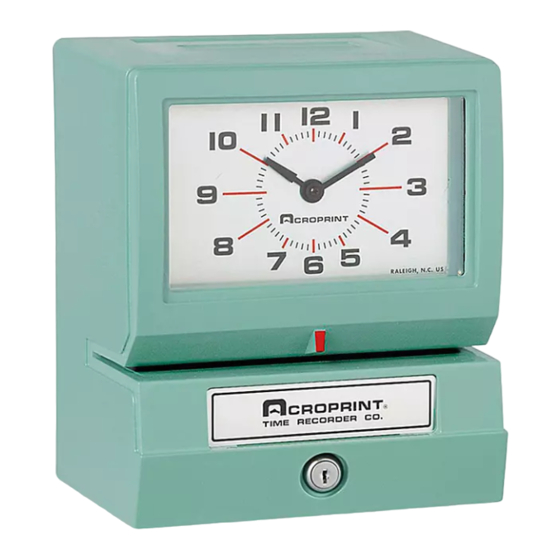
TIME CLOCK
TO REMOVE CASE COVER
1. Turn key one-quarter turn clockwise.
2. Lift case cover up then forward.
3. Reverse procedure to replace cover.
TO SET TIME AND/OR DATE
NOTE: Unless your recorder is equipped
with continental (0-23) hours, all PM hours
on the time card will be printed underscored
(Ex.: 1:00). To change the time and/or date
follow these steps:
1.
Unplug recorder and remove Case Cover.
TO SET DAY/DATE
1.
Make sure current time setting is between midnight
and noon (see note above).
2. Push down and release Yellow Lever (See Figure 1)
to set correct day/date.
3. Plug in recorder and punch card to verify correct
setting. Repeat steps 1-3 if reading is incorrect.
TO SET TIME
1.
Push down and release Black Lever to set the correct
time. (See Figure 1) If Black Lever does not work, plug
in recorder and wait for minute hand to advance,
then unplug recorder and try lever again. DO NOT
MOVE CLOCK HANDS TO SET THE TIME.
TO SET MONTH
1. Turn Month Knob counter-clockwise to select correct
month. (See Figure 1)
2. Plug in recorder and punch card to verify correct
setting. Repeat steps 1-2 if reading is incorrect.
PAGE 1 OF 12
1-800-295-5510
uline.com
INSTRUCTIONS
Figure 1 (front view with cover removed)
Black Lever
(time)
IMPORTANT NOTES
1. The date setting MUST be manually reset to the first
of the month each month following any month with
less than 31 days.
2. The month settings MUST be manually reset every
month.
3. To reset the recorder after a power failure
repeat steps from "TO SET TIME AND/OR DATE."
4. HINT: If clock is set slightly ahead of actual time,
unplug it until it matches the correct time.
Para Español, vea páginas 5-8.
Pour le français, consulter les pages 9-12.
Month Knob (turn counter-clockwise)
Yellow Lever
(day/date)
0721 IH-1086
Advertisement

Summary of Contents for U-Line H-1086
- Page 1 Para Español, vea páginas 5-8. Pour le français, consulter les pages 9-12. H-1086, H-1087 1-800-295-5510 uline.com TIME CLOCK INSTRUCTIONS TO REMOVE CASE COVER Figure 1 (front view with cover removed) 1. Turn key one-quarter turn clockwise. 2. Lift case cover up then forward.
- Page 2 INSTRUCTIONS CONTINUED TO SET TIME AND/OR DATE Figure 2 (left print models) FOR LEFT PRINT MODELS Month Lever Unplug recorder and remove Case Cover. Black Lever TO SET DAY/DATE (time) Follow the same steps as for standard models, but note the different location of Yellow Lever. (See Figure 2) Yellow Lever (day/date)
- Page 3 INSTALLING THE TIME RECORDER UNPACKING AND INSPECTION WOODEN/PLYWOOD WALLS Carefully unpack your recorder and inspect it for any You may use the three screws included with the recorder damage. Verify that the following accessories are for mounting. Mark a location on the wall 53" above included: three mounting screws, a case lock key and the floor.
-
Page 4: Maintenance
MAINTENANCE To obtain the best results from your recorder, we recommend periodic inspection, cleaning and oiling throughout each year. CONVERSION CHART If your recorder is equipped with a continental hour, tenths or hundredths wheel, please see the minute conversion chart below. DECIMAL EQUIVALENTS OF MINUTE TYPE WHEELS MINUTES TENTHS... - Page 5 H-1086, H-1087 800-295-5510 uline.mx RELOJ CHECADOR INSTRUCCIONES PARA QUITAR LA CUBIERTA DE LA CARCASA Diagrama 1 (vista frontal sin la cubierta) 1. Gire la llave un cuarto de vuelta en el sentido de las agujas del reloj. 2. Jale la cubierta de la carcasa hacia arriba y luego hacia delante.
- Page 6 CONTINUACIÓN DE INSTRUCCIONES CONFIGURAR LA HORA Y/O LA FECHA Diagrama 2 (modelos de impresión izquierda) EN MODELOS DE IMPRESIÓN IZQUIERDA Palanca de Mes Desenchufe el reloj checador y quite la cubierta de Palanca la carcasa. Negra PARA CONFIGURAR EL DÍA/LA FECHA (hora) Siga los mismos pasos que para los modelos estándar, pero tenga en cuenta que la palanca...
- Page 7 INSTALAR EL RELOJ CHECADOR DESEMPAQUE E INSPECCIONE PAREDES DE MADERA/CONTRACHAPADO Desempaque cuidadosamente su reloj checador e Para el montaje, puede usar los tres tornillos incluidos inspecciónelo en busca de daños. Verifique que se con el reloj checador. Marque una ubicación en la hayan incluido los siguientes accesorios: tres tornillos pared a 135 cm (53") del piso.
-
Page 8: Mantenimiento
MANTENIMIENTO Para obtener los mejores resultados de su reloj checador, recomendamos realizar inspecciones periódicas así como una limpieza y lubricación al año. GRÁFICA DE CONVERSIÓN Si su reloj checador está equipado con un sistema horario continental, o con una rueda de décimas o centécimas, consulte la gráfica de conversión a minutos que se indica a continuación. - Page 9 H-1086, H-1087 1-800-295-5510 uline.ca HORLOGE POINTEUSE INSTRUCTIONS RETRAIT DU BOÎTIER Figure 1 (vue de face avec le boîtier retiré) Tournez la clé d'un quart de tour dans le sens horaire. 2. Soulevez le boîtier, puis basculez-le vers l'avant. 3. Suivez la procédure inverse pour replacer le boîtier.
- Page 10 INSTRUCTIONS SUITE RÉGLAGE DE L'HEURE ET DE LA DATE Figure 2 (modèles à marge gauche) POUR LES MODÈLES D'IMPRESSION À Levier du mois MARGE GAUCHE Débranchez l'enregistreur et retirez le boîtier. Levier noir (heure) RÉGLAGE DU JOUR ET DE LA DATE Suivez les mêmes étapes que pour les modèles standard, mais remarquez l'emplacement différent Levier jaune...
- Page 11 INSTALLATION DE L'ENREGISTREUR DÉBALLAGE ET INSPECTION MURS DE BOIS/CONTREPLAQUÉ Déballez soigneusement votre enregistreur et inspectez- Vous pouvez utiliser les trois vis fournies avec le pour repérer tout dommage. Assurez-vous que les l'enregistreur pour l'installation. Tracez un repère sur accessoires suivants sont inclus : trois vis d'installation, une le mur à...
-
Page 12: Entretien
ENTRETIEN Pour un fonctionnement optimal de l'enregistreur, nous recommandons de l'inspecter, de le nettoyer et de le lubrifier régulièrement tout au long de l'année. TABLEAU DE CONVERSION Si votre enregistreur utilise les centièmes, les dixièmes et les heures sur un système horaire de 24 heures, reportez-vous au tableau de conversion des minutes ci-dessous.
Need help?
Do you have a question about the H-1086 and is the answer not in the manual?
Questions and answers