Advertisement
Quick Links
Advertisement

Summary of Contents for ASTRO-MED Dash 10
- Page 1 ® Advanced Test Equipment Rentals www.atecorp.com 800-404-ATEC (2832)
- Page 2 SETTING UP ZERO AND GAIN ENTERING TEXT ANNOTATION SETTING UP DATA CAPTURE & PLAYBACK SAMPLE EXERCISE Astro-Med, Inc. Astro-Med Industrial Park, 600 East Greenwich Ave., West Warwick, RI 02893 Toll-Free Phone: 800-343-4039 Phone: 401-828-4000 Fax: 401-822-2430 email: mtgroup@astromed.com Part Number 22834-312 December, 2004...
-
Page 3: Getting Started
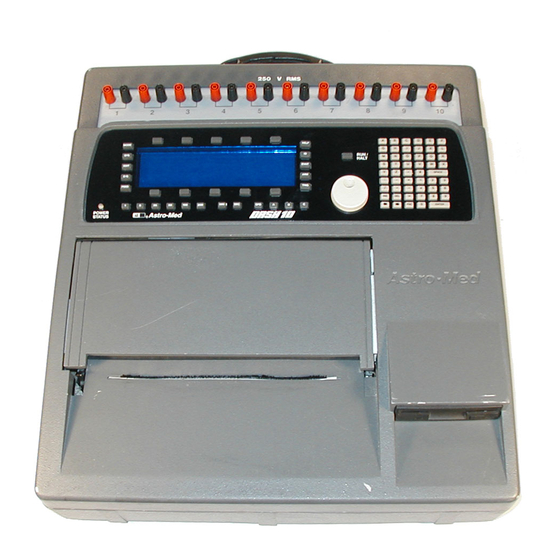
1. INTRODUCTION Thank you for choosing the Astro -Med Dash 10 chart recorder. This Quick Start Guide was prepared to let you get acquainted with the Dash 10 as quickly as possible. We even include a sample exercise so you can become familiar with the basic operation. - Page 4 A group of keys in the lower center of the front panel controls the chart speed. CHANGE SPEEDS Dedicated keys provide a means for quickly setting the common charts speeds. Non standard speeds can be set easily also. There are six dedicated speed keys on the front panel labeled [1], [5], [25], [50], [100] DEDICATED SPEED KEYS &...
- Page 5 3. SETTING UP CHARTS AND GRIDS The Dash 10 gives you total control over chart layout. You can set individual channel widths, channel locations, grid on/off and major and minor division sizing. You are also able to suppress or enable the prin ting of waveforms as well as vary the waveform trace thickness.
- Page 6 • Press the [RUN/HALT] key to halt the chart . Later on, we’ll program these keys to contain customized charts. The Dash 10 allows you to design exactly the grid you want. Let’s try to design a grid. CHANGE GRID •...
- Page 7 • Press the soft key above “CHART 1 - ASTRO 1”. Notice that now the grid is off. • Press the [RUN/HALT] key to halt the chart. The Dash 10 automatically saves the chart to the soft key that you were previously running.
-
Page 8: Zero Position
MODE root mean square method. • Press the soft key above “MODE” to toggle between pk -pk and rms. The Dash 10 has an input range of 50mv to 500V peak. To change the range of a RANGE specific channel: •... -
Page 9: Entering Text
5. ENTERING TEXT ANNOTATION The Dash 10 is equipped with thirty 128 character channel annotation buffers, one 128 character on demand annotation buffer and one system log buffer. The thirty 128 character annotation buffers and the on demand buff er can be moved to any of the 95 positions across the chart. - Page 10 6. SETTING UP DATA CAPTURE & PLAYBACK For earlier models of the Dash 10, data capture was an option. Dash 10 recorders with data capture were known as the Dash 10M. In later years, data capture became a standard feature of the Dash 10, and the model Dash 10M was no longer referenced. If your model does not have data capture, the menus for data capture will not be present.
- Page 11 You are able to change the number of channels that you want to capture. • Press the soft key below "more". • Turn the encoder wheel to see which channels/events are enabled or disabled. Disable all channels except channel 1 by pressing the soft key under “DISABLE”, for each channel you want disabled.
- Page 12 Be sure to For parameters that have many choices available, the Dash 10 uses an encoder wheel that you follow each step in order to achieve a better turn to make your selection.
- Page 13 Run the chart [RUN / HALT] Arm for capture [ARM] This key is located near the encoder wheel. The Dash 10 is now recording pre- trigger data, waiting for the trigger. Input battery voltage into Channel #1 A trigger should be produced and the capture continues to the end. While capturing, you should have seen the waveform for Channel #1 increase from the bottom of the channel to near the top on both the display and the chart.
- Page 14 … this completes the exercise. Throughout the setup of the Dash 10, you can consult the manual for additional help . This Quick Start Guide provides the basic information for operating the Dash 10. Under many of the menus, you will find additional choices for more advanced capabilities of the Dash 10, and the Operations Manual provides information on utilizing these features.


Need help?
Do you have a question about the Dash 10 and is the answer not in the manual?
Questions and answers
Does a DASH10 unit need a WARM UP TIME ???? so that it provides consistent results ???
The provided context does not mention any requirement for a warm-up time for the ASTRO-MED Dash 10 unit. Therefore, based on the available information, there is no indication that a warm-up time is required for consistent results.
This answer is automatically generated