Table of Contents
Advertisement
Quick Links
Advertisement
Table of Contents

Subscribe to Our Youtube Channel
Related Manuals for Euromex VC.3040

Summary of Contents for Euromex VC.3040
-
Page 1: The Vc.3040-4K Camera Help Manual
VC.3040 UHD-4K camera manual... -
Page 2: Table Of Contents
Connecting camera to the PC with gigabit ethernet port ................... 8 Connecting multi-cameras to the router through the GE port/WLAN STA mode for the network application 11 Brief introduction of VC.3040-4K UI and its functions ..................... 14 Mouse-driven software UI..........................14 The camera control panel on the left side of the video window .............. -
Page 3: The Application Of The Vc.3040-4K Camera
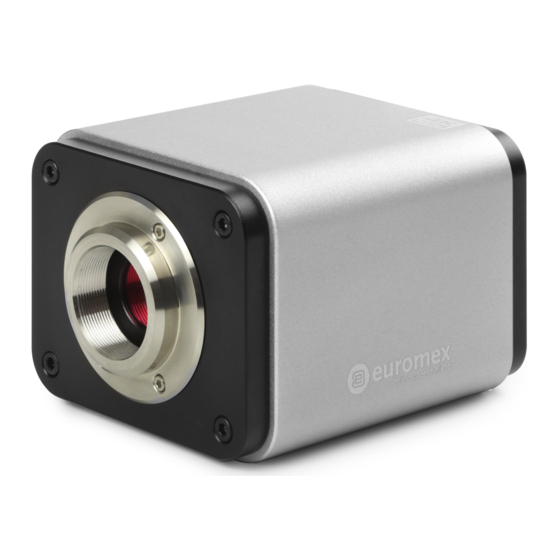
The application of the VC.3040-4K camera Figure 1-1 the VC.3040-4K Camera The VC.3040-4K camera is intended to be used for the acquisition of digital images from the stereo microscope, biological microscope or online interactive teaching. The basic characteristic is listed as below: Sony Exmor back illuminated CMOS sensor •... -
Page 4: Vc.3040-4K Camera Datasheet
1/1.8"(7.68x4.32) 0.1mv with 1/30s 30@3840*2160(Wi-Fi, GE) VC.3040-4K camera function description 4 4 . . 1 1 V V i i d d e e o o O O u u t t p p u u t t Video Output Interface Function description Comply with HDMI2.0 standard;... -
Page 5: Other Functions
English / Simplified Chinese / Traditional Chinese / Korean / Thai / French / German / Multiple Language Support Japanese / Italian VC.3040-4K camera packing information Figure 5-1 VC.3040-4K Camera Packing Information Standard packing list VC.3040-4K camera Software DVD Power Adapter: Input: AC 100~240V 50Hz/60Hz, Output: DC 12V 1A USB Mouse HDMI 2.0 Cable... -
Page 6: Software And App
The App for iOS is only available from Apple appstore VC.3040-4K Camera Application Configurations You can use the VC.3040-4K camera in 4 different ways. Each application requires different hardware environment. 7 7 . . 1 1 C C a a m m e e r r a a w w o o r r k k i i n n g g s s t t a a n n d d a a l l o o n n e e w w i i t t h h b b u u i i l l t t - - i i n n m m o o u u s s e e - - d d r r i i v v e e n n s s o o f f t t w w a a r r e e For this application, apart from the microscope, you only need an HDMI displayer, the supplied USB mouse and the camera embedded mouse-driven software. -
Page 7: Camera Working In Wlan Mode (Ap Mode)
7 7 . . 2 2 C C a a m m e e r r a a w w o o r r k k i i n n g g i i n n W W L L A A N N m m o o d d e e ( ( A A P P m m o o d d e e ) ) The PC should be a WLAN enabled one. -
Page 8: Connecting Camera To The Pc With Gigabit Ethernet Port
Connect the PC or mobile device with the WLAN AP point that the camera provides; The network name (SSID) and the WLAN password (The default one is 12345678) can be found on the camera’s Setting>Network>WLAN page in AP mode Start the ImageFocus Alpha software or ImageFocus Alpha App and check the configuration. Normally, active VC.3040- •... - Page 9 Figure 7-2 Connecting the VC.3040-4K Camera with Ethernet Cable to the PC • Start the camera according to Sec. 7.1 after the camera is running, clicking the button on the Synthesis Camera Control Toolbar at the bottom of the video window, a small window called Settings will pop up as shown below on the left side, clicking the LAN property page, uncheck the DHCP item.
- Page 10 After the above configurations are finished, user can connect the VC.3040-4K camera to the computer through the USB to Ethernet adapter as shown below: • Connect the GE port with the Ethernet cable to the PC’s network port; Insert the supplied SD card/USB flash disk (USB3.0 interface) into the HDMI camera SD card slot/USB3.0 interface;...
-
Page 11: Connecting Multi-Cameras To The Router Through The Ge Port/Wlan Sta Mode For The Network Application
In addition, please guarantee that the broadcasting function is enabled in the network. Active VC.3040-4K camera recognized by the ImageFocus Alpha software or the ImageFocus Alpha App and they are displayed as a camera list or thumbnail in the software or app. - Page 12 Or start the camera according to Sec. 7.1. After the camera is running, moving the mouse to the bottom of the UI and • clicking the button on the Synthesis Camera Control Toolbar at the bottom of the video window, a small window called Settings will pop up as shown below.
- Page 13 ImageFocus Alpha software, and the Camera Thumbnail is used in the ImageFocus Alpha App; Select the VC.3040-4K camera you are interested in. To do so, double click the camera’s name in the Camera List tool window if you use the ImageFocus Alpha software;...
-
Page 14: Brief Introduction Of Vc.3040-4K Ui And Its Functions
M M o o u u s s e e - - d d r r i i v v e e n n s s o o f f t t w w a a r r e e U U I I The VC.3040-4K UI shown in Figure 8-1 includes a Camera Control Panel on the left of the video window, a Measurement Toolbar on the top of the video window and a Synthesis Camera Control Toolbar on the bottom of the video window. -
Page 15: The Camera Control Panel On The Left Side Of The Video Window
8 8 . . 2 2 T T h h e e c c a a m m e e r r a a c c o o n n t t r r o o l l p p a a n n e e l l o o n n t t h h e e l l e e f f t t s s i i d d e e o o f f t t h h e e v v i i d d e e o o w w i i n n d d o o w w The Camera Control Panel controls the camera to achieve the best video or image quality according to the specific applications;... -
Page 16: The Measurement Toolbar On Top Of The Video Window
8 8 . . 3 3 T T h h e e m m e e a a s s u u r r e e m m e e n n t t t t o o o o l l b b a a r r o o n n t t o o p p o o f f t t h h e e v v i i d d e e o o w w i i n n d d o o w w The Measurement Toolbar will pop up when moving mouse cursor to any place near the upper edge of the video window. -
Page 17: Icons And Functions Of The Synthesis Camera Control Toolbar At The Bottom Of The Video Window
Scale Bar Arrow Execute Calibration to determine the corresponding relation between magnification and resolution, which will establish the corresponding relationship between measurement unit and the sensor pixel size. Calibration needs to be done with the help of a micrometer. For detailed steps of carrying out Calibration please refer to ImageFocus Alpha help manual. - Page 18 8.4.1 Setting>network>general Figure 8-3 Comprehensive Network Settings Page Name The current camera name recognized as the network name The encoding bandwidth for the video transmission stream. The larger the bandwidth, the higher Bandwidth quality the video. 8.4.2 Setting>network>LAN Figure 8-4 Comprehensive Network LAN Settings Page Dynamic host control protocol allows DHCP server to automatically assign IP information to the DHCP camera.
- Page 19 By default, unicast function is used. Only in Sec 6.4 networking environment, when the router/switch has multicast function, camera can switch to multicast mode, which can save the Unicast/Multicast network bandwidth consumed by the camera and facilitate the connection of more cameras in the same network;...
- Page 20 Uncheck the DHCP and select the Multicast item, user still need to set the IP address, Subnet Mask and Default Gateway as shown below: Figure 8-6 Manual DHCP and Multicast 8.4.3 Setting>network>WLAN Wi-Fi Mode AP/STA mode to select; Channel/SSID Channel for the AP mode and SSID for the STA mode. Here, the SSID is the router’s SSID; Password Camera Password for the AP mode.
- Page 21 Figure 8-7 The Measurement Setup Used for setting digits behind the decimal point for measurement results; Global Line Width Used for defining width of the lines for calibration; Calibration Color Used for defining color of the lines for calibration; EndPoint Type: Used for defining shape of the endpoints of lines for calibration: Null means no EndPoints, rectangle means rectangle type of endpoints.
- Page 22 Name Names such as 10X, 40X, 100X are based on magnification of the microscopes. For continuous zoom microscopes, ensure that the selected magnification coincides with the scale alignment line on the microscope zoom knob; Users could also edit the name of the magnification with other information, for example, microscope mode, users name, etc.
- Page 23 8.4.7 Setting>storage Figure 8-10 Comprehensive Setting of SD Card Setting Page SD Card: Select it to save the video and image to the SD card. Prefered Storage Page USB Flash Disk: Select it to save the video and image to the SD card. File System Format of List the file system format of the current storage device the Storage Device...
- Page 24 8.4.9 Setting>language Figure 8-12 VC.3040-4K Comprehensive Setting of Language Selection Setting Page English Set language of the whole software into English; Simplified Chinese Set language of the whole software into Simplified Chinese; Traditional Chinese Set language of the whole software into Traditional Chinese;...
- Page 25 Check this will show the Clarity Factor on the video window screen to tell if the camera is Clarity Factor Show focused correctly or not; ROI Color Choosing the ROI rectangle line color Cursor Choosing the Cursor size according to the screen resolution or personal preference Camera Parameters Import the Camera Parameters from the SD card or USB flash disk to use the previously Import...
-
Page 26: Sample Photos Captured With Vc.3040-4K Camera
Sample photos captured with VC.3040-4K camera Rabbit Embryo captured Ovary captured 26 /... - Page 27 Cotton stem captured Taste bad captured 27 /...
-
Page 28: 10 Contacting Customer Service
Please contact your local distributor if you have any questions about the product. Management System ISO 9001:2015 Euromex Microscopen bv • Papenkamp 20 • 6836 BD Arnhem • The Netherlands • T +31 (0) 26 323 22 11 All information may be changed without prior notice • info@euromex.com • www.euromex.com www.tuv.com v.023301...
Need help?
Do you have a question about the VC.3040 and is the answer not in the manual?
Questions and answers