Advertisement
Quick Links
Advertisement

Summary of Contents for Raven ISOBUS AUXILIARY DISPLAY
- Page 1 ISOBUS Auxiliary Display Guide 016-0171-682 Rev. A 11/19 E31630 Copyright 2019...
- Page 2 Raven Industries shall not be held responsible for any modifications or repairs made outside our facilities, nor damages resulting from inadequate maintenance of this system.
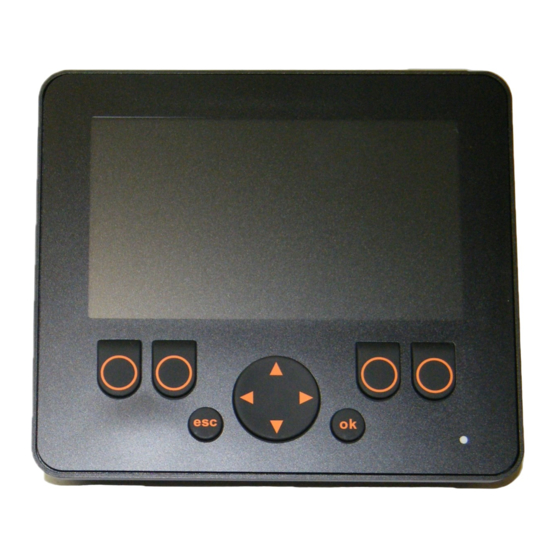
- Page 3 RAVEN ISOBUS AUXILIARY DISPLAY The Raven ISOBUS Auxiliary Display (P/N 063-0173-938) is designed to allow the operator to monitor the tank or bin filling operations, zero tank weights, and initiate catch test calibrations. NOTE: Ensure the tank is empty before zeroing the tank weights.
- Page 4 TOGGLE RCM DISPLAY 1. Press the ”esc” button to power on the Auxiliary Display. 2. Use the UP/DOWN or LEFT/RIGHT arrows to select the “Diagnostics” menu. 3. Press ”ok” to enter the Display Information screen. 4. Press either button below NEXT ECU to toggle between RCMs. 5.
- Page 5 RCM for that product. FIGURE 5. Zero Out Warning and Zeroed Out Product 7. Press the NEXT or PREV buttons to toggle screen view. The toggled view will display text only for the Capacity and Quantity for dry products. ISOBUS Auxiliary Display Guide...
- Page 6 FIGURE 6. Tank Capacity READ AND EDIT TANK WEIGHT VIA TANK/BIN INFO FOR LIQUID PRODUCTS 1. Power on the Auxiliary Display by pressing the “esc” button on the front of the monitor. 2. Using the UP/DOWN or LEFT/RIGHT arrows to highlight the box “Tank/Bin Info” menu.
- Page 7 7. On the Product Quantity screen for liquid products, press the “EDIT” button to change the percentage of the tank or hit “REFILL” to get back to 100%. FIGURE 9. Edit Product Quantity for Liquid Product ISOBUS Auxiliary Display Guide...
- Page 8 READ AND ZERO TANK WEIGHT VIA SCALE 1. Power on the remote monitor by pressing the “esc” button on the front of the monitor. 2. Using the UP/DOWN or LEFT/RIGHT arrows highlight the box “Scales” box blue. 3. Touch “ok” to enter the Scales Info screen. FIGURE 10.
- Page 9 FIGURE 13. Rate Calibration Menu 3. Press “ok” to enter the Rate Calibration screen. 4. The Calibration Information of the previously selected product will be displayed. 5. Press the LEFT/RIGHT arrows to change the selected product if necessary. ISOBUS Auxiliary Display Guide...
- Page 10 FIGURE 14. Select Product to Calibrate 6. The display will show what product is selected, the current calibration value, product type, and product density. The product density can be ignored. 7. Confirm the correct product will be calibrated and press either button below CALIBRATE.
- Page 11 UP or DOWN arrow buttons to highlight the value to be changed in black. 15. Once the value is highlighted black press the “ok” button to change the value. FIGURE 17. Edit Catch Test Summary Options ISOBUS Auxiliary Display Guide...
- Page 12 16. Using the LEFT/RIGHT and UP/DOWN arrow enter a new value for the Rate or Desired weight. 17. When the desired value is entered press the “ok” button. The Catch Test Summary will be displayed with the new values. If the values are satisfactory continue by pressing the NEXT button.
- Page 13 When the desired value is entered press the “ok” button. FIGURE 21. Enter Catch Weight 23. The Catch Test Results will be displayed. To accept the results press the “ok” button. To cancel the results press the “esc” button. ISOBUS Auxiliary Display Guide...
-
Page 14: Troubleshooting
FIGURE 22. Catch Test Results 24.Repeat steps 5 through 22 to calibrate either the same product or a different product. 25. When the calibrations are complete press the “esc” button to return to the main menu. TROUBLESHOOTING MAIN MENU IS GRAYED OUT If the main menu is grayed out, either the RCM(s) are off line or the Current ECU (RCM) is not selected. - Page 15 LED BLINKING RED If the Raven ISOBUS Auxiliary Display screen is black and the LED light in the bottom, right hand corner is blinking red, the monitor did not boot up in sequence. 1. Turn Tractor OFF. 2. Turn Universal Terminal (UT) OFF.
-
Page 16: Limited Warranty
HOW CAN I GET SERVICE? Bring the defective part and proof of purchase to your Raven dealer. If the dealer approves the warranty claim, the dealer will process the claim and send it to Raven Industries for final approval. The freight cost to Raven Industries will be the customer’s responsibility. -
Page 17: What Is Not Covered By This Warranty
WHAT IS NOT COVERED BY THIS WARRANTY? Raven Industries will not assume any expense or liability for repairs made outside our facilities without written consent. Raven Industries is not responsible for damage to any associated equipment or products and will not be liable for loss of profit, labor, or other damages. The... -
Page 18: Extended Warranty
24 months from the date of retail sale. In no case will the Extended Warranty period exceed 36 months from the date the product was issued by Raven Industries Applied Technology division. This Extended Warranty coverage applies only to the original owner and is non-transferable. - Page 19 HOW CAN I GET SERVICE? Bring the defective part and proof of purchase to your Raven dealer. If the dealer approves the warranty claim, the dealer will process the claim and send it to Raven Industries for final approval. The freight cost to Raven Industries will be the customer’s responsibility.
Need help?
Do you have a question about the ISOBUS AUXILIARY DISPLAY and is the answer not in the manual?
Questions and answers