Table of Contents
Advertisement
Quick Links
1. What's in the box?
User manual
EN
Instrukcja obsługi
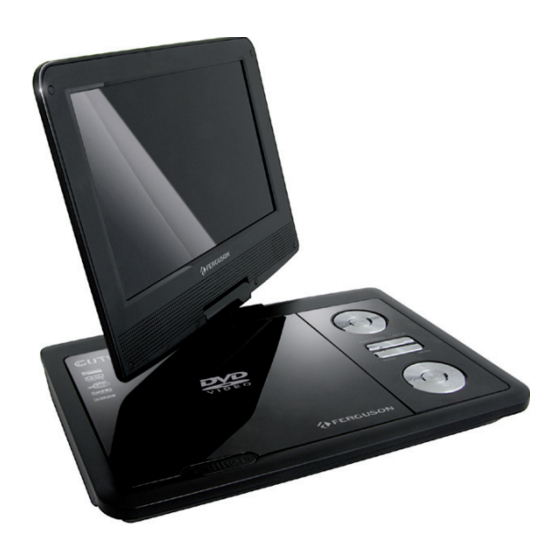
Portable DVD
PL
player
H andbuch
DE
Uživatelská příručka
CZ
Kézikönyv
HU
3
5
mm
,
User manual
Remote
Control Unit
2. Setup
Press OFF/ON switch to turn on.
A
Press SETUP
B
Select
Menu OSD and press .
C
Use keys to select a language option in the menu and press OK to confi rm.
D
Adjust other settings if needed
E
Press SETUP to exit.
F
3. Use
Playback may start automatically when a disc has been loaded in the disc tray.
A
If a disc menu appears on the TV, use keys to navigate in the DVD menu.
B
Press PLAY/PAUSE
C
To stop playback, press STOP .
D
portable DVD player Cute9
Earphones
to start playback.
Qucik Start Guide
A/V cable
DC adapter
car adapter
Advertisement
Table of Contents

Subscribe to Our Youtube Channel
Related Manuals for Ferguson Cute9

Summary of Contents for Ferguson Cute9
- Page 1 Qucik Start Guide 1. What’s in the box? portable DVD player Cute9 User manual Instrukcja obsługi Portable DVD player H andbuch Uživatelská příručka Kézikönyv User manual Remote Earphones A/V cable DC adapter car adapter Control Unit 2. Setup Press OFF/ON switch to turn on. Press SETUP Select Menu OSD and press . Use keys to select a language option in the menu and press OK to confi rm. Adjust other settings if needed Press SETUP to exit. 3. Use Playback may start automatically when a disc has been loaded in the disc tray.
- Page 2 Qucik Start Guide 4. Battery recharging Connect DC adapter or car adapter. The baterry will be recharged automatically when the player is connected with the power source. The baterry indicator is red during recharging , and it will turn green when fully recharged. The baterry could be usually fully recharged in 3.5-4 hours. CAUTION! Refer to the user manual for more information.
-
Page 3: Table Of Contents
Contents Introduction Disc Operation 1 Safety Information 13 Playable discs 1 Power Sources 13 Playable Content 2 Handling the LCD screen 14 Playing discs 2 Cleaning discs 15 Basic playback controls 2 User manual 15 Selecting various repeat/shuffle 2 Software upgrade functions 3 Symbols used on the device 16 Operation for video playback (DVD/VCD/ 3 Setup SVCD) 17 OSD (On-Screen Display) (DVD/VCD/ SVCD/XviD) 18 Special DVD Features Connections 18 Special .avi (XviD) Features 4 Power supply 19 Playing a XviD disc 5 Optional: Connecting headphones 19 Playing multimedia files from the USB 6 Optional: Connecting additional device or memory card equipment 7 Optional: Connecting a supported USB... -
Page 5: Introduction
Introduction Safety Information Do not use damaged cables for connections: you could cause fires. Please observe all warnings and Please switch off completely the device instructions on the equipment and while making all connections. contained in these operating instructions. The product purchased is a sophisticated Please carefully read this user’s manual electronic device which is not suitable for before using the device. children under 18 years. To avoid electric-shock hazards, do not We do not assume responsibility for open the cabinet, refer servicing to damages caused to people or object, qualified personnel only. If cabinet is deriving from use of the device made by opened warranty will be invalid. people under 18 years. Please switch off completely the device during thunder, during abnormal phenomenon, before cleaning it and in case it remains out of service for a long Power Sources period. Do not expose the device under the sunlight. And keep it away from the heat This unit operates on a supplied AC source or humid environments. Do not... -
Page 6: Handling The Lcd Screen
Introduction Handling the LCD screen User manual The LCD is manufactured using high Ferguson has used all the available precision technology. You may, however, means to ensure the latest information see tiny black points and/or bright regarding its products. Ferguson does not points(red,blue,green) that continuously give a warranty regarding the contents appear on the LCD. This is a normal result of this User Manual and waives any of the manufacturing process and does implied warranties regarding market not indicate a malfunction. value or fitness for specific purposes. The information contained herein provide guidelines allowing the operation and maintenance of the receiver. Cleaning discs Ferguson reserves the right to make changes, corrections or to translate the User Manual without giving prior To clean a disc ,use a micro fibre cleaning notice of such changes. Therefore, it is cloth and wipe the disc from the center to recommended that users visit our website the edge in a straight line. regularly to receive the latest information. CAUTION! Do not use solvents such as benzene, thinner, commercially available cleaners, or anti-static sprays intended for discs. Software upgrade... -
Page 7: Symbols Used On The Device
Introduction Symbols used on the device Setup Finding a suitable location CAUTION! DO NOT OPEN – Do not position the set on top of other RISK OF ELECTRIC SHOCK ACHTUNG! UWAGA! equipment that might heat it up (e.g. NICHT ÖFFNEN NIE OTWIERAĆ LEBENSGEFAHR RYZYKO PORAŻENIA reciever or amplifier). The caution risk of electrical shock - do not open symbol Space for ventilation This symbol tells you that you are not allowed to open the device. Only... -
Page 8: Connections
Connections Power supply Using the AC / DC adaptor Using the car adapter Connect the supplied adapter to the set Connect the supplied car adapter to the (DC IN 9V socket) and the main power set (DC IN 9V socket) and the car cigarette supply. lighter outlet. Note: Note: To avoid damage to the player, switch off To avoid damage to the player, switch before plugging or unplugging the AC off before plugging or unplugging the car adaptor. adaptor. When connecting with car power (cigarette lighter) adaptor, be sure the input voltage of the adaptor is identical with car voltage. -
Page 9: Optional: Connecting Headphones
Connections Optional: Connecting headphones Charging the battery pack Connecting headphones S witch off the set. Connect the earphones\headphones into the output of your set. C onnect the supplied adapter to the set and the main power supply. Charge until the red indicator turns green (approximately 3.5 - 4 hours when unit is charged from power off ). Note: It is normal for the battery pack to become warm during charging. Rechargeable batteries have a limited number of charge cycles and may eventually need to be replaced. Battery life and number of charge cycles vary by use and settings. -
Page 10: Optional: Connecting Additional Equipment
Connections Optional: Connecting additional equipment IMPORTANT! AV IN Turn off your set before connecting to any additional equipment. You can connect the player to a TV or an On the DVD player panel, press SOURCE amplifier to enjoy DVDs. to select A/V IN. Connection Color AV OUT Video Yellow Audio (Left) White On the DVD player panel, press SOURCE Audio (right) to select A/V OUT Connection Color Video Yellow Audio (Left) White Audio (right) -
Page 11: Optional: Connecting A Supported Usb Devices And Memory Cards
Connections Optional: Connecting a supported USB devices and memory cards Helpful hints: Using USB port The USB port supports playback of JPEG/ audio fi les/video fi les. You can only view the content of Not all portable audio/video players and supported USB devices through this DVD digital cameras are supported. system. While connected to a card reader, only C onnect the supported USB device one card can be read at the same time. directly to the USB port on the front panel Only format FAT16, FAT32 partitions are (as shown on the above illustration). supported by USB. NTFS is not supported P ress USB/Card button on the remote Part of external hard disk drives without ... -
Page 12: Optional: Car Kit
Connections Optional: Car kit Rotate the screen 180o to the right and fold it as shown in the picture below. Insert the strips between the screen and the player. Use the straps to clip the player to the car headrest. -
Page 13: Functional Overview
Functional Overview Panels SPEAKERS 9’’ Digital panel OPEN - Open the disc tray IR Sensor - Point the remote control towards this sensor OK - Confirms an entry or selection NEXT / PREV - Skips to the next/ previous title/chapter/ track Fast forward / reverse search DVD/USB/SD - Access the contents of disc or the connected supported USB SCREEN ROTATE device or memory card SETUP - Enters or exits system setup menu SOURCE - switch to AV IN mode MENU - Enter or exits the disc menu - Cursor buttons for moving left, right, up, down. -
Page 14: Remote Control Unit
Functional Overview Remote Control Unit MENU - Enter or exits the disc menu Menu TITLE - To go back to show title menu Title Display Card DISPLAY - Display information on the screen during playback Mode Setup USB/CARD - Access the contents of disc or the connected supported USB device or memory card Mute Zoom MODE - Change brightness, contrast and saturation of the screen. SETUP - Enters or exits system setup menu - Cursor buttons for moving left, right, up, down. OK - Confirms an entry or selection Go to Slow Source... -
Page 15: Getting Started
Getting Started Step 2: Setting language Step 1: Inserting batteries into the preference Remote Control The language options are different O pen the battery compartment. depending on your country or region.It Insert two batteries type AAA, may not correspond to the illustrations following the indications(+ -) inside the shown on the user manual. compartment. C lose the cover. Setting the OSD language Using the Remote Control to operate The On-screen language for the system the Player menu will remain as you set it, regardless of various disc languages A im the Remote Control directly at the remote sensor (IR) on the front panel. - Page 16 Getting Started Setting the Audio, Subtitle and Disc menu language You can choose your own preferred language or soundtrack from audio, subtitles and DVD menu languages. If the language selected is not available on the disc, the disc’s default language will be used instead. PREFERENCE PAGE TV Type English Audio French Subtitle Spanish Disc Menu Chinese Parental Japanese Password Korean Default Russian Thai Preferred Audio language P ress twice, then press SETUP. P ress . to select {Preference Page}.
-
Page 17: Disc Operation
Disc operation Playable Content IMPORTANT! If the inhibit icon (ø) appears on the TV screen when a button is pressed, it File Systems means the function is not available on the FAT (FAT16 and FAT32) current disc or at the current time. ISO-9660 and partly UDF on CD and DVD discs Video containers Playable Discs MPEG-1/2 Program Stream (MPG, MPEG) MPEG-4 Part 14 (MP4) Your DVD Player will play: VOB Digital Video Discs (DVDs) AVI Video CDs (VCDs) Super Video CDs (SVCDs) Video codecs: Digital Video Discs + Most video codecs are supported up to Recordable[Rewritable] (DVD+R[W]) 576p resolution. Compact Discs (CDs) XviD (except 3 warp-point GMC) MPEG-1 MPEG-2 ML@MP MPEG-4 ASP Subtitle formats: SRT (SubRip) SMI (Sami) SUB (MicroDVD, SubViewer2) -
Page 18: Playing Discs
P ress OPEN on the front of the DVD WMA player. P lace a disc into the disc tray with the Audio codecs: lable facing up, then close cover. Dolby Digital (AC3) For double-sided discs, load the side WMA (except lossless and WMA Pro) you want to play facing up. MP1, MP2, MP3 P layback will start automatically. If not press Extensions recognized in Ferguson file If a disc menu appears on the TV see browser. “Using the Disc Menu”. List of recognized multimedia file If the disc is locked by parental control, extensions are listed below. Not all files you must enter your password. with those extensions are playable - some files may include not supported codecs and/or settings. Files with other extensions player will not play. avi, dat, divx, jpe, jpeg, jpg, mp1, mp2, mp3, mp4, mpe, mpeg, mpg, vob, wma... -
Page 19: Basic Playback Controls
Disc operation Selecting various repeat/shuffle Basic playback controls functions Unless otherwise stated, all operations described are based on Remote Control Repeat play mode use. The repeat play options vary depending Pausing playback on the disc type. D uring playback , press to pause playback and display a still picture. W hile playing a disc, press REPEAT Sound will be muted. continuously to choose a repeat options. T o resume normal playback, press again. T o cancel repeat playback, press STOP . Selecting track/chapter / PREV to go to the Press NEXT previous or next track/chapter Stopping playback... -
Page 20: Operation For Video Playback
Disc operation Slow Motion Operations for video playback (DVD/ VCD/SVCD) P ress during playback to select the required speed: 1/2, 1/4, 1/8 or 1/16 Using the Disc Menu (forward {DVD/SVCD/VCD} or backward {DVD}). Sound will be muted. Depending on the disc, a menu may T o return to normal speed, press appear on the TV screen once you load in the disc. Forward/Reverse Searching To select a playback feature or item Use keys or numeric keypad P ress during playback to select (0-9) on the remote, then press OK to the required speed: 2X, 4X, 8X, 16X, 32X start playback. -
Page 21: Osd (On-Screen Display) (Dvd/Vcd/ Svcd/Xvid)
Disc operation Playback info OSD (On -Screen Display) (DVD/ VCD/SVCD/XviD) This OSD menu shows the disc playback information (for example, title or chapter Using the OSD menu number, elapsed playing time), without interrupting disc playback. OSD menu shows the disc playback During playback, press DISPLAY information (for example, title or Info about current playback progress chapter number, elapsed playing time, and other information appears on the TV audio/ subtitle language), a number screen. of operations can be done without interrupting disc playback. Angle Function During playback, press DISPLAY A list of available disc information appears on the TV screen. P ress to highlight {Angle}, then press to access. U se the numeric keypad (0-9) to key in a valid number. -
Page 22: Special Dvd Features
Disc operation Special DVD Features Special .avi (XviD) Features Playing a Title Subtitles loading S tart .avi plaback. P ress MENU. C hoose subtitle by pressing SUBTITLE The disc title menu appears on the TV button during plaback. screen. U se keys or numeric keypad (0-9) to select a play option. Resuming playback from the last stopped point P ress OK key to confirm Resume playback of the last 5 movies is possible, even if the disc was ejected Changing the Audio Language (open) or standby. Auto resume is active for DVD, CD types of discs. -
Page 23: Playing A Xvid Disc
Disc operation Playing multimedia files from the Playing a XviD disc USB device or memory card This DVD player supports the XviD movie playback that you download This DVD system able to access and view the data in the supported USB device or from your computer onto a CD-R/RW or DVD±RW memory card. L oad a XviD disc. I f a disc is playing, inserting a supported Playbak will start automatically. If not USB device into the USB port on the front... - Page 24 Disc operation Compatibility of USB device Playback selection During playback ,you can; The USB port does not support the / PREV connection of other USB device except to select the Press NEXT the supported USB device. previous/next track/file in the current folder. The USB port can supports the playback of JPEG/music files/AVI files. / PREV repeatedly to Press NEXT pause/resume playback. It is not possible to record from the data from USB ports to this DVD system. Copy protected contents are not playable. Zoom picture (JPEG) Helpful Hints: During playback, press ZOOM repeatedly Supported USB device include: flash drive, to display the picture with different card readers for different kinds of cards, scales. external hard disk. Use to view the zoomed picture General Operation...
-
Page 25: Dvd Setup Menu Options
DVD Setup Menu Options Setting the TV Display This DVD Player setup is carried out via menu on the screen, enabling you to customise the DVD player to suit your The picture shape can be adjusted to fit particular requirement. your TV and the format must be available on the playback disc. Otherwise, the TV display will not affect the picture during playback. General Setup menu I n disc mode, press SETUP. I n ‘Video Setup Page’ , use keys to P ress to select ‘General Setup Page’ highlight { TV Display }, then press . icon. U se keys to select a setting: { 4:3 Panscan } Select this for a full-height picture with PREFERENCE PAGE the sides trimmed. -
Page 26: Audio Setup Menu
DVD Setup Menu Options Audio Setup menu Dolby Digital Setup Menu I n disc mode, press SETUP. P ress SETUP. P ress to select ‘Audio Setup Page’ P ress to select DOLBY DIGITAL icon. SETUP icon. SPEAKER SETUP PAGE Downmix Lt/Rt DOLBY DIGITAL SETUP Stereo Dual Mono Stereo Dynamic L-Mono R-Mono Mix-Mono Set Downmix Mode Dual Mono (1 + 1) Setup Analog Output DYNAMIC RANGE... -
Page 27: Video Setup Menu
DVD Setup Menu Options Video Setup Menu Preference Page I n disc mode, Press SETUP. P ress STOP button twice to stop playback (if any), then press SETUP. P ress to select ‘Video Setup Page’ icon. P ress to select ‘Preference Page’ icon. PREFERENCE PAGE TV Type VIDEO SETUP PAGE Dynamic Auto Sharpness High Audio NTSC Brightness Medium Subtitle Contrast Disc Menu Logo Parental Password Default... - Page 28 DVD Setup Menu Options Changing the Password Restricting playback by Parental Control The same password is used for both Rating setting and Disk Lock, Enter your Some DVDs may have a parental level password when prompted on the screen, assigned to the complete disc or to default password is 0000. certain scenes on the disc. This feature lets you set a playback limitation level. I n ‘PREFERENCE PAGE’ , press to The rating levels are form 1 to 8 and are highlight {PASSWORD}, then press to country dependent. You can prohibit select {CHANGE}. the playing of certain discs that are not suitable for your children or have certain P ress OK and the menu appears. discs played with alternative scenes. U se the numeric keypad (0-9) to enter I n ‘PREFERENCE PAGE’ , press to your old six-digit password.
-
Page 29: Troubleshooting
Troubleshooting WARNING Under no circumstances should you try to repair the system yourself, as this will invalidate the warranty. Do not open the system as there is a risk of electric shock. If a fault occurs, first check the points listed below before taking the system for repair. - Page 30 Troubleshooting An XviD movies does not repeat – Check that file size of the movies does not exceed the file size of the CD disc during burning. The contents of the USB flash drive – The USB flash drive format is not compatible with the player. cannot be read – Drive is formatted with a different file system. (eg. NTFS) Slow operations of the USB flash – Big file size or high resolution USB flash drive takes longer time drive to read and display on the TV screen.
-
Page 31: Specification
Specifications Processor Cabinet Mediatek MT1389L Dimensions (w x h x d) 240 x 43 x 175 mm Weight Approximately 1.5 kg Flash Power consumption 2 MiB (16 Mbit) NAND Built-in rechargeable battery Lithium 1500 mAh Power Supply Rating 110-240V; 50/60Hz Power consumption 8 MiB SDRAM Screen Specifications subject to change without prior notice 9’’ TFT digital panel 800x480 swivel screen 180 degree Built-in two channels stereo speakers output, 2x 1W Connections AV Output minijack-3x Cinch (Stereo and CVBS) AV Input minijack- 3x Cinch (Stereo and CVBS) earphone minijack Port USB 1x USB 2.0 High Speed type A 3-in-1 card reader 1x SD/MMC/MS... -
Page 32: Glossary
Glossary Composite (CVBS) - Low quality analogue video DTS (Digital Theater System) - is a required signal format. Can carry PAL signal.. standard of both Blu-Ray and DVD players and is widely regarded to produce audio quality superior Aspect ratio: The ratio of vertical and horizontal to Dolby Digital. Up to 5.1 channel surround sound sizes of a displayed image. The horizontal vs. is supported. DTS is a ‘lossy’ compression standard vertical ratio of conventional TVs is 4:3, and that of so the audio is of a lesser quality than the original widescreens is 16:9. studio recording. The DTS audio track can either Disc menu: A screen display prepared for allowing be decoded (downmixed) in the Player to stereo selection of images, sounds, subtitles, multi-angles, or digitally bitstreamed direct (passthrough) to a etc recorded on a DVD. compatible receiver (via TOSLINK/Coaxial/HDMI) for JPEG: A very common digital still picture format. A decoding. still-picture data compression system proposed Bit Rate: The amount of data used to hold a given by the Joint Photographic Expert Group, which length of music; measured in kilobits per seconds, features small decrease in image quality in spite of or kbps. Or, the speed at which you record. its high compression ratio. Generally, the higher the bit rate, or the higher XviD: MPEG-4 based video compression technology, the recording speed, the better the sound quality. that can shrink digital video to sizes small enough However, higher bit rates use more space on a Disc.
Need help?
Do you have a question about the Cute9 and is the answer not in the manual?
Questions and answers