Table of Contents
Advertisement
Quick Links
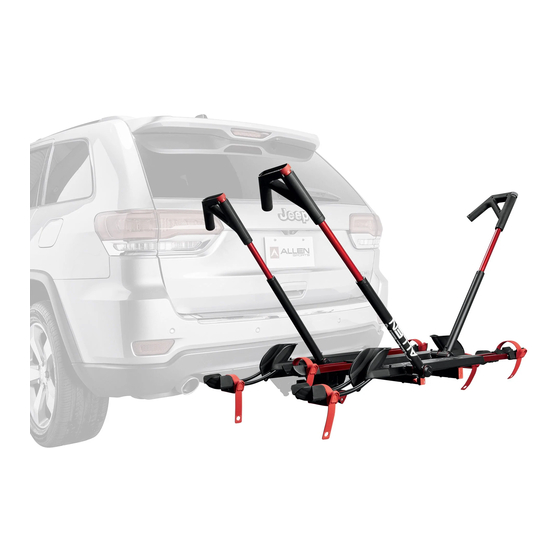
MODEL AR200 2-BIKE CARRIER
Owner's Manual should be kept for future reference
1. Completely read and understand Owner's Manual before assembling or operating this product.
2. This product should be assembled by an adult.
WARNING:
Bicycles or rack falling in road can cause serious accidents resulting in bodily injury – do not use rack
on any vehicle on which it can't be properly mounted as described in this instruction sheet.
• Rack should only be used on vehicles with Class II 1 ¼", or Class III or IV 2" receiver hitches.
• Never used on a trailer, fifth wheel, RV, or the front of a vehicle. Never use with a third party hitch adapter or extender.
• Only carry bicycles with 26" to 29" diameter wheels, and tires up to 3.5" wide.
• Only carry bicycles with a wheelbase of min. 35" to max. 48".
• Check that front and rear wheels are securely attached to bicycle - check quick release skewers for proper connection.
• Only load bicycle front wheel in Front Wheel Tray - never transport bike with back wheel loaded in Front Wheel Tray.
• Only carry with front wheel placed in Front Wheel Tray. Never load bicycles with back wheel in Front Wheel Tray.
• Max. allowable bicycle weight: 40 LB; Max. rack capacity: 80 LB.
• Never carry tricycles, mopeds or recumbents. Car tail lights must remain visible.
• Never carry bicycles with flat or leaky tires. Loss of air pressure in tires can cause bicycles to become unstable during
transport.
• Do not carry bicycles with front fenders installed. Fenders should be removed prior to transport.
• Bikes must be securely tied to rack using bike tie-downs and additional straps as needed.
• Check periodically during use that all bolts are tight and that bicycles are secure.
• Drive conservatively, especially over bumps. Never use off road.
• Never use rack if any parts are damaged or worn. Contact R. A. Allen Company for replacement parts.
CAUTION:
Use AR200 only in accordance with local motor vehicle and traffic regulations
• INSTALL RACK AND LOAD BICYCLES ONLY AT A SAFE DISTANCE AWAY FROM MOVING TRAFFIC.
• MAKE SURE THAT ALL OF RACK AND BICYCLES ARE CARRIED AT A SAFE DISTANCE FROM ROAD AND HOT EXHAUST.
• ONLY OPERATE VEHICLE WITH RACK IN AN UPRIGHT, LOCKED POSITION.
• BICYCLES SHOULD NEVER EXTEND BEYOND THE SIDE OF VEHICLE DURING TRANSPORT.
• REMOVE RACK FROM CAR WHEN NOT IN USE.
INSTRUCTIONAL OWNER'S MANUAL
PRODUCT REGISTRATION:
MAKE SURE TO REGISTER YOUR PURCHASE AT
https://allensportsusa.com/pages/register-your-product
TO QUALIFY FOR PRODUCT WARRANTY AND TO RECEIVE
IMPORTANT PRODUCT NOTIFICATIONS
1
Advertisement
Table of Contents

Related Manuals for Allen Sports AR200


Summary of Contents for Allen Sports AR200
- Page 1 • Never use rack if any parts are damaged or worn. Contact R. A. Allen Company for replacement parts. CAUTION: Use AR200 only in accordance with local motor vehicle and traffic regulations • INSTALL RACK AND LOAD BICYCLES ONLY AT A SAFE DISTANCE AWAY FROM MOVING TRAFFIC.
- Page 2 PARTS LIST QUANTITY DESCRIPTION HARDWARE KIT INCLUDING M6 Bolts with Thread Lock Installed M6 Washers M6 Nylon Insert Lock Nut M6 Carriage Bolts 4mm Hexhead tool (for rack assembly) Set Keys (2) and Keychain Hitch Insert & U Support Front Wheel Tray Note: Wheel trays will be marked "Inner"...
- Page 3 INSTRUCTIONAL OWNER’S MANUAL ASSEMBLY INSTRUCTION Tools Required: 1—Hexhead wrench (included) INSTALLING INNER BIKE SUPPORT NOTE: THE INNER BIKE SUPPORT IS THE TRAY WITH NO "ALLEN" DECALS PLACE BIKE SUPPORT ONTO HITCH INSERT U-SUPPORT STEP 1: Place the alignment holes on bottom of the Bike Support [A] over the inner alignment posts [B] on the U Support, as shown in Figure 1.
- Page 4 INSTRUCTIONAL OWNER’S MANUAL ASSEMBLY INSTRUCTION (CONT.) INSTALLING OUTER BIKE SUPPORT ONTO HITCH INSERT U-SUPPORT NOTE: THE OUTER WHEEL TRAY IS THE TRAY WITH THE "ALLEN" DECALS SECURE BIKE SUPPORT ONTO HITCH INSERT U-SUPPORT STEP 3: Place the alignment holes on bottom of the Outer Wheel Tray over the outer alignment posts on the U Support, like shown in Figure 1 above.
- Page 5 INSTRUCTIONAL OWNER’S MANUAL INSTALL RACK INTO RECEIVER HITCH AR200 SHOULD ONLY BE USED WITH A PROFESSIONALLY INSTALLED CLASS II 1 1/4" OR CLASS III NOTE: AND IV 2" RECEIVER HITCH. STEP 5: 1 1/4" HITCH INSTALLATION 2" HITCH INSTALLATION 1. Using a 4mm hex head wrench, remove the Filler 1.
- Page 6 INSTRUCTIONAL OWNER’S MANUAL READYING AR200 TO INSTALL BICYLCES STEP 7: Raise Bike Spar Arm, lift pull pin [G] as shown in Fig. 10, while rotating Spar Arm to its full forward position, Fig 10a. FIGURE 10a FIGURE 10 1. Making sure that Spar Arm Release is unlocked, push down Spar Arm release [I] and fully...
- Page 7 INSTRUCTIONAL OWNER’S MANUAL INSTALLING BICYCLES ONTO AR200 WARNINGS! 1. Only carry bicycles with max weight of 40 LB each, 26” to 29” diameter wheels, tires up to 3.5” wide, and a wheelbase of min. 35" up to max. 48". 2. Load heaviest bike first.
- Page 8 FIGURE 22 FOR QUESTIONS REGARDING WARRANTY SERVICE, ASSEMBLY, INSTALLATION, OR USE, PLEASE CONTACT ALLEN SPORTS USA (800) 722-5536 ~ CUSTOMERSERVICE@ALLENRACKS.COM Please note that all returns and exchanges are subject to the return policy of the retailer where the product was originally purchased R.
Need help?
Do you have a question about the AR200 and is the answer not in the manual?
Questions and answers