Advertisement
Advertisement

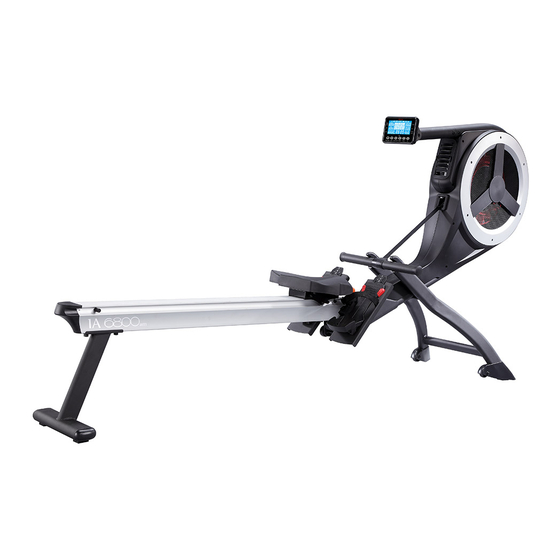
Related Manuals for IMPETUS 1A 6800 am

Summary of Contents for IMPETUS 1A 6800 am
- Page 1 User manual...
- Page 2 IA6800/impetus Testing specification : Low voltage Directive - EN60335 - 1 E&E Directive - EN62233 EMC Directive - EN55014 - 1 EN55014 - 2 EN61000 - 3 - 2 EN61000 - 3 – 3 Features of product with CE mark: Mechanical and electrical safety.
-
Page 3: Table Of Contents
IA6800/impetus INDEX Introduction/Safty Guideline..................1 Exploded View......................Parts List........................4-5 Assembly instruction....................6-12 Monitor Instruction....................13-18 How to Use the Rower................19 Warm-up........................ 19-20 Cleaning & Maintenance........ -
Page 4: Introduction/Safty Guideline
IA6800/impetus INTRODUCTION / SAFETY GUIDELINE A. Introduction This user's manual contains assembly, operation, maintenance and safety information. In the interest of safety, please make certain that you read and understand all the information below. B. Safety guideline a. Read the user's manual and all accompanying literature. Follow it carefully before using your machine. - Page 5 IA6800/impetus m. Do not “over train” Incorrect or excessive training may result in injury. n. Warning that any of the adjustment devices should not be left projecting. o. Braking system:speed-independent. IMPORTANT : THE MAXIMUM RECOMMENDED WEIGHT CAPACITY FOR YOUR EQUIPMENT IS KGS.
-
Page 6: Exploded View
IA6800/impetus EXPLODED VIEW... -
Page 7: Parts List
IA6800/impetus PARTS LIST NAME SPECIFICATION Q'TY NAME SPECIFICATION Q'TY Main frame Philips screw A42 Protecting cover ( L ) Air fan wheel Φ345_16 A43 Protecting cover ( R ) Tension motor Adjust fixed base M6 A44 Belt port cover... - Page 8 IA6800/impetus NAME SPECIFICATION Q'TY NAME SPECIFICATION Q'TY Aluminum guide Front foot set Guide rail Seat frame End plug Protection plate PR-B734 Foot cap ( L ) B2-1 Side plate Foot cap ( R ) B2-2 PR-B828 Allen bolt M8×40mm B2-3...
-
Page 9: Assembly Instruction
IA6800/impetus ASSEMBLY INSTRUCTION: PACKING LIST... - Page 10 IA6800/impetus ASSEMBLY: STEP 1: 1-1 Remove the Allen bolts (A12) and the flat washers (A7) from the main frame (A). 1-2 Assemble the main frame (A) to the front foot set (C) with the Allen bolts (A12) and flat washers (A7) just removed in the previous step.
- Page 11 IA6800/impetus STEP 2: 2-1 Hook up the pull lever (A13) to the front foot set (C). 2-2 Remove the Allen bolts (B4) and the flat washers (B12) from the main frame (A).
- Page 12 IA6800/impetus STEP 3: 3-1 Remove the Allen bolts (E8) from the pedal assembly (E) and separate the two pedals (E1L & E1R). 3-2 Get the two pedals (E1L & E1R) through the main frame (A). Attach both pedals to the main frame (A) with the Allen bolts removed in the previous step.
- Page 13 IA6800/impetus STEP 5: 5-1 Insert the aluminum guide rail (B) to the main frame (A), then firmly fasten with the Allen bolts (B4) and flat washers (B12) removed in step 2-2. 5-2 Remove the Allen bolts (F2) and the flat washers (F3) from the seat (F), and attach the seat (F) firmly to the aluminum guide rail (B) with the Allen bolts (F2) and flat washers (F3) just removed.
- Page 14 IA6800/impetus STEP 6: Hold the aluminum guide rail (B), and pull the pull pin (G) to slowly let down the aluminum guide rail (B). Let go the pull pin (G2) when the aluminum guide rail (B) is settled on the floor. Lift up the guide rail lift lever (B10) until you hear the click.
- Page 15 IA6800/impetus STEP 7: Remove the Allen bolt (A33) from the main frame (A). Connect the 12-pin (H6) and 3-pin female (H7) adapter wires to the sensor wire on the main frame (A). 7-2 Attach the monitor assembly (H) to the main frame (A) with the Allen bolt (A33) just removed in the previous step.
-
Page 16: Monitor Instruction
IA6800/impetus LCD DISPLAY: DISPLAY FUNCTIONS: ITEM DESCRIPTION ‧ Stoke per minute. ‧ Display range 0~99; Each increment/decrement is 5. ‧ Workout time display during rowing. ‧ Display range 0:00~99:00. Time/500m ‧ Computer will display the time needed to row 500 meters according to current speed. - Page 17 IA6800/impetus KEY FUNCTION: ITEM DESCRIPTION ‧ Setting selection. ‧ Increase resistance level. ‧ Setting selection. Down ‧ Decrease resistance level. ‧ Confirm setting or selection. ENTER ‧ Hold on pressing for 2 seconds, computer will reboot. ‧ Clear setting value.
- Page 18 IA6800/impetus 4.5 When any preset workout value count down to 0, console will STOP. The function is flashing in 1Hz and alarm bi-bi-bi-bi per second for 8 seconds. Then display average value. (Press any key to stop alarm.) 4.6 Press START/STOP to pause workout. Press RESET to reverse to main menu.
- Page 19 IA6800/impetus when LEVEL=1 for 30s, console will stop automatically for user safety. If no pulse input to console, system will decrease 1 level immediately and then reduce one level each 15s with beeps till LEVEL=1. No pulse input for 30s, console will stop.
- Page 20 IA6800/impetus Picture 14 8. USER Mode 8.1 Press UP or DOWN to select USER mode and press ENTER to confirm. 8.2 Press UP or DOWN to set resistance level of each column (Picture 15). Press ENTER to next one. Hold on pressing MODE for 2s to finish or quit setting.
- Page 21 IA6800/impetus Outstanding 1.0 < F2 < 2.0 Excellent 2.0 < F3 < 2.9 Good 3.0 < F4 < 3.9 Fair Below average 4.0 < F5 < 5.9 Poor “WARNING! Heart rate monitoring systems may be inaccurate. Over exercise may result in serious injury or death.
-
Page 22: How To Use The Rower
IA6800/impetus HOW TO USE THE ROWER The proper way to use the bike is shown below. WARM UP Warm up is an important part of every workout. It prepares the body for more strenuous exercise and reduces the chance of joint and body injuries by increasing your blood flow to the muscles, delivering more oxygen to the muscles, and increasing the body temperature. -
Page 23: Cleaning & Maintenance
IA6800/impetus Toe Touches Stand with your knees bend slightly, slowly bend forward from the hips. Allow your back and shoulders to relax as you stretch down toward your toes. Go as far as you can and hold for 15 counts, then relax. Repeat three times. - Page 24 Without our authorization, any contents of this manual are not allowed to be copied, saved or transferred. We reserve rights to revise specification, equipment, and maintenance information for our R&D team keeps improving our product quality. We have done the best efforts on this manual to be more comprehensible for all users.
Need help?
Do you have a question about the 1A 6800 am and is the answer not in the manual?
Questions and answers