Advertisement
Available languages
Available languages
Quick Links
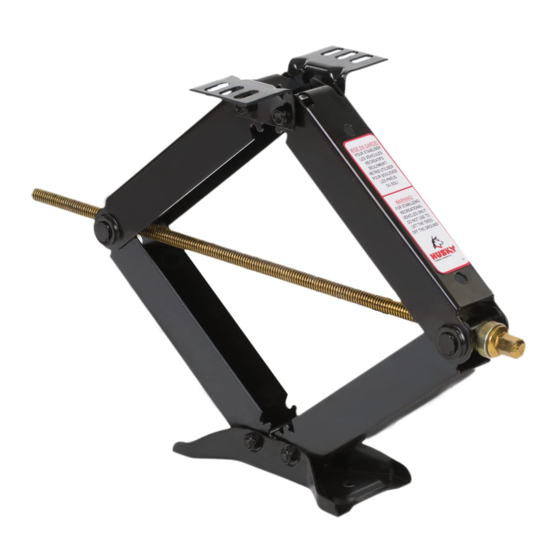
Instructions for Husky Scissor Jacks
DTS reserves the right to modify appearances and specifications without notice.
Read all of the following steps before beginning installation.
WARNING: Raising the corners or extreme ends of the trailer
to excessive height can cause damage to the trailer.
Product Specifications
Maximum Lift Capacity ............... 6,000 lbs
Vertical Travel ............................ 24 in. & 30 in.
Retracted Height ........................ 4" (24" Jack), 4.5" (30"Jack)
Foot Pad Area ............................ 28 in.
Aprox. Shipping Wt. (set of 2)..... 28 lbs(24"Jack), 35 lbs(30"Jack)
Tools Required for Installation
• Marker
• Drill bits: 1/8in & 11/32in
• Center Punch
• Drill
• 9/16" Wrench
• Hammer
Installation
1.
Park the trailer on a level surface and block the wheels.
2.
Position each Husky Scissor Jack under the trailer frame
where it will be installed. For proper placement of the jacks,
refer to Figure 1, and follow these guidelines:
Front Installation: Jacks should be positioned
just ahead of the trailer step or 6'-8' behind the
trailer hitch.
Rear Installation: Jacks should be
approximately halfway between the rear axle and
the end of the trailer.
3.
Raise the jacks to make contact with the trailer frame using
the crank. Then continue turning the crank until the trailer just
begins to lift. To use the crank:
1.
Slide the open end of the crank on the hex
head at the jack's elbow.
2.
Turn crank clockwise to raise the jack.
3.
Turn crank counter-clockwise to lower the jack.
Husky Scissor Jacks can be welded to the trailer frame or
bolted in place using self-tapping screws (Figure 2).
the jacks, continue with the following step-by-step
instructions.
4.
Using the pre-punched holes on the mounting plate as a
template, mark 2 bolt locations per jack. The bolts must be on
opposite sides of the jack.
5.
Lower the jack and move it out of the way.
6.
Center punch the hole locations.
CAUTION: To avoid metal particles, wear safety goggles
while drilling overhead! Do not remove safety goggles without
first cleaning the particles from your face and hair.
7.
Drill a pilot hole through the center punch using a 1/8" drill bit,
then drill to final size using an 11/32" drill bit.
8.
Reposition the jack and install using the 3/8" x 1" self tapping
screws. Turn screws until they seat and are tight.
9.
Repeat steps 4-8 for each jack to be installed.
10. Lubricate all leveler drive screws with grease.
DTS Manufacturing, Wilsonville, OR 97070
2
To bolt
Operation
1.
Before unhitching your trailer, try to obtain the most level
position that ground conditions will allow. Some sites may
require wheel ramps or planking under the tire on the low
side.
Note: Always use wheel chocks when parking.
2.
Unhitch the trailer and use tongue jacks to level the trailer
front to back.
3.
Beginning on the lowest side, open the Husky Scissor Jacks
and adjust to obtain a level side to side position.
4.
Lower the opposite units to provide stability.
WARNING: Although Husky Scissor Jacks are strong enough
to lift the trailer, trailers are not designed to be raised off the
ground in this manner. Raising any corner too high can
damage the trailer frame.
Following the steps above should help to avoid damage
caused by raising, but you can check for excess lifting by the
action of the entrance door. If it sticks, start again at step 1 of
the operating instructions, and make sure the wheels are as
level as possible.
NOTE: Side-to-side leveling can be expedited by attaching a
stick-on level where it can be easily seen while operating the
jacks. Attach a level directly to the tongue jack for easy front-
to-back leveling.
Lubrication (important)
Lubricate each drive screw with grease twice a year.
Trailer Main Rail
1" Weld
(in 4 places)
⅜"x1" Self-Tapping Screws
Figure 2
Revised 01/04/2011
Advertisement

Related Manuals for Husky 72139


Summary of Contents for Husky 72139
- Page 1 Turn crank clockwise to raise the jack. Turn crank counter-clockwise to lower the jack. Husky Scissor Jacks can be welded to the trailer frame or bolted in place using self-tapping screws (Figure 2). To bolt the jacks, continue with the following step-by-step instructions.
- Page 2 Superficie du socle ..... 28 in. En commençant par le côté le plus bas, ouvrez les crics Poids de livraison (2 crics)…..….. 28 lbs(24”cric), 35 lbs(30”cric) ciseaux Husky et ajustez-les pour obtenir une mise à niveau Outils Requis pour L’installation latérale.