
Subscribe to Our Youtube Channel
Summary of Contents for Vimar ELVOX 4626.08B
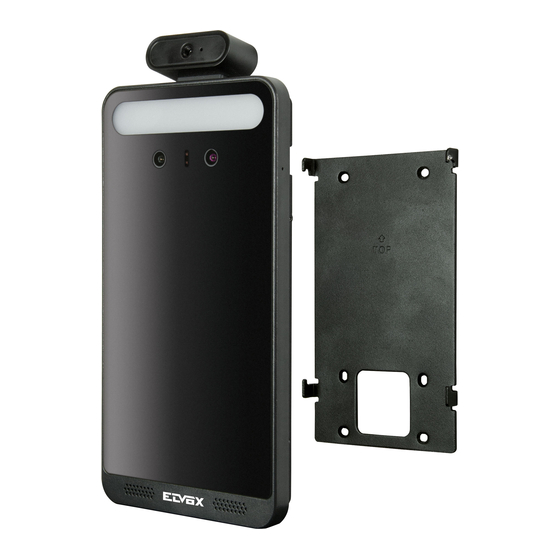
- Page 1 Manuale per il collegamento e l’uso Installation and operation manual Termoscanner Termoscanner...
-
Page 2: Table Of Contents
Termoscanner Sommario 1 - Introduzione ........................................... 3 1.1 - Login da Touch screen ....................................3 2 - Accesso remoto ........................................4 2.1 - LAN ..........................................4 2.1.1 - Accesso da IP-Tool ....................................3 2.1.2 - Accesso diretto da Internet Explorer ..............................5 2.2 - WAN .......................................... -
Page 3: Introduzione
Termoscanner Note sulla sicurezza - Utilizzare l'alimentazione specificata per il collegamento. - Non tentare di smontare il dispositivo: esiste il rischio di scossa elettrica; non rimuovere le viti o i coperchi. - All'interno non vi sono parti che possono essere riparate dall'utente. In caso di guasto, rivolgersi il prima possibile al centro assistenza più vicino. - Evitare di azionare il prodotto in modo improprio, sottoporlo a urti, vibrazioni o forti pressioni che possono danneggiarlo. -
Page 4: Accesso Remoto
Termoscanner 2 - Accesso remoto È possibile collegare il dispositivo tramite LAN o WAN. In questo documento viene utilizzato come esempio il browser Internet Explorer. Di seguito sono indicati i dettagli: 2.1 - LAN In una LAN è possibile accedere al dispositivo in due modi: 1 - accesso da IP-Tool;... -
Page 5: Accesso Diretto Da Internet Explorer
Termoscanner Inserire il nome utente e la password per accedere. Il nome utente predefinito è "admin" e la password "123456". E' possibile utilizzare le stesse credenziali per accedere al menu di configurazione sul touch screen. Il sistema farà apparire la casella di testo sopra menzionata per chiederti di cambiare la password predefinita. Si consiglia vivamente di modificare la password predefinita per la sicurezza dell'account. -
Page 6: Wan
Termoscanner Selezionare "Proprietà" e quindi il protocollo Internet opportuno (ad esempio, IPv4). Infine, fare clic sul pulsante "Proprietà" per impostare la rete del PC. 2 - Aprire Internet Explorer, inserire l'indirizzo predefinito del dispositivo e confermare. Internet Explorer scarica automaticamente i controlli ActiveX. 3 - Dopo il download dei controlli ActiveX, viene visualizzata la finestra di dialogo di accesso. - Page 7 Termoscanner 3 - Accedere all'interfaccia di gestione del router tramite Internet Explorer per eseguire il forwarding dell'indirizzo IP e della porta del dispositivo nel "Server virtuale". Configurazione del router 4 - Aprire Internet Explorer, inserire l'IP WAN corrispondente e la porta http per accedere. ►...
-
Page 8: Misura Di Temperature E Riconoscimento Facciale, Impostazioni
Termoscanner 3 - Misura di temperature e riconoscimento facciale, impostazioni NOTA: Parametri di temperatura modificabili anche da Touch screen Menu Sistema Misurazione temperatura 3.1 - Impostazione misurazione della temperatura Dopo la connessione di rete, andare su web client. Fare clic su Config Misura di Temperatura per arrivare alla seguente pagina: 1 - Selezionare “Temperature Unit”, selezionare l’unità... -
Page 9: Gestione Del Database Dei Volti
Termoscanner 2 - Selezionare “Salvataggio informazione sorgente” oppure “Salvataggio informazione volto” Salvataggio informazione sorgente: se selezionato, l’immagine completa del volto e sfondo rilevati verrà salvata su SD card. Salvataggio informazione volto: se selezionato, solo l’immagine del volto rilevato verrà salvata su SD card. Nota: per salvare le immagini su PC locale, selezionare prima il salvataggio locale (Config System Local Config). -
Page 10: Rilevamento Della Maschera
Termoscanner Ci sono quattro modi per aggiungere immagini di volti: 1 - Inserimento “Una alla volta” Fare clic su per far comparire il relativo box. Poi fare clic su per selezionare l’immagine tra quelle salvate nel PC, rispettando i formati e le dimensioni indicate. -
Page 11: Visione Dal Vivo
Termoscanner 1 - Selezionare “rilevamento maschera” 2 - Impostare la durata della permanenza degli allarmi. 3 - Impostare le opzioni dell’attivazione degli allarmi. Attiva out allarme: se selezionato, l’uscita di allarme del dispositivo verrà attivata se la persona rilevata non indossa la mascherina Attiva allarme audio: se selezionato, un segnale sonoro informerà... -
Page 12: Visualizzazione Della Misurazione Della Temperatura E Del Riconoscimento Facciale
Termoscanner Per una misura piu accurata della temperatura, è necessario posizionare la fronte nella zona di misurazione. Se la temperatura rilevata è molto bassa, si consiglia di avvicinarsi ulteriormente al sensore di misurazione (5-20 cm). La presenza di sudore sulla fronte o la rilevazione dopo un intenso esercizio fisico alternano la misura della temperatura. L’altezza di installazione del prodotto deve considerare l’altezza delle persone da rilevare. -
Page 13: Visualizzazione Live Da
Termoscanner Si prega di eseguire le misurazioni in accordo alle indicazioni dei paragrafi precedenti. Il valore di temperatura visualizzato con sfondo verde indica una temperatura normale mentre una temperatura anomala (fuori dalla soglia impostata) sarà indicata con sfondo rosso. Il messaggio audio preconfigurato comunicherà l’esito della misurazione se abilitato. Quando nel menu impostazioni del dispositivo viene attivata la funzione di riconoscimento del volto, il display visualizza l’eventuale corrispondenza o meno come nelle seguenti immagini. - Page 14 Termoscanner Dopo aver effettuato l‘accesso, verrà visualizzata la seguente finestra. Questa interfaccia mostra il viso catturato, il risultato dell’eventuale confronto con il database e la temperatura corporea misurata. 36.5 °C La seguente tabella descrive le icone presente nell‘interfaccia live. Icona Descrizione Icona Descrizione...
- Page 15 Termoscanner 36.5 °C Visualizza i dettagli del confronto Cliccando sull‘immagine dei volti presenti nell’area si apre la seguente scheda dove è possibile visualizzare le informazioni sul confronto. Aggiungi immagini di volti acquisiti al database dei volti Cliccando nei volti presenti nell’area sarà...
-
Page 16: Impostazioni Controllo Accessi
Termoscanner Compila le informazioni pertinenti e fai clic su “Entry” per aggiungere il nuovo volto. 5 - Impostazioni controllo accessi. Nel menu di configurazione è possibile impostare alcuni parametri del menu touch come la lingua (menu e vocale), il ritardo di standby dello schermo, il volume audio e la luminosità. -
Page 17: Impostazioni Wiegand
Termoscanner te selezionabili. Riconoscimento volto: se l’immagine del volto scattata corrisponde ad una presente nel database, la serratura viene sbloccata e la porta aperta. Temperatura normale: se la temperatura misurata è normale, la serratura viene sbloccata e la porta aperta. Maschera: se la persona rilevata indossa la mascherina, la serratura viene sbloccata e la porta aperta. -
Page 18: Configurazioni Generali
Termoscanner 6 - Configurazioni generali 6.1 - Configurazione del sistema 6.1.1 - Informazioni di base Nell'interfaccia Informazioni di base è possibile controllare le relative informazioni del dispositivo. 6.1.2 - Data e ora Andare al menu Config System Date and Time. Fare riferimento all'interfaccia seguente. È... -
Page 19: Configurazione Locale
Termoscanner 6.1.3 - Configurazione locale Andare al menu Config System Local Config. È possibile impostare il percorso per l'archiviazione delle immagini acquisite e dei video registrati. 6.1.4 - Memorizzazione Andare a Config System Storage per accedere all'interfaccia illustrata di seguito. Gestione della scheda SD Fare clic sul pulsante "Formatta"... - Page 20 Termoscanner 3 - Impostare la registrazione programmata. Seleziona “Abilita pianificazione programmata” e imposta la pianificazione. Week Schedule (Programmazione settimanale) Consente di impostare l'orario dell'allarme da lunedì a domenica per attivare l'allarme ogni giorno della settimana. La linea orizzontale corrisponde al giorno della settimana, le righe verticali indicano le 24 ore.
-
Page 21: Configurazione Immagine
Termoscanner 6.2 - Configurazione immagine 6.2.1 - Configurazione Display Diversi parametri della telecamera sono impostati dall'interfaccia di configurazione display quali luminosità, contrasto, tonalità, saturazione, ampia gam- ma dinamica, ecc. Brightness (Luminosità): imposta il livello di luminosità dell'immagine della telecamera. Contrast (Contrasto): imposta la differenza di colore tra le parti più luminose e quelle più scure. Hue (Tonalità): imposta il grado di colore totale dell'immagine. - Page 22 Termoscanner Impostazioni programmata dei parametri immagine: fare clic sulla scheda Schedule “Pianificazione” come mostrato di seguito. Imposta il programma Full time (Tempo pieno) per la modalità comune, oppure diurna, notturna e la programmazione oraria specifica per il giorno e la notte.
-
Page 23: Flusso Video
Termoscanner 6.2.2 - Flusso video Facendo clic su Config Image Video/Audio viene visualizzata l'interfaccia seguente. In questa interfaccia è possibile impostare risoluzione, frame rate, velocità in bit, qualità video e altro ancora a seconda delle condizioni effettive della rete. Per impostare la codifica e il tipo di audio, selezionare la scheda audio. È... -
Page 24: Luminosità Dello Schermo
Termoscanner 6.2.4 - Luminosità dello schermo NOTA: Parametro modificabile anche da Touch screen Menu Sistema Config.Locale Fare clic su Config Access control (controllo accesso) Access control system config (Config. sistema controllo accessi) per passare alla se- guente interfaccia. In questa interfaccia, è possibile impostare la luminosità dello schermo del terminale. L’intervallo regolabile va da 150 a 255. 6.2.5 - Impostazioni LED luce bianca Fare clic su Config ->... -
Page 25: Scheda Sd Piena
Termoscanner 1 - Abilita le funzioni di rilevamento desiderate: - Rilevamento cambio scena (Scene Change Detection) attiva l’allarme se la scena dovesse cambiare. - Rilevamento sfocatura video (Video Blur Detection) attiva l’allarme se il video diventa sfocato. - Rilevazione oscuramento (Enable Video Color Cast Detection) attiva l’allarme se il video viene oscurato. 2 - Imposta il tempo di durata allarme. -
Page 26: Errore Sd Card
Termoscanner 2 - Fai clic su “Abilita” e imposta il tempo di attesa dell’allarme. 3 - Impostare le opzioni di attivazione dell’allarme. Le fasi di impostazione sono le stesse delle impostazioni di misurazione della temperatura. Per i det- tagli, consultare il capitolo relativo alle impostazioni di misurazione della temperatura. 6.3.3 - Errore SD card Quando ci sono alcuni errori nella scrittura sulla scheda SD, verranno attivati gli allarmi corrispondenti. -
Page 27: Uscita Allarme
Termoscanner 1 - Selezionare l’ID sensore, fare clic su “Abilita” e impostare il tipo di allarme, il tempo di attesa dell’allarme e il nome del sensore. 2 - Impostare le opzioni di attivazione dell’allarme. Le fasi di impostazione sono le stesse delle impostazioni di misurazione della temperatura. Per i det- tagli, consultare il capitolo relativo alle impostazioni di misurazione della temperatura. -
Page 28: Configurazione Di Retev
Termoscanner 6.4 - Configurazione di rete 6.4.1 - TCP/IPv4 Andare a Config Network TCP/IPv4. Sono disponibili due tipi di connessione alla rete. - Utilizzare l'indirizzo IP. Per IP setup (Impostazione IP) sono disponibili due opzioni: Obtain an IP address auto by DHCP protocol (Ottieni indirizzo IP automaticamente da protocollo DHCP) e Use the following IP address (Utilizza questo indirizzo IP). -
Page 29: Configurazione Ddns
Termoscanner 1 - Selezionare "Enable" (Attiva). 2 - Controllare l'indirizzo IP e la porta del server di trasferimento nel CVM Elvox. Attivare l'auto segnalazione nel CVM Elvox quando viene aggiunto un nuovo dispositivo. Inserire quindi le restanti informazioni relative al dispositivo nel CVM Elvox. Il sistema assegna automaticamente un ID dispositivo. Controllare nel CVM Elvox. -
Page 30: Rtsp
Termoscanner 6.4.5 - RTSP Andare a Config Network RTSP. 1 - Selezionare "Enable" (Attiva). 2 - RTSP Port (Porta RTSP): porta di accesso del supporto di streaming. Il numero predefinito è 554. 3 - RTSP Address (Indirizzo RTSP): l'indirizzo RTSP da inserire nel media player. Indirizzo multicast Flusso principale: il formato dell'indirizzo è... -
Page 31: Configurazione Posta
Termoscanner 6.4.7 - Configurazione posta Se si vuole attivare un'email al verificarsi di un allarme o di un cambio di indirizzo IP, impostare prima l'email in questo punto. Andare a Config Network Email. From Email (Email mittente): indirizzo email del mittente; User name and password (Nome utente e password): nome utente e password del mittente;... -
Page 32: Https
Termoscanner 6.4.9 - HTTPS HTTPs fornisce l‘autenticazione del sito Web e protegge la privacy degli utenti. Vai a Config Rete HTTPS come mostrato di seguito. Esiste un certificato installato per impostazione predefinita, come mostrato sopra. Abilita questa funzione e salvala. Quindi sarà possibile accedere al dispositivo immettendo “https://IP:https port”... -
Page 33: Configurazione Sicurezza
Termoscanner 6.5 - Configurazione Sicurezza NOTA: Parametro modificabile anche da Touch screen Menu Sistema Gestione permessi utenti 6.5.1 - Configurazione utente Andare a Config Security. Add user (Aggiungi utente): 1 - Fare clic sul pulsante "Add" (Aggiungi) per visualizzare la casella di testo seguente. 2 - Inserire il nome utente nella casella di testo "User Name"... -
Page 34: Utente Online
Termoscanner 3 - Inserire la vecchia password dell'utente nella casella di testo "Password". 4 - Inserire la nuova password nelle caselle di testo "New password" (Nuova password) e "Confirm" (Conferma). 5 - Inserire l'indirizzo MAC del computer in base alle esigenze. 6 - Fare clic sul pulsante "OK"... -
Page 35: Manutenzione
Termoscanner 6.6 - Manutenzione NOTA: Parametro modificabile anche da Touch screen Menu Manutenzione 6.6.1 - Backup e ripristino Andare a Config Maintenance Backup & Restore. - Impostazione importazione ed esportazione: È possibile importare ed esportare le informazioni di impostazione dal PC o nel dispositivo. 1 - Fare clic su "Browse"... -
Page 36: Log
Termoscanner 6.6.4 - Log (Registro operazioni) Per inserire una query ed esportare il log. 1 - Andare a Config Maintenance Operation Log. 2 - Selezionare main type (tipo principale), sub type (sotto-tipo), start and end time (ora inizio e fine). 3 - Fare clic su "Search"... -
Page 37: Ricerca Salvataggi
Termoscanner 7 - Ricerca salvataggi 7.1 - Ricerca video Fai clic su Cerca per accedere all'interfaccia come mostrato di seguito. I video che sono stati registrati localmente sul PC, possono essere riprodotti in questa interfaccia. 1 - Selezionare "Record" e successivamente "Locale" nei menu di scelta. 2 - Selezionare la data, l'ora di inizio e di fine. -
Page 38: Ricerca Foto
Termoscanner Le descrizioni dei pulsanti dell'interfaccia di riproduzione sono le seguenti. Pulsante Descrizione Pulsante Play. Quando il video è in pausa, fare clic su questo pulsante per continuare la riproduzione Pulsante Pausa Pulsante Stop Diminuzione velocità di riproduzione Aumento velocità di riproduzione Icona indicante lo stato della riproduzione Volume Apre/chiude filigrana... -
Page 39: Ricerca Video In Sd Card
Termoscanner 7.3 - Ricerca video in SD card Andare a Search (ricerca) Video SD Card Recording (registrazione SD) per accedere all'interfaccia illustrata di seguito. È possibile eseguire una ricerca nella registrazione salvata sulla scheda SD. 1. Scegli “Registrazioni” - “Scheda SD”. (SD Card) 2. -
Page 40: Ricerca Corrispondenza Volti
Termoscanner 8 - Ricerca corrispondenza volti Clicca sulla scheda „Registro volti“ per accedere al menu dedicato alla ricerca della corrispondenza volti. Imposta l‘ora di inizio e di fine e fare clic su „Cerca“ per visualizzare i risultati della ricerca. L’orario evidenziato in rosso indica che il volto non ha auto nessun esito positivo nel confronto del volto con il database. In verde sono evidenziate invece le corrispondenze. -
Page 41: Appendice
Termoscanner Appendice Appendice 1 Domande e Risposte D: Come posso recuperare la password dimenticata? R: Ripristinare le impostazioni predefinite di fabbrica del dispositivo. IP predefinito: 192.168.226.201 Nome utente: admin Password: 123456 D: I dispositivi non si collegano dal Internet Explorer. Perché? R: a. - Page 42 Termoscanner Table of Contents 1 - Introduction ......................................... 43 1.1 - Login from Touch screen ................................... 43 2 - IE Remote Access ......................................44 2.1 - LAN ..........................................44 2.1.1 - Access through IP-Tool ..................................43 2.1.2 - Directly Access through IE ................................45 2.2 - WAN ..........................................
-
Page 43: Introduction
Termoscanner Notes on Safety - Please use the specified power supply to connect. - Do not attempt to disassemble the device; in order to prevent electric shock, do not remove screws or covers. - There are no user-serviceable parts inside. Please contact the nearest service center as soon as possible if there is any failure. - Avoid from incorrect operation, shock vibration, heavy pressing which can cause damage to product. -
Page 44: Ie Remote Access
Termoscanner 2 - IE Remote Access You may connect the device via LAN or WAN. Here only take IE browser (6.0) for example. The details are as follows: 2.1 - LAN In LAN, there are two ways to access device: 1 - access through IP-Tool;... -
Page 45: Directly Access Through Ie
Termoscanner Input the username and password to log in. ► The default username is “admin”; the default password is “123456”. E' possibile utilizzare le stesse credenziali per accedere al menu di configurazione sul touch screen. The system will pop up the above-mentioned textbox to ask you to change the default password. It is strongly recommended to change the default pass- word for account security. -
Page 46: Wan
Termoscanner Select “Properties” and then select internet protocol according to the actual situation (for example: IPv4). Next, click “Properties” button to set the network of the PC. 2 - Open the IE browser and input the default address of device and confirm. The IE browser will download Active X control automatically. 3 - After downloading Active X control, the login dialog box will pop up. - Page 47 Termoscanner 3 - Go to the router’s management interface through IE browser to forward the IP address and port of the device in the “Virtual Server”. Router Setup 4 - Open the IE browser and input its WAN IP and http port to access. ►...
-
Page 48: Temperature Measurement And Face Recognition - Settings
Termoscanner 3 - Temperature Measurement and Face Recognition - Settings Note: To set temperature measure via the terminal, please tap System Settings Temperature Measurement. 3.1 - Temperature Measurement Settings After the network is connected, go to the web client. Click Config Temperature Measurement to go to the following interface. -
Page 49: Face Database Management
Termoscanner 2. Enable“Save Source Information” or “Save Face Information”. Save Source Information: if checked, the whole picture will be saved to the SD card when detecting a face. Save Face Information: if checked, the captured face picture will be saved to the SD card when detecting a face. Note: To save images to the local PC, please enable the local smart snapshot storage first (Config System Local Config). -
Page 50: Mask Detection
Termoscanner There are four ways to add face pictures. 1 - Adding face pictures "one by one" Fare clic su to pop up an adding user box. Then click to select a face picture saved on the local PC. Please select the picture according to the specified format and size limit. -
Page 51: Live View
Termoscanner 1 - Enable “Mask Detection”as needed. 2 - Set the alarm holding time. Set the alarm trigger options. Alarm Out: If enabled, alarm output will be triggered when the detected person doesnt wear a mask. Trigger Audio Alarm: If enabled, the alarm voice will be heard when the detected person doesn’t wear a mask. The setup steps of other alarm trigger options are the same astemperature measurement settings. -
Page 52: Temperature Measurement& Face Recognition View
Termoscanner 3) The accurate temperature will not be gotten if the forehead of the detected person doesn’t aim at the “Temp zone”. 4) If the temperature is very lower than the normal value, please move towards the temperature measurement sensor (5cm-20cm away from the tem- perature sensor) to get the accurate value. - Page 53 Termoscanner Please measure the body temperature according to the above-mentioned temperature measurement requirements. Abnormal temperature: the red block and temperature will be shown. Normal temperature: the green block and temperature will be shown. If “Trigger Alarm Audio”is selected, you will hear the alarm voice. The system will measure the temperature and compare the captured face at the same time as shown below.
-
Page 54: Live View Via Web
Termoscanner 4.2 - Live View via Web After logging in, the following window will be shown. In this interface you will see the captured face, match result and body temperature. 36.5 °C The following table is the instructions of the icons on the live view interface. Icon Description Icon... - Page 55 Termoscanner Area : captured face pictures; Area : face comparison area 36.5 °C View the comparison details In area , click the compared face picture to bring up the following window. In this interface, you can view the detailed comparison information.
-
Page 56: Access Control Settings
Termoscanner Add captured face pictures to the face database Click a captured picture in area . This will bring a face picture adding box. Fill out the relevant information and click “Entry” to add this face picture. 5 - Access Control Settings In the configuration menu it is possible to set some parameters of the touch menu such as the language (menu and voice), the screen standby delay, the audio volume and the brightness. -
Page 57: Wiegand Settings
Termoscanner Unlocking Mode: four options--by face recognition, normal temperature, mask on, by password. Please check as needed. By Face Recognition: if the capture face picture is successfully matched, the door can be unlocked. Normal Temperature: if the temperature of the person measured is normal, the door will be unlocked. Mask On: if there is a mask on the face of the detected person, the door will be unlocked. -
Page 58: Other Configuration
Termoscanner 6 - Other Configuration 6.1 - System Configuration 6.1.1 - Basic Information In the Basic Information interface, you can check the relative information of the device. 6.1.2 - Date & Time Go to Config System Date and Time. Please refer to the following interface. You can select the time zone and DST as required. -
Page 59: Local Configuration
Termoscanner 6.1.3 - Local Configuration Go to Config System Local Config. You can set the storage path of the captured pictures and video records. 6.1.4 - Storage Go to Config System Storage to go to the interface as shown below. SD Card Management Click the “Format”... - Page 60 Termoscanner 3 - Set schedule recording. Check “Enable Schedule Record” and set the schedule.. Week Schedule Set the alarm time from Monday to Sunday for a single week. Each day is divided in one hour increments. Green means scheduled. Blank means unscheduled.
-
Page 61: Image Configuration
Termoscanner 6.2 - Image Configuration Image Configuration includes five submenus: Display, Video/Audio, OSD, Video Mask and ROI Config. 6.2.1 - Display Configuration Many parameters of the camera can be set in display configuration interface such as brightness, contrast, chroma, saturation wide dynamic, etc. Brightness: set the brightness level of the camera's image. - Page 62 Termoscanner Schedule Settings of Image Parameters: Click the “Schedule” tab as shown below. Set full time schedule for common, day, night mode and specified time schedule for day and night. Choose “Timing” in the drop-down box of schedule as shown below. Drag “...
-
Page 63: Video Stream
Termoscanner 6.2.2 - Video Stream The following interface will be displayed by clicking Config Image Video/Audio. In this interface, you can set the resolution, frame rate, bitrate type, video quality and so on subject to the actual network condition. To set the audio encoding and audio type, please select the audio tab. Three video streams can be adjustable. -
Page 64: Screen Brightness
Termoscanner 6.2.4 - Screen Brightness Note: To set parameter via the terminal, please tap Touch screen Main Menu System Settings Local Config Click Config Image Screen Brightness to go to the following interface. In this interface, you can set the brightness of the screen of the terminal. The adjustable range is from 150 to 255. 6.2.5 - White Light Control Click Config Image... -
Page 65: Sd Card Full
Termoscanner 1 - Enable the applicable detection that’s desired. Scene Change Detection: Alarms will be triggered if the scene of the monitor video has changed. Video Blur Detection: Alarms will be triggered if the video becomes blurry. Enable Video Color Cast Detection: Alarms will be triggered if the video becomes obscured. 2 - Set the alarm holding time. -
Page 66: Sd Card Error
Termoscanner Please refer to temperature measurement settings chapter for details. 6.3.3 - SD Card Error When there are some errors in writing to the SD card, the corresponding alarms will be triggered. 1. Go to Config Alarm Exception SD Card Error as shown below. 2 - Click “Enable”... - Page 67 Termoscanner 1 - Select the sensor ID, click “Enable” and set the alarm type, alarm holding time and sensor name. 2 - Set alarm trigger options. The setup steps are the same astemperature measurement settings. Please refer to temperature measurement settings chapter for details.
-
Page 68: Network Configuration
Termoscanner 6.4 - Network Configuration 6.4.1 - TCP/IPv4 Go to Config Network TCP/IPv4. There are two ways for network connection. - Use IP address. There are two options for IP setup: obtain an IP address auto by DHCP protocol and use the following IP address. Please choose one of options for your requirements. -
Page 69: Ddns Configuration
Termoscanner 1 - Check “Enable”. 2 - Check the IP address and port of the transfer media server in the CVM ELVOX. Then enable the auto report in the CVM ELVOX when adding a new device in the CVM ELVOX. Next, input the remaining information of the device. After that, the system will auto allot a device ID. Please check it in the CVM ELVOX. -
Page 70: Rtsp
Termoscanner 6.4.5 - RTSP Go to Config Network RTSP. Select “Enable” to enable the RTSP function. Port: Access port of the streaming media. The default number is 554. RTSP Address: The RTSP address (unicast) format that can be used to play the stream in a media player. Multicast Address Main stream: The address format is “rtsp://IP address: rtsp port/profile1?transportmode=mcast”. -
Page 71: Mail Configuration
Termoscanner 6.4.7 - Mail configuration If you need to trigger E-mail when an alarm happens or IP address is changed, please set the E-mail here first. Go to Config Network Email. Sender Address: sender’s e-mail address; User name and password: sender’s user name and password; SMTP Address: The SMTP IP address or host name. -
Page 72: Https
Termoscanner 6.4.9 - HTTPS HTTPs provides authentication of the web site and protects user privacy. Go to Config Network HTTPS as shown below. There is a certificate installed by default as shown above. Enable this function and save it. Then the device can be accessed by entering https://IP: https port via the web browser (eg. https://192.168.226.201:443). A private certificate can be created if users don’t want to use the default one. -
Page 73: Security Configuration
Termoscanner 6.5 - Security Configuration Note: To set parameter via the terminal, please tap Touch screen Main Menu System Settings User Permission Managenment 6.5.1 - User Configuration Go to Config Security. Add user: 1 - Click “Add” button to pop up the following textbox. 2 - Input user name in “User Name”... -
Page 74: Online User
Termoscanner 3 - Input old password of this user in the “Password” text box. 4 - Input new password in the “New password” and “Confirm Password” text box. 5 - Input computer’s MAC address as required. 6 - Click “OK” button to modify user’s password. Note: To change the access level of a user, the user must be deleted and added again with the new access level. -
Page 75: Maintenance
Termoscanner 6.6 - Maintenance Note: To set parameter via the terminal, please tap Touch screen Main Menu Device Maintenance 6.6.1 - Backup & Restore Go to Config Maintenance Backup & Restore. - Import & Export Setting: You can import or export the setting information from PC or to device. 1 - Click “Browse”... -
Page 76: Operation Log
Termoscanner 6.6.4 - Operation Log To query and export log 1 - Go to Config Maintenance Operation Log. 2 - Select the main type, sub type, start and end time. 3 - Click “Search” to view the operation log. 4 - Click “Export” to export the operation log. -
Page 77: Search
Termoscanner 7 - Search 7.1 - Video Search Click Search to go to the interface as shown below. Videos were recorded locally to the PC can be played in this interface. 1 - Choose “Record”—“Local”. 2 - Set search time: Select the date and choose the start and end time. 3 - Click "... -
Page 78: Image Search
Termoscanner The descriptions of the buttons are shown as follows. Button Description Play button. After pausing the video, click this button to continue playing Pause button Stop button Speed down Speed up The status icon of playing Full screen. Click it to display full screen. Double click to exit full screen Volume Open/close watermark 7.2 - Image Search... -
Page 79: Sd Card Video Search
Termoscanner 7.3 - SD card video search Click Search Video SD Card Recording to go to the interface as shown below. You can search the record saved in the SD card. 1 - Choose “Record”—“SD Card”. 2 - Set search time: Select the date and choose the start and end time. 3 - Click "... -
Page 80: Face Match Result Search
Termoscanner 8 - Face Match Result Search Click “Data Record” tab to go to the face recognition result search interface. Set the start time and end time and click “Search” to view the face recognition result. The capture face pictures, the body temperature and the snapshot time will be shown. Click “Export” to export the captured face pictures and the file about the face match result. -
Page 81: Appendix
Termoscanner Appendix Appendix 1 Q & A Q: How to find my password if I forget it? A: Reset the device to the default factory settings. Default IP: 192.168.226.201 User name: admin Password: 123456 Q: Fail to connect devices through IE browser, why? A: a. - Page 82 Viale Vicenza, 14 36063 Marostica VI - Italy 49401587A0 00 2007 www.vimar.com...
Need help?
Do you have a question about the ELVOX 4626.08B and is the answer not in the manual?
Questions and answers