Table of Contents
Advertisement
Quick Links
Advertisement
Table of Contents

Related Manuals for TerraView RangePro RPX8-P


Summary of Contents for TerraView RangePro RPX8-P
- Page 1 RangePro RPX8-P ® User Manual (For Pixhawk/Ardupilot Flight Controlled Systems) Toll Free: +1 (800) 628-3119 Phone: +1 (301) 263-7321 Support: https://terraview.com/contact/ Web: www.terraview.com Document Number: 50000094-T3IMD, Rev. A Revised: December 9, 2020...
- Page 2 Web: www.terraview.com Trademark Statement The term RangePro is a registered trademark of TerraView 360, Inc. (TerraView). All other trademarks presented in this document are the property of their respective owners. Copyright © 2020, TerraView 360, Inc., all rights reserved.
-
Page 3: Table Of Contents
Summary Table of Contents General Information ......................17 What’s in the Case?......................20 Register Your Drone ......................24 Cautions and Warnings.....................26 Assemble RangePro RPX8-P for Flight ................29 Ground Control Station Setup ..................52 Emergency Procedures ......................62 Flight Ops ........................66 Data Management ......................80 Drone Battery Management ....................83... - Page 4 RangePro RPX8-P User Manual Using the D400 Charger with a RangePro RPX8-P Battery ..........133 Summary Table of Contents...
-
Page 5: Table Of Contents
Table of Contents Summary Table of Contents ....................3 Table of Contents ......................5 List of Figures ........................11 List of Tables ........................13 About this Guide ......................14 Audience ..........................14 Structure..........................14 Precautions .......................... 15 Conventions/Terminology....................15 Reference Documents......................16 Other Documentation......................16 Hitec ..........................16 Airborne Innovations... - Page 6 RangePro RPX8-P User Manual Assemble RangePro RPX8-P for Flight ................29 Introduction........................30 Parts of the Aircraft......................30 Aircraft Assembly......................33 Battery Installation ......................43 Testing the Battery ......................43 Installing the Battery ......................46 Payload Installation ......................48 Ground Control Station Setup ..................52 Introduction........................53 Herelink Radio System Setup..................53...
- Page 7 RangePro RPX8-P User Manual GPS Satellite Connectivity .....................73 Takeoff ..........................74 In-Flight ........................75 Landing .........................76 Post-Flight ........................77 Disassemble the RangePro RPX8-P ................77 Disassemble the Ground Control Station ................78 Packing up ........................78 Data Management ......................80 Introduction........................81 Downloading Parameter Files..................81 QGroundControl ......................81 Mission Planner ......................81...
- Page 8 Union......................93 CE Mark ........................93 Standards ........................93 Warranty ........................94 What Is Covered......................95 What TerraView Will Do To Correct Problems...............95 What This Warranty Does Not Cover ................95 RangePro RPX8-P Manual Flight Checklist ..............97 Preflight Checklist ......................98 Arm for Flight, Takeoff, and Control Validation..............99...
- Page 9 RangePro RPX8-P User Manual Connecting to the Radios .....................108 Video Encoder ......................109 Standard Controller Channel Numbers ................110 Standard Controller Layout...................111 Standard Controller Related Parameter Settings .............112 Herelink Controller Settings ..................114 Herelink Controller Settings ..................115 Radio Tab ........................115 Joystick Tab ........................115 Button Tab .........................115...
- Page 10 RangePro RPX8-P User Manual Shipping Lithium Polymer Batteries ................130 Introduction.........................131 Basic Shipping Requirements ..................131 Using the D400 Charger with a RangePro RPX8-P Battery ...........133 Introduction.........................134 Modify and Verify System Settings ................134 Program Battery Memory Charge Settings ..............135 Balance Charge the Battery Using Battery Memory #1 ...........136...
-
Page 11: List Of Figures
........38 13 RangePro RPX8-P standing on landing legs . - Page 12 RangePro RPX8-P User Manual 32 GCU power switch............56 33 GCU battery level indicators .
-
Page 13: List Of Tables
List of Tables RangePro RPX8-P case contents ..........22 Power Out Pinout . -
Page 14: About This Guide
Structure This guide contains the following chapters and appendices: • Chapter 1, starting on page 17, contains an overview describing the RangePro RPX8-P UAS Chapter 2, starting on page 20, covers the contents of the UAS box • Chapter 3, starting on page 24, explains how to register and label the UAV •... -
Page 15: Precautions
Payload: Any gimbal and/or sensor attachment connected to the RangePro RPX8-P. RTH/RTL: Return to Home/Return to Launch. Transmitter: The controller that the pilot holds while flying the RangePro RPX8-P. UAS: Unmanned Aircraft System. Includes the UAV and all ground units for control and communication. -
Page 16: Reference Documents
RangePro RPX8-P, safety regulations, and other information that will ensure your flight operations are safe and your RangePro RPX8-P is well maintained. Prior to flight operations be sure to familiarize yourself with this document and all the information in the refer- ence documents noted below. -
Page 17: General Information
Chapter 1 General Information Chapter Contents RangePro RPX8-P Overview ....................18 Understanding Pixhawk and Ardupilot Open Source Autopilot Systems ......18... -
Page 18: Rangepro Rpx8 Overview
The RangePro RPX8 is available with a number of flight control systems, including A3 and Lightbridge 2 elec- tronics, or a Pixhawk Blue Cube solution with a variety of ground control stations. This document provides details on how to maintain and safely operate a RangePro RPX8-P with Pixhawk flight control systems. - Page 19 If any parameters have been adjusted from their factory default settings and your RangePro RPX8-P is not per- forming as expected, TerraView recommends reloading the factory-set parameter file for that specific aircraft and make any new modifications from that baseline (see section “Uploading Parameter Files”...
-
Page 20: What's In The Case
Chapter 2 What’s in the Case? Chapter Contents Introduction ..........................21 Where is the Battery and Battery Charger?................23 Spares and Replacements ......................23... -
Page 21: Introduction
RangePro RPX8-P User Manual 2 • What’s in the Case? Introduction To make it easier to move the RangePro RPX8-P case, the extension handle Note (see figure 2) can be extended by pulling on the handle while sliding the release button. Stop sliding the button after the handle is at the desired length. -
Page 22: Rangepro Rpx8-P Equipment Locations
RangePro RPX8-P User Manual 2 • What’s in the Case? Table 1. RangePro RPX8-P case contents Callout Description Callout Description Callout Description RangePro RPX8-P GCU Antennas Breakout Cable Set Drone Temporary Battery Stor- Ground Control Unit age Areas (remove the... -
Page 23: Where Is The Battery And Battery Charger
Spares and Replacements Your RangePro RPX8-P comes with 1 set of top propellers and 1 set of bottom propellers. In the event of a crash, inspect your RangePro RPX8-P for damage, including small cracks in the propellers and in the arms. -
Page 24: Register Your Drone
Chapter 3 Register Your Drone Chapter Contents Introduction ..........................25 Label Your Drone According to FAA Regulations..............25... -
Page 25: Introduction
In the US, current FAA regulations require registration of all drones that weigh in excess of 9 ounces (250 grams). The RangePro RPX8-P with a battery and no payload weighs approximately 10 pounds (4.4 kilo- grams) and is therefore subject to registration requirements. To register your drone, visit the FAA website at https://faadronezone.faa.gov. -
Page 26: Cautions And Warnings
Chapter 4 Cautions and Warnings Chapter Contents Introduction ..........................27 Motors and Propellers......................27 The Aircraft ..........................28 During a Flight........................28 Shipping Lithium Polymer Batteries ..................28... -
Page 27: Introduction
RangePro RPX8-P User Manual 4 • Cautions and Warnings Introduction The RangePro RPX8-P is a sophisticated UAV. Flying it can be dangerous. Review and heed all warnings. For best results, review section “Reference Documents” on page 16 of this manual before using the UAV. -
Page 28: The Aircraft
4 • Cautions and Warnings The Aircraft To avoid damaging the RangePro RPX8-P: • DO NOT fly the RangePro RPX8-P if any battery cell is below 3.2V. Full charge on the battery should be 4.3V per cell, or 25.8V total. CAUTION •... -
Page 29: Assemble Rangepro Rpx8-P For Flight
Chapter 5 Assemble RangePro RPX8-P for Flight Chapter Contents Introduction ..........................30 Parts of the Aircraft........................30 Aircraft Assembly........................33 Battery Installation........................43 Testing the Battery ......................43 Installing the Battery ......................46 Payload Installation........................48... -
Page 30: Introduction
RangePro RPX8-P User Manual 5 • Assemble RangePro RPX8-P for Flight Introduction Refer to the following sections to assemble the UAV for flight: Parts of the Aircraft • Aircraft Assembly (see page page • Battery Installation (see page • •... -
Page 31: Top View
RangePro RPX8-P User Manual 5 • Assemble RangePro RPX8-P for Flight The rear view of the aircraft is shown in figure 6 on page 33. The following are called out in the figure: • GPS Antenna (Raised) USB Access Port •... -
Page 32: Bottom View
RangePro RPX8-P User Manual 5 • Assemble RangePro RPX8-P for Flight Figure 5. Bottom view Parts of the Aircraft... -
Page 33: Aircraft Assembly
RangePro RPX8-P User Manual 5 • Assemble RangePro RPX8-P for Flight Figure 6. Rear view Aircraft Assembly Do the following to assemble the UAV: 1. Remove landing legs from the case (see figure 7 on page 34) and set them aside. -
Page 34: Removing Landing Leg From Case
RangePro RPX8-P User Manual 5 • Assemble RangePro RPX8-P for Flight Figure 7. Removing landing leg from case Until the landing legs have been installed, if you must place the UAV on a flat sturdy sur- face, do so carefully to avoid damaging the propellers. -
Page 35: Removing Rangepro Rpx8-P Drone From Case
RangePro RPX8-P User Manual 5 • Assemble RangePro RPX8-P for Flight Figure 8. Removing RangePro RPX8-P drone from case 2. While gripping the RangePro RPX8-P firmly as shown in figure 8, carefully lift it from the case. 3. Install a landing leg by first positioning it as shown in figure 9 on page 36. -
Page 36: Installing A Landing Leg
RangePro RPX8-P User Manual 5 • Assemble RangePro RPX8-P for Flight Figure 9. Installing a landing leg 4. Insert the landing leg into a socket on the airframe (see figure 10) by pressing the pin so the leg can enter the socket. - Page 37 RangePro RPX8-P User Manual 5 • Assemble RangePro RPX8-P for Flight Install both antennas. Installing only one will lead to reduced performance and may even cause the radio system to fail permanently. IMPORTANT If alternate antennas are used they must use 50-ohm cable terminated with Note standard SMA connectors (not RP-SMA).
-
Page 38: Attaching Antenna Clips Onto Landing Legs
RangePro RPX8-P User Manual 5 • Assemble RangePro RPX8-P for Flight Figure 12. Attaching antenna clips onto landing legs 8. Install the second antenna cable onto the remaining radio antenna SMA connector (shown in figure 11 page 37). 9. Attach the remaining antenna clip onto the other landing leg (see figure 12). -
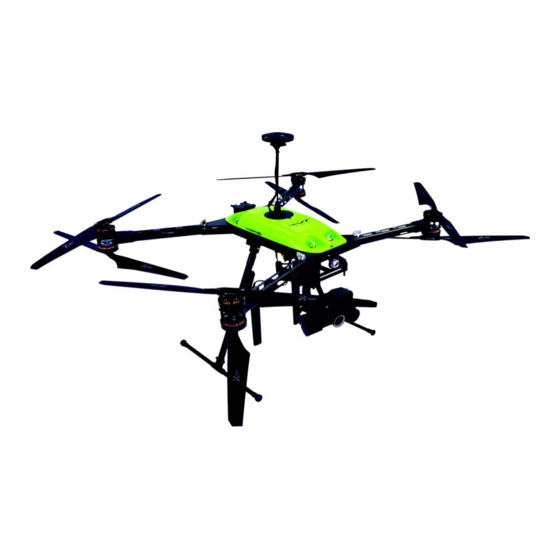
Page 39: Rangepro Rpx8-P Standing On Landing Legs
10. Stand the drone on its legs on a sturdy flat surface as shown in figure Figure 13. RangePro RPX8-P standing on landing legs 11. Rotate the GPS antenna mast to the upright position, then tighten the locking nut at the base of the... -
Page 40: Raising The Gps Antenna
RangePro RPX8-P User Manual 5 • Assemble RangePro RPX8-P for Flight Figure 14. Raising the GPS antenna 12. Now you are ready to unfold the arms. Turn the props out of the way, then loosen the 4 wing fasteners about 1/4 turn as shown in figure 15 on page 41. - Page 41 RangePro RPX8-P User Manual 5 • Assemble RangePro RPX8-P for Flight Figure 15. Loosening wing fasteners 13. Unfold the rear arms, being careful not to damage the propellers (see figure 16). Aircraft Assembly...
-
Page 42: Rear Arms Unfolded
RangePro RPX8-P User Manual 5 • Assemble RangePro RPX8-P for Flight Figure 16. Rear arms unfolded 14. Lift arm pins (see figure 17) and continue to rotate arms into position (see figure 18). Make sure the arm pin clears the arm flange and inserts into the arm. Wiggle arm slightly when the pin is seated into the threads, making sure the arms are locked in position. -
Page 43: Battery Installation
RangePro RPX8-P User Manual 5 • Assemble RangePro RPX8-P for Flight Figure 18. All arms unfolded 15. Once an arm is in position, lower the arm pin into place and lightly tighten. Repeat this process for the remaining arms. 16. Once aircraft arms are correctly positioned, tighten the arm and pivot pins securely by hand. -
Page 44: Battery Tester
RangePro RPX8-P User Manual 5 • Assemble RangePro RPX8-P for Flight Figure 19. Battery tester 2. Remove the battery tester cable (see figure 20) from the case. Figure 20. Battery tester cable 3. Connect the battery tester cable to the battery. -
Page 45: Battery Tester Connected To Battery
CAUTION battery. DO NOT attempt to fly the RangePro RPX8-P if the total battery voltage is below 19.2 volts (3.2 volts per cell). If the battery voltage is too low, or is reporting variation between cells in excess of 0.1 volts, refer to section “Charging the Battery”... -
Page 46: Installing The Battery
RangePro RPX8-P User Manual 5 • Assemble RangePro RPX8-P for Flight DO NOT disconnect the battery tester cable from the battery by pulling on the cable wires. Instead, grasp the connector as shown in figure IMPORTANT 8. Disconnect the battery tester cable from the battery. -
Page 47: Installing The Battery Into The Airframe Rails
RangePro RPX8-P User Manual 5 • Assemble RangePro RPX8-P for Flight Figure 24. Installing the battery into the airframe rails 2. Continue inserting the battery into the rails until the spring-loaded pin engages the battery transport mode hole (see figure 25). -
Page 48: Payload Installation
RangePro RPX8-P User Manual 5 • Assemble RangePro RPX8-P for Flight Payload Installation There are a wide range of payloads available from third party suppliers. For Note additional support details, contact https://terraview.com/contact/. If you are installing a payload other than a Pixy U or Pixy F, install it using payload specific instructions. Oth- erwise, do the following to install a Pixy gimbal: 1. -
Page 49: Installing Gimbal Ring Onto Gimbal Plate
RangePro RPX8-P User Manual 5 • Assemble RangePro RPX8-P for Flight 2. Using the 4 mounting screws provided with your gimbal, attach the gimbal ring to the gimbal plate as shown in figure Figure 27. Installing gimbal ring onto gimbal plate 3. -
Page 50: Installing Gimbal On Gimbal Ring
RangePro RPX8-P User Manual 5 • Assemble RangePro RPX8-P for Flight Figure 28. Installing gimbal on gimbal ring 4. Align the white dot on the gimbal with the alignment mark on the gimbal ring (see figure 28), then insert the gimbal into the ring. - Page 51 RangePro RPX8-P User Manual 5 • Assemble RangePro RPX8-P for Flight Do not over-tighten the GPS SMA connector to the FLIR camera. When over-tightened the SMA connector on the camera may come loose when attempting to remove the extension cable, spin in place, and eventually break the antenna connection internal to CAUTION the FLIR camera.
-
Page 52: Ground Control Station Setup
Chapter 6 Ground Control Station Setup Chapter Contents Introduction ..........................53 Herelink Radio System Setup ....................53 Standard Ground Control Station Setup..................53 Setting Up the Ground Control Unit (GCU) ................54 Mounting the Tablet onto the Tablet Holder ................57 Connecting the Client Device to WiFi ..................60 Running the QGroundControl Application................61... -
Page 53: Introduction
Airborne Innovations Picoraptor. IP address configuration and credential management are paramount in ensuring the system works as expected. Documentation for these units can be found on the TerraView support site or from the manufacturer.The combined GCU and client device make up the ground station controller... -
Page 54: Setting Up The Ground Control Unit (Gcu)
RangePro RPX8-P User Manual 6 • Ground Control Station Setup Setting Up the Ground Control Unit (GCU) An AC power outlet must be available to charge the ground control unit (GCU). IMPORTANT Verify that the GCU is fully charged as follows: 1. -
Page 55: Installing Antennas On The Gcu
RangePro RPX8-P User Manual 6 • Ground Control Station Setup Figure 31. Installing antennas on the GCU 2. Install the ground control unit antennas (see callout 6 in figure 3 on page 22 for antennas location) on the GCU as shown in figure Never operate any GCU without antennas installed. -
Page 56: Gcu Power
RangePro RPX8-P User Manual 6 • Ground Control Station Setup 3. Slide the GCU power button to the ON position (see figure 32). All 4 LEDs of the battery level indicator should be lit, showing that the battery is fully charged (see figure 33). -
Page 57: Mounting The Tablet Onto The Tablet Holder
RangePro RPX8-P User Manual 6 • Ground Control Station Setup Figure 34. GCU charger 5. Remove the GCU charger (see figure 34) from the case. 6. Plug the GCU charger cable barrel plug into the GCU power input connector (see figure 32 on page 56). -
Page 58: Unfolded Tablet Holder
RangePro RPX8-P User Manual 6 • Ground Control Station Setup 2. Unfold the tablet holder (see figure Figure 36. Unfolded tablet holder 3. Grasp and lift the tablet holder clamp, as shown in figure 37 on page 59, until there is space enough to place the tablet inside the table holder. -
Page 59: Lifting The Tablet Holder Clamp
RangePro RPX8-P User Manual 6 • Ground Control Station Setup Figure 37. Lifting the tablet holder clamp 4. Place the tablet inside the clamp and adjust it to secure the tablet, then release the clamp (see figure 38 page 60). -
Page 60: Connecting The Client Device To Wifi
RangePro RPX8-P User Manual 6 • Ground Control Station Setup Figure 38. Mounting the tablet on the tablet holder 5. Position the tablet for convenient viewing, then tighten the locking lever to secure the tablet holder. 6. Adjust the antennas to the desired positions. -
Page 61: Running The Qgroundcontrol Application
RangePro RPX8-P User Manual 6 • Ground Control Station Setup – Gateway: 192.168.42.1 – Prefix Length: 24 (255.255.255.0) Running the QGroundControl Application Do the following to run the QGroundControl app: 1. Load the QGroundControl app onto the client device. Versions of the app are available for iOS and Android devices as well as Windows. -
Page 62: Emergency Procedures
Chapter 7 Emergency Procedures Chapter Contents Introduction ..........................63 Propeller Loss ..........................63 Loss of Power...........................63 Loss of GPS ..........................64 Loss of Command and Control Link ..................64 Loss of Telemetry Data Link....................64 Loss of Video Link........................64 Away..........................65... -
Page 63: Introduction
RangePro RPX8-P User Manual 7 • Emergency Procedures Introduction Refer to the appropriate sections for instructions on what to do in case of an emergency: Propeller loss • Loss of power • Loss of GPS (see page • • Loss of command and control link (see... -
Page 64: Loss Of Gps
RangePro RPX8-P User Manual 7 • Emergency Procedures Loss of GPS Do the following: 1. If the GPS signal degrades until it is not working properly, or fails completely, you can still fly the aircraft in Altitude Hold or Stabilize flight modes. The difference between these two modes is that in Altitude Hold mode the aircraft altitude is automatically held using on board sensors Roll, Pitch, and Yaw are all under manual control. -
Page 65: Fly Away
RangePro RPX8-P User Manual 7 • Emergency Procedures 4. You may also try adjusting the antennas so that they are facing the aircraft. If this doesn't work, bring the aircraft back and land immediately using your instruments or by initiating the RTH/RTL function. -
Page 66: Flight Ops
Ground Station Connection ....................71 Calibration .........................71 Battery Health Monitor .....................72 Flight Safety Settings ......................72 GPS Satellite Connectivity ....................73 Takeoff ............................74 In-Flight ..........................75 Landing ...........................76 Post-Flight ..........................77 Disassemble the RangePro RPX8-P ..................77 Disassemble the Ground Control Station ................78 Packing up .........................78... -
Page 67: Introduction
Pre-Flight Do the following: 1. Place the RangePro RPX8-P in a clear area absent of debris with direct access to satellites to obtain GPS lock. 2. Unfold propellers so they are fully extended and perpendicular with props below and repeat for each arm... -
Page 68: Positioning Propellers For Flight
RangePro RPX8-P User Manual 8 • Flight Ops Figure 40. Positioning propellers for flight 3. Raise and secure the GPS antenna mast. 4. Ensure the radio antennas connections are tight and the antennas secured to the legs. 5. Ensure the payload is properly installed and clear of obstructions. -
Page 69: Proper Distance Between Propeller Tips
8. Check the arm pivot pin and arm mount thumb screws for tightness. To avoid damaging the RangePro RPX8-P, verify that there is sufficient clear space (no loose debris on the ground) around the UAV (TerraView recommends a 30-foot or 9-... - Page 70 11. Open the QGroundControl app. 12. With the transmitter on, it’s now time to turn on the RangePro RPX8-P. While pulling down the battery locking pin, press the battery into the rails far enough that the battery pin clears the battery transport mode...
-
Page 71: Ground Station Connection
RangePro RPX8-P User Manual 8 • Flight Ops Figure 43. UAV green and white position strobe lights 14. Verify that the white position strobe light on the UAV front (see figure 43), and the green position strobe light on the rear are flashing. -
Page 72: Battery Health Monitor
RangePro RPX8-P User Manual 8 • Flight Ops and follow the instructions provided at https://docs.qgroundcontrol.com/master/en/SetupView/sen- sors_ardupilot.html To start the compass calibration sequence from QGroundControl, select Settings > Sensor > Compass > OK and follow the instructions provided on the screen. -
Page 73: Gps Satellite Connectivity
RangePro RPX8-P User Manual 8 • Flight Ops Figure 46. Flight Safety Settings GPS Satellite Connectivity Verify that there is sufficient GPS signal strength (10 or higher with an HDOP of 1.0 or lower to support flight operations on the QGroundControl app as shown in figure 47). -
Page 74: Takeoff
Takeoff Do the following: 1. Make sure the RangePro RPX8-P is in a good takeoff location (free of debris and a safe distance from objects and structures like buildings and trees. TerraView recommends a 30-foot or 9-meter radius around the aircraft) for takeoff and landing (see figure 42 on page 70). -
Page 75: In-Flight
In-Flight Do the following: 1. Once the RangePro RPX8-P has taken flight, put it in a hover approximately 10 feet (3 meters) above the ground. 2. With the right stick, make small left and right (roll) commands, then up and down (pitch) commands, and verify the aircraft responds as expected. -
Page 76: Landing
RangePro RPX8-P User Manual 8 • Flight Ops 6. Monitor the HUD for RangePro RPX8-P system health and continually scan the area of operation for maximum situational awareness. Look for good GPS signal strength, a good data link signal, battery volt- age, and other alert notifications that may be displayed on the HUD screen. -
Page 77: Post-Flight
The UAV has safely landed. Continue to section “Post-Flight”. Post-Flight Post-Flight consists of the following: Disassembling the RangePro RPX8-P (see page • • Disassembling the Ground Control Station (see... -
Page 78: Disassemble The Ground Control Station
RangePro RPX8-P User Manual 8 • Flight Ops 6. Unscrew the GPS antenna locking nut, then rotate the GPS antenna mast so it is resting on the front of the RangePro RPX8-P. To avoid damage to the antenna mast when closing the case lid, do not position the antenna mast so it is resting on the accessory platform. - Page 79 Verify that the battery or batteries have been removed from the temporary storage area in the case and/or the drone before shipping the case. See Appendix O, “Shipping Lithium Polymer Batteries” on page 130 or the TerraView IMPORTANT Lithium Battery Shipping Notice for additional details Continue to Chapter 9, “Data Management”...
-
Page 80: Data Management
Chapter 9 Data Management Chapter Contents Introduction ..........................81 Downloading Parameter Files ....................81 QGroundControl .......................81 Mission Planner .........................81 Uploading Parameter Files .......................81 QGroundControl .......................81 Mission Planner .........................81 Collecting On-Board Flight Telemetry ..................82 QGroundControl .......................82 Mission Planner .........................82 Collecting Payload Data ......................82... -
Page 81: Introduction
It is possible to load a file that will cause the aircraft to operate in an unstable manner. Be sure to have a known good configuration as a backup before proceeding with uploading a parameter file. Only expert users should modify the parameter file after TerraView Flight Support pro- vides instructions for uploading a new parameter file (see Chapter 12, “Contacting Terra-... -
Page 82: Collecting On-Board Flight Telemetry
RangePro RPX8-P User Manual 9 • Data Management Collecting On-Board Flight Telemetry Sometimes it is important to download telemetry flight data to assist in analysis of sensor data, or to analyze performance of the aircraft during flight operations. QGroundControl Select the Analyze Icon > Refresh > Log Download > [select files] > Download... -
Page 83: Drone Battery Management
Chapter 10 Drone Battery Management Chapter Contents Introduction ..........................84 Charging the Battery........................84 Inspecting the Battery ......................86 Storing the Battery........................86 End of Life Battery Processing Steps ..................86... -
Page 84: Introduction
RangePro RPX8-P User Manual 10 • Drone Battery Management Introduction Refer to the following sections for information on drone battery management: Charging the Battery • Inspecting the Battery (see page • Storing the Battery (see page • • End of Life Battery Processing Steps (see... -
Page 85: Battery Charging
RangePro RPX8-P User Manual 10 • Drone Battery Management 3. Remove the battery charging cable (see figure 53) from the case. Figure 53. Battery charging cable DO NOT connect the battery charging cable to the battery at this time. CAUTION 4. -
Page 86: Inspecting The Battery
Ultimate Duo 400W Charger with a RangePro RPX8-P RP6S24KHDx battery pack or refer to the Ultimate Duo 400W Charger with a Range Pro X8 RP6S24KHDx Battery Pack guide for the remainder of the battery charging procedure. -
Page 87: Maintenance
Chapter 11 Maintenance Chapter Contents Introduction ..........................88 User Maintenance Activities.....................88 Replacing a Pair of Propellers....................88... -
Page 88: Introduction
• Keep it clean: The proper way to clean your RangePro RPX8-P is to use a damp cloth to wipe down the cover and remove any debris from the visible carbon fiber components. Do NOT remove any components for clean- ing. - Page 89 3. Install the second screw. 4. Using the Allen key wrench, tighten both mount screws securely. The replacement propellers are now installed. If you need to contact TerraView for support, continue to Chapter 12, “Contacting TerraView for Support” page 90.
-
Page 90: Contacting Terraview For Support
Chapter 12 Contacting TerraView for Support Chapter Contents Support Options........................91... -
Page 91: Support Options
RangePro RPX8-P User Manual 12 • Contacting TerraView for Support Support Options In addition to standard warranty support, TerraView offers training, integration, and customization services, maintenance, repair, and extended warranty options. Contact your distributor or sales representative for more information. -
Page 92: A Certifications/Compliance
Appendix A Certifications/Compliance Chapter Contents Compliance ..........................93 North America (United States and Canada)................93 FCC Part 15 Class B ......................93 NRTL (Nationally Recognized Test Lab) Mark ..............93 Standards ...........................93 European Union ........................93 CE Mark ..........................93 Standards ...........................93... -
Page 93: Compliance
RangePro RPX8-P User Manual A • Certifications/Compliance Compliance The RangePro RPX8-P is compliant with the following standards for North America and the European Union. Subsystem specific certification and compliance statements can be found in their respective user manuals and documentation. -
Page 94: B Warranty
Appendix B Warranty Chapter Contents What Is Covered........................95 What TerraView Will Do To Correct Problems ..............95 What This Warranty Does Not Cover ..................95... -
Page 95: What Is Covered
If your product is being replaced or repaired, TerraView will direct you to send your product to TerraView or its authorized service center. You are responsible for securely packing the product and for shipping costs to the TerraView service center. - Page 96 RangePro RPX8-P User Manual B • Warranty by a TerraView authorized servicer. If a claimed defect cannot be identified or reproduced, you will be held responsible for the costs incurred. THE WARRANTY AND REMEDY PROVIDED ABOVE ARE EXCLUSIVE AND IN LIEU OF ALL...
-
Page 97: C Rangepro Rpx8-P Manual Flight Checklist
Appendix C RangePro RPX8-P Manual Flight Checklist Chapter Contents Preflight Checklist ........................98 Arm for Flight, Takeoff, and Control Validation ..............99 Landing ...........................99... -
Page 98: Preflight Checklist
RangePro RPX8-P User Manual C • RangePro RPX8-P Manual Flight Checklist Preflight Checklist 1. Check batteries to make sure they are properly charged. 2. Turn on Ground Control Station (GCS)—control unit and client device. 3. Verify GCS battery status. 4. Verify volume on the client device and ensure GCS warnings are audible. -
Page 99: Arm For Flight, Takeoff, And Control Validation
RangePro RPX8-P User Manual C • RangePro RPX8-P Manual Flight Checklist 22. Initial Pre-Flight is now complete, RangePro is now ready to arm. Arm for Flight, Takeoff, and Control Validation 1. Verify the area is clear and that it is safe to arm. -
Page 100: D Rangepro Rpx8-P Automated Flight Checklist
Appendix D RangePro RPX8-P Automated Flight Checklist Chapter Contents Preflight Checklist .........................101 Perform the Mission ......................101 Completing the Mission ......................101... -
Page 101: Preflight Checklist
2. Ensure GCS client has a complete and validated flight plan defined and ready for upload. 3. Follow all steps in the Preflight Checklist section of the RangePro RPX8-P Manual Flight Checklist. 4. If required, ensure payload GPS cable is installed and has freedom of movement. -
Page 102: E Rangepro Rpx8-P Post Flight Checklist
Appendix E RangePro RPX8-P Post Flight Checklist Chapter Contents Power Down Sequence ......................103 Safety Inspection........................103 Payload Management......................103 Stowing the Aircraft.......................103... -
Page 103: Power Down Sequence
RangePro RPX8-P User Manual E • RangePro RPX8-P Post Flight Checklist Power Down Sequence 1. Ensure aircraft is on ground, props have stopped rotating, and system has disarmed. 2. Note battery voltage and flight time on GCS Client Display and record in logbook. -
Page 104: Fled Meanings
Appendix F LED Meanings Chapter Contents Introduction ..........................105... -
Page 105: Introduction
RangePro RPX8-P User Manual F • LED Meanings Introduction The following information is available from the cubepilot.org website and is provided here for easy reference: https://docs.cubepilot.org/user-guides/here+/here+v2-user-manual Indicator Status Flashing red and blue Initializing sensors; place the vehicle still and level while it initial- izes the sensors. -
Page 106: G Passwords And Ip Addresses
Appendix G Passwords and IP Addresses Chapter Contents Introduction ..........................107 Herelink Systems ........................107 Important Settings Within QGroundControl ..............107 Standard Ground Control Station ..................107 GCS Client Configuration ....................108 Connecting to the Radios ....................108 Video Encoder .........................109... -
Page 107: G Passwords And Ip Addresses
Airborne Innovations Picoradio. Video conversion is accomplished using an Air- borne Innovations Picoraptor. IP address configuration and credential management are paramount in ensuring the system works as expected. Documentation for these units can be found on the TerraView support site or from the manufacturer. -
Page 108: Gcs Client Configuration
RangePro RPX8-P User Manual G • Passwords and IP Addresses GCS Client Configuration The Ground Control Unit provides a WiFi connection for a client device. This device can be any WiFi enabled device with a flight control software package such as QGroundControl. The GCU and the client device make up the Ground Control Station (GCS). -
Page 109: Video Encoder
RangePro RPX8-P User Manual G • Passwords and IP Addresses Video Encoder Not all units have a video encoder. It is recommended that the video compression rate be set to as low as possi- ble to support a clear video display on the client screen. Setting this number too high may result in drop outs and significantly worse video, possibly even causing the application to freeze as it attempts to stitch together a broken video stream. -
Page 110: H Standard Controller Channel Numbers
Appendix H Standard Controller Channel Numbers Chapter Contents Standard Controller Layout ....................111 Standard Controller Related Parameter Settings..............112... -
Page 111: Standard Controller Layout
RangePro RPX8-P User Manual H • Standard Controller Channel Numbers Standard Controller Layout Figure 55. Standard Controller Layout Channel Description Yaw Control Pitch Control Throttle Control Roll Control 3-position switch, usually used for flight modes. 3-position momentary switch, springs to center from both directions. Usually used for zoom. -
Page 112: Standard Controller Related Parameter Settings
RangePro RPX8-P User Manual H • Standard Controller Channel Numbers Standard Controller Related Parameter Settings Channel Purpose or Example Ardupilot Settings Yaw Control Gimbal RCMAP_YAW = 1, do not change Pitch Control Gimbal RCMAP_PITCH = 2, do not change Throttle Control Gimbal... - Page 113 RangePro RPX8-P User Manual H • Standard Controller Channel Numbers Channel Purpose or Example Ardupilot Settings Gimbal Pan Rotary Dial or other… To use for gimbal pan: MNT_RC_IN_PAN = 10 (RC10) SERVO11_FUNCTION=0 (disabled) To use for digital zoom on FLIR...
-
Page 114: I Herelink Controller Settings
Appendix I Herelink Controller Settings Chapter Contents Herelink Controller Settings ....................115 Radio Tab ........................115 Joystick Tab ........................115 Button Tab ........................115 Channel Purpose and Effect .....................115 Hotspot ..........................116... -
Page 115: Herelink Controller Settings
RangePro RPX8-P User Manual I • Herelink Controller Settings Herelink Controller Settings Radio Tab Item Value Notes Country United States Video Sharing Enabled Turn off to prevent other clients from con- necting Joystick Tab Item Value Notes Wchannel This is the scroll wheel... -
Page 116: Hotspot
RangePro RPX8-P User Manual I • Herelink Controller Settings Channel Purpose Associated Commands Switch Servo9 / Aux1 between high and low, direct SERVO9_FUNCTION = 61 wired to Strobe Lights Switch Servo10 / Aux2 between high and low, SERVO10_FUNCTION = 62... -
Page 117: J Helpful Parameter Hints
Appendix J Helpful Parameter Hints Chapter Contents General Ardupilot Settings.....................118 Aircraft Orientation During Autonomous Flight ..............118 Behavior During Return to Land ..................118 Herelink Specific ........................118 Trick for Tilting the Camera ....................118... -
Page 118: General Ardupilot Settings
RangePro RPX8-P User Manual J • Helpful Parameter Hints General Ardupilot Settings Aircraft Orientation During Autonomous Flight Is your aircraft pointing the right direction during autonomous flight? Solar panel inspection may require keep- ing the aircraft always oriented in the same direction regardless of the direction of flight, while a tower inspec- tion may require the aircraft to change orientation. -
Page 119: K Configuration Specific Parameters
Appendix K Configuration Specific Parameters Chapter Contents Load Specific Parameters .......................120... -
Page 120: Load Specific Parameters
RangePro RPX8-P User Manual K • Configuration Specific Parameters Load Specific Parameters Herelink Herelink US GCS Parameter Notes Standard Airbot Airbot BATT_AMP_PERVLT Device Specific BATT_VOLT_MULT Device Specific MNT_ANGMAX_TIL 7000 7000 9000 7000 used to force -10 deg gimbal tilt RCMAP_PITCH... -
Page 121: L Making Sense Of Motor Tests
Appendix L Making Sense of Motor Tests Chapter Contents Making Sense of Motor Tests ....................122... - Page 122 RangePro RPX8-P User Manual L • Making Sense of Motor Tests Making Sense of Motor Tests When running a motor test within Mission Planner the motors are identified alphabetically, not numerically. The table below shows the link between the Motor Location ID, the Motor Test ID, and the expected rota- tional direction of the motor.
-
Page 123: M Serial Port Assignment
Appendix M Serial Port Assignment Chapter Contents Serial Port Assignment......................124... -
Page 124: Serial Port Assignment
RangePro RPX8-P User Manual M • Serial Port Assignment Serial Port Assignment Carrier Port External Access Point Serial Channel Protocol SRx Assignment Rear of Aircraft Serial0 1: MAVlink1 Telem1 Serial1 2: MAVlink2 Telem2 Bottom of Aircraft Serial2 2: MAVlink2 GPS1... -
Page 125: N Breakout Board Connections And Pinouts
Appendix N Breakout Board Connections and Pinouts Chapter Contents Introduction ..........................126 Power Out ..........................126 Serial Out ..........................126 Ethernet Out .........................127 Out..........................127 SBus Out ..........................128 PWM Out ..........................128 Related TerraView Breakout Cables..................129... -
Page 126: Introduction
RangePro RPX8-P User Manual N • Breakout Board Connections and Pinouts Introduction The RangePro RPX8-P includes a breakout board underneath the airframe, just above the payload area. Con- nections include 12V power, serial, Ethernet, I2C, SBus, and PWM signals (see figure 56). -
Page 127: Ethernet Out
RangePro RPX8-P User Manual N • Breakout Board Connections and Pinouts • Pinout shown in table Table 3. Serial Out Pinout Description VCC/VCC TX/TX RX/RX CTS/CTS RX/RX Ethernet Out Extension of the Ethernet port from the radio system, typically the J4 WAN Ethernet port of the Picoradio. -
Page 128: Sbus Out
RangePro RPX8-P User Manual N • Breakout Board Connections and Pinouts • Pinout shown in table Table 5. I2C Out Pinout Description SBus Out Extension of the SBus pins on the carrier board. Connector ID: J1 • Breakout board connector: JST SM03B-GHS-TB(LF)(SN) •... -
Page 129: Related Terraview Breakout Cables
RangePro RPX8-P User Manual N • Breakout Board Connections and Pinouts Table 7. PWM Out Pinout (Continued) Description AUX 6 Related TerraView Breakout Cables Cable Number Description Note 10000061 Serial to Pixy QuickConnect Six-pin JST to six-pin JST; serial crossover... -
Page 130: O Shipping Lithium Polymer Batteries
Appendix O Shipping Lithium Polymer Batteries Chapter Contents Introduction ..........................131 Basic Shipping Requirements....................131... -
Page 131: Introduction
FedEx or UPS. WARNING When shipping these batteries for return to TerraView or a third party, the following basic requirements must be met: 1. The shipping box must meet the U3480 regulation. The packaging in which the batteries shipped is appropriate and approved. - Page 132 RangePro RPX8-P User Manual O • Shipping Lithium Polymer Batteries 3. The capacity of these batteries does not allow for shipping on passenger aircraft. The label shown in figure 58 must also be present on the shipping container when shipping via air. When shipping via ground, this label is not required.
-
Page 133: P Using The D400 Charger With A Rangepro Rpx8-P Battery
Appendix P Using the D400 Charger with a RangePro RPX8-P Battery Chapter Contents Introduction ..........................134 Modify and Verify System Settings ..................134 Program Battery Memory Charge Settings................135 Balance Charge the Battery Using Battery Memory #1 ............136 Troubleshooting Common Charging Errors ................137 The Channel Times Out Before Charging is Complete ............137... -
Page 134: Introduction
RangePro RPX8-P User Manual P • Using the D400 Charger with a RangePro RPX8-P Battery Introduction The Range Pro X8 RP6S24KHDx is a dual 6S2P, 24,000 mAh, high density, battery pack consisting of two independent 6S2P Lithium Ion Polymer battery packs installed in a single battery cage. The battery packs are impedance matched at the factory, placed in a common cage, and wired independently to a single connector. -
Page 135: Program Battery Memory Charge Settings
RangePro RPX8-P User Manual P • Using the D400 Charger with a RangePro RPX8-P Battery Parameter Channel 1 Value(s) Channel 2 Value(s) Max Power Set 200W 200W Synchronization Safety Timer 150Min 150Min Capacity Cut-Off 12600mAh 12600mAh Temp Cut-Off 50C 122F... -
Page 136: Balance Charge The Battery Using Battery Memory #1
RangePro RPX8-P User Manual P • Using the D400 Charger with a RangePro RPX8-P Battery 6. To scroll from one parameter to another, use the STATUS “+” or “-” buttons. 7. To change the value of a parameter enter into editing mode by pressing ENTER “ ”. -
Page 137: Troubleshooting Common Charging Errors
RangePro RPX8-P User Manual P • Using the D400 Charger with a RangePro RPX8-P Battery 4. Use the STATUS “+” or “-” buttons to scroll through the locations until the top line of the display screen reads: [BATT MEMORY 1] 5. -
Page 138: The Channel Stops Charging Due To An Over Charge Capacity Limit
RangePro RPX8-P User Manual P • Using the D400 Charger with a RangePro RPX8-P Battery Each Range Pro X8 RP6S24KHDx battery pack requires approximately Note 12,000 mAH for a full charge. At 6 Amps this equates to two hours or 120 minutes. -
Page 139: The Charger Will Only Charge The Battery At 0.1A And It Takes A Long Time
RangePro RPX8-P User Manual P • Using the D400 Charger with a RangePro RPX8-P Battery The Charger Will Only Charge the Battery at 0.1A and it Takes a Long Time 1. This can happen when a battery is significantly drained beyond normal operating voltages and the cell voltages have fallen below a certain charging threshold.
Need help?
Do you have a question about the RangePro RPX8-P and is the answer not in the manual?
Questions and answers