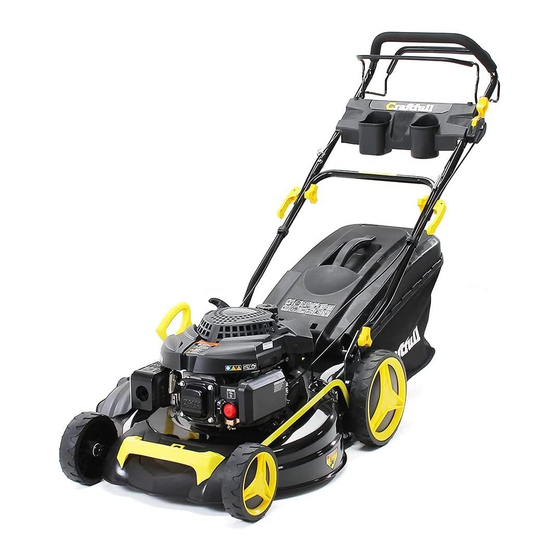
Summary of Contents for Craftfull CR-196-10E
- Page 1 Craftfull CR-196-10E www.miweba.de Miweba GmbH Omiwebo Telefon: + 49 (0) 9544 / 987908-0 Gewerbepark 20 Fax: + 49 (0) 9544 / 987908-19 96149 Breitengüßbach E-mail: kundenservice@miweba.de...
- Page 2 USER MANUAL 21 inch Gasoline Lawnmower Self-propelled: HG53SMH-XP200 Gasoline Engine:ZONGSHEN-XP200, 196cc, OHV, Single Cylinder, 4 Strokes CAUTION: Before any use read carefully the user manual which has been purposely drawn up to provide you with all the necessary information for proper use, in compliance with basic safety requirements.
-
Page 3: Table Of Contents
SUMMARY: DESCRIPTION ASSEMBLY OF GRASS CATCHER/DEFLECTOR HANDLE ASSEMBLY SCHNELLAUFBAU ADJUSTMENT OF CUTTING HEIGHT SAFETY PRECAUTIONS OPERATION GEAR BOX SAFETY RULES MAINTENANCE EXPLODING VIEW WARRANTY 1-DESCRIPION 1 Engine control bar 2 Self-propelled 3 Superior handle 4 Inferior handle 5 Engine 6 Deck 7 Tool box 8Throttle control Side-Closing Board... - Page 4 Mulcher Guard 2-4 IN 1 FUNCTION Mulching: Close the Side-Closing Board and insert the Mulcher Guard (Fig C) Rear discharge with grass collection: Take out the Mulcher Guard (Fig C) and place the grass catcher at its place. fig B Rear discharge without grass collection: Take out the Mulcher Guard (Fig C) and close the Side-Closing Board.
- Page 5 Side discharge: Take out the Mulcher Guard (Fig C) and Side-discharge Grass-guiding Board (Fig D) Fig Pictures 3-ASSEMBLY OF THE HANDLE Open out the handle and screw the handles parts with the two screws and plastic nuts. Put the recoil starter on the right of the handle and fix the cable with the plastic collar. Introduce the rope of the recoil starter handle on its support guide rope.
- Page 6 4-SCHNELLAUFBAU Klingenmontage Rad zusammenbauen Die Schrauben der Klinge Installation der unteren Armlehne müssen mit über 40 Newton fest angezogen werden. Installation der Handlaufverkleidung Fixierung der oberen Armlehne und der unteren Armlehne Fixierung der Verkabelung Einfädeln des Seils...
- Page 7 Montagezubehör Batterieinstallation Grassfangkorb Mulcheinsatz Seitenauswurf Kabelverbindung für Batterie und Netzschalter...
-
Page 8: 6-Safety Precautions
5-CUTTING HEIGHT AJUSTMENTS Highest Level Lowest Level 6-SAFETY PRECAUTIONS a) Always use the lawnmower with the grass catcher or/ and the deflector in position. b) Stop the engine before emptying the grass catcher or before you change the cutting height. c) While the engine is running, never introduce your hands or feet under the lawnmower or under the grass ejection area. -
Page 9: 7-Operation
7-OPERATION Before using the machine you must read the Engine instruction book. Engine delivered without oil: add 0.6liter of oil before starting the engine. ENGINE STARTING: Once the machine has been set up properly, start the engine as follow: a) Put the lever on the START position or 。 b) Take the flame out (N 3) and maintain it against the superior handle, pull on the recoil starter ○... -
Page 10: 8-Gear Box
DEMARRAGE HG53SMH-XP200 FOR THE SELF PROPELLED MOWER To engage the self-propelled system, pull on the inferior lever of the handle and maintain it engaged together with the brake lever. fig H 8-GEAR BOX Control frequently the self-propelled system. Polish the gear in the wheels and put grease on them. Do the same control on the ball bearing if any. - Page 11 3. The user is responsible of the safety of other people in the working area. Keep children and domestic animals at a safe distance while the mower is in use. 4. Before mowing, remove all foreign object from the lawn which may be thrown by the machine, stay alert for any foreign objects which may have been missed.
-
Page 12: 10/ Maintenance
tank to add gasoline while the engine is running or still hot. Do not start the engine if there is some gasoline spread around, take the mower away from the one where gasoline have been split and avoid any contact from a hot source as long as the split gasoline is completely eva0porated. - Page 13 THE BLADE: the blade is made of pressed steel, in order to obtain a clean work sharpen the blade frequently, around every 25hours of work. Be sure that the blade is always well balance, introduce a small iron axle(φ2 or φ3 mm) in the central hole of the blade, it should stay horizontal. If the blade does not stay horizontal balance it by taking off some metal on the side, which is down.
-
Page 14: 11/ Exploding View
LwA: 98dB(A) N.W./G.W.: 36kg/39kg 11-EXPLODING VIEW—HG53SMH-B... - Page 15 Spare Part List for HG53SMH-B Nos. Part No. Spare Parts Name LM530S-40006 Deck LM530S-40045-01 Connecting Rod LM530S-40185-01 Front Cover LM480S-40087-01 Bumper 6SQDD08-25D Bolt LM480S-40020-01 Front Wheel Cover 6SQDD06-12D Bolt LM480S-40202-01 Washer LM480S-40210-01 Bearing LM480S-40440-01 Front Wheel LM480S-40202-02 Washer LM480S-40440-02 Front Wheel Axle LM480S-40206-01 Screw LM480S-40334-01...
- Page 16 LM480S-40440-04 Rear Axle LM480S-40440-05 Adjuster Handle Assey 6SDD06-12D Bolt LM480S-40331-01 Adjuster Knob 6SQDD08-25D Bolt 6SQDD06-55D Bolt LM480S-40206-03 Tapping Screw 6NE-06D Self-locking Nut LM480S-40181-02 Bracket LM480S-40206-04 Bolt LM480S-40181-03 Limited plate LM480S-40206-05 Side Discharge Fixed LM480S-40292-01 Bolt LM480S-40206-06 Tapping Screw LM480S-40440-06 Triangular Nuts LM480S-40342-02 Spring LM480S-40206-07...
-
Page 17: 12-Warranty
LM480S-40185-02 Handle Panel LM480S-40020-04 Left Handle Bracket LM480S-40440-09 Driving Cable LM480S-40440-10 Flame Out Cable LM530S-40600 Engine(1P70) LM480S-40087-05 Inferior handle LM480S-40181-06 Rear Cover LM480S-40342-06 Left Spring LM480S-40201-03 Ring LM480S-40081-02 Rear Cover Axle LM480S-40292-03 Left Handle Bracket 6ND-08D Bolt 12-WARRANTY WARRANTY CONDITIONS: The manufacturer warrants the product 12 months from the date of purchasing, from all fabrication faults. - Page 18 Die alleinige Verantwortung für die Ausstellung dieser Konformitätserklärung trägt der Hersteller. We herewith confirm that the following appliance complies with the mentioned directives. This declaration of conformity is issued under the sole responsibility of the manufacturer. Artikelbezeichnung: Rasenmäher CR-196-10E Article Description: Artikelnummer: PR0021908-01, PR0021958-01, PR0021959-01 Article Number:...

Need help?
Do you have a question about the CR-196-10E and is the answer not in the manual?
Questions and answers