Table of Contents
Advertisement
Quick Links
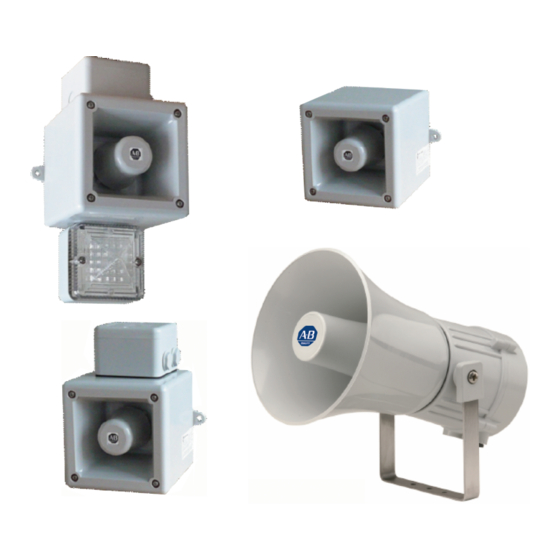
Bulletin 855H Recordable Horn
855H-R30E, 855H-R45E, 855H-RC30Ex, 855H-RC45Ex
855H-R30F, 855H-R45F
-20°C to +55°C (-4°F to +131°F)
WARNING
AVERTISSEMENT
WARNUNG
ADVERTENCIA
ATENÇÃO
AVVERTENZA
Wiring practices must meet applicable electrical codes.
Les procédures de câblage doivent répondre aux codes électriques en vigueur.
Bei der Verdrahtung sind die geltenden elektrotechnischen Sicherheitsvorschriften zu befolgen.
Le procedure adottate per i cavi devono rispettare le codifiche elettriche applicabill.
A instalação da fiação deve atender aos códigos elétricos aplicáveis.
Las prácticas de instalación eléctrica deben seguir los códigos eléctricos.
FEATURES:
•
4 stages - Each stage can record up to 30 seconds of CD quality audio
•
Record via on-board microphone or from external source using audio input jack
•
Message can be played back preceded by one of forty five alarm tones, or without any alarm tone if desired
•
Master / Slave functionality allows multiple horns to be set up exactly the same way
•
Optional high-output LED beacon available
•
Horn / LED combination units allow user to select steady or flashing LED function (2 Hz flash rate)
OPERATING AND MARKING:
All units have the following operating requirements and limitations.
855H Horn only units:
Catalog No.
Voltage Range
855H-R30E
14-30V DC
855H-R30F
855H-R45E
90-260V AC
855H-R45F
(50/60Hz)
Sound Output @ 1 meter:
111 dB (A) Voice
112 dB (A) Music
HORN SET-UP AND RECORDING
Prior to use, the unit will need to be configured to suit the end user.
If recording either via the onboard microphone or the line-in jack, the unit will need to be supplied with power.
WARNING
AC and DC units should be powered normally to complete recording and set-up.
Disconnect from power source to prevent electrical shock before installing
or servicing. Check power supply voltage and frequency.
Déconnecter l'alimentation avant toute opération d'installation ou de maintenance,
afin d'éviter les décharges électriques. Controler la tension et la fréquence d'alimentation.
Schalten Sie den Strom während der Installation oder bei Wartungsarbeiten ab um
einen elektrischen Schlag zu vermeiden. Prüfen Sie die Spannung und Frequenz der Stromquelle.
Scollegare dall'alimentazione prima dell'installazione e della messa in servizio.
Controllare la tensione di alimentazione e la frequenza.
Desligar a alimentação antes de realizar qualquer intervenção. Verificar a tensão e
frequência da alimentação.
Durante el proceso de instalación o mantenimiento desconectar la tensión de
alimentación para evitar descargas eléctricas. Comprobar tensión y frecuencia de alimentación.
Current
779mA@14V
1.51A@24V
1.85A max@30V
542mA@120V
517mA@230V
668mA max@260V
126 dB (A) Tone
Risk of Electrical Shock. Disconnect from power source to prevent electrical
shock before servicing.
UL Type 4/4X/13/3R
855H Combined horn/LED units:
Catalog No.
Voltage Range
855H-RC30Ex
14-30V DC
855H-RC45Ex
90-260V AC
(50/60Hz)
Hearing protection required.
1
(Frame E / Flare)
IP66 - Frame E
IP66/67 - Flare
Current
936mA@14V
1.67A@24V
1.92A max@30V
602mA@120V
552mA@230V
701mA max@90V
Advertisement
Table of Contents

Summary of Contents for Rockwell Automation 855H-R30E
- Page 1 Bulletin 855H Recordable Horn (Frame E / Flare) 855H-R30E, 855H-R45E, 855H-RC30Ex, 855H-RC45Ex 855H-R30F, 855H-R45F IP66 - Frame E UL Type 4/4X/13/3R -20°C to +55°C (-4°F to +131°F) IP66/67 - Flare Disconnect from power source to prevent electrical shock before installing WARNING or servicing.
-
Page 2: Tone Selection
ACCESS TO PCB’S FOR PROGRAMMING AND POWER CONNECTIONS FLARE FRAME E Remove Remove 20 lb-in (2.2 N•m) 4.5 lb-in Optional (4 places) (0.5 N•m) LED Beacon (4 places) FRAME E UNITS: FLARE UNITS: Remove 4 screws on face of unit for access to Remove 4 screws on rear of unit for access to power connections, programming power connections, programming functions, and... - Page 3 STAGE WIRING BEACON PRE-WIRED DC Units Second, Third and Fourth Stage Selection INTERNALLY Beacon The 855H Recordable Horn uses negative switching to change the tone to the second, third and fourth stages. The negative supply must remain WARNING connected to the ‘-’...
-
Page 4: Mounting Dimensions
MOUNTING DIMENSIONS 209.8 209.8 190.0 190.0 190.0 190.0 Ø9.0 Ø9.0 86.5 BEACON 86.4 191.5 191.5 183.8 855H-R30E 855H-R45E 183.8 855H-RC30Ex 855H-RC45Ex 142.1 181.0 20.0 thread 18° 219.6 160.0 166.0 25.0 855H-R30F Ø 7.0mm 3 x 6mm (¼”) 855H-R45F (3 places) 30.0mm... -
Page 5: Pcb Layout
PCB LAYOUT S2 - Set-up Function LEDs S4 - Tones Jumpers ACTION RESET Master / Slave MA SY ME 2 3 4 5 6 Connector PEAK DC Power & Alarm LINE IN Stage Terminal TONE Peak Level LED VOLUME On board microphone VOICE VOLUME... - Page 6 855H RECORDABLE HORN QUICK START GUIDE This guide is designed to get the user quickly interfacing with the 855H Recordable Horn. • The unit can be set-up to either play an alarm tone followed by a recorded message, or just play the recorded message. •...
-
Page 7: Record Mode
RECORD MODE TO RECORD A MESSAGE ON STAGE 1 USING THE ON-BOARD MICROPHONE (NOTE: “Black” color indicates “ON” position) For Stage 1: Set dip switch S2 positions 2,3 & 4 to ‘ON’, all others to ‘OFF’ For Stage 2: Set Switch ‘S2’ positions 3 & 4 to ‘ON’;... -
Page 8: Playback Mode
PLAYBACK MODE (TO PLAY BACK A MESSAGE) (NOTE: “Black” color indicates “ON” position) For Stage 1: Set Switch ‘S2’ positions 1,2,3 & 5 to 'ON' Alternatively for : For Stage 2: Set Switch ‘S2’ positions 1,3 & 5 to 'ON’ For Stage 3: Set Switch ‘S2’... - Page 9 ERASE MODE - SINGLE STAGE (TO ERASE ONE STAGE AT A TIME) (NOTE: “Black” color indicates “ON” position) For Stage 1: Set Switch ‘S2’ positions 2,3 & 7 to 'ON' Alternatively: For Stage 2: Set Switch ‘S2’ positions 3 & 7 to 'ON' For Stage 3: Set Switch ‘S2’...
- Page 10 MASS ERASE MODE (ERASES ALL STAGES AT ONCE) (NOTE: “Black” color indicates “ON” position) Set Switch ‘S2’ position 7 to 'ON' Set jumper J4 ‘ME’ to ON position (centre and right pin connected) Switch on power or Press reset button Press action button: Erase will begin - - - - erase complete...
- Page 11 SYNCHRONIZING TWO SOUNDERS (ALL STAGES) THIS FUNCTION WILL ALLOW MULTIPLE UNITS TO BE SET UP EXACTLY THE SAME AS A PREDETERMINED “MASTER” UNIT Connect Synch cable to Master and Slave PCB Designate one unit as Master and one unit as Slave On both units: Set jumper J6 (SYNC) to ON Set jumper J5 (S/M) on Master...
- Page 12 TONE SE E LECTIO O N TABLE E Switch Stage 2 Stage 3 Stage 4 Stage 1 Frequency Description 1 2 3 4 5 6 (S3) (S2) (S4) Tone 1 340 Hz Continuous Tone 2 Tone 5 Tone 29 Tone 2 800/1000 Hz @ 0.25 sec Alternating Tone 17 Tone 5 Tone 29...
Need help?
Do you have a question about the 855H-R30E and is the answer not in the manual?
Questions and answers