Advertisement
Available languages
Available languages
Quick Links
13. Retirer les vis
14. Connecter les tubes et les tiges
D
Note: Ensuite, vous pouvez continuer
l'installation en suivant l'étape 1.
A
C
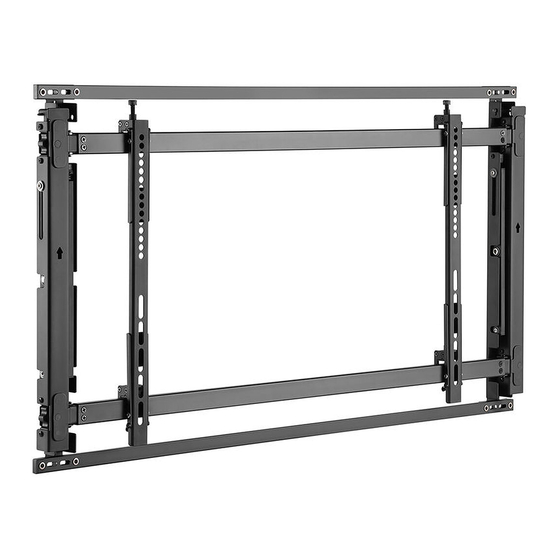
Support mur d'images ultra
slim pour écran TV 43''-55''
200x200/300x200
017-2064
300x300/400x200
400x300/400x400
600x400
MANUEL DE MONTAGE
rated
43"~55''
35kg/77lbs
Advertisement

Related Manuals for Kimex 017-2064


Summary of Contents for Kimex 017-2064
- Page 1 Support mur d'images ultra 13. Retirer les vis slim pour écran TV 43''-55'' 14. Connecter les tubes et les tiges MANUEL DE MONTAGE 200x200/300x200 017-2064 300x300/400x200 rated 43"~55'' 400x300/400x400 35kg/77lbs 600x400 Note: Ensuite, vous pouvez continuer l’installation en suivant l’étape 1.
- Page 2 Liste des pièces Lisez l'intégralité du manuel d'instructions avant de commencer l'installation et l'assemblage. Si vous avez des questions concernant les instructions ou les avertissements, veuillez contacter votre distributeur local pour obtenir de l'aide. ATTENTION • L'utilisation avec des produits plus lourds que les poids indiqués peut entraîner une instabilité Plaque murale (montage paysage) Support pouvant engendrer des blessures.
- Page 3 2. Fixation murale en béton et maçonnerie 1. Planifier l'emplacement de montage 60mm 60mm 60mm 60mm (2.4") (2.4") (2.4") (2.4") ø 10 ø 10 ø 3/8" ø 3/8" X=longueur d'affichage Y=Hauteur d'affichage Marquer Percer des trous l'emplacement pilotes exact des trous de montage √...
- Page 4 3. Étendre le bras de montage 4. Disposer les supports d'adaptateur Pour le montage paysage Pour le montage en portrait...
- Page 5 5b. Installation d'un écran non standard 5a. Installation d'un écran plat · Choisissez les vis, rondelles et entretoises appropriés (si nécessaire) en fonction du type de tamis. · Centrez les supports de l'adaptateur à l'arrière de l'écran, comme indiqué, et vissez-les sur l'écran en veillant à ne pas trop serrer.
- Page 6 6. Accrocher l'écran à la plaque murale 7. Repousser l'écran Insérez et serrez la vis pour fixer.
- Page 7 8. Installation de mur d'images Note: Veuillez commencer par la gauche en bas. START START 9. Enlever les écrans Faites glisser les écrans des deux côtés, puis déverrouillez et agrandissez l'écran que vous allez supprimer.
- Page 8 10. Ajustement Réglage en hauteur Pour l'ajustement de la hauteur Pour le réglage de la profondeur...
- Page 9 Réglage de la profondeur...
-
Page 10: Maintenance
11. Niveler les écrans 12. Pour le montage en portrait: remonter la plaque murale wall D1=D2 Note: Utilisez la pièce de verrouillage en plastique pour mesurer et garder un espace de 1,2 mm entre les installer / ajuster écrans. l'affichage selon l'ordre numérique indiqué... - Page 11 13. Remove the Screws Ultra slim video wall support for 43'' - 55'' TV screens 14. Connect Tubes and Rods INSTALLATION MANUAL 200x200/300x200 017-2064 300x300/400x200 rated 43"~55'' 400x300/400x400 35kg/77lbs 600x400 Note: Next, you can continue the installation by following step 1.
- Page 12 Component Checklist Read the entire instruction manual before you start installation and assembly. If you have any questions regarding any of the instructions or warnings, please contact your local distributor for assistance. CAUTION • Use with products heavier than the rated weights indicated may result in instability causing Wall Plate (Landscape Mounting) Adapter Bracket possible injury.
- Page 13 2. Masonry and Concrete Wall Mounting 1. Plan the Mounting Placement 60mm 60mm 60mm 60mm (2.4") (2.4") (2.4") (2.4") ø 10 ø 10 ø 3/8" ø 3/8" X=length of display Y=Height of display Mark the exact Drill pilot holes location of mounting holes √...
- Page 14 3. Extend the Mounting Arm 4. Arrange the Adapter Brackets For Landscape Mounting For Portrait Mounting...
- Page 15 5b. Non-Standard Back Screen Installation 5a. Flat Back Screen Installation · Choose the appropriate screws, washers and spacers (if necessary) according to the type of screen. · Center the adapter brackets on the back of the display as shown, and screw the brackets onto the display, being sure to not over-tighten.
- Page 16 6. Hook the Display onto the Wall Plate 7. Push the Screen Back Insert and tighten the screw to secure.
- Page 17 8. Video Wall Installation Note: Please start from the left at bottom. START START 9. Remove the Screens Slide the screens on both sides, then unlock and extend the screen that you're going to remove.
- Page 18 10. Adjustment Height adjustment For Height Adjustment For Depth Adjustment...
- Page 19 Depth Adjustment...
- Page 20 11. Level the Displays 12. For Portrait Mounting: Reassemble the Wall Plate wall D1=D2 Note: Use the plastic locking piece to measure and keep a 1.2 mm gap between displays. MAINTENANCE: Check that the product is secure and safe to use at regular intervals (at least every three months).
Need help?
Do you have a question about the 017-2064 and is the answer not in the manual?
Questions and answers