Advertisement
Quick Links
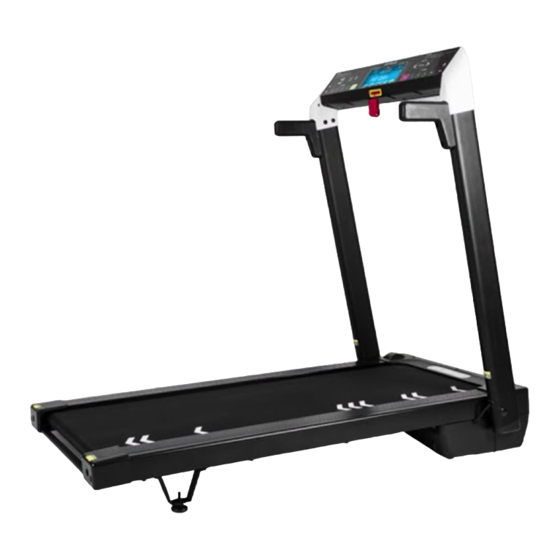
AT100 Specifica on
Basic specifca on
Unit dimensions:
Length: 141 CM (55.5 in)
Width: 74 CM (29.1 in)
Height: 123.4 CM (48.5 in)
Unit weight:
54 KG (118.8 lb)
Maximum user
weight :
100 KG (220 lb)
carrying capacity:
Belt size:
48 x 130 CM (19 x 51 in)
Motor:
1.5 HP
Voltage:
110V
220V,50/60Hz
Speed:
1~16 (KM/HR)
Incline:
3~9 %
Basic equipment
Compatible HR
NFC, Bluetooth, and ANT+
devices:
USB:
USB Charger
Tablet rack
Power switch/
power cord
Upright
Cautious with the gap
Caster
Prepara ons before Use
The treadmill is a simple and efficient training equipment and your shortcut to pursue a
healthy lifestyle.
The treadmill is an equipment for aerobic exercise that can facilitate weight loss, cardiopulmonary func on enhancement, and muscle tension and basic metabol-
ic rate improvement. Good exercise habits are helpful for achieving these goals. This product can help you to build healthy exercise habit at home.
Please evaluate your physical condi on before the exercise and pay a en on to following advice:
1) Do warm-up before you start to run. Warm-up can help stretching your muscles and avoid sports injury.
2) Wear sneakers with a gum sole. This can effec vely relieve the pressure to the knees during the workout.
3) Please focus on your workout and please a ach the safety clip to your clothing, please also pay high a en on to your safety to use smart device or any media
player to watch TV/magazine during workout as this may lead to sport injury caused by poor posture.
4) Gradually increase your running speed. Release your grip on the handrails at a comfortable speed.
5) We recommend to limit your exercise to 30~60 minutes. Excessive exercise may result in knee injury or other poten al injuries.
6) Decrease your speed from a fast walk to a slow walk for a gradual recovery when your workout is coming to the end. DO NOT leave the deck immediately a
the workout to avoid dizziness.
Treadmill loca on
Place the machine on a level ground. Clearance requirement: 200cm at the
rear, 100cm at le and right sides and 30~50 cm at the front. DO NOT place
the machine in front of the indoor/outdoor vent, in the garage, in the open
yard, outdoors, or near the water supply.
DO NOT start the machine with your feet on the belt. Please stand on foot rails when star ng the machine. Start walking on the treadmill only
when the belt starts moving. DO NOT start the machine with the fast run speed. DO NOT try to jump on the machine.
Safety key
The machine will not start opera ng un l the safety key is correctly inserted into the port. Always a ach the safety key to your clothing during workout. The
safety key is the device to ensure your safety, the emergency stop cu ng off the power in case runner accidentally falls down on the treadmill. Please check every
2 weeks to ensure the safety key work func onally.
Correct use
Start with slow speed and gradually increase the speed to a comfortable level. DO NOT let the machine run by itself. Please pull out the safety switch, turn the
power off and unplug the power cord when not in use. Stand on foot rails first and try to turn your trunk or lean forward. Please stop using any sport
equipments including the treadmill immediately once you feel any dizziness, pain, exhaustion or difficult breathing.
Leveling
Level the machine before use. When the
treadmill loca on is determined, please adjust
the regula ng foot pads on the deck and fix on
the best position. Make sure the deck is adjusted
to an appropriate height before use.
Turn on the power
Make sure the power cord of treadmill is correctly plugged. The indicator should light up when the power is on. The digital screen will light up a er the beep; 3
seconds a er the machine enters standby status, you can press "Quick Start" twice to proceed to fast exercise or select "PROGRAMS" and the machine will start
to operate at low speed.
•
DO NOT use the machine without using the safety clip. Please a ach the safety clip to your clothing before the workout. Try to pull out
the safety switch and make sure the clip does not fall from clothing.
•
Damaged power cord or outlet may lead to irregular machine opera on and personnel injury. Please stop the opera on or workout imme-
diately if this occurs.
Exercise programs
P1
MANUAL
P10
P2
RANDOM
P11
P3
CROSS COUNTRY
P12
P4
WEIGHT LOSS
P13
P5
INTERVAL 1-1
P14
P6
INTERVAL 2-1
P15
P7
HILL
P16
P8
THR GOAL
P17
P9
FAT BURN
Console display overview/
opera
ng panel
Safety key
Belt tension adjus ng screw
100CM
30~50CM
100CM
Regula ng foot pad
Before Assembly
Accessory pack
CARDIO
Safety key x 1
HR HILL
Power cable x 1
CALORIES GOAL
Silicon oil x 1
DISTANCE GOAL 1.6K
Screw x 4
DISTANCE GOAL 5K
Handrail x 2
DISTANCE GOAL 10K
CUSTOM 1
CUSTOM 2
•
Please contact the distributor on the Warranty card for technical support if any part is missing or you have any question.
Please always make sure that serial number on treadmill is same as warranty card indicated. If not, please do not assemble
•
machine and contact
Alatech's service center or distributor for further assistance. If maintenance needed, the serial number on machine and warranty
card must be the same, if inconsistent serial number is found, we will not provide warranty.
•
Please follow the assembly instructions and steps in this quick guide and make sure all parts are securely fastened. Fail to follow
the instructions may smay lead to loose parts on the treadmill. Loose parts can produce noise or may cause personnel injury.
Please thoroughly read the assembly instruc on to avoid any damage to the treadmill.
•
Several parts are lubricated before delivery to facilitate assembly. DO NOT arbitrarily wipe off the lubricant. You can use lubricant
to assemble parts when facing any difficulty. It is recommended to use the lithium base grease for treadmill.
Assembly Procedure
Side rail
Belt
Step 2
1) Screw both handrails tightly on the machine.
er
200CM
A
Step 3
1) To use the tablet rack, simply flip it up.
No ces and safety ps
1) Please move and transport the treadmill carefully. Put the box on a level surface. Only open the box with its
surface on top. It is recommended to put a protective mat on the floor.
2) Unpack and assemble the treadmill at the planned location to avoid unnecessary transportation. Pay great
a en on when unfastening cable e that used for packing or fixing to avoid accidental bounce.
3) Please follow assembly procedure to assemble the treadmill a er unfastening cable e.
DO NOT try to crane the machine.
4) DO NOT try to li or move the machine with a single part or stand. (Refer to "Move/transport the treadmill" on
informa on related to moving the product.)
Step 1
1) Step on the red cylinder.
2) Lift the console up until you heard a click that
indicates the console has been fixed on the right
position.
3) Make sure the console is completely fixed.
Parts
Illustra on
A
B
B
2) To fold the tablet rack, push it slightly to the left
and bend backward.
Hardware pack for step 1
Type
Descrip on
Qty
Screw
Bu on Head Socket Bolt (55L)
4
Handle
Bu on Head Socket Bolt (20L)
2
Advertisement

Summary of Contents for alatech AT100
- Page 1 • machine and contact devices: Alatech’s service center or distributor for further assistance. If maintenance needed, the serial number on machine and warranty USB: USB Charger card must be the same, if inconsistent serial number is found, we will not provide warranty.
- Page 2 Grounding Instruc on Move / Transport the Treadmil Grounding Folding Instructions The power socket of this product contains a grounding conductor. This socket must be inserted into the outlet via the power cord with grounding latch. The plug must be plugged into an appropriate outlet that is properly installed and grounded in accordance with local codes and ordinances. Please step on the red cylinder, gently let down the console stand until it is folded on top of the deck and the cylinder stick has been locked.
- Page 3 AT100 基本規格 組裝前 基本規格 運動模式 注意事項及安全說明 配件包 機台尺寸: 長(LENGTH): 141 CM (55.5 in) MANUAL 手動模式 CARDIO 有氧模式 1)運送和搬動本跑步機時請務必小心輕放,請將跑步機紙箱放在平坦表面 寬(WIDTH): 74 CM (29.1 in) 安全開關 x 1 RANDOM 隨機模式 HR HILL 登頂心律 上,切勿在紙箱側放的情況下打開紙箱,建議您在地板上鋪上防護墊。 高(HEIGHT): 123.4 CM (48.5 in) CROSS 電源線 x 1 2)解開包裝袋後,如需抬起或搬動跑步機,請先將跑步機收折為平整狀態...
- Page 4 移動/搬動跑步機 接地說明 接地說明 折疊說明 本產品電源插槽備有接地導體,此插槽必須透過具備接地插銷電源線插入電源插座中,該插座需根據當 請用腳踩踏紅色卡榫折收處,小心將儀表向下放置於跑板水平位置, 地電源及法規法令正確且安全的安裝與接地。 直到卡榫鎖上。 插座說明 本產品使用額定220或110伏特電壓,並附有一條三插孔電源線,如下圖。 如沒有可用接地插頭,請使用接地轉接器,轉接器可用來連接此插頭到兩孔插座。請聯絡合格電工安 裝正確的接地插頭後,才能使用接地轉接器。每次使用接地轉接器時,請將把手或類似轉接器延伸物 與固定地表連接,請使用金屬螺絲固定,如下圖。 移動說明 請於開關旁的規格貼紙或參閱本說明書機台規格說明,確定本跑步機使用的電源線為220或110伏特 電壓,請勿接在錯誤的電壓插座上,也請勿透過各種轉接器或延長線使用本跑步機的電源線,避免提 跑步機機台內建兩組移動輪,若要移動請先將跑步機折疊起,確認跑 供電流過大或過小,導致機台元件損毀,造成各種人身傷害。 板已固定,再緊握機台車架將跑步機向上提起並移動。如未將機台折 疊固定即嘗試移動或搬動跑步機,將會導致人身傷害或機台損毀。 兩孔插座 跑步機電源線 跑步機電源線 金屬接地螺絲 三孔接地插座 接地轉接器 如何站立 •上圖僅表示三插孔電源線及三孔接地插座,或兩孔插座及接地轉接器。三孔接地插座、兩孔插座、接地轉接器會 •上圖僅表示三插孔電源線及三孔接地插座,或兩孔插座及接地轉接器。三孔接地插座、兩孔插座、接地轉接器會 跑步機的馬達上蓋前方有兩顆固定支撐墊,請於儀表確定折收後可從機台後方 因國別不同而有各種型式。本跑步機使用的電源線會依各國使用規範提供符合當地使用的電源線。 因國別不同而有各種型式。本跑步機使用的電源線會依各國使用規範提供符合當地使用的電源線。 抬起並直立,確認機台穩定站立並腳墊有貼於地面。 •請勿將電源線接在錯誤的電壓插座,也請勿使用電壓轉接器或是延長線做媒介接於插座上,此舉可能會出現不可 •請勿將電源線接在錯誤的電壓插座,也請勿使用電壓轉接器或是延長線做媒介接於插座上,此舉可能會出現不可 預測的電流量,造成機台元件的損毀,導致各種人身傷害。 預測的電流量,造成機台元件的損毀,導致各種人身傷害。 安全注意:請將固定支撐墊放於接近牆面 面板按鍵操作說明 在操作面板上有一層透明的保護膜,使用前請先將保護膜撕下。 直立折收時請緊貼於牆面確定機台穩定站立及確保腳墊有貼於地面...
Need help?
Do you have a question about the AT100 and is the answer not in the manual?
Questions and answers