
Related Manuals for ratiotec Smart Protect


Summary of Contents for ratiotec Smart Protect
- Page 1 User manual Smart Protect | Smart Protect Plus Bedienungsanleitung Smart Protect | Smart Protect Plus Smart Protect Smart Protect Plus...
- Page 2 Bedienungsanleitung Smart Protect | Smart Protect Plus ....... [EN] Instruction manual Smart Protect | Smart Protect Plus ........[IT] Istruzioni per l’uso di Smart Protect | Smart Protect Plus ....... [ES] Manual de instrucciones Smart Protect | Smart Protect Plus......[FR] Mode d’emploi Smart Protect | Smart Protect Plus .........
-
Page 3: Bedienung
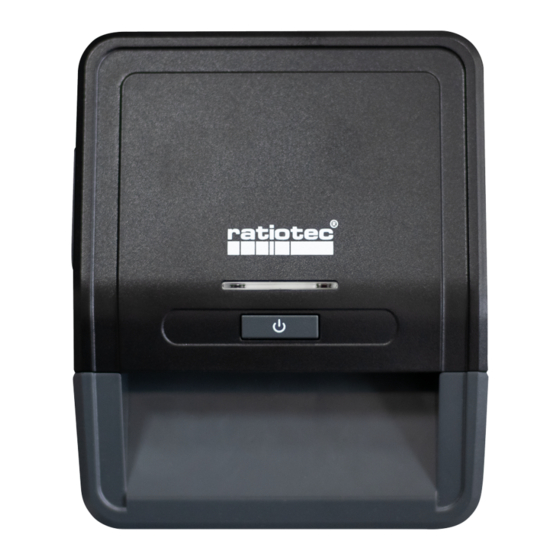
[ DE] Einleitung Sehr geehrter Kunde, sehr geehrte Kundin, vielen Dank, dass Sie sich für ein Banknotenprüfgerät der Smart Protect Serie von ratiotec entschieden haben. Die kompakten Prüfgeräte gewährleisten eine schnelle und zuverlässige Echtheitsprüfung von Banknoten. Bedienung Smart Protect LED-Anzeige 2. -
Page 4: Gerät Ein- Und Ausschalten
[DE] Smart Protect Plus LCD-Bildschirm 2. LED-Anzeige 3. Banknoteneinzug 4. Mode-Taste Ein/Aus-Taste 6. Pfeiltaste Deckelgriff 8. Micro-SD Kartensteckplatz 9. Banknotenauswurf 10. Mini-USB Anschluss 11. Netzkabelanschluss 12. Akkufach Gerät ein- und ausschalten Smart Protect: Drücken und halten Sie zum Einschalten des Gerätes zwei Sekunden die Ein/Aus-Taste. - Page 5 Fehlercodes auf dem Bildschirm angezeigt. Die verschiedenen Fehlercodes setzen sich wie folgt zusammen: E+Zahlenkombination Hinweis: Ist beim Smart Protect Plus der Ton im Menü ausgeschaltet, wird kein akustisches Signal wiederge- geben. Berichtserkennung- und Löschung – Nur für den Smart Protect Plus im Additionsmodus Drücken Sie nach Abschluss der Erkennung die Pfeiltaste, um den...
-
Page 6: Software Update
4. Nach erfolgreicher Aktualisierung ertönt zweimal ein Signalton und das Prüfgerät schaltet sich automa- tisch aus. Software Update Smart Protect Plus mit MicroSD Karte Setzen Sie die MicroSD Karte in den MicroSD Kartensteckplatz auf der Rückseite des Prüfgerätes ein. 2. Halten Sie alle drei Tasten bis Ihnen UPD im Display angezeigt wird. - Page 7 [ DE] Fehlermeldungen Wenn eine Fehlermeldung im Anzeigefenster angezeigt wird, liegt dies normalerweise daran, dass der Sensor durch Banknoten oder Staub blockiert ist. Verwenden Sie eine Bürste oder ein weiches Tuch, um den Staub auf dem Sensor zu entfernen, oder entfernen Sie die Banknote, und starten Sie das Gerät neu. Fehleranzeige im Display Fehlermeldung Linker Sensorfehler...
-
Page 8: Operation
[EN] Introduction Dear Customer, Thank you for choosing a banknote detector of the Smart Protect Series from ratiotec. Our compact detectors offer a fast and reliable counterfeit detection of banknotes. Operation Smart Protect LED indicator 2. Banknote feeder 3. ON/OFF key 4. - Page 9 [ EN] Smart Protect Plus LCD display 2. LED indicator 3. Banknote feeder 4. Mode key ON/OFF key 6. UP/DOWN arrow key Cover-turning handle 8. MicroSD card slot 9. Banknote ejector 10. Mini USB port 11. Mains cable port 12. Battery compartment...
- Page 10 The diff erent error codes are composed as follows: E+number combination. Note: If TONE is switched off in the setup of the Smart Protect Plus, no acoustic signal will appear. Detecting Report and Clearing - only for Smart Protect Plus in the Addition mode After fi nishing the detection process, press the UP/DOWN arrow key to enter the report mode.
-
Page 11: Technical Settings
3. The software is automatically implemented on the device. 4. After successful updating, the detector will beep two times and will switch off automatically. Software Update Smart Protect Plus with microSD card Insert the microSD card into the microSD card slot at the back of the detector. -
Page 12: Error Messages
[EN] Error Messages If an error message occurs in the display window, it is usually because the sensor is blocked by banknotes or dust. Please use a brush or a soft cloth to clean the dust on the sensor or remove the banknote, and then restart the machine. -
Page 13: Operazione
[ IT] Introduzione Caro Cliente, Grazie per aver scelto un rilevatore di banconote della Smart Protect Serie della ratiotec. I nostri rilevatori compatti offrono un rilevamento rapido e affidabile delle banconote. Operazione Smart Protect Indicatore LED 2. Alimentatore di banconote 3. -
Page 14: Accensione E Spegnimento
[IT] Smart Protect Plus Display LCD 2. LED indicatore 3. Alimentatore banconote 4. Tasto modalità Tasto ON/OFF 6. SU/GIÙ frecce Maniglia 8. Slot scheda MicroSD 9. Vano espulsore di banconote 10. Mini porta USB 11. Porta cavo di rete 12. Vano batteria... - Page 15 Combinazione E+numero. Nota: Se il suono è disattivato nel menu di Smart Protect Plus, non viene riprodotto alcun segnale acustico. Rilevamento e report e cancellazione - solo per Smart Protect Plus in modalità somma Al termine del processo di rilevamento, premere il tasto freccia SU/ GIÙ...
-
Page 16: Aggiornamento Software
3. Il software viene implementato automaticamente sul dispositivo. 4. Dopo l‘aggiornamento riuscito, il rilevatore emetterà due segnali acustici e si spegnerà automaticamente. Aggiornamento software Smart Protect Plus con scheda microSD Inserire la scheda microSD nello slot della scheda microSD sul retro del rilevatore. -
Page 17: Messaggi Di Errore
[ IT] Messaggi di errore Se si verifica un messaggio di errore nella finestra di visualizzazione, è perché il sensore è bloccato da ban- conote o polvere. Utilizzare un pennello o un panno morbido per pulire la polvere sul sensore o rimuovere la banconota, quindi riavviare la macchina. - Page 18 [ES] Introducción Estimada cliente, estimado cliente: Muchas gracias por decidirse por un comprobador de billetes de la serie Smart Protect de ratiotec. Los compro- badores compactos garantizan una autentificación de billetes rápida y fiable. Manejo Smart Protect Indicador LED 2. Entrada de billetes 3.
- Page 19 [ ES] Smart Protect Plus Pantalla LCD 2. Indicador LED 3. Entrada de billetes 4. Botón de modo Botón de encendido/apagado 6. Tecla de flecha Mango de la tapa 8. Ranura para tarjeta Micro SD 9. Expulsión de billetes 10. Conexión mini USB 11.
- Page 20 Los diferentes códigos de error se componen de la siguiente manera: Combinación E+número. Nota: Si se desactiva el sonido en el menú del Smart Protect Plus, no se reproduce ninguna señal acústica. Identifi cación y eliminación de informes – Solo para Smart Protect Plus en modo de adición Una vez fi nalizada la identifi cación, pulse los botones de flecha para...
-
Page 21: Actualización Del Software
4. Una vez completada la actualización, el comprobador emite dos señales acústicas y se apaga automáticamente. Actualización del software Smart Protect Plus con tarjeta MicroSD Coloque la tarjeta MicroSD en la ranura para tarjetas MicroSD ubicada en la parte trasera del comprobador. -
Page 22: Mensajes De Error
[ES] Mensajes de error Por lo general, cuando aparece un mensaje de error en la venta de visualización se debe a que hay billetes o polvo bloqueando el sensor. Utilice un cepillo o un paño suave para eliminar el polvo del sensor o retire el billete y reinicie el aparato. - Page 23 [ FR] Introduction Chère cliente, cher client, Merci d’avoir choisi un détecteur de faux billets de la gamme Smart Protect de ratiotec. Nos appareils com- pacts vous garantissent une vérification rapide et sûre des billets. Utilisation Smart Protect Témoin LED 2.
-
Page 24: Allumer Et Éteindre L'appareil
Smart Protect : Pour mettre l’appareil en marche, maintenez la touche marche/arrêt enfoncée pendant deux secondes. Smart Protect Plus : Pour mettre l’appareil en marche, maintenez la touche marche/arrêt enfoncée pendant deux secondes. Le témoin LED s’allume alors. L'appareil est désormais prêt à être utilisé. - Page 25 Les diff érents codes d’erreur se composent comme suit : Combinaison E+numéro. Remarque : Si le son est désactivé dans le menu du Smart Protect Plus, aucun signal sonore n’est émis. Détection et suppression de rapport - Seulement pour le Smart Protect Plus en mode addition Une fois la détection terminée, appuyez sur les touche fleche pour...
-
Page 26: Mise À Jour Du Logiciel
4. Une fois l’actualisation effectuée avec succès, un signal sonore retentit deux fois et l’appareil s’éteint automatiquement. Mise à jour du logiciel Smart Protect Plus avec carte micro SD Insérez la carte micro SD dans le logement de la carte micro SD à l’arrière de l’appareil. -
Page 27: Messages D'erreur
[ FR] Messages d'erreur Si un message d’erreur s’affiche dans la fenêtre d’affichage, cela est généralement du au fait que le capteur est bloqué par des billets ou par de la poussière. Utilisez une brosse ou un chiffon doux pour enlever le poussière du capteur ou enlevez les billets, et redémarrez l’appareil. - Page 28 [DE] Rücksendeinformation Ihre Zufriedenheit steht bei uns an erster Stelle. Sollten Sie ein technisches Problem mit Ihrem ratiotec Gerät haben oder benötigt Ihr Gerät eine Wartung, beachten Sie bitte folgenden Ablauf für Ihre Rücksendung, damit eine schnelle Bearbeitung erfolgen kann.
-
Page 29: Return Information
[ EN] Return Information Your satisfaction is a priority for us. If you have a technical problem with your ratiotec device or your device requires maintenance, please regard the following procedure for the return of your device to ensure a quick processing. - Page 30 Gerät zur Entsorgung an uns zurückzusenden: ratiotec GmbH & Co. KG, Max-Keith-Str. 66, 45136 Essen, Deutschland -EN- This equipment is marked with the above recycling symbol. It means that at the end of the life of the equipment you must dispose of it separately and not place it in the normal domestic unsorted waste stream.
- Page 31 Notes...
- Page 32 User manual Smart Protect | Smart Protect Plus Bedienungsanleitung Smart Protect | Smart Protect Plus ratiotec Italia S.r.L. ratiotec GmbH & Co. KG Località Bessiche 76|B Max-Keith-Str. 66 | 45136 Essen Zona Industriale T: +49 (0) 201/361 49 – 0 15070 Tagliolo Monferrato (AL) F: +49 (0) 201/361 49 –...
Need help?
Do you have a question about the Smart Protect and is the answer not in the manual?
Questions and answers