Table of Contents
Advertisement
Advertisement
Table of Contents

Summary of Contents for System76 Thelio
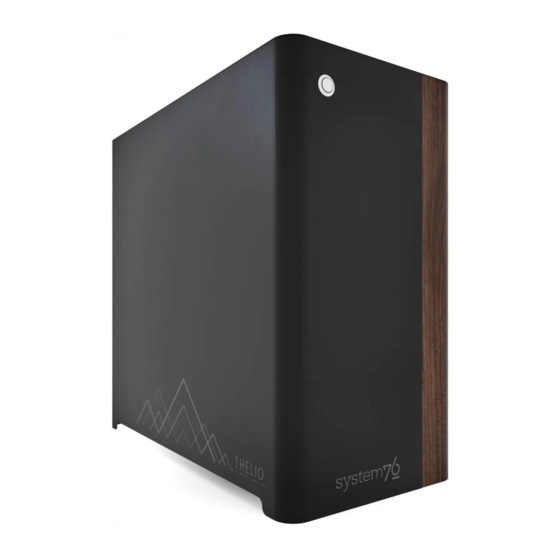
- Page 1 System76 Thelio (thelio-b1) Service Manual ...
- Page 2 Remarks Alex Gerber 2019-03-01 Initial First Outline/Draft Aaron Honeycutt 2020-01-07 2nd Draft Expansion/Revision Nathaniel 2020-01-07 2nd Draft Expansion/Revision Warburton /Photography Thomas 2020-01-07 2nd Draft Teardown/ Modeling/Consultation/ Zimmerman Proofreading Jacob Kauffmann 2020-01-23 2nd Draft Proofreading/Editing System76 Thelio (thelio-b1)
-
Page 3: Table Of Contents
Contents Thelio B1 BIOS Overview: ● BIOS ○ M.I.T. ○ System ○ BIOS ○ Peripherals ○ Chipset ○ Power ○ Save & Exit Thelio B1 Hardware Overview: ● External Overview ○ Ports Overview ○ Power Switch Connections Overview ● Internal Overview ○... -
Page 4: Bios
BIOS Hardware Keyboard Shortcuts: F12 : Boot Menu : System Information ESC : BIOS END : Q-Flash M.I.T. Fig. 1: T he M.I.T. page allows tweaking the frequency of some system components. System76 Thelio (thelio-b1) -
Page 5: System
System Fig. 2: S ystem summary in BIOS. System76 Thelio (thelio-b1) -
Page 6: Bios
BIOS Fig. 3: B IOS boot summary. System76 Thelio (thelio-b1) -
Page 7: Peripherals
Peripherals Fig. 4: B IOS section for Peripheral setup. Chipset Fig. 5: C hipset information in Thelio BIOS. System76 Thelio (thelio-b1) -
Page 8: Power
Power Fig. 6: P ower Management settings. Save & Exit Fig. 7: E xit the BIOS saving changes to settings. System76 Thelio (thelio-b1) -
Page 9: External Overview
1 Standard 3-prong AC wall adapter port connected to the power supply (with power switch). As well as an additional expansion port available via the PCI slot on the board. Fig. 8: E xternal Thelio Ports Overview. System76 Thelio (thelio-b1) - Page 10 Removing the lid will give you easy access to all components inside. To remove the lid, you’ll need to unscrew the 4 thumbscrews from the back of the Thelio. These thumbscrews will be on the top left and right, and bottom left and right of the back of the case.
- Page 11 This guide explains how to easily replace the Thelio’s Top Case after performing maintenance. 1. Align the grooves inside the case with the front of the Thelio frame (the side where the power-button is located). 2. Once aligned, the case should easily slide down over the chassis. ...
- Page 12 Fig. 11: A ligning the Thelio Top Case for replacing (left, top and bottom). Detailed view of Thelio internal switch (right, top and bottom). System76 Thelio (thelio-b1)
-
Page 13: Internal Overview
Internal Overview Power Switch Connections Overview The Thelio power button is wired as in the diagram and photo. Fig. 12: C lose up of Thelio power switch wiring (left). Thelio power switch Wiring Diagram (right). System76 Thelio (thelio-b1) -
Page 14: Thelio Io Board
Both are connected with the solid plastic side facing the edge. This is the pinout: Button LED+ LED- BTN+ BTN- Board LED+ LED- BTN+ BTN- Fig. 14: Power Button and Motherboard power connectors attached to Thelio IO board. System76 Thelio (thelio-b1) - Page 15 Fig. 15: Thelio internal power switch (underside of the Thelio IO board). The Thelio IO power button can be used to power on the Thelio when the top case is removed. The button is located on the underside of the Thelio IO Board (Fig. 15, above).
- Page 16 Fig. 17: T helio external display ports overview. If your Thelio does not have a GPU, then connect external monitors to the ports at the top, which are connected directly to the motherboard. If the Thelio has a GPU installed, then the top video out ports are disabled automatically.
-
Page 17: Shroud (Remove Or Replace)
3. Slide the Cooler Shroud horizontally off of the CPU Cooling fan, and set aside. 4. You are now free to perform work on the CPU Cooler fan, or access other components that may have been obstructed by the shroud. System76 Thelio (thelio-b1) -
Page 18: Replacing The Shroud
Time estimate: 2 minutes Difficulty: E asy Screws: 4 total 4 Thumbscrews (Phillips/Crosshead). Fig. 19: CPU Cooler with Shroud removed side view (left) and top (right). Fig. 20: R eplacing the CPU Cooler Shroud and thumbscrews. System76 Thelio (thelio-b1) -
Page 19: Ram (Remove Or Replace)
Screws: 4 total 4 Thumbscrews (Phillips/Crosshead). This guide covers how to upgrade or replace your memory sticks, or RAM in your Thelio. B efore you remove the lid, be sure to power off and unplug all cords from the computer. - Page 20 Difficulty: E asy Screws: 4 total 4 Thumbscrews (Phillips/Crosshead). Fig. 22: I ndicating the RAM notch on the motherboard (left), and on the RAM stick (middle). Pressing the RAM stick down into place (right). System76 Thelio (thelio-b1)
-
Page 21: Removing The Ram
6. Reconnect external devices: keyboard, mouse, monitor(s). 7. Reconnect external power cable and turn power-supply switch to the on position. 8. Power the Thelio on to ensure the RAM is working correctly. If so, the computer will boot normally. GPU (Remove or replace) Removing the GPU GPU Removal is a multistep process, but it is not complicated. - Page 22 8. If you are not planning on installing another GPU follow the steps to R eplace the CPU Cooler Shroud , R eplace the Top Case , and reconnect all cables and peripherals. Fig. 23: Removing the thumbscrews and GPU Bracket. System76 Thelio (thelio-b1)
-
Page 23: Replacing The Ram
Screws: 8 total 8 Thumbscrews (Phillips/Crosshead). If you have not yet completed the steps to remove the PCI bracket and GPU brace, you will find these instructions in the section on R emoving the GPU System76 Thelio (thelio-b1) - Page 24 Fig. 26: Thelio internal context view of PCIe slot. Fig. 27: Close up view of the PCIe slot. 1. After removing the GPU (Or, if no GPU is installed, removing the bracket, insert the new graphics card into the PCIe lane slot until it clicks into place.
- Page 25 GPU. The necessary cabling is provided inside your Thelio’s chassis. 5. Do not connect the cables to the GPU until it has been inserted in the PCIe slot and secured with the brackets.
-
Page 26: Drives (Remove Or Replace)
NOTE: Some GPU's use the PCI-e slot for power and don't need a cable. If your Thelio is configured with a Radeon RX 550 graphics card, for example, you will not find any power connectors in your GPU. The cards compatible with this Thelio model require 8-pin, 12 pin or 16-pin power cable connections. - Page 27 Removing a 2.5” is simple. A cross-head (Phillips) screwdriver may be helpful. Tools required: F ingers or Cross-head (Phillips) screwdriver. Time estimate: 5 minutes. Difficulty: E asy Screws: 4 total 4 Thumbscrews (Phillips/Crosshead) in the Top Case 4 Thumbscrews (Phillips/Crosshead) per Drive. System76 Thelio (thelio-b1)
- Page 28 Replace the Top Case a nd reconnect all cables. Fig. 31: (above and below-right) Sequence of shots showing the removal and/or replacement of 2.5” drives in the Thelio drive cage. Removing an M.2 Drive Removing an M.2 drive is simple, but may require removal of the GPU or CPU Cooler Shroud for ...
-
Page 29: Replacing A 2.5" Drive
Fig. 32: T helio’s rear M.2 drive slot and rear case (left), close up view (right). 11. Follow the steps to R emove the Top Case Remove the CPU Cooler Shroud (if applicable). Remove the GPU (if applicable). 14. Unscrew the M.2 screw opposite the M.2 slot. Set it safely aside. System76 Thelio (thelio-b1) -
Page 30: Cpu Thermal Paste (Remove Or Replace)
CPU Thermal Paste (Remove or Replace) If you are experiencing thermal issues with your Thelio, one possible solution would be to change the Thermal paste. Thermal paste helps transfer heat from the CPU to the CPU Cooler via the heat sink. - Page 31 15. Follow the steps to R eplace the Top Case NOTE: DO NOT use your Thelio without thermal paste. Steps 11-12 above are there simply to help you reassemble your machine if you are not yet ready to apply new Thermal Paste.
- Page 32 Fig. 33: Removing the CPU Cooler Fan from the Heat Sink. Fig. 34: Loosening/Removing screws on opposite corners. System76 Thelio (thelio-b1)
- Page 33 Fig. 35: Lifting the Heat Sink free (left). The bottom of the heat sink covered in old Thermal Paste. Fig. 36: Cleaning old thermal paste of the bottom of the Heat Sink (left), and off the CPU core (right). System76 Thelio (thelio-b1)
- Page 34 8. Next, follow the steps in Replacing the CPU Cooler Shroud. 9. Follow the steps in Replacing the Top Case. 10. Reconnect all external cables and peripherals, and turn the Power Supply switch to the “on” position. 11. Power on the Thelio to ensure successful boot. System76 Thelio (thelio-b1)
-
Page 35: Specifications
Dual 27” 2560x1440 Matte Pro IPS displays Memory Dual Channel D DR4 Two 288 Pin DIMM Sockets Supporting D DR4 2666 MHz Memory Modules (real operational frequency depends on the FSB of the processor) System76 Thelio (thelio-b1) - Page 36 / PCIe Gen 3*4 Interface (M Key) SATA Slots Four SATA drive Slots for 2.5” SATA drives Network Built-In 10/100/1000Mb Base-TX Ethernet LAN Intel® CNVi 802.11ac Wave2 2T2R WIFI Intel Windstorm Peak 8265NGW 2x2 11ac & BT4.2 System76 Thelio (thelio-b1)
- Page 37 Component Specification Power 500W 80+ Certified Optional: 650W 80+ Certified Operating System Ubuntu / Pop!_OS System76 Thelio (thelio-b1)
Need help?
Do you have a question about the Thelio and is the answer not in the manual?
Questions and answers