Advertisement
Advertisement
Table of Contents

Subscribe to Our Youtube Channel
Related Manuals for Dragon Touch K4W10

Summary of Contents for Dragon Touch K4W10
- Page 1 USER MANUAL Dragon Touch K4W10 HD NVR KIT v1.0...
-
Page 2: Table Of Contents
CONTENTS What's in the Box Introduction Specifications Installation and Connections Menu Operation Legal Disclaimer Regulatory Information EU Conformity Statement Safety Instructions Preventive and Cautionary Tips Contact Us... -
Page 3: What's In The Box
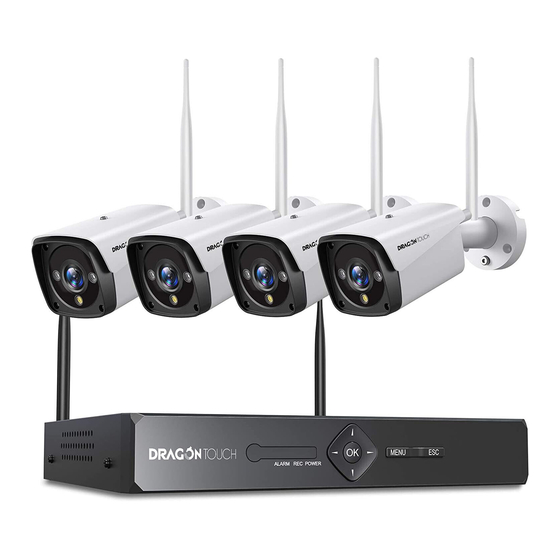
WHAT'S IN THE BOX NVR × 1 Security Camera × 4 Mouse × 1 Antenna Extension Power Adapter × 5 Network Cable × 1 Cable × 1 Quick Start Guide Dragon Touch K4W10 HD NVR KIT V1.0 Quick Start Guide × 1... -
Page 4: Introduction
INTRODUCTION 1. NVR Front Panel Antenna Alarm Indicator Power Indicator Menu OK Button REC Indicator 2. Rear Panel Antenna Port Audio-Out HDMI Antenna Port RJ45... -
Page 5: Specifications
SPECIFICATIONS 1. NVR (Network Video Recorder) Type 3MP Wireless NVR NVR Chip HISILICON chip Video Input 8 channels Audio Compression G.711 Video Compression H.265/H.264 Operating System Embedded LINUX Manual/Motion Detection/Schedule/Alarm/ Recording Mode Human Recognition Supports 8-channel 720P/960P/1080P Sync Playback synchronous playback Playback Speed 1/4, 1/2, 2X, 4X Storage &... -
Page 6: Installation And Connections
2. Camera Image Sensor: HISILICON 3MP image sensor Video Compression: H.265/H.264 Recording Mode: Manual/Motion Detection/Schedule/Alarm/Human Recognition Input: DC 12V Antenna: Built-in professional enhanced wireless reception INSTALLATION AND CONNECTIONS 1. Installation Connect to Connect the Connect the Connect the Connect the NVR and power router monitor... - Page 7 Correct method Incorrect method 2. Hard Disk Installation The NVR system requires a 3.5" or 2.5" SATA internal hard drive or mobile hard disk drive for video recording. Without installing a hard drive, the system can display real-time video, but cannot record or play back video footage. The system supports a hard drive of up to 8TB.
- Page 8 ③ Connect the data wire ④ Connect the power wire ⑤ Secure the screws of the hard drive ⑥ Put the cover back, and secure the screws of the cover Note: • Please power off the NVR before you install the hard drive. •...
-
Page 9: Menu Operation
MENU OPERATION 1. Startup Wizard After booting up the NVR, the Startup Wizard will be displayed on the screen. If you don't want to see the Startup Wizard next time, you can check and enable "No more hints", then click [Next]. 2. - Page 10 3. Safety Question Set a safety question to reset the NVR password if you forget it, then click [Next]. [Question]: Select a security question. [Answer]: Enter the answer. [Way to receive verification code]: Supports monitor APP or email.
- Page 11 4. Time-Language Configuration Enter Startup Wizard and click [Next] to go to this interface. [Time Zone]: Set and select the time zone. [System Time]: Set the system date and time. [Date Format]: Choose the date format: YMD, MDY or DMY. [Date Separator]: Choose the separator of the date format.
- Page 12 [NETIP]: Select network protocol. [Search]: Search IP cameras in the same LAN. [Add]: Add a camera to the list. [Quick set]: System auto search and add cameras. [Delete]: Delete an IP camera in the same LAN. [Clear]: Delete all added cameras. [Encode]: Pair a camera in the same LAN.
- Page 13 6. Install the Mobile App [Serial Number]: Scan the QR code to add a device to the app. [APP]: Scan the QR code to download the HOMEVIZ app, which is available on the App Store and Google Play (for Android and iOS mobile phones). 7.
- Page 14 8. Access by Mobile Phone For Android Devices 1) Install the HOMEVIZ app for free from Google Play. Tap the app icon to open the app. 2) Tap [Register] to create a new account, then log in by inputting the user name and password.
- Page 15 5) Tap OK to add your device to the app. 6) Whenever you open the HOMEVIZ app, Device List the Device List window will pop up first. 30b70c42c6583362 From here, you can access video from Online all connected cameras. Just tap the Online Online device you want to view.
- Page 16 Step 2: On your friends' mobile phone, open the app, tap [ ] and scan the QR code that you sent. Scan QR code Device List 30b70c42c6583362 Online Please scan the QE code in the desktop system of Online the video recorder device To add or reuieve the password , or add other Online devices, please tap...
- Page 17 [Channel]: Select the corresponding channel number to set the channel. [Redundancy]: Click and check this option to double backup the file. If your system supports the installation of two hard drives, every video file will be duplicated to be saved on each. Make sure that two hard disks are installed. One is the read-write disk and the other is the redundant disk.
- Page 18 11. Playback There are two methods for playing back video files on the hard drive. ① Right-click the mouse and select [Playback] in the menu list. ② Enter [Main Menu] → [Main Menu] → [Playback]. Playback mode includes Common Playback, Sync Playback, Dayparting, Smart Express and Smart Search.
- Page 19 [Common Playback]: In Common Playback mode, you can select the channel, period and date. [Sync Playback]: Play back multiple channels of video at the same time.
- Page 20 [Dayparting]: Play back multiple videos of the same channel at the same time. [Smart Express]: Intelligently fast forward the specified file type.
- Page 21 [Smart Search]: Intelligently play back the specified file type. 11. Alarm Settings Go to the NVR's [Main Menu] → [Alarm] to enter the Alarm interface. Alarm functions include Intelligent Alert, Abnormality and Traditional Alarm.
- Page 22 13. Intelligent Alert ① Go to the NVR's [Main Menu] → [Main Menu] → [Record] → [Record Configuration] and check [Detect]. ② Go to the NVR's [Main Menu] → [Alarm] → [Intelligent Alert] to enter the Intelligent Alert interface. The human body motion detection function is enabled by default.
- Page 23 [Smart Alert]: If the preview image is in black and white, human motion detected in the camera's field of view will trigger a human detection alarm and an alarm sound will be heard, the infrared light will go out and the white light will illuminate, and the preview image will switch to a color image.
- Page 24 15. Email Settings ① Make sure your NVR is successfully connected to the router and Internet. You can go to the NVR's [Main Menu] → [Advanced] → [Version] to confirm that [Nat status] shows "Connected". ② Go to the NVR's [Main Menu] → [Alarm] → [Intelligent Alert] to click [Set] and check [Send Email].
- Page 25 ③ Go to the NVR's [Main Menu] → [Main Menu] [Network] → [Net Service] → [EMAIL] to enter the Email Settings interface, then double-click [EMAIL]. ④ Login to your Gmail mailbox on the website and enter https://myaccount.google.com/security?pli=1#connectedapps. Allow less secure apps: ON Some apps and devices use less secure sign-in technology, which could leave your account vulnerable.
- Page 26 ⑤ Please check [Enable] and select ''TLS" in the [Encryption] option, then input the information as required. For example, [SMTP Server] is [smtp.gmail.com] (you must enable [Less secure on] on the web page), [Port] is [587], [User Name] and [Sender] are your Gmail account details, [Password] is your Gmail account password and [Receiver] can be any email.
- Page 27 16. Video Blind ① Go to the NVR's [Main Menu] → [Record] → [Record Configuration] to check [Detect]. ② Go to the NVR's [Main Menu] → [Alarm] → [Traditional Alarm] → [Video Blind] to enter the Video Blind interface. Check [Enable] and select [Channel], [Sensitivity], [Period], [Record Channel], [Snapshot], [Send Email] or [Mobile reported] according to your needs, then click [OK] to save.
- Page 28 18. Abnormality ① Go to the NVR's [Main Menu] → [Record] → [Record Configuration] to check [Alarm]. ② Go to the NVR's [Main Menu] → [Alarm] → [Abnormality] to enter the Abnormality interface. Click and select [Event Type] (No Storage/Storage Device Error/Storage No Device/Net Disconnection/IP Conflict can be selected), [Enable], [Show Message], [Mobile Reported] or [Send Email] according to your needs, then click [OK] to save.
- Page 29 19. Network Settings Go to the NVR's [Main Menu] → [Main Menu] → [Network] and check [DHCP Enable]. You will then receive an IP Address as shown in the figure below. Note: Ensure that you have a router and high-speed network connection. Connect your NVR to the router by using the Ethernet cable.
- Page 30 Go to the NVR's [Main Menu] → [Main Menu] → [Network] → [Wireless Channels] to check the NVR's wireless channels, including region and channel options. The NVR has been set completely before leaving the factory. Please contact technical support before resetting. 20.
-
Page 31: Legal Disclaimer
[Type]: Select the corresponding type ([All], [Alarm], [MD], [Alarm/MD], [Manual] and [General]) to back up. [Channel]: Select the corresponding channel to back up. [Start Time]: Select time to start backup. [End Time]: Select time to end backup. Click [OK] when you receive the message [Backup finished], then you can remove the USB drive. -
Page 32: Eu Conformity Statement
Caution: Changes or modifications not expressly approved by the party responsible for compliance could void the user's authority to operate the equipment. Note: This equipment has been tested and found to comply with the limits for a Class A digital device, pursuant to part 15 of the FCC Rules. These limits are designed to provide reasonable protection against harmful interference when the equipment is operated in a commercial environment. -
Page 33: Safety Instructions
SAFETY INSTRUCTIONS These instructions are intended to ensure that users can use the product correctly and avoid danger and property loss. The precaution measures are divided into [Warnings] and [Cautions]. Warnings: Serious injury or death may occur if any of the warnings are neglected. Cautions: Injury or equipment damage may occur if any of the cautions are neglected. -
Page 34: Preventive And Cautionary Tips
Replace with the same or equivalent type battery only. Dispose of used batteries according to the instructions provided by the battery manufacturer. CONTACT US For any inquiries about Dragon Touch products, please feel free to contact us. We will respond within 24 hours. Email: cs@dragontouch.com Tel: 888-811-1140 (US) Mon-Fri (except holidays) 9am-5pm (EST) Official website: www.dragontouch.com...
Need help?
Do you have a question about the K4W10 and is the answer not in the manual?
Questions and answers