Table of Contents
Advertisement
Quick Links
Advertisement
Table of Contents
Troubleshooting

Related Manuals for Nanometrics Trillium Compact

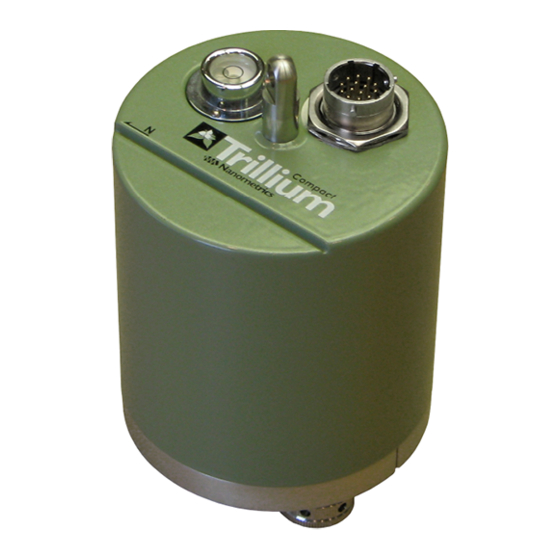
Summary of Contents for Nanometrics Trillium Compact
- Page 1 Trillium Compact User Guide Kanata, Ontario • Canada...
- Page 2 17656-20 The information in this document has been carefully reviewed and is believed to be reliable. Nanometrics Inc. reserves the right to make changes at any time without notice to improve the reliability and function of the product. No part of this publication may be reproduced, stored in a retrieval system or transmitted, in any form or by any means, electronic, mechanical, photocopying, recording, or otherwise, without the prior written permission of Nanometrics Inc.
-
Page 3: About This Document
Added the case tilt reporting feature to Section 7.2 “State-of-Health” on page 37 in Chapter 7 “Using the Web Interface”. The case tilt feature applies to all Trillium Compact models with serial numbers 2500 and above. Trillium Compact User Guide 16889R5 2014-03-04 ... -
Page 4: Table Of Contents
About Trillium Compact Seismometers ........ - Page 5 Selecting the Trillium Compact Configuration for a Nanometrics Instrument ..30 Using a Trident Digitizer with a Trillium Compact ......31 Increasing System Sensitivity.
- Page 6 Connector and Cables 10.1 14-Pin Trillium Compact Connector and Cables ......51 10.1.1 Pinout for 14-Pin Trillium Compact Connector ......51 10.1.2...
- Page 7 About Nanometrics ........
- Page 8 Calibration circuit parameters for 120 s and 20 s models ....48 10-1 Pinout for 14-pin Trillium Compact connector......51 10-2 Cable 16777 –...
- Page 9 Trillium Compact axis orientation ........
-
Page 10: Part 1 Installation
Part 1 Installation Getting Started Performing a Posthole Installation Performing a Surface Vault Installation Trillium Compact User Guide 16889R5 2014-03-04 ... -
Page 11: Chapter 1 Getting Started
• Ease of deployment through no mass lock, no mass centering and wide tilt range • Integrated web server for efficient instrument management Trillium Compact seismometers are available with 20 s or 120 s low corner period. The 20 s variants have a wide operational tilt range of ±10° and are suitable for downhole installations where the seismometer cannot be levelled, or for rapid deployments where a quick settling time is needed. - Page 12 For some studies, it may be preferable to use UVW mode instead of XYZ mode for recording seismic data. Trillium Compact is available in several variants to facilitate vault, surface, or buried downhole deployments: Model TC120-SV1 A surface vault seismometer in an aluminum enclosure with a •...
-
Page 13: Unpacking And Handling A Trillium Compact
Contacting Nanometrics on page 81). After delivering a Trillium Compact to its installation site, you can safely remove it from the packaging or carrying case and handle it without any special precautions other than taking care not to drop it or bang it against hard surfaces. Trillium Compact seismometers do not require any mass lock mechanisms or mass centring. - Page 14 Cable – Serial 16978–2M A cable that provides serial communications and power to communications the Trillium Compact. The cable has a Trillium Compact and power cable, connector on one end and splits into two 2 m lengths. One molded end of the cable split has a DB-9 serial connector that connects to the serial port of a computer, and the other end has a two-prong banana plug for power.
- Page 15 Cable – Serial 16978–2M A cable that provides serial communications and power to communications the Trillium Compact. The cable has a Trillium Compact and power cable, connector on one end and splits into two 2 m lengths. One molded end of the cable split has a DB-9 serial connector that connects to the serial port of a computer, and the other end has a two-prong banana plug for power.
- Page 16 A robust IP68 rated cable with a polyurethane jacket that is Compact Posthole suitable for buried deployments. The cable has a 14-pin 17769-3M Cable Waterproof Trillium Compact connector on one end and the connector 17769-5M Shroud to for a Nanometrics digitizer on the other end. Ideal for Nanometrics...
-
Page 17: Technical Support And Maintenance
1.5.1 Recording Your Serial Number and IP Address Before installing your Trillium Compact, it is important to record both the serial number and the IP address of the unit. Both numbers are provided on the unit label. -
Page 18: Site Record
________________ January 1 to March 31 __________ Trees ________Height (m) __________ Dwellings ________________ April 1 to June 30 __________ Industrial site __________ Others (describe): ________________ July 1 to September 30 ________________ October 1 to December 31 Notes: Trillium Compact User Guide 16889R5 2014-03-04 ... -
Page 19: Chapter 2 Performing A Posthole Installation
A Trillium Compact Posthole seismometer may be installed in an uncased or cased hole. Units will self-level as long as the Trillium Compact Posthole is within ±2.5° for the 120 s model or ±10° for the 20 s model of vertical, making site preparation simple. -
Page 20: Aligning A Trillium Compact Posthole To North
The recommended practices for aligning a Trillium Compact Posthole vary based on the depth of the hole where the unit is installed. (1) For recommendations on aligning a Trillium Compact Posthole in a shallow hole of 2 m or less, see 2.2.1 “Using a Surface Line”... -
Page 21: Using A Surface Seismometer
You can use a seismometer installed at the surface to determine the orientation of the horizontal (X and Y) components of the Trillium Compact Posthole once installed in the hole. This method involves comparing the recorded output of both seismometers and computing the relative direction of seismic wave motion to determine the relative azimuth of the down-hole Trillium Compact Posthole compared to the surface seismometer. -
Page 22: Troubleshooting Your Installation
2.3 Troubleshooting Your Installation It is normal to see spikes in the horizontal channels of a Trillium Compact as the seismometer settles after installation. However, if these spikes do not diminish after a few days, there may be a problem with the installation and the site should be visited to determine the cause of the spikes. -
Page 23: Chapter 3 Performing A Surface Vault Installation
Chapter 3 Performing a Surface Vault Installation (1) The contents of this chapter are applicable to Trillium Compact, model numbers TC120-SV1 and TC20-SV1, TC120-PH1, and TC20-PH1. (2) For model numbers TC120-PH1 and TC20-PH1, the optional bubble level will be required and the optional adjustable locking feet kit may be required when performing a surface vault installation. -
Page 24: Choosing The Right Concrete
Insulate the seismometer to protect it from drafts and temperature change. To achieve optimal insulation of the seismometer, the following optional equipment is recommended: a Carrying Case / Insulating Cover (Nanometrics part number 16862). In addition, if you are 1. Bob Uhrhammer and Bill Karavas, Guidelines for Installing Broadband Seismic Instrumentation (Berkeley: The Regents of the University of California, 1997), http://seismo.berkeley.edu/bdsn/instrumentation/guidelines.html. -
Page 25: Temporary Installations On Rock
(Nanometrics part number 16863) and a Carrying Case / Insulating Cover (Nanometrics part number 16862). In addition, if you are installing model number TC120-PH1 or TC20-PH1 as a surface vault seismometer, you will also need the optional levelling bubble (Nanometrics part number MSC0225). -
Page 26: Alignment, Levelling, And Placement Features
(at or very close to zero). 3.4 Alignment, Levelling, and Placement Features To aid in the proper alignment of your seismometer, each Trillium Compact has: Vertically-scribed marks on the north-south axis. A north-south guide on the top of the case. -
Page 27: Example Of Seismometer Alignment Using Vertically Scribed Marks
Performing a Surface Vault Installation Figure 3-1 shows the north scribe line on a Trillium Compact aligned with a line drawn on the installation surface that is parallel to north-south. Figure 3-1 Example of seismometer alignment using vertically scribed marks... -
Page 28: Best Practices For Alignment And Levelling
TC120-PH1 and TC20-PH1 (stainless steel enclosure). 3.5 Best Practices for Alignment and Levelling Following are best practices for aligning and levelling a Trillium Compact using the vertically scribed marks on the north-south axis or the north-south guide on the top of the case: ... -
Page 29: Theory And Practice Of Insulation
When the Trillium Compact is level, lock the feet by rotating each locking nut tightly against the seismometer base, while preventing the foot from turning. Insert an Allen key into one of the holes in the locking nut to act as a lever and help tighten the locking nut. - Page 30 For seismometers that are well temperature-compensated, such as the Trillium Compact, but are improperly installed, thermally induced tilt on the horizontal channels will be more significant than direct thermal sensitivity on the vertical channel. Furthermore, due to the natural convection of air, thermally induced tilt is even observable in sealed underground vaults where the temperature is very stable.
-
Page 31: Insulation Options
Trillium Compact without touching any part of the seismometer or the cable. When fitted over a Trillium Compact, the cover creates a small air gap between itself and the seismometer. This gap reduces the potential for noise by preventing the cover or other objects from exerting force on the seismometer;... -
Page 32: Insulating With A Rigid Foam Box
“Best Practices for Alignment and Levelling” on page 19). If you are burying the Trillium Compact and its insulating cover, pull all of the foam out of the cover. Retain these pieces of foam for future installations and transport. See Section 3.4 “Alignment, Levelling, and Placement Features”... -
Page 33: Cut-Away Illustration Of A Trillium Compact In The Insulating Cover
Ensure that the insulating cover is centred on the centreline of the Trillium Compact 7. Gradually lower the insulating cover over the Trillium Compact, ensuring that the insulating cover does not touch the seismometer. Ensuring the cover does not touch the seismometer is important for keeping the seismometer level and aligned. -
Page 34: Troubleshooting Your Installation
3.9 Troubleshooting Your Installation It is normal to see spikes in the horizontal channels of a Trillium Compact as the seismometer settles after installation. However, if these spikes do not diminish after a few days, there may be a problem with the installation and the site should be visited to determine the cause of the spikes. -
Page 35: Part 2 Operation
Part 2 Operation Input and Output Signals Configuring Your System Configuring Serial Communications Using the Web Interface Trillium Compact User Guide 16889R5 2014-03-04 ... -
Page 36: Chapter 4 Input And Output Signals
Input and Output Signals 4.1 UVW and XYZ Output Signals The Trillium Compact can be configured to output either XYZ or UVW signals. The “natural” output is UVW where the outputs represent the actual motion of the three sensor component masses. The “conventional” seismometer output is XYZ where the outputs represent horizontal and vertical motion. -
Page 37: Serial Rs-232 Communications
4.3 Digital Control Input Signals A Trillium Compact has two digital control input signals: UVW and CTRL. UVW changes the output mode (which is XYZ by default) to UVW mode. By default, CTRL enables the calibration function. You can reconfigure the CTRL control line to activate short period mode (the default is long period mode) instead. -
Page 38: Calibration Input Signal
±4 V, with an optimal output of 0 V. A maximum mass position output signal greater than ±3.5 V indicates that the Trillium Compact is no longer sufficiently level and may not be providing useful seismic signals. Should this occur, visit the installation site as soon as possible to level the unit. -
Page 39: Chapter 5 Configuring Your System
5.1 Selecting the Trillium Compact Configuration for a Nanometrics Instrument The method for selecting the default Trillium Compact configuration on a Nanometrics instrument varies by instrument. For instance, current generation Nanometrics instruments feature an on-board sensor library that contains the default configurations for all Nanometrics sensors;... -
Page 40: Using A Trident Digitizer With A Trillium Compact
Trident 305 user guide and the user guide for the NMXbus device for configuration details. Following are instructions for configuring your Trident and NaqsServer to work with a Trillium Compact seismometer. 1. Match the settings on the Configuration tab of Nanometrics UI to those in the following table. Nanometrics UI Configuration Tab... -
Page 41: Increasing System Sensitivity
Increasing the sensitivity of a digitizer by decreasing the input range below the 40 Vpp output range of the Trillium Compact can cause the digitizer to clip during the strong events. Table 5-2 Increasing system sensitivity Digitizer Input... -
Page 42: Chapter 6 Configuring Serial Communications
Configuring Serial Communications 6.1 About Serial Communications The Trillium Compact has an integrated Web server that is accessible using a standard Web browser and the RS-232 serial interface. You can create a direct serial connection to a computer using a serial communications cable (see Section 6.2 “Establishing a Direct Serial... -
Page 43: Establishing A Direct Serial Connection
For example, if the IP address of the Trillium Compact is 2.23.1.200, then the URL to access the home page of the instrument is http://2.23.1.200. The IP address of the unit is provided on the label of your Trillium Compact. If you cannot find the IP address, see Section 6.4 “Calculating the IP Address”... -
Page 44: Creating A Slip Connection On A Windows 7 Computer
Chapter 6 Configuring Serial Communications 8. Select the communications port where the Trillium Compact is attached and click Next. 9. Click Anyone’s use and click Next. 10. Click Finish. 11. Open the properties for the new connection. 12. Click the General tab and click Configure. -
Page 45: Connecting Through A Nanometrics Digitizer
Trillium Compact Web interface through these instruments. 6.4 Calculating the IP Address The IP address of your Trillium Compact is 2.23.x.y, where x and y are calculated from the serial number of the unit. You will need the IP address when configuring your SLIP connection (see Section 6.2.1 “Creating a SLIP Connection on a Windows XP Computer”... -
Page 46: Chapter 7 Using The Web Interface
Ensure that the proxy server is disabled when using a Web browser with a Trillium Compact. The home page of the Trillium Compact presents links to other pages. The following sections describe these pages: Section 7.2 “State-of-Health”... -
Page 47: Seismometer Control
The approximate unit temperature in degrees Celsius and Fahrenheit. Case tilt Displays the tilt of the case from vertical in degrees. The case tilt feature applies to all Trillium Compact models with serial numbers 2500 and above. 7.3 Seismometer Control The Seismometer Control page allows you to enable or disable calibration, change the XYZ/UVW output mode, and change the long/short period mode. -
Page 48: Sensor Response
Nanometrics. When restarting the unit from the Firmware page, a message stating “Goodbye” appears. To access the home page of the Trillium Compact after it restarts, wait 20 s and return to the home page using the IP address. -
Page 49: Part 3 Reference
Transfer Function and Noise Floor Connector and Cables Physical Features and Dimensions Carrying Case Cable Waterproof Shroud Levelling Cradle and Spike Kit Free Software Information Glossary Trillium Compact User Guide 16889R5 2014-03-04 ... -
Page 50: Chapter 8 Specifications
26 mm/s from 0.1 Hz to 10 Hz Tilt 120 s models Dynamic and operational tilt range of ±2.5° 20 s models Dynamic and operational tilt range of ±10° Parasitic resonances None below 200 Hz Trillium Compact User Guide 16889R5 2014-03-04 ... -
Page 51: Hardware Interface
Firmware updates State-of-health request Upload user calibration data Data outputs Independent mass position values Instrument temperature Factory sensitivity and sensor response data User calibration data (poles and zeros) Instrument serial number and firmware revision Trillium Compact User Guide 16889R5 2014-03-04 ... -
Page 52: Power
Optional bubble level Optional tripod deployment cradle for rapid levelling Alignment Vertical scribe marks for north-south Case-top north-south guide for straight-edge, line, or laser level Weather resistance Rated to IP68 for full submersion Trillium Compact User Guide 16889R5 2014-03-04 ... -
Page 53: Environmental
Storage temperature – 65°C to 75°C Shock 100 g half sine, 5 ms without damage, 6 axes No mass lock required for transport Magnetic Insensitive to natural variations of the earth’s magnetic field Trillium Compact User Guide 16889R5 2014-03-04 ... -
Page 54: Chapter 9 Transfer Function And Noise Floor
9.1 Frequency Response for 120 s and 20 s Models Figure 9-1 is a bode plot that shows the nominal ground motion and combined calibration response for Trillium Compact, 120 s and 20 s models. As illustrated in Figure 9-1, the amplitude response to calibration input signals is nearly identical to that for ground motion. -
Page 55: Ground Motion Response Nominal Parameters For 120 S Models
Zeros -392 rad/s -1960 -1490 ±1740i –0.03691 ±0.03702i –343 -370 ±467i rad/s Poles -836 ±1522i -4900 ±4700i -6900 -15000 Normalization factor 4.34493 x 10 (rad/s) Normalization frequency Ground motion sensitivity at 754.3 V·s/m Trillium Compact User Guide 16889R5 2014-03-04 ... -
Page 56: Ground Motion Response Nominal Parameters For 20 S Models
⋅ ---------------------------- - (EQ 1) ∏ – Where the normalization factor ( ) is defined by ∏ i2πf – (EQ 2) ---------------------------------------- - ∏ i2πf – and is given for informational purposes only. Trillium Compact User Guide 16889R5 2014-03-04 ... -
Page 57: Calibration Circuit Parameters For 120 S And 20 S Models
The calibration sensitivity is not trimmed with the same accuracy as the ground motion sensitivity. The calibration input can be used to verify the frequency response but not the absolute sensitivity. The calibration input sensitivity, combined calibration sensitivity, and input resistance of the available models of Trillium Compact are listed in Table 9-3. -
Page 58: Self-Noise For 120 S Models
9.2 Self-Noise for 120 s Models Figure 9-2 plots typical self-noise for Trillium Compact seismometers. Three curves are included for reference: Peterson’s new low-noise model (NLNM) and new high-noise model (NHNM), and McNamara and Buland’s probability density function (PDF) mode low noise model (MLNM). -
Page 59: Self-Noise For 20 S Models
9.3 Self-Noise for 20 s Models Figure 9-3 plots typical self-noise for Trillium Compact seismometers. Three curves are included for reference: Peterson’s new low-noise model (NLNM) and new high-noise model (NHNM), and McNamara and Buland’s probability density function (PDF) mode low noise model (MLNM). -
Page 60: Chapter 10 Connector And Cables
10.1 14-Pin Trillium Compact Connector and Cables 10.1.1 Pinout for 14-Pin Trillium Compact Connector Trillium Compact model numbers TC120-SV1, TC20-SV1 (surface vault), TC120-PH1, and TC20-PH1 (surface vault or posthole) are equipped with a 14-pin male military circular type hermetic connector. -
Page 61: Cable Pinout - 14-Pin Connector To Nanometrics Digitizer
10.1.2 Cable Pinout – 14-Pin Connector to Nanometrics Digitizer Part number: 16777-nM (where n is the length of the cable in metres) Description: Trillium Compact (models TC120-SV1, TC20-SV1, TC120-PH1, and TC20-PH1) to Nanometrics digitizer, right-angled Trillium Compact connector Table 10-2 Cable 16777 – 14-pin connector to Nanometrics digitizer... -
Page 62: Cable Pinout - 14-Pin Cable Waterproof Shroud To Nanometrics Digitizer
10.1.3 Cable Pinout – 14-pin Cable Waterproof Shroud to Nanometrics Digitizer Part number: 17769-nM (where n is the length of the cable in metres) Description: Trillium Compact (models TC120-PH1 and TC20-PH1) to Nanometrics digitizer Table 10-3 Cable 17769– Cable waterproof shroud to Nanometrics digitizer Nanometrics Digitizer... -
Page 63: Cable Pinout - 14-Pin Connector To Open End
10.1.4 Cable Pinout – 14-Pin Connector to Open End Part number: 16865-nM (where n is the length of the cable in metres) Description: Trillium Compact (models TC120-SV1, TC20-SV1, TC120-PH1, and TC20-PH1) to open end, right-angled Trillium Compact connector Table 10-4 Cable 16865 – 14-pin connector to open end... -
Page 64: Cable Pinout - 14-Pin Connector To Serial Port
10.1.5 Cable Pinout – 14-Pin Connector to Serial Port Part number: 16978-nM (where n is the length of the cable in metres) Description: Trillium Compact (models TC120-SV1, TC20-SV1, TC120-PH1,and TC20-PH1) to serial port and power Table 10-5 Cable 16978 – 14-pin connector to serial port and power... -
Page 65: 16-Pin Trillium Compact Connector And Cables
10.2 16-Pin Trillium Compact Connector and Cables 10.2.1 Pinout for 16-Pin Trillium Compact Connector Trillium Compact model numbers TC120-PH2 and TC20-PH2 (posthole seismometers) are equipped with a 16-pin male neoprene molded waterproof connector. Table 10-6 provides the connector pinout. -
Page 66: Cable Pinout - 16-Pin Connector To Nanometrics Digitizer
10.2.2 Cable Pinout – 16-Pin Connector to Nanometrics Digitizer Part number: 17768-nM (where n is the length of the cable in metres) Description: Trillium Compact Posthole (models TC120-PH2 and TC20-PH2) to Nanometrics digitizer, molded Trillium Compact Posthole connector Table 10-7 Cable 17768– 16-pin Trillium Compact to Nanometrics digitizer... -
Page 67: Cable Pinout - 16-Pin Connector To Open End
10.2.3 Cable Pinout – 16-Pin Connector to Open End Part number: 17356-nM (where n is the length of the cable in metres) Description: Trillium Compact Posthole (models TC120-PH2 and TC20-PH2) to open end, molded Trillium Compact connector Table 10-8 Cable 17356 – 16-pin connector to open end... -
Page 68: Cable Design Guidelines
Ensure the cable length is sufficient to allow for strain relief. Ensure that the peak current requirement of the Trillium Compact does not result in a voltage drop along the cable which takes the power supply voltage below the minimum required at the Trillium Compact. -
Page 69: Top Views
11.1 Top Views The figures in the following sections are illustrations that show the relative orientation of the north-south alignment features on the various Trillium Compact models. All dimensions are in millimetres unless otherwise stated. 11.1.1 Top View of Models TC120-SV1 and TC20-SV1... -
Page 70: Top View Of Models Tc120-Ph2 And Tc20-Ph2
Chapter 11 Physical Features and Dimensions 11.1.2 Top View of Models TC120-PH2 and TC20-PH2 Figure 11-2 Top view of models TC120-PH2 and TC20-PH2 North-South Guide Connector Eye Bolts 96.4 Trillium Compact User Guide 16889R5 2014-03-04 ... -
Page 71: Top View Of Models Tc120-Ph1 And Tc20-Ph1
Figure 11-3 Top view of models TC120-PH1 and TC20-PH1 Eye Bolts Shroud with Cable Gland North-South Guide 96.4 Illustration shows optional cable waterproof shroud (Nanometrics part number 17658-nM, where n is the length of the cable in metres) on connector. Trillium Compact User Guide 16889R5 2014-03-04 ... -
Page 72: Bottom Views
11.2 Bottom Views The figures in the following sections are illustrations that show the features located on the bottom of the various models of the Trillium Compact. (1) All dimensions are in millimetres unless otherwise stated. (2) The feet are removed from the seismometer in all bottom views. -
Page 73: Bottom View Of Models Tc120-Ph2, Tc20-Ph2, Tc120-Ph1, And Tc20-Ph1
11.2.2 Bottom View of Models TC120-PH2, TC20-PH2, TC120-PH1, and TC20-PH1 Figure 11-5 Bottom view of models TC120-PH2, TC20-PH2, TC120-PH1, and TC20-PH1 120° 82.3 120° 3X M6x1.0 Threaded holes for feet attachment. 9mm Deep 120° Trillium Compact User Guide 16889R5 2014-03-04 ... -
Page 74: Side Views
11.3 Side Views The figures in the following sections are illustrations that show the alignment features and dimensions of the various models of the Trillium Compact. All dimensions are in millimetres unless otherwise stated. 11.3.1 Side View of Models TC120-SV1 and TC20-SV1 Figure 11-6 Side view of models TC120-SV1 and TC20-SV1 12.7... -
Page 75: Side View Of Models Tc120-Ph2 And Tc20-Ph2
Chapter 11 Physical Features and Dimensions 11.3.2 Side View of Models TC120-PH2 and TC20-PH2 Figure 11-7 Side view of models TC120-PH2 and TC20-PH2 41.9 North-South guide Trillium Compact User Guide 16889R5 2014-03-04 ... -
Page 76: Side View Of Models Tc120-Ph1 And Tc20-Ph1
Chapter 11 Physical Features and Dimensions 11.3.3 Side View of Models TC120-PH1 and TC20-PH1 Figure 11-8 Side view of models TC120-PH1 and TC20-PH1 Trillium Compact User Guide 16889R5 2014-03-04 ... -
Page 77: Side View Of Models Tc120-Ph1 And Tc20-Ph1
Chapter 11 Physical Features and Dimensions Figure 11-9 Side view of models TC120-PH1 and TC20-PH1 with cable waterproof shroud North-South guide Trillium Compact User Guide 16889R5 2014-03-04 ... -
Page 78: Side View Of Optional 70 Mm Spikes
Chapter 11 Physical Features and Dimensions 11.4 Side View of Optional 70 mm Spikes Figure 11-10 Side view of optional 70 mm spikes (posthole models only) Trillium Compact User Guide 16889R5 2014-03-04 ... -
Page 79: Appendix A Carrying Case
The recommended method for transporting your Trillium Compact is in its specially designed Carrying Case / Insulating Cover (Nanometrics part number 16862). This enclosure functions as both a carrying case for transporting your Trillium Compact and as an insulating cover at the installation site. - Page 80 -OR- If you are not packing a cable in the case, insert the foam plug or other cushioning material that will prevent movement of the Trillium Compact and levelling cradle during transport. 3. Firmly fit the feet of the levelling cradle into the corresponding slits in the foam of the lid.
-
Page 81: Appendix B Cable Waterproof Shroud
Appendix B Cable Waterproof Shroud The contents of this appendix are applicable to the Trillium Compact Posthole, model numbers TC120-PH1 and TC20-PH1. B.1 Installing the Waterproof Shroud Cable Assembly The Cable with Waterproof Shroud to Nanometrics Digitizer (Nanometrics part number 17769-nM, where n is the length of the cable in metres) is an IP-68 rated cable assembly for Nanometrics Posthole sensors. -
Page 82: Installing The Cable Waterproof Shroud
Appendix B Cable Waterproof Shroud 3. Lightly grease the cleaned surface around the Trillium Compact Posthole connector. 4. Loosen the cable gland cap nut of the cable assembly and slide the waterproof shroud up the cable to expose the connector. -
Page 83: Appendix C Levelling Cradle And Spike Kit
Section C.2 on page 75) use the shallow bowl of the cradle to hold the Trillium Compact. The supports on the deep side of the cradle are designed to act as feet when the spike kit is not in use. -
Page 84: Using The Levelling Cradle And Spike Kit
Long spike: One spike for use in rocky or frozen soil or ice. If more support is required, you can use the three thin spikes with the long spike. Figure C-2 shows four views of a Trillium Compact mounted on a levelling cradle with the various spike configurations. Figure C-2 Levelling cradle and spike kit assembly configurations To use the spike kit: 1. - Page 85 Section 3.5 “Best Practices for Alignment and Levelling” on page 19). 4. Level the Trillium Compact by adjusting it on the cradle until the levelling bubble is centred in the black ring. 5. Test the stability of the cradle by gently pressing down on a corner of the levelling cradle.
-
Page 86: Appendix D Free Software Information
Appendix D Free Software Information Trillium Compact software is distributed with free software that is protected by other licenses. A list of this free software and their respective licensing information is available on the Nanometrics Web site: http://www.nanometrics.ca/products/licences D.1 BSD Licence Information... -
Page 87: Appendix E Glossary
Appendix E Glossary E.1 Glossary of Abbreviations and Terms AGND Analog Ground American Wire Gauge CHGND Chassis Ground DGND Digital Ground Electromagnetic Interference Global Positioning System MLNM Mode Low Noise Model Trillium Compact User Guide 16889R5 2014-03-04 ... - Page 88 Appendix E Glossary NHNM New High-Noise Model NLNM New Low-Noise Model Probability Density Function Power Radio Frequency Return Merchandise Authorization SLIP Serial-Over-IP TCP/IP Transmission Control Protocol/Internet Protocol Trillium Compact User Guide 16889R5 2014-03-04 ...
-
Page 89: List Of Unit Abbreviations And Symbols
Appendix E Glossary E.2 List of Unit Abbreviations and Symbols Table E-1 provides a list of unit abbreviations and symbols commonly used in Nanometrics documentation. Table E-1 Unit Abbreviations and Symbols Abbreviation Abbreviation Definition Definition or Symbol or Symbol °... -
Page 90: About Nanometrics
Web: www.nanometrics.ca Contacting Technical Support If you need technical support please submit a request on the Nanometrics technical support site or by email or fax. Include a full explanation of the problem and related information such as log files.