
Summary of Contents for DRAX TBU9000
- Page 1 V1.2E USER’S MANUAL Exercise Bike Series #&$:$-& TBU9000 TBR9000 Be sure to read the manual before using the product in order to use safely and correctly. Please keep user manual at a place to be available easily.
-
Page 2: Table Of Contents
CONTENTS GETTING STARTED INSTALLATION HOW TO USE - HOW TO ADJUST THE SADDLE - DISPLAY AND CONSOLE OPERATION PANEL - CONTROL PANEL - BASIC START-UP - HOW TO USE THE PROGRAM MODE THE WORKOUTS - WORKOUT DESCRIPTIONS - PRESET MODE - HEARTRATE CONTROL MODE SPECIFICATION MAINTENANCE... -
Page 3: Getting Started
Only authorized service providers may service this equipment. Do not operate this exercise equipment if damaged or if any abnormal noises are heard. Please Contact DRAX INC. Customer Support Center for assistance. Caution • The owner of exercise equipment must inform all users of the safety instructions and correct operating procedure for this exercise equipment. -
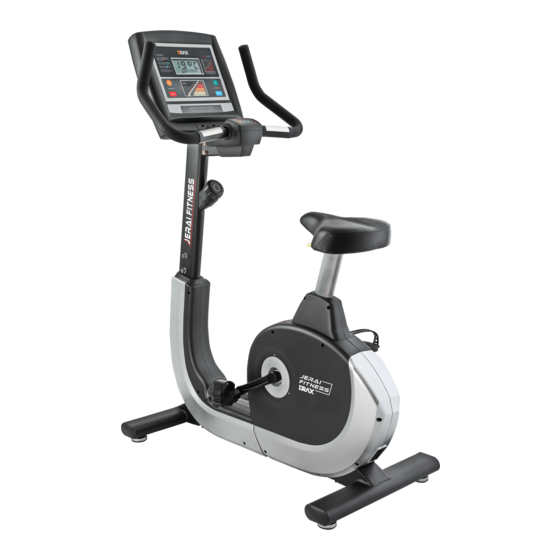
Page 4: Installation
INSTALLATION PRECAUTIONS _ (1) Always ensure that this exercise equipment is installed on flat level ground and feet are leveled and locked into place prior to operation. (2) Always only use the grounding type power cord that is supplied with the exercise equipment. PART NAME _ UpRight Bike ①... - Page 5 BECYCLE Recumbent Bike ① Display ② book hanger Supported ③ Touch type Heartrate ④ Console Column ⑤ Console ⑥ Cup Holder ⑦ Foot ⑧ Pedal ⑨ Saddle ⑩ Saddle Lever ⑪ Operation Panel...
- Page 6 (2) Press the pedal on the bike to see if it rotates normally . (3) If it rotates normally, press all the switches on the control panel to check whether it operates normally. (4) If abnormal vibration or noise occurs on the product, please contact the DRAX Service Center.
-
Page 7: How To Use
BECYCLE HOW TO USE HOW TO ADJUST THE SADDLE _ For effective exercise, the saddle should be in the proper position or height, As you pedal. there should be a slight bend in your knees when the pepals are in the lowest position. Up Right Bike Pedal strap Recumbent Bike... -
Page 8: Display And Console Operation Panel
DISPLAY AND CONSOLE OPERATION PANEL _ ① Pace/Distance Change ② RPM/Speed Change ③ Dotmatrix 16 x 8 ④ Program ⑤ Pause ⑥ TIME Control ⑦ TIME ⑧ LEVEL ⑨ LEVEL Control ⑩ Undo Initialization... -
Page 9: Control Panel
BECYCLE CONTROL PANEL _ Control Panel Control Panel ① START/STOP Button ② Level Adjust Button ① START/STOP Button When you start exercise or finish exercise, push this button. ② Level Adjust Button This button is used to adjust the intensity of exercise. [∧... -
Page 10: Basic Start-Up
BASIC START-UP _ Quick Start 1. Turn on the console. when you begin to pedal, the console will automatically be turned on and “select workout or QUICK START will appear on the display. 2. Press the QUICK START key. 3. Begin exercising and adjust the resistance level. As you exercise, adjust the resistance of the exercise bike as desire by pressing the UP(+) and DOWN(-) or numeric keys. -
Page 11: How To Use The Program Mode
BECYCLE HOW TO USE THE PROGRAM MODE _ Weight Loss Mode 1. Select weight Loss Mode. The message LED will Display TIME GOAL when the Press the weight Loss key. Weight Loss 2. Use the arrow key to set the desired time, distance and Calories, 3-1. - Page 12 Heart Rate Control Program FAT BURN : Fat burn mode is a heart rate controlled program for effective weight loss and many be adjusted to the resistance level until your heart rate during workout corresponds to the target heart rate. For maximum fat burn, set the target heart rate up to 60%~70% level of your max H/R.
- Page 13 BECYCLE 7. Set Target Heart rate. When prompted by the MESSAGE CENTER to TARGET HR 96 BPM, use the ARROW KEYS to increase or decrease the displayed time to the desired value, and press ENTER. (*Target Heart Rate(THR) is a percentage of the theoretical maximum. For example, a 40-year-old user’s THR for the CARDIO workout is 144.
- Page 14 2. The message LED will Display HILL 1 when the Press HILL Key. Speed Speed Speed {km/h} {km/h} {km/h} <Hill 1, 20min> <Hill 2, 30min> <Hill 3, 30min> When prompted to select a workout, use the ARROW keys to scroll through the workout program Graph as they appear in the MESSAGE CENTER.
-
Page 15: The Workouts
BECYCLE THE WORKOUTS WORKOUT DESCRIPTIONS _ Quick START QUICK START is the fastest way to begin exercising, and it bypasses the steps of selecting a specific workout program. The intensity level for the workout is set automatically and remains the same unless manually changed. -
Page 16: Preset Mode
PRESET MODE _ 1. Press the PROGRAM key. Program Mode The message LED will Display Program Mode when the Press Program key When prompted to select a workout, use the 1. Preset Mode ARROW keys to scroll through the workout program As they 2. -
Page 17: Heartrate Control Mode
BECYCLE HEARTRATE CONTROL MODE _ 1. Press the PROGRAM key. The message LED will Display Program Mode when the Press Program key. When prompted to select a workout, use the ARROW keys to scroll through the workout program as they appear in the MESSAGE CENTER. When the desired program appears, press Start. Program Mode 1. -
Page 18: Specification
SPECIFICATION BECYCLE _ TBR9000 TBR9000L TBU9000 TBU9000L Specification (Recumbent Bike) (Recumbent Bike) (Upright Bike) (Upright Bike) Intensity Level 25 steps 25 steps 25 steps 25 steps Control method Premises generator system Premises generator system Premises generator system Premises generator system... -
Page 19: Maintenance
- Check the power cord is connected properly at both ends. - Remove the power cord from the power supply and inspect it for damage. - If the problem continues contact DRAX INC. Customer Support Center. Always only use the grounding type power cord that is supplied with Notice the exercise equipment. - Page 20 Please use a soft, light cloth when you clean the exterior of product. Notice Rather than cleaning the product directly, clean it by using a vacuum cleaner after using a cloth. • Product Management Schedule Please follow the below schedule for maintenance. Component Weekly Monthly...
-
Page 21: Limited Warranty
DRAX. 2. DRAX is not responsible or liable for indirect, special or con sequential damages arising out of or in connection with the use or performance of the product or damages with respect to any economic loss, loss of property, loss of revenues or profits, loss of enjoyment or use, costs of removal, installation or... - Page 22 Designed For Your Health & Happiness We design for your healthy living and happiness...
- Page 24 V1.2E BECYCLE DRAX Inc. 26, Jeonpa-ro 62Beon-gil, Manan-gu, Anyang-si, Gyeonggi-do, 14086, KOREA Tel : +82-31-459-8530 Fax : +82-31-459-8531 E-mail : drax@draxfit.com www.draxfit.com...
Need help?
Do you have a question about the TBU9000 and is the answer not in the manual?
Questions and answers