
Related Manuals for Echo BEARCAT SC5540


Summary of Contents for Echo BEARCAT SC5540
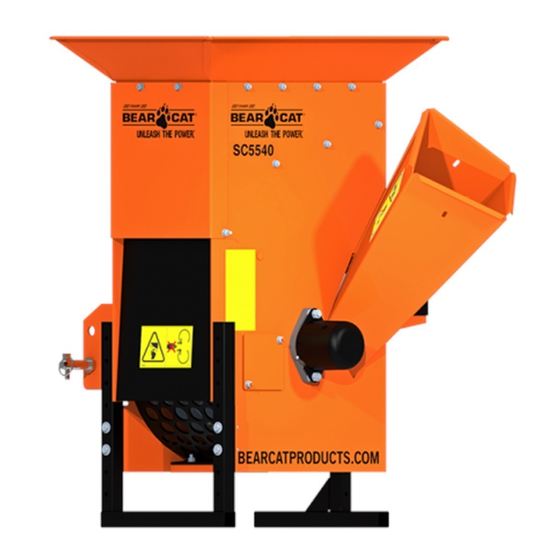
- Page 1 5 INCH CHIPPER/SHREDDER SC5540 – 540 PTO PN: 16023 Rev. 010113 bearcatproducts.com Companion to 12142 Range: D00001 - Current...
- Page 2 Please read and understand this manual before operating your machine. If you have any questions or comments about this manual, please call us toll-free at 888.625.4520. If you have any questions or problems with your machine, please call or write your local authorized ECHO Bear Cat dealer.
- Page 3 Crary Industries, Inc. In the event of a failure, return the product, at your cost, along with proof of purchase to the selling ECHO Bear Cat dealer. Crary Industries, Inc. will, at its option, repair or replace any parts found to be defective in material or workmanship. Warranty on any repairs will not extend beyond the product warranty.
-
Page 4: Table Of Contents
TABLE OF CONTENTS SAFETY ................................... 1 1.1 SAFETY ALERT SYMBOL ..............................1 1.2 BEFORE OPERATING ................................1 1.3 OPERATION SAFETY ................................2 1.4 PTO SAFETY ..................................2 1.5 MAINTENANCE/STORAGE SAFETY ..........................2 1.6 SAFETY DECALS ................................. 3 1.7 SAFETY DECAL LOCATIONS ............................. 4 ASSEMBLY................................ -
Page 5: Safety
SAFETY Section 2. Familiarize yourself with all of the safety and 1.1 SAFETY ALERT SYMBOL operating decals on this equipment and on any of its attachments or accessories. 3. Keep safety decals clean and legible. Replace missing or illegible safety decals. 4. -
Page 6: Operation Safety
SAFETY 1.3 OPERATION SAFETY 1.4 PTO SAFETY 1. Always stand clear of discharge area when operating 1. Read and follow instructions on PTO safety decals. this machine. Keep face and body away from feed 2. Stay alert and pay attention when PTO is operating. and discharge openings. -
Page 7: Safety Decals
SAFETY 1.6 SAFETY DECALS See Section 1.7 for decal locations. Familiarize yourself with all of the safety and operating decals on the machine and the associated hazards. See the engine owner’s manual or contact the engine manufacturer for engine safety instructions and decals. -
Page 8: Safety Decal Locations
SAFETY 1.7 SAFETY DECAL LOCATIONS The numbers below correspond to the decals in Section 1.6. Make certain that all safety and operating decals on this machine are kept clean and in good condition. Decals that need replacement must be applied to their original locations. *Decal located under shield 5 INCH CHIPPER/SHREDDER... -
Page 9: Assembly
ASSEMBLY Section 2.2 CONNECT THE PTO DRIVELINE WARNING The driveline supplied with this machine may need to be If any bolts or nuts are dropped in the machine, be cut to a shorter length for proper operation with the tractor sure to remove them before starting the machine. -
Page 10: Connect Control Box Wires To Tractor
ASSEMBLY 9. File both shaft ends to remove sharp edges and slide the driveline pieces back together. 10. When you have confirmed that the driveline is the Yoke correct length for your tractor, connect the driveline to Shield the chipper rotor. 11. -
Page 11: Features & Controls
FEATURES & CONTROLS Section Understanding how your machine works will help you achieve the best results when using your chipper/shredder. The following descriptions define the features and controls of your machine. 1. SHREDDER CHUTE Materials no larger than 3/4" (1.9 cm) in diameter are fed through the shredder chute to the shredder knives. 2. -
Page 12: Operation
OPERATION Section As with any other piece of outdoor equipment, getting the 4.1 STARTING THE CHIPPER feel for how your machine operates and getting to know the best techniques for particular jobs are important to 1. Connect PTO driveline to tractor as described in overall good performance. -
Page 13: Chipper Operation Guidelines
OPERATION 4.3 CHIPPER OPERATION GUIDELINES 9. ALWAYS feed brush from the side of the chipper WARNING chute, rather than from the front. Step aside to avoid being hit by the brush moving into the chipper. Read and follow all safety instructions in this manual. 10. -
Page 14: Service & Maintenance
SERVICE & MAINTENANCE Section 5.1 MAINTENANCE SCHEDULE The items listed in this service and maintenance schedule WARNING are to be checked, and if necessary, corrective action taken. This schedule is designed for units operating under To prevent personal injury or property damage: shut normal conditions. -
Page 15: Chipper Blades Maintenance
SERVICE & MAINTENANCE WARNING BEFORE INSPECTING OR SERVICING ANY PART OF THIS MACHINE, SHUT OFF POWER SOURCE, AND MAKE SURE ALL MOVING PARTS HAVE COME TO A COMPLETE STOP. 5.2 CHIPPER BLADES MAINTENANCE 5.3 REMOVING THE BLADES The chipper blades will eventually become dull, making WARNING chipping difficult and adding extra strain on the machine. -
Page 16: Installing The Blades
SERVICE & MAINTENANCE WARNING BEFORE INSPECTING OR SERVICING ANY PART OF THIS MACHINE, SHUT OFF POWER SOURCE, AND MAKE SURE ALL MOVING PARTS HAVE COME TO A COMPLETE STOP. 5.7 REMOVING THE SHREDDER KNIVES 5. Remove an equal amount off each blade to maintain rotor balance. -
Page 17: Changing The Discharge Screen
SERVICE & MAINTENANCE WARNING BEFORE INSPECTING OR SERVICING ANY PART OF THIS MACHINE, SHUT OFF POWER SOURCE, AND MAKE SURE ALL MOVING PARTS HAVE COME TO A COMPLETE STOP. 5.9 SETTING BLADE CLEARANCE 5.8 CHANGING THE DISCHARGE SCREEN The chipping blades should clear the chipper anvil, located inside the frame on the bottom edge of the chipper chute 5.8.1 REMOVE intake, by 1/16"... -
Page 18: Clearing A Plugged Rotor
SERVICE & MAINTENANCE WARNING BEFORE INSPECTING OR SERVICING ANY PART OF THIS MACHINE, SHUT OFF POWER SOURCE, AND MAKE SURE ALL MOVING PARTS HAVE COME TO A COMPLETE STOP. 4. Loosen the set screws on the lock collars. 5.11 DRIVE BELTS 5. -
Page 19: Removing The Rotor
SERVICE & MAINTENANCE WARNING BEFORE INSPECTING OR SERVICING ANY PART OF THIS MACHINE, SHUT OFF POWER SOURCE, AND MAKE SURE ALL MOVING PARTS HAVE COME TO A COMPLETE STOP. 5.12 REMOVING THE ROTOR 5.13 PTO DRIVELINE LUBRICATION WARNING WARNING The rotor weighs in excess of 100 lbs. It is extremely To prevent personal injury or property damage: important to support the rotor to prevent it from falling Disconnect the PTO driveline from the source providing... -
Page 20: Lubrication
SERVICE & MAINTENANCE WARNING BEFORE INSPECTING OR SERVICING ANY PART OF THIS MACHINE, SHUT OFF POWER SOURCE, AND MAKE SURE ALL MOVING PARTS HAVE COME TO A COMPLETE STOP. 5.14 LUBRICATION WARNING NOTE Do not over grease bearings. Overfilling can lead to Polyurea lithium-based greases... -
Page 21: Troubleshooting
Section Before performing any of the corrections in this troubleshooting chart, refer to the appropriate information contained in this manual for the correct safety precautions and operating or maintenance procedures. Contact your dealer or ECHO Bear Cat for service problems with the machine. - Page 22 TROUBLESHOOTING PROBLEM POSSIBLE CAUSES REMEDY Dull chipper blades Flip, sharpen, or replace Check drive belts, bearings, and pulleys for Drive system vibration bad or worn areas. Check for dull chipper blades. Excessive vibration while running Inspect rotor for damaged or missing Rotor out of balance chipper blades, replace if needed Set blade/anvil clearance to recommended...
-
Page 23: Specifications
SPECIFICATIONS Section DESCRIPTION ENGLISH METRIC Overall size 43" × 43" × 44" 109 cm × 109 cm × 112 cm Overall weight 450 lbs. 204.1 kg Max chipper capacity 5" 12.7 cm Chipper blades 4 reversible (3.125" × 2" × 0.25") 4 reversible (7.9 cm ×... -
Page 24: Bolt Torque
SPECIFICATIONS 7.1 BOLT TORQUE The tables below are for reference purposes only and their use by anyone is entirely voluntary, unless otherwise noted. Reliance on their content for any purpose is at the sole risk of that person and any loss or damage resulting from the use of this information is the responsibility of that person. -
Page 25: Options
OPTIONS Section PART NUMBER DESCRIPTION 70487 1-SPEED COMMERCIAL BLOWER PACKAGE 70531 WELDMENT, SCREEN 3/4 DIAMETER, LARGE C/S 70559 WELDMENT, LARGE WET DEBRIS SCREEN 70703 WELDMENT, LARGE FINE SCREEN 70972 KIT, SHREDDER KNIFE REPLACEMENT 71110 2‑SPEED BLOWER PACKAGE (USE WITH PN 71125) 71125 KIT, 8"... - Page 26 ECHO Bear Cat ® bearcatproducts.com 237 NW 12th Street, West Fargo, ND 58078-0849 Phone: 701.282.5520 • Toll Free: 888.625.4520 • Fax: 701.282.9522 E-mail: service@bearcatproducts.com • sales@bearcatproducts.com...
Need help?
Do you have a question about the BEARCAT SC5540 and is the answer not in the manual?
Questions and answers