Advertisement
Available languages
Available languages
Quick Links
USER MANUAL
Hereby, MOB, declares that item MO8426 is in Compliance with
the essential requirements and other relevant conditions of
Directive 2014/30/EC. A copy of the DOC (Declaration of
Conformity) is available at: DOC@reclamond.com or
MOB, PO BOX 644, 6710 BP (NL).
PO: 41-XXXXXX
Made in China
Advertisement

Summary of Contents for MOB MO8426
- Page 1 USER MANUAL Hereby, MOB, declares that item MO8426 is in Compliance with the essential requirements and other relevant conditions of Directive 2014/30/EC. A copy of the DOC (Declaration of Conformity) is available at: DOC@reclamond.com or MOB, PO BOX 644, 6710 BP (NL).
- Page 2 MO8426...
-
Page 3: Installation
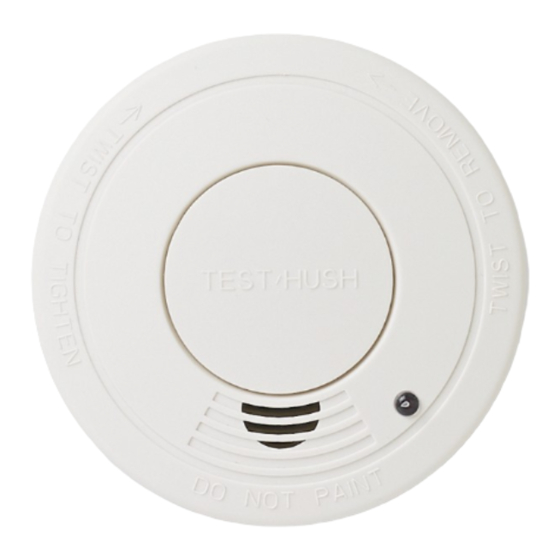
Smoke detector Product specifications Battery: 1 x 9V 6F22 ≥85dB/3m Alarm output: Operation temperature: -10°C - 40°C ≤95% Relative humidity Operation humidity: with no water condensing ≤12µA Quiescent current: ≤20mA Alarming current: Dimensions: 36mm x 102mmØ Weight: 140g LED indicator: Red LED Hush status: LED flashes every 10s... - Page 4 • Press and hold the TEST/HUSH button. The LED flashes quickly and the detector sounds. This means the detector works properly. At that time, the detector turns to a low sensitive detection mode. After 10 minutes, it turns to the standard sensitive detection mode.
- Page 5 Heizkörpern und mindestens 50cm von Leuchtstoffröhren und Energiesparlampen, um den Alarm zu installieren. Verwenden Sie die mitgelieferten Schrauben und Stecker, um die Installationsplatte sicher an der Decke zu befestigen. • Richten Sie die 2 Positionierungsschlitze im Rauchmelder mit den 2 Markierungen auf der Montageplatte aus und drehen Sie sie im Uhrzeigersinn, bis sie einrastet.
- Page 6 Détecteur de Fumée Caractéristiques du produit Batterie: 1 x 9V 6F22 ≥85dB / 3m Sortie d'alarme: Température de fonctionnement: -10 ° C - 40 ° C ≤95% Humidité relative Humidité de fonctionnement: sans condensation d'eau ≤12μA Courant descendant: ≤20mA Courant alarmant: Dimensions: 36mm x 102mmØ...
-
Page 7: Instalación
aiguilles d'une montre jusqu'à ce qu'elle s'enclenche. • Appuyez sur le bouton TEST / HUSH et maintenez-le enfoncé. La LED clignote rapidement et le détecteur sonne. Cela signifie que le détecteur fonctionne correctement. À ce moment-là, le détecteur se transforme en un mode de détection peu sensible. - Page 8 techo lejos de obstrucciones, puertas, ventanas, ventiladores y radiadores y como mínimo a 50 cms. de las luces fluorescentes y bombillas de baja energía. • Utilizar los tornillos y tomas de corriente suministradas para asegurar la instalación del panel de seguridad al techo. •...
- Page 9 5. Pruebe la alarma para la operación normal usando la instalación de prueba cuando se reemplaza la batería. 6. Reemplace el detector de humo después de 8 años de uso. Rilevatore di fumo Specifiche del prodotto Batteria: 1 x 9V 6F22 ≥85dB/3m Output Allarme: Temperatura funzionamento:...
- Page 10 dietro la leva di sicurezza rossa sul lato del pannello • Allineare le due fessure (locating slots) nel rilevatore di fumo con le due targette nel pannello di installazione, e ruotare in senso orario finché non si chiude nella posizione corretta. •...
- Page 11 Lage batterijstatus: Piept elke 43 sec. vervang de batterij Installatie • Kies een positie om het alarm te installeren op het plafond uit de buurt van obstakels zoals deuren, ramen, ventilator of radiator en tenminste 50 cm van fluorescerend licht of licht met een laag energieverbruik.
- Page 12 6. Vervang de rookmelder na 8 jaar gebruik. Wykrywacz dymu Specyfikacja produktu Bateria: 1 x 9V 6F22 Wyjście alarmowe: ≥ 85dB / 3m Temperatura pracy: -10 ° C - 40 ° C Wilgotność działania: ≤95% wilgotność względna bez kondensacji wody Prąd spoczynkowy: ≤12μA Prąd alarmowy:...
- Page 13 boku panelu. Wyrównaj 2 gniazda ustalające w detektorze dymu z 2 • znacznikami na panelu instalacyjnym i obróć go zgodnie z ruchem wskazówek zegara, aż zablokuje się. Naciśnij i przytrzymaj przycisk TEST / HUSH. Dioda LED miga • szybko i rozlega się detektor. Oznacza to, że detektor działa prawidłowo.
Need help?
Do you have a question about the MO8426 and is the answer not in the manual?
Questions and answers