Table of Contents
Advertisement
Available languages
Available languages
Quick Links
I
ISTRUZIONE PER L'INSTALLAZIONE, L'USO E LA MANUTENZIONE
GB INSTALLATION, OPERATION AND MAINTENANCE
D
INSTALLATIONS-, GEBRAUCHS- UND WARTUNGSANLEITUNG
F
INSTRUCTIONS POUR L'INSTALLATION, L'EMPLOI ET L'ENTRETIEN
E
INSTRUCCIONES PARA LA INSTALACION, USO Y MANTENIMENTO
I
LEGGERE ATTENTAMENTE QUESTO LIBRETTO PRIMA DI USARE LA MACCHINA
GB BEFORE USING THE MACHINE PLEASE CAREFULLY READ THE INSTRUCTIONS
D
LESEN SIE SICH DIE BEDIENUNGSANLEITUNG BITTE GENAU DURCH, BEVOR SIE DIE MASCHINE BENUTZEN
F
NOUS VOUS PRIONS DE BIEN LIRE LE MANUEL D'INSTRUCTIONS AVANT D'UTILISER LA MACHINE
E
LEER ATENTAMENTE ESTE MANUAL ANTES DE USAR LA MÁQUINA
Italiano
Pagina 01
I
GB
English
Page 10
D
Deutsch
Seite 19
F
Français
Page 28
Español
Página 37
E
Minipack-torre S.p.A.
Via Provinciale, 54 - 24044 Dalmine (BG) - Italy
Tel. (035) 563525 – Fax (035) 564945
E-mail:info@ minipack-torre.it
http://www.minipack-torre.it
Media Matic
DOC. N. FM111037
REV. 01
ED. 02.2007
Advertisement
Chapters
Table of Contents

Subscribe to Our Youtube Channel
Related Manuals for Minipack-Torre Media Matic


Summary of Contents for Minipack-Torre Media Matic
- Page 1 INSTALLATIONS-, GEBRAUCHS- UND WARTUNGSANLEITUNG INSTRUCTIONS POUR L’INSTALLATION, L’EMPLOI ET L’ENTRETIEN INSTRUCCIONES PARA LA INSTALACION, USO Y MANTENIMENTO Media Matic LEGGERE ATTENTAMENTE QUESTO LIBRETTO PRIMA DI USARE LA MACCHINA GB BEFORE USING THE MACHINE PLEASE CAREFULLY READ THE INSTRUCTIONS LESEN SIE SICH DIE BEDIENUNGSANLEITUNG BITTE GENAU DURCH, BEVOR SIE DIE MASCHINE BENUTZEN NOUS VOUS PRIONS DE BIEN LIRE LE MANUEL D’INSTRUCTIONS AVANT D’UTILISER LA MACHINE...
-
Page 2: Table Of Contents
Indice Capitolo 1. Introduzione 1.1. Prefazione pagina 02 1.2. Prestazioni della macchina confezionatrice pagina 02 1.3. Identificazione della macchina pagina 02 1.4. Peso e dimensioni dell’imballo pagina 02 1.5. Peso e dimensioni della macchina pagina 02 Capitolo 2. Installazione della macchina 2.1. -
Page 3: Capitolo 1. Introduzione
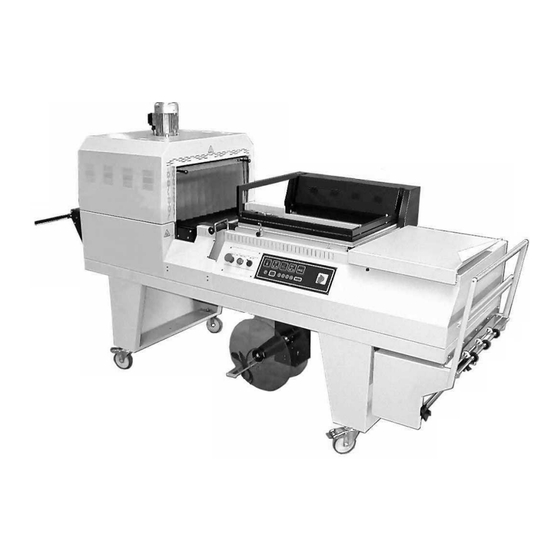
La “Media Matic” è una confezionatrice angolare corredata di tunnel di retrazione. Le novità sostanziali di questo modello sono da individuare proprio nel tunnel di retrazione, che è un corpo unico con il resto della macchina. -
Page 4: Capitolo 2. Installazione Della Macchina
Capitolo 2. Installazione della macchina 2.1. Trasporto e posizionamento Nel trasporto e nel posizionamento della macchina si raccomanda di manovrare con molta cautela! Nella movimentazione della macchina utilizzare guanti di protezione. Tagliare con la forbice la reggia (avendo cura di proteggersi gli occhi con degli occhiali) e sfilare il cartone (figura 2.1.A pag.47). - Page 5 Capitolo 3. Regolazione ed approntamento macchina 3.1. Regolazione CARATTERISTICHE SCHEDA ELETTRONICA La macchina ha 5 programmi selezionabili: N° Programma Caratteristiche Programma Solo taglio Taglio + avanzamento nastro (senza retrazione) Programmi completi P3, P4, P5 Il programma più completo è composto da 6 variabili modificabili (qualora una variabile non fosse impostabile, chiaramente non comparirà): Variabile Campo...
-
Page 6: Ciclo Manuale Ed Automatico
Capitolo 3. Regolazione ed approntamento macchina 3.1. Regolazione In caso di “ANOMALIA ” sul display (D1) compaiono le seguenti sigle: La macchina è stata accesa con il telaio di saldatura abbassato. Alzare il telaio. La macchina è stata accesa col pulsante (S) premuto. Rilasciare il pulsante. -
Page 7: Confezionamento
Capitolo 3. Regolazione ed approntamento macchina 3.10. Confezionamento Premere il pulsante di marcia (M) (figura 3.10. pag.49). Il telaio di saldatura si abbasserà automaticamente per eseguire il taglio e la saldatura. Alla riapertura del telaio, la confezione avanzerà verso il tunnel liberando la zona di saldatura per un nuovo ciclo. -
Page 8: Capitolo 7. Manutenzione Ordinaria
Capitolo 6. Norme di sicurezza 6.1. Avvertimenti Prima di inserire il ciclo automatico assicurarsi di avere effettuato tutte le regolazioni. Tutte le regolazioni della macchina vanno eseguite con il selettore (Q) in posizione “MAN.” (figura 6.1.A pag.50). In caso di blocco della macchina o per fermarla durante il ciclo automatico premere il PULSANTE DI EMERGENZA (O) (figura 6.1.A pag.50). -
Page 9: Regolazione Delle Cammes
Capitolo 7. Manutenzione ordinaria 7.6. Regolazione delle cammes La regolazione delle cammes deve essere eseguita solo dal personale autorizzato! Per accedere alle cammes è necessario smontare il pannello (38) posto sul retro della macchina (figura 7.6.A pag.51). Le cammes sono 2 e regolano (figura 7.6.B pag.51): 1. -
Page 10: Particolari Di Ricambio
Capitolo 7. Manutenzione ordinaria 7.9. Particolari di ricambio Codice Denominazione particolare S08A0404 Rivestimento teflon FE385602 Lama saldante S0K00306 Morsetto porta lama centrale S0K00302 Morsetto porta lama posteriore S0K00301 Morsetto porta lama anteriore S03A0606 Rotellina con cava completa S03A0605 Rotellina con aghi completa FE380015 (380/415V) Resistenza FE380019 (200/208V) - Page 11 Index Chapter 1. Foreword 1.1. Preface page 11 1.2. Performances of packaging machine page 11 1.3. Machine identification page 11 1.4. Package weight and dimensions page 11 1.5. Machine weight and dimensions page 11 Chapter 2. Machine installation 2.1. Transport and positioning page 12 2.2.
- Page 12 The technological concept underlining its design, as well as the components and materials used in the manufacturing and testing process are the best assurance of proper operation and long-lasting liability. “Media Matic” is an “L” sealer packaging machine equipped with shrinking tunnel. Which represents a real novelty ab it is incorporate in machine structure.
- Page 13 Chapter 2. Machine installation 2.1. Transport and positioning It is recommended to handle with great care during transport and positioning! Use protection gloves while handling the machine. Cut the strap with scissors (make sure you protect your eyes by wearing glasses) and withdraw the cardboard (figure 2.1.A page 47).
- Page 14 Chapter 3. Machine adjustment and setting up 3.1. Adjustment ELECTRONIC BOARD FEATURES The machine is equipped with 5 selectionable programs: Program no. Program features Cutting only Cutting + belt advancing (no shrinking) Complete programs P3, P4, P5 Each program is composed by 6 variables which can be modified (in case it is not possible to set one of them, such a variable will obviously not appear on the display): Variable Field...
- Page 15 Chapter 3. Machine adjustment and setting up 3.1. Adjustment In case of “ANOMALY” the display (D1) will show as follows: Machine has been switched on when sealing frame was lowered. Lift sealing frame up. Machine has been switched on when (S) button was pressed. Release button. In case the error signalling still persists, check the correct functioning of the button.
- Page 16 Chapter 3. Machine adjustment and setting up 3.10. Packaging Press the ON push-button (M) (figure 3.10. page 49). The sealing frame will automatically lower to cut and weld the film. When the frame opens again, the packed product will be fed towards the tunnel. Thus, the welding area will be released and ready to start a new sealing cycle.
- Page 17 Chapter 6. Safety standards 6.1. Warnings Before starting the automatic cycle, make sure that all necessary adjustments have been made. All adjustments of the machine will be made by the selector (Q) in “MAN.” position (figure 6.1.A page 50). In case of blocking of the machine or in order to stop it during the automatic cycle press EMERGENCY PUSHBUTTON (O) (figure 6.1.A page 50).
- Page 18 Chapter 7. Ordinary maintenance 7.6. Adjustment of the cams The adjustment of the cams must only be carried out by authorised personnel! It is necessary to disassemble the panel (38) at the back of the machine in order to get access to the cams (figure 7.6.A page 51).
- Page 19 Chapter 7. Ordinary maintenance 7.9. Spare parts Code Item description S08A0404 Teflon liner FE385602 Sealing blade S0K00306 Complete central terminal S0K00302 Complete rear terminal S0K00301 Front blade holder clamp S03A0606 Complete slotted microperforator S03A0605 Complete needles microperforator FE380015 (380/415V) Heaters FE380019 (200/208V) FE380020 (230V) FE240070 (230/380/415V)
- Page 20 Inhaltsverzeichnis Kapitel 1. Einleitung 1.1. Vorwort Seite 20 1.2. Leistungseigenschaften der Verpackungsmachine Seite 20 1.3. Beschreibung der Maschine Seite 20 1.4. Gewicht und Abmessungen der Verpackung Seite 20 1.5. Gewicht und Abmessungen des Geräts Seite 20 Kapitel 2. Aufstellung der Maschine 2.1.
-
Page 21: Kapitel 1. Einleitung
Endkontrolle sind die beste Garantie für ein zuverläßiges Funktionieren über einen langen Zeitraum. “Media Matic” ist eine Eckverpackungsanlage mit Schrumpftunnel. Die wichtigsten Neuheiten dieses Modells sind in dem Schrumpftunnel zu finden, der mit dem Rest der Maschine eine einzige Einheit bildet. -
Page 22: Kapitel 2. Aufstellung Der Maschine
Kapitel 2. Aufstellung der Maschine 2.1. Beförderung und Positionierung Bei der Beförderung und Positionierung der Maschine lassen Sie die größte Vorsicht walten! Beim Umstellen der Maschine Schutzhandschuhe tragen. Schneiden Sie das Band mit Schere (schützen Sie Ihre Augen mit Brillen) und ziehen Sie den Karton ab (Abbildung 2.1.A Seite 47). - Page 23 Kapitel 3. Regelung und Bereitstellung der Maschine 3.1. Regulierung TECHNISCHE DATEN DER ELEKTRONISCHEN KARTE Die Maschine ist mit 5 auswählenden Programmen ausgestattet: Programm Nummer Daten Nur Schnitt Schnitt + Bandbeförderung (ohne Schrumpfung) Vollständige Programme P3, P4, P5 Jeder Programm besteht aus 6 auswählende Variable (falls eine Variable nicht eingegeben werden kann, wird sie natürlich auch nicht angezeigt): Variable Feld...
-
Page 24: Der Manuelle Und Automatische Arbeitskreislauf
Kapitel 3. Regelung und Bereitstellung der Maschine 3.1. Regulierung Falls einige Unregelmäßigkeiten passen, zeigt der Datensichtgerät (D1) die folgende Siegel: E 1 Die Maschine wurde mit abgesenktem Schweißrahmen eingeschaltet. Den Rahmen anheben. E 2 Die Maschine wurde mit bedrückten Knopf (S) eingeschaltet. Knopf (S) wieder lassen. Die richtige Einordnung des Knopfs prüfen wenn die Fehlermeldung beständig ist. -
Page 25: Verpacken
Kapitel 3. Regelung und Bereitstellung der Maschine 3.10. Verpacken Auf den Anlassknopf (M) drücken (Abbildung 3.10. Seite 49). Der Schweißrahmen sinkt automatisch ab, um das Schneiden und das Schweißen vorzunehmen. Nach Öffnung des Rahmens wird die Konfektion zum Tunnel weiter befördert, der Schweißbereich steht für einen neuen Zyklus bereit. -
Page 26: Kapitel 7. Wartung Der Maschine
Kapitel 6. Sicherheitsmassnahmen 6.1. Warnungen Bevor Sie den automatischen Arbeitskreislauf wählen, vergewissern Sie sich, daß Sie alle Regulierungen vorgenommen haben. Alle Regulierungen der Maschine müssen vorgenommen werden, nachdem durch den Wähler (Q) die Stellung MANUELL gewählt worden ist (Abbildung 6.1.A Seite 50). Falls die Maschine stoppt, oder Sie selbst während des automatischen Arbeitskreislaufes die Maschine stoppen wollen, drücken Sie auf die NOTTASTE (O) (Abbildung 6.1.A Seite 50). -
Page 27: Die Regulierung Der Nocken
Kapitel 7. Wartung der Maschine 7.6. Die Regulierung der Nocken Die Regulierung der Nocken darf nur vom befugten Personal durchgeführt werden! Um zu den Nocken Zugang zu haben, müssen Sie die Tafel (38) demontieren, die sich auf der hinteren Seite der Maschine befindet (Abbildung 7.6.A Seite 51). -
Page 28: Ersatzteile
Kapitel 7. Wartung der Maschine 7.9. Ersatzteile Codenummer Beschreibung der Teilen S08A0404 Teflonstreifen FE385602 Schweissklinge S0K00306 Komplette mittlere Klemme S0K00302 Komplette hintere Klemme S0K00301 komplette vordere Klemmleiste S03A0606 Rädchen mit Nadeln S03A0605 Rädchen mit Gummianschlag FE380015 (380/415V) Widerstände FE380019 (200/208V) FE380020 (230V) FE240070 (230/380/415V) Motor des Lűfterrad... - Page 29 Index Chapitre 1 Avant-propos 1.1. Préface page 29 1.2. Performances de l’emballeuse page 29 1.3. Identification de la machine page 29 1.4. Poids et dimensions de l’emballage page 29 1.5. Poids et dimensions de la machine page 29 Chapitre 2 Installation de la machine 2.1.
- Page 30 “Media Matic” est une soudeuse à “L” dovée de son tunnel de rétraction. Qui répresent la nouveauté substantielle de ce modelle. Ce tunnel est compris dans la structure de la machine pour la rendre plus compacte.
- Page 31 Chapitre 2. Installation de la machine 2.1. Transport et positionnement Pour le transport et le positionnement de la machine on recommande de manoeuvrer avec beaucoup de précaution! Utiliser des gants de protection pour le déplacement de la machine. Couper avec une ciseaux le feuillard (ayant soins de se proteger les yeux avec des lunettes de protection) et enlever le carton d’emballage (figure 2.1.A page 47).
- Page 32 Chapitre 3. Réglage et preparation de la machine 3.1. Réglage CARACTÉRISTIQUES DE LA CARTE ÉLECTRONIQUE La machine est douée de 5 programmes à sélectionner: Nr. du Caractéristiques du programme Programme Coupe seulement Coupe + avancement du ruban (sans rétraction) Programmes complets P3, P4, P5 Chaque programme est composé...
- Page 33 Chapitre 3. Réglage et preparation de la machine 3.1. Réglage En cas d’ “ANOMALIE” le panneau (D1) affiche les sigles suivants: E 1 La machine à été allumée avec le cadre de soudure baissé. Soulevez-le. E 2 La machine à été allumée avec le bouton (S) appuyé. Laissez de nouveau le bouton.
- Page 34 Chapitre 3. Réglage et preparation de la machine 3.10. Emballage Appuyer sur le bouton-poussoir de marche (M) (figure 3.10. page 49). Le cadre de soudure baissera automatiquement pour exécuter le découpage et la soudure. Lors de la réouverture du cadre, le produit confectionné avancera vers le tunnel en direction de la voie à rouleaux, de manière à...
- Page 35 Chapitre 6. Normes de securité 6.1. Avertissements Avant d’insérer le cycle automatique il faut s’assurer d’avoir suivi tous les réglages. Tous les réglages de la machine sont effectués avec le sélecteur (Q) en position “MAN.“ (figure 6.1.A page 50). En cas de blocage de la machine ou pour l’arrêter durant le cycle automatique appuyer le BOUTON ARRET D'URGENCE (O) (figure 6.1.A page 50).
- Page 36 Chapitre 7. Manutention ordinaire 7.6. Réglage des cames La régulation des cames doit être effectuer par le personnel autorisé! Pour accéder aux cames il est nécessaire de démonter le panneau (38) situé à l’arrière de la machine (figure 7.6.A page 51). Les 2 cammes réglent (figure 7.6.B page 51): La descente du cadre de soudure et sa pression sur la lame de soudure.
- Page 37 Chapitre 7. Manutention ordinaire 7.9. Pièces detachés Code Dénomination des pièces S08A0404 Revêtement teflon FE385602 Lame de soudure S0K00306 Borne centrale complète S0K00302 Borne postérieure complète S0K00301 Borne porte lame antérieure S03A0606 Molette perforateur à picots S03A0605 Ensemble perforateurs en eplingles FE380015 (380/415V) Résistances FE380019 (200/208V)
- Page 38 Indice Capítulo 1. Prefacio página 38 1.1. Prólogo página 38 1.2. Prestaciones de la máquina empaquetadora página 38 1.3. Identificación de la máquina página 38 1.4. Peso y medidas del embalaje página 38 1.5. Peso y medidas de la máquina página 38 Capítulo 2.
-
Page 39: Capítulo 1. Prefacio
“Media Matic” es una empaquetadora angular con túnel de retracción. Las novedades más importantes de este modelo se encuentran propiamente en el túnel de retracción, que está... -
Page 40: Capítulo 2. Installacion De La Máquina
Capítulo 2. Installación de la máquina 2.1. Transporte y postura En el transporte y en la postura de la máquina saben Ustedes manejar con mucha cautela! Para el movimiento de la máquina utilizar guantes de protección. Cortar la cinta con unas tijeras (protegerse los ojos con gaffas protectoras) y quitar la caja de carton (figura 2.1.A página 47). - Page 41 Capitulo 3. Regulación y preparacion máquina 3.1. Regulación CARACTERÍSTICAS DE LA PLAQUETA ELECTRÓNICA La máquina tiene 5 programas seleccionables: N° de Programa Características del programa Sólo corte Corte + avance de la cinta transportadora (son retracción) Programas completos P3, P4, P5 Cada programa está...
-
Page 42: Ciclo Manual Y Automàtico
Capitulo 3. Regulación y preparacion máquina 3.1. Regulación En caso de “ANOMALÍA” en el display (D1) aparecen las siguientes siglas: E 1 La máquina ha sido encendida con el telar de soldadura bajado. Levantar el telar. E 2 La máquina fue encendida con la tecla (S) apretada. Soltar la tecla. -
Page 43: Confección
Capitulo 3. Regulación y preparacion máquina 3.10. Confección Apretar el pulsador de marcha (M) (figura 3.10. página 49). El telar de soldadura bajará automáticamente para efectuar el corte y la soldadura. Cuando se abre nuevamente el telar, el paquete avanzará hacia el túnel liberando la zona de soldadura para iniciar un ciclo nuevo. -
Page 44: Capítulo 7. Manutención Ordinaria
Capítulo 6. Normas de seguridad 6.1. Advertencias Antes de insertar el ciclo automático Ustedes tienen que asegurarse haber efectuado todas las regulaciónes. Todas las regulaciónes de la máquina tienen que ser efectuadas con el selector (Q) en posición “MAN.” (figura 6.1.A página 50). -
Page 45: Regulación De Las Levas
Capítulo 7. Manutención ordinaria 7.6. Regulación de las levas La regulación de las levas tiene que ser efectuada solo por los empleados autorizados! Para acceder a las levas es necesario descomponer el retablo (38) puesto atrás de la máquina (figura 7.6.A página 51). Las levas son 2 y reglan (figura 7.6.B página 51): 1. -
Page 46: Particulares De Recambio
Capítulo 7. Manutención ordinaria 7.9. Particulares de recambio Codigo Denomonación particular S08A0404 Revestimiento teflon FE385602 Lamina soldadora S0K00306 Borne central completo S0K00302 Borne trasero completo S0K00301 Terminal anterior completo FM170002 Barra de torsion S03A0606 Rueda con cava completa S03A0605 Rueda con microperforador completa FE380015 (380/415V) Resistencias FE380019 (200/208V) -
Page 47: Eg Konformitätserklärung
µηχανή συσκευασίας τύπου: Media Matic n° è conforme a quanto prescritto dalle seguenti direttive e successive modifiche: is in conformity with prevision of following directives and their modifications: ist im vebereinstimmaung mit den Sicherheitszielen der Bestimmungen und Zuckünftige warianten: est en conformité... - Page 48 1.3. 1.4. 1.5. 2.1.A 2.1.B 2.2. 2.3. 3.1.A 3.1.B 3.1.C...
- Page 49 3.1.D 3.2. 3.3.A 3.3.B 3.3.C 3.4.A 3.4.B 3.5.A...
- Page 50 3.5.B 3.6. 3.7. 3.8.A 3.8.B 3.9.A 3.9.B 3.10. 4.1. 5.1.
- Page 51 5.2. 6.1.A 6.1.B 6.1.C 6.1.D 6.1.E 7.2.A 7.2.B...
- Page 52 7.3.A 7.3.B 7.4.A 7.4.B 7.5. 7.6.A 7.6.B 7.7.
- Page 53 7.8.
- Page 54 7.8.
- Page 55 " (I) Tipo CERTIFICATO DI GARANZIA (GB) Type CERTIFICATE OF GUARANTEE (D) Typ GARANTIESCHEIN (F) Type BULLETIN DE GARANTIE (E) Tipo CERTIFICADO DE GARANTIA (P) Tipo CERTIFICADO DE GARANTIA (GR) Τύπος ΠΙΣΤΟΠΟΙΗΤΙΚΟ ΕΓΓΥΗΣΗΣ (I) Matricola n° Data e timbro rivenditore (GB) Serial n°...
- Page 56 Minipack-torre S.p.A. Via Provinciale, 54 - 24044 DALMINE (BG) - ITALY Tel. (035) 563525 – Fax (035) 564945 E-mail: info@minipack-torre.it http://www.minipack-torre.it " Spett.le minipack-torre S.p.A. Via Provinciale, 54 24044 DALMINE (BG) ITALY MADE IN ITALY...
Need help?
Do you have a question about the Media Matic and is the answer not in the manual?
Questions and answers