Table of Contents
Advertisement
Quick Links
Advertisement
Table of Contents
Troubleshooting

Summary of Contents for PIKA B801 REcharge
- Page 1 Pika B801 REcharge™ Off-grid Charge Controller Operation Manual...
-
Page 3: Revision Table
Operation M anual B801 B idirectional R Ebus™ B attery C harge C ontroller Revision Table Revision Date Changes 03/19/2015 Initial Release... -
Page 4: General Remarks
Congratulations! You have purchased the Pika Energy B801 Bidirectional REbus™ Charge Controller, a dependable, efficient component of your clean energy system. The B801 is the result of the Pika team’s careful development and testing, building on decades of experience in the fields of power electronics and renewable energy systems. -
Page 5: Table Of Contents
2.1 Appropriate Usage ..........................5 2.2 Supported Battery Types ........................5 3 Notes concerning installation and operation .................... 6 3.1 Intended (normal) use ........................6 3.2 Pika Energy Factory Limited Warranty ....................6 3.3 Service ..............................6 4 The REbus Microgrid ..........................7 4.1 Simple and Efficient Power Distribution and Management ............... - Page 6 8.3 Wi-Fi Status Messages and Troubleshooting ..................25 8.3.1 Connection states: ........................25 8.3.2 Connection state messages: ...................... 26 8.4 Pika account and the REview™ online monitoring system ............... 27 9 Maintenance ............................28 9.1 Battery Maintenance ........................28 9.2 Handling Errors and Faults ........................ 28 10 Troubleshooting Guide ..........................
-
Page 7: Regarding This Document
1 Regarding this Document This manual contains important instructions for the B801 Charge controller that must be followed during installation and maintenance of the charge controller. The B801 is designed with safety in mind, but as with all electrical and electronic equipment, certain precautions must be observed when installing and/or operating the B801. -
Page 8: Important Safety Information And Instructions
2.2 Supported Battery Types The B801 is to be connected to a 24V to 48V battery bank, contact Pika support for information regarding other battery voltages. Supported battery chemistries include: flooded lead acid, sealed lead acid (“maintenance free”), AGM, NiFe (Nickel-Iron), aqueous hybrid ion and lithium based chemistries. -
Page 9: Notes Concerning Installation And Operation
WARNING: Do not attempt to repair the B801 Charge Controller. The charge controller contains no user-serviceable parts. If the Pika B801 malfunctions or fails in any way, first contact Pika customer service at 1 (207) 887-9105 for troubleshooting help. See the Warranty section for details on terms and conditions for repair or replacement under warranty. -
Page 10: The Rebus Tm Microgrid
REbus™ Microgrid to communicate with one another. The B801 uses this capability to gather information about your system such as the status and energy production of your Pika T701 Wind Turbine or your solar array, which connects to the REbus™ Microgrid through the Pika S2001 PV Link. -
Page 11: Designing A Rebus™ System
REbus™ ensures that excess input power from renewable sources such as the Pika T701 Wind Turbine or Pika S2001 PV Link will be throttled back to prevent over-charging of the batteries. As of publication, Pika Energy offers the following REbus™ products in ... -
Page 12: Blue "Wi-Fi" Led
When solid green, the B801 is functioning normally and is importing or exporting power to/from the REbus™ DC Microgrid. Blinking green indicates a state where the B801 is functioning normally but not importing or exporting power to/from the REbus™ DC Microgrid. When solid yellow, the B801 is in a “Waiting”... -
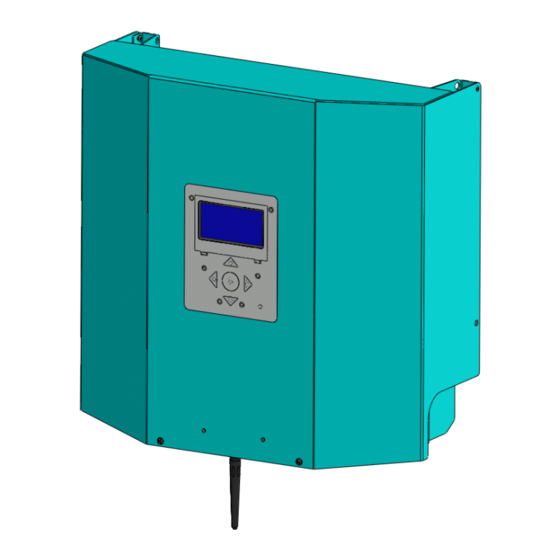
Page 13: B801 Charge Controller Page
REbus™ This message is displayed when a REbus device reports an error. The Device message indicates which REbus device requires your attention. Error Notification REbus This LED describes the state of all of the REbus devices connected to the Status REbus DC Microgrid. - Page 14 Battery batteries as initiated by the user. ERR: General An unspecified error has occurred. Please contact Pika Energy for assistance. DC Power, The B801 displays the instantaneous power being imported/exported battery to/from the batteries as well as the current battery voltage. It also tracks the voltage and amount of energy that has been exported overall.
- Page 15 Button functionality for battery charge Menu Options: controller information page Enable/Disable Instruct the charge Left/Down Scroll to the REbus information controller to enable or page. disable. Right/Up Scroll to the device information Settings Adjust setpoints for B801 pages. Center Open the battery charge controller menu.
- Page 16 Holding the up or down button for 5 seconds will increment the setpoint much faster. Refer to Table 1 User Setpoint Table for a description of each setpoint as well as permissible ranges. Only after pressing “Commit” will all of the setpoints be saved. NOTE that changing the number of cells (“Batt Num Cell”, setpoint #4) or the battery chemistry type (“Batt Type”, setpoint #3) will automatically default the ENTIRE setpoint table after selecting commit.
-
Page 17: Wi-Fi Status Page
6.3.3 Wi-Fi Status Page Position Description Explanation Wi-Fi network The B801 displays the Wi-Fi network and IP address that it has been and IP address assigned when configured to connect to a Wi-Fi network. Wi-Fi Status The B801 also displays the Wi-Fi connection status when configured to connect to a Wi-Fi network. - Page 18 6.3.4 Other REbus™ Device Pages Position Description Explanation REbus Device The B801 will display the name, device type, and status of each of the Name, Type, REbus devices. Status REbus Device The B801 also displays the instantaneous DC power being generated (or DC Power and used) by this device.
-
Page 19: Background Illumination
7 Operation 7.1 Installation Please consult the Pika B801 Charge Controller Installation & Service Manual for instruction and important safety precautions related to the installation of your new charge controller. Anyone installing a B801 Charge Controller should follow the strict safety procedures and instructions provided in the Installation &... -
Page 20: Bulk
Depth of Discharge (DoD) The state of charge of the batteries can be 0% to 100% charged. The Depth of Discharge refers to how much of the total charge you want to use before charging the battery bank back to 100% charge again. For example a 40% DoD would mean that when the batteries got down to 60% state of charge then the B801 would start to Bulk charge the batteries back to 100% state of charge (see Bulk charging section for more information on Bulk charging). -
Page 21: Battery Voltage Limits
Pika recommends that the user only override the “Error Low Battery Voltage” state when there is input power available from the sources (e.g. the wind is blowing or the sun is shining). -
Page 22: High Temperature Operation
bank to 65V, however if an external source (e.g. a different charge controller) charges the batteries to this high voltage, then the B801 will shut down to protect itself. 7.6 High Temperature Operation The B801 is designed and tested to operate continuously at full power in ambient air temperature up to 50ºC. - Page 23 “Blk Exit T” Bulk Exit Time Minutes 360 (6hrs) ” Eq. V Nom” Equalize Voltage Volts 62.0 Nominal “Eq. Exit T” Equalize Exit Time Minutes 360 (6hrs) “Dchrg V Min” Discharge Voltage Volts 47.0 Minimum “Abs V Min” Absolute Voltage Volts 45.0 “Batt T Co”...
- Page 24 6) Re-bulk Voltage: Determines the battery voltage at which to enter the “Bulk” charging state. This setpoint determines Depth of Discharge of your battery bank. Please consult the manufacture for an optimal value for “Re-bulk Voltage” setpoint for your system. 7) Float Exit Time: Sets the amount of time that the B801 will remain in the “Float”...
-
Page 25: Internet Compatibility
REview page. 8.1 Wi-Fi Antenna The Pika B801 is shipped standard with a Wi-Fi antenna that should offer good performance for most installations within 150 feet of a wireless router. For installations where the charge controller is located at a large distance from the Wi-Fi router, the signal strength may not be adequate. -
Page 26: Configuring Your Wi-Fi Connection
(available from electronic component distributors) will be compatible. For alternate antenna suggestions contact Pika Energy. 8.2 Configuring your Wi-Fi Connection This section will describe how to connect the B801 to your Wi-Fi network. The B801 Wi-Fi connection is IEEE 802.11G compliant and connects to 802.11b/g/n routers with WEP, WPA-PSK, and... -
Page 27: Add Network Setup
(Scan) Step 4: Enter your password by using the UP/DOWN/LEFT/RIGHT buttons. RIGHT and LEFT will change the cursor position. UP and DOWN will change the character at the cursor position. Press CENTER when you have finished entering your password. The B801 will immediately try to connect to your network with the provided password. -
Page 28: Wi-Fi Status Messages And Troubleshooting
(Manual) Step 6: Enter your password by using the UP/DOWN/LEFT/RIGHT buttons. RIGHT and LEFT will change the cursor position. UP and DOWN will change the character at the cursor position. Press CENTER when you have finished entering your password. You will be brought back to the Manual network setup screen. -
Page 29: Connection State Messages
8.3.2 Connection state messages: “Connection failed This message is displayed when the B801 has failed to connect to your Wi-Fi network join failed” network but not enough information is available to determine a specific reason. In many cases this is due to poor receiver reception on the B801. Try moving your Wi-Fi router closer to the B801. -
Page 30: Pika Account And The Review™ Online Monitoring System
B801. 8.4 Pika account and t he R Eview™ o nline m onitoring s ystem Use the device ID card for each piece of hardware you’d like to see on your REview page by logging on to http://www.profiles.pika-energy.com/... -
Page 31: Maintenance
9 Maintenance In general the Pika B801 does not require any regular maintenance. Periodically ensure that nothing is blocking the flow of air through the heatsink fins to prevent from thermally limiting the unit. If a hardware failure of the B801 has occurred, contact Pika technical service for information on how to obtain a replacement unit. - Page 32 Unit displays waiting state 1) Some fault conditions warrant a timeout, if the unit does not return to normal operation after 10 minutes contact technical service. LCD Screen displays solid black or solid 1) Turn the unit off using the power switch on the white bottom, wait 1 minute and turn it back on again.
-
Page 33: Frequently Asked Questions
11 Frequently Asked Questions Where do I go to see my REview page? To make a REview account and register your hardware visit http://profiles.pika-energy.com. Collect all device ID cards which will be needed for registration. Consult the REview quickstart guide for more information regarding registration. -
Page 34: Specifications
12 Specifications Electrical Rating Name Units REbus™ DC Maximum Microgrid voltage REbus™ DC Microgrid operating voltage range REbus™ DC Maximum Microgrid input current REbus™ DC Maximum Microgrid output current Operating battery voltage range (DC) Maximum continuous DC charging battery current Maximum continuous DC discharging battery current...
Need help?
Do you have a question about the B801 REcharge and is the answer not in the manual?
Questions and answers