Advertisement
Quick Links
Please Contact Moen First
For Installation Help, Missing or
Replacement Parts
(USA)
1-800-BUY-MOEN (1-800-289-6636)
Mon - Fri 8:00 AM to 7:00 PM, Eastern
Sat. 9:00 AM to 3:00 PM Eastern
WWW.MOEN.COM
(Canada)
1-800-465-6130
Mon - Fri 7:30 AM to 7:00 PM, Eastern
WWW.MOEN.CA
Por favor, contáctese primero con Moen
Para obtener ayuda de instalación, piezas
faltantes o de recambio
01-800-718-4345
Lunes a viernes de 8:00 a 20:00 hs.
(Costa Este)
Sáb. 8:00 a 18:30 hs. (Costa Este)
WWW.MOEN.MX
Veuillez d'abord contacter Moen
en cas de problèmes avec l'installation, ou pour
obtenir toute pièce manquante ou de rechange
1-800-465-6130
Du lundi au vendredi:
de 7 h 30 à 19 h, HE
WWW.MOEN.CA
HELPFUL TOOLS
For safety and ease of faucet replacement,
Moen recommends the use of these
helpful tools.
Installation Guide
Guía de Instalación
Guide d'installation
7570/ 67570
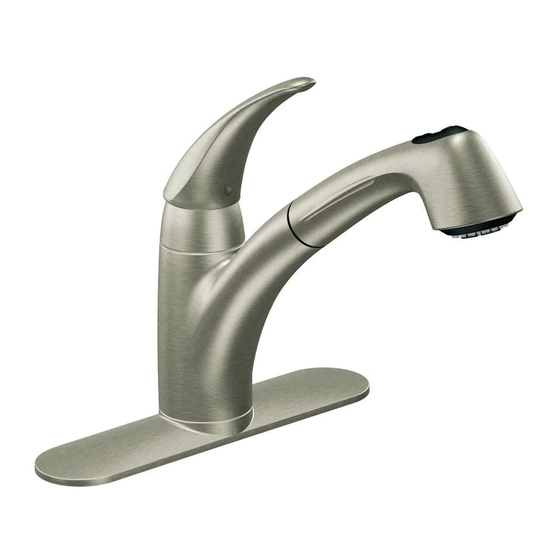
ONE HANDLE PULLOUT KITCHEN FAUCET
MEZCLADORA MONOMANDO
RETRÁCTIL PARA COCINA
ROBINET DE CUISINE À BEC
RÉTRACTABLE ET UNE POIGNÉE
Style varies by model.
El estilo varía por el modelo.
Le style varie selon le modèle.
HERRAMIENTAS ÚTILES
Para que el cambio de la llave sea fácil y
seguro, Moen le recomienda usar estas
útiles herramientas.
1
7545 / 67545
7575
OUTILS UTILES
Par mesure de sécurité et pour faciliter
l'installation, Moen suggère l'utilisation des
outils suivants.
INS1912C - 1/14
7560
67315
Advertisement

Related Manuals for Moen 7545


Summary of Contents for Moen 7545
- Page 1 WWW.MOEN.COM (Canada) 1-800-465-6130 Mon - Fri 7:30 AM to 7:00 PM, Eastern 7545 / 67545 7560 WWW.MOEN.CA Por favor, contáctese primero con Moen Para obtener ayuda de instalación, piezas faltantes o de recambio 01-800-718-4345 7570/ 67570 7575 67315 Lunes a viernes de 8:00 a 20:00 hs.
-
Page 2: Parts List
Parts List Note: Style may vary by model. Nota: El estilo puede variar por el modelo. Note : Le modèle peut varier par le modèle. A. Spray Wand H. Mounting Nut B. Screen Washer I. Hose Protector C. O-Ring J. Hose Weight D. - Page 3 INS1912C - 1/14 SINGLE HOLE OPTION OPCIÓN CON UN SOLO ORIFICIO OPTION D'UNE SEULE OUVERTURE GO TO VAYA A ALLER À Insert Spout O-Ring (E) into Faucet Body (K) groove. For single hole installation option, install Faucet Body (K) Install Escutcheon (M) and Gasket (N) together onto sink. through sink opening.
- Page 4 º 1 2 0 Verify that the faucet rotates properly. Thread on Hose Protector (I) by hand as shown. 1. Place Installation Tool (L) over Mounting nut (H). 2. Insert screwdriver through bottom hole of tool and tighten nut. Asegúrese de que el Grifo gire apropiadamente. Enrosque el protector de la manguera (I) a mano como se 1.
- Page 5 INS1912C - 1/14 Note: weight must be installed to ensure ease of function. Nota: se debe colocar la Etiqueta pesa para garantizar un buen funcionamiento. Étiquette Cold Frio Note : un poid doit être installé pour faciliter le Froid fonctionnement. Caliente Chaud Insert Hose into end of Outlet Hose (F).
- Page 6 Tighten Spray Hose (D), flush with Spray Wand (A). Make 1/8 Check Spray Wand (A) movement. turn. Do not over tighten. Controle el movimiento de la varilla rociadora (A). Apriete la manguera retráctil (D) hasta que quede contra la Vérifier que le bec de pulvérisation (A) se déplace bien. varilla rociadora (A).
-
Page 7: Débit Réduit
INS1912C - 1/14 Irregular Flow / Flujo Irregular / Débit réduit Sec. For irregular flow, follow steps A through D to achieve regular Unscrew Pullout Hose (D) from Spray Wand (A) and remove Turn on handle. Rinse Screen Washer (B) with water for 15 Screen Washer (B) and O-Ring (C). - Page 8 à Moen inc. à l’adresse indiquée ci-dessous, pour expli- address, area code and telephone number. estado a otro o de una provincia o nación a otra. Moen lo asesorará en el procedimiento a seguir para hacer válida quer le défaut, d’inclure une preuve d’achat, d’inscrire esta garantía.