
Related Manuals for Microgreen Power Pak

Summary of Contents for Microgreen Power Pak
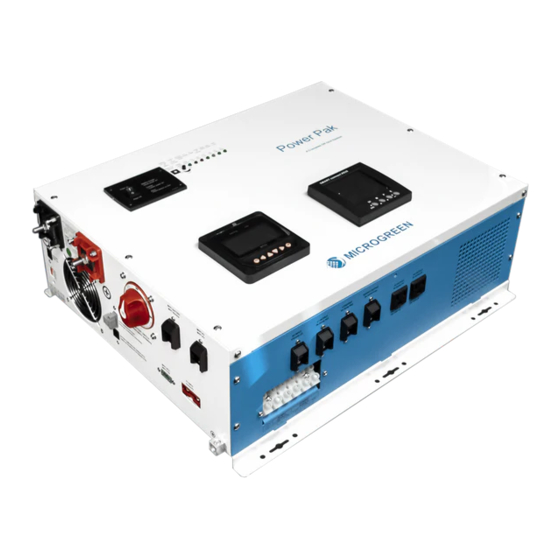
- Page 1 Power Pak user manual Off-Grid System In a Box 3kW / 4kW / 10kW Models MICROGREEN SOLAR CORP. 1-888-684-8868 info@microgreen.ca Microgreen.ca...
-
Page 3: Table Of Contents
Table of Contents HOW TO USE THIS MANUAL ....................................4 POWER PAK MODELS ......................................4 SYSTEM OVERVIEW ........................................7 PRODUCT DESCRIPTION ....................................... 8 Recommended Uses ....................................9 Features ..........................................10 IMPORTANT SAFETY INFORMATION................................11 General safety precautions..................................11 Precautions When Working with Batteries ..........................12 INSTALLATION .......................................... - Page 4 LED Indicators ....................................... 33 Fans ............................................. 34 DIP Switches........................................34 Other Features ......................................36 8.8.1 Battery Voltage Recover Start ...............................36 8.8.2 Auto Gen Start ......................................36 TROUBLESHOOTING GUIDE ....................................37 WARRANTY ..........................................39 POWER PAK SPECS SHEET ....................................40 HOW TO CONTACT US ...................................... 41...
-
Page 5: How To Use This Manual
Power Pak. 2 Power Pak Models This manual covers the 3 available Power Pak Models. The features and functionalities are largely the same, the main differences being the AC power output rating, the battery voltage required, and the maximum charge that can be accepted from solar panels:... - Page 6 MINI Power Pak COMPACT Power Pak...
- Page 7 GRANDE Power Pak...
-
Page 8: System Overview
(with or without solar) available as a back-up in the event of a power outage. Note: The Power Pak does NOT work as an “on-grid” system, where solar energy can be fed back to the grid for credit. -
Page 9: Product Description
4 Product Description... -
Page 10: Recommended Uses
The Power Pak can be optionally set up as a back-up power source for the grid or generator. This can be done by connecting it to an AC power source - either the electrical grid or a generator - and by setting it to AC Utility Priority Mode. -
Page 11: Features
Industrial equipment – metal halide lamps, high-pressure sodium lamps. ▪ Home entertainment electronics – TVs, VCRs, video games, stereos, musical instruments, satellite ▪ equipment. 4.2 Features • Easy to install & operate • ULc certified for safest possible operation • Designed to operate in harsh environments •... -
Page 12: Important Safety Information
Please read and understand the following section. Do not expose the Power Pak to rain, snow, spray, bilge or dust. To reduce risk of hazard, do not cover or obstruct the ventilation openings. Do not install the Power Pak in a zero-clearance compartment. Overheating may result. -
Page 13: Precautions When Working With Batteries
Installation should ensure that the inverter’ s AC output is, at no time, connected to its AC input. WARNING – LIMITATIONS ON USE The Power Pak should not be used in connection with critical life support systems as it is not a redundant power source. -
Page 14: Installation
It is recommended to have at least 2 persons present during installation. The Power Pak should be installed indoors in a location that is dry, clean and cool. Leave at least 12 inches of space around all sides of the Power Pak for ventilation. It is recommended to install the Power Pak near the building’s electrical panel. -
Page 15: Wall Mounting
Hook the bottom rail of the Power Pak onto the lip of the Mounting Panel. The Mounting Panel will support the weight of the Power Pak. Use 3 screws in the top rail to secure the Power Pak to the wall. -
Page 16: Solar Panels Connection (Optional)
6.5 Solar Panels Connection (optional) This section describes how to connect a solar panel array to the Power Pak. This is optional. If solar panels are not connected, then another power source is required, e.g. electrical utility, diesel generator, etc. -
Page 17: Grounding
6.7 Grounding The Power Pak system comes with a bare ground wire and a ground plate if required. If there is an existing ground for the building’s electrical panel, do not install a second ground. ESA does not permit use of a second ground plate unless the first one is under another building at least 100 feet away, to prevent a ground loop. -
Page 18: Ac Connections - Input And Output (Optional)
The Power Pak is not designed to accept AC inputs from multiple sources simultaneously, i.e. either the electrical utility or a generator can be connected to the Power Pak’s AC input, but not both at the same time. Please consult a qualified electrician if you want to connect to both. -
Page 19: Ac Output Connections
Power Pak can connect to, depending on the model: The Power Pak MINI provides a single 3 kW 120 V AC output. This is designed for single-input 120 V electrical panels that are used in RVs, trailers and boats. - Page 20 STEPS to connect to a split 120V bus electrical panel for COMPACT and GRANDE. Connect the Power Pak’s AC Output (L1, L2, and Neutral) to the electrical panel with 3 pieces of wire, size AWG 8. Distinguish L1, L2, and Neutral spots when wiring. Also connect the ground. See Figure below: L1 (red), L2 (black), Neutral (blue), and Ground (copper).
-
Page 21: Operating Instructions
1,000Wh of energy per day. Power Saver can save approximately 800Wh per day. In Power Saver mode, the Power Pak will sleep when there is no significant AC load. It will wake up and operate when there is a constant AC draw of approximately 40W or more. -
Page 22: Monitoring
If a generator’s auto start is connected to the Auto Gen Start on the Power Pak, the switch will activate and start the generator if the voltage of the batteries drops below a certain value. The triggering voltage levels for each model is as follows: •... -
Page 23: Ac Meter
Solar Priority mode operation. When the Power Pak first is powered up the AC meter goes through a power test and the display will flash through a few different screens. Then the default measurement screen will appear. -
Page 24: Button Functions
7.2.1.1 Button Functions Button Display Example Displays Voltage or Current in each line. Press this button until the V (volts) or A (amps) are displayed Displays power delivered in each line. Press this button until the W (Watts) are displayed Displays total energy delivered in each line. - Page 25 Operating products with a motor, like a saw or water pump, may drop the PF to 0.8 or lower. Operating with a PF below 0.5 for many hours may reduce performance of the Power Pak. This is most common with failing motors or some motors manufactured outside of North America.
-
Page 26: Dc Meter
The DC meter, also called the charge controller display, can be found on the lower left of the Power Pak’s front panel. This meter provides accurate information on how much power is being used. This can be helpful in planning when or whether to use certain appliances, or when considering system upgrades. - Page 27 The icons on the screen are explained below. Figure: DC meter display elements Day and night icons: when solar panel voltage is above 1V, this will automatically switch to day. When solar panel voltage is below 1V, it will automatically switch to night. Charge current icon: dynamically displays charge current.
- Page 28 The AC meter has 6 buttons under the display screen, as shown in the diagram below: From the default display screen, push ESC to enter the main menu. Use the Up and Down buttons to move the cursor and the OK and ESC buttons to enter or exit menu items. The main menu is shown below. For the average user, Monitoring will be the only item of interest.
-
Page 29: Components Description And Features
AC with an average Total Harmonic Distortion (THD) of 10% (min 5%, max 15%) depending on load connected and battery voltage. The peak overall efficiency of the Power Pak is 80% - 85%, while the efficiency of the inverter is 95%. 8.2 Charging The Power Pak is equipped with two chargers: a DC charge controller for charging the batteries from solar panels, and an AC charger for charging the batteries from the electrical grid or a generator. - Page 30 Absorb Charging: During the second charging stage the charger provides the batteries with a constant voltage and reduces the charging current in order to maintain the Fast Charge Voltage setting. The purpose of this stage is to “top-up” the batteries to full charge while limiting the voltage to a safe level.
-
Page 31: Battery Type Selector
8.2.1 Battery Type Selector The Power Pak is compatible with many types of batteries. The table below shows a list of supported battery types and associated charge voltages. The battery type can be set by pushing the button to the left of the LEDs on the front of the Power Pak. -
Page 32: Charging Depleted Batteries
The Power Pak is capable of starting up with depleted batteries. For the 24VDC model, as long as the battery voltage does not drop below 20V, the Power Pak will be able to charge the battery once qualified AC or DC inputs are present. This will only occur if the following conditions are met once the battery voltage goes below 20 V: The Power Pak Switch on the front of the product is always kept in the "ON"... -
Page 33: Power Transfer
Back feeding protection ● After the reason for a fault has been cleared, the Power Pak has to be reset to start working again. Do this by turning the Power Pak Switch on the front of the unit off and on again. -
Page 34: Led Indicators
Load>150% (±10%) Buzzer beeps 0.5s every 1s. Shutdown after 20s. 8.5 LED Indicators There is an LED display on the front of the Power Pak. The following display explains the meaning of each LED indicator. PowerSaver mode active (light flashes). -
Page 35: Fans
8.6 Fans The Power Pak contains both AC and DC fans. The AC fan will only run when there is AC output from the Power Pak. In PowerSaver mode, the AC fan will turn on from time to time, when a certain temperature or load level is reached. - Page 36 AC input is present, it will be used to charge the battery and supply the load at the same time. When the SW3 is switched to Position 1, the Power Pak’s inverter is initially in standby mode and sends a pulse to detect the presence of a load every 3 seconds.
-
Page 37: Other Features
8.8.1 Battery Voltage Recover Start After a low battery voltage shutoff ( 10V for 12V model, 20V for 24V model, 40V for 48V), the Power Pak is able to restore operation once the battery voltage recovers to 13VDC / 26VDC / 52VDC (with power switch still in the “On”... -
Page 38: Troubleshooting Guide
This section contains information about how to troubleshoot possible error conditions while using the Power Pak. The following tables are designed to help you quickly pinpoint the most common causes of failures. Table 9.1 Indicators & Buzzers Indicator on Front of Power Pak POWER OVER OVER FLOAT... - Page 39 Power Pak’s built-in chargers to initiate a charge. An external charging source, such as a car charge, may be required to bring the battery voltage up to the minimum for the Power Pak to function. See Section 7.2.3 for more information.
-
Page 40: Warranty
10 Warranty The Power Pak comes with a 2-year limited warranty. The following cases are not covered under warranty: DC polarity reverse. The Power Pak is designed without DC polarity reverse protection. A polarity reverse may severely damage the Power Pak. -
Page 41: Power Pak Specs Sheet
11 Power Pak Specs Sheet Power Pak MINI COMPACT GRANDE MODEL Continuous Output 3000W 4000W 10000W Power Surge Rating(20s) 9000W 12000W 18000W Output Waveform Pure Sine wave/Same as input (Bypass mode) Nominal Efficiency 88% (Peak) Line Mode Efficiency > 95% Power Factor 0.9-1.0... -
Page 42: How To Contact Us
Wall mount Dimensions (L*W*H) 484*328.2*192.2mm 505*447*178mm 588*415*200mm Mechanical Weight 26 KG 35 KG 68 KG Specifications Shipping Dimensions (Power Pak 630*525*265mm 630*525*265mm 846*731*259mm (L*W*H) Series) Shipping Weight 28 KG 37 KG 94 KG Display Status LEDs / Status LED + LCD...
Need help?
Do you have a question about the Power Pak and is the answer not in the manual?
Questions and answers