Palram Feria 4x4.2 Assembly Instructions Manual
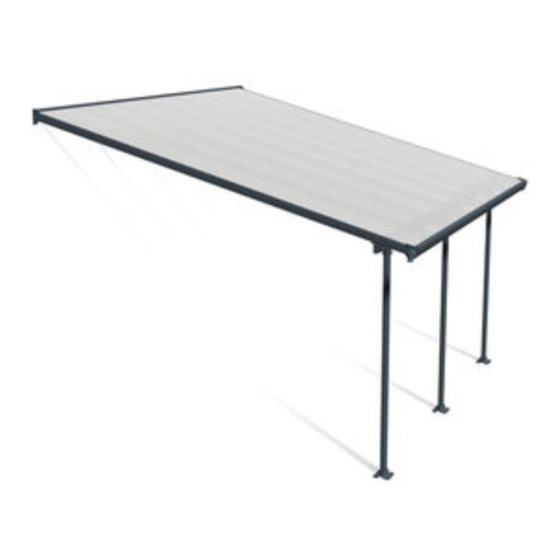
Patio cover 425l x 387w cm / 167.3"l x 152.4"w
Hide thumbs
Also See for Feria 4x4.2:
- Manual (68 pages) ,
- Assembly lnstructions (47 pages) ,
- Installation instructions manual (80 pages)
Advertisement
Quick Links
A
ssembly Instructions
Approx. Dim.
Feria 4x4.2- Patio Cover
425L x 387W cm / 167.3"L x 152.4"W
M
dule Extention
o
181L x 387W cm / 71.3"L x 152.4"W
USA
877-627-8476
Canada
1 800-866-5749
After Sale Service
Email: customer.service@palram.com
England 01302-380775
Germany 0180-522-8778
www.palramapplications.com
France
0169-791-094
International +972 4-848-6942
Advertisement

Related Manuals for Palram Feria 4x4.2


Summary of Contents for Palram Feria 4x4.2
- Page 1 Instructions Approx. Dim. Feria 4x4.2- Patio Cover 425L x 387W cm / 167.3”L x 152.4”W dule Extention 181L x 387W cm / 71.3”L x 152.4”W After Sale Service Email: customer.service@palram.com 877-627-8476 England 01302-380775 France 0169-791-094 Canada 1 800-866-5749 Germany 0180-522-8778 International +972 4-848-6942 www.palramapplications.com...
-
Page 2: You Will Need
Before Assembly Please read these instructions carefully before you start to This product is suitable for Palram’s Patio Covers range assemble this product. Please carry out the steps in the order set out in these instructions. Please consult your local authorities if any permits are required to construct the Keep these instructions in a safe place for future reference. -
Page 3: During Assembly
0” - 21.3” 0” - 21.3” In case that you already own Palram Patio cover it is necessary to dismantle some parts and keep them for future use. Step 4: Install plates #937 with part #7507 as described in step 3... - Page 4 Vor Beginn der Montage Anmerkung: Bitte lesen Sie diese Anleitungen sorgfältig durch, bevor Sie Dieses Produkt eignet sich für alle Pergolen der Firma Palram mit dem Aufbau dieses Produktes beginnen. Bitte führen Sie die Schritte Fragen Sie bei Ihren örtlichen Behörde nach, ob irgendwelche Genehmigungen aus, wie sie in der Reihenfolge dieser Anleitung angegeben werden.
- Page 5 0” - 21.3” 0” - 21.3” Falls Sie bereits eine Palram Patio - Abdeckung besitzen, ist es notwendig einige Teile abzumontieren und diese für den zukünftigen Gebrauch aufzubewahren. Schritt 4: Installieren Sie Platten # 937 mit dem Teil # 7507 wie im Schritt 3 beschrieben wird Schritt 10: Installieren Sie wie in den Schritten 8-9 beschrieben wird Schritt 18: Installieren Sie wie in den Schritten 12-17 beschrieben wird.
- Page 6 Avant Assemblage Lisez s’il vous plaît attentivement ces instructions avant de commencer assembler ce produit. Ce produit est adapté pour les Gamme Couvres Patio de Palram Veuillez s’il vous plait exécuter les étapes d’assemblage dans l’ordre définit dans ces instructions.
- Page 7 0” - 21.3” et les dommages. Dans le cas ou vous avez déjà un Couvre Patio Palram il est nécessaire de démonter les pièces et de les garder pour utilisation ultérieur. Step 4: Étape 4 : installer lamelles #937 avec pièce #7507 comme décris dans l’étape 3 Étape 10 : installer comme décris dans les étapes 8-9...
-
Page 8: Antes Del Montaje
Por favor, lea atentamente estas instrucciones antes de empezar a ensamblar el producto. Este producto es compatible con la gama de Cubiertas de Patio de Palram. Lleve a cabo los pasos en el orden indicado en estas instrucciones. Consulte con las autoridades locales si es necesario obtener algún permiso para Guarde las instrucciones en un lugar seguro para futuras consultas. - Page 9 0” - 21.3” 0” - 21.3” Si usted ya tiene una cubierta de patio de Palram, será necesario que desarme algunas partes y que las guarde para usarlas en el futuro. Paso 4: Instale los paneles nº937 con la pieza nº7507 como se describe en el paso 3...
- Page 10 Conte nt s Qty. Item Qty. Item Qty. Item Qty. Item 7335 T001 (+1) (+1) (+2) 8708 7039 7028 (+1) 7294 (+1) 7295 7038 4042 (+6) (+1) 7027 4010 7334 7296 (+6) (+1) 5000 7297 7029 4000 (+1)
- Page 11 Conte nt s Qty. Item Qty. Item 7042 7041 7043 7040 7288 7285 7290 7291 7287 7293 7298 7286...
- Page 12 In case that you purchased an extension kit, please select at this step on which side of the patio cover you wish to install it and continue according to thefollowing described steps. Falls Sie ein Erweiterungsset für das Produkt erworben haben, dann wählen Sie in diesem Schritt bitte aus auf welcher Seite der Patio – Überdachung Sie eses Set installieren und gehen Sie entsprechend der nachfolgenden Schritte vor.
- Page 13 7285 4042 13mm 4042 7285...
- Page 14 7040 7041 7040 7041...
- Page 15 7041 7041 7040 7040 0 - 54cm 21.2'' 7040 7041 7040 7041...
- Page 16 7506 7507 7507 7507 15cm 7506 7506 7507...
- Page 17 7294 8708 7295 7295 7294 8708 7294...
- Page 18 4042 4042 13mm...
- Page 19 4042 4042 7285...
- Page 20 7039 7029 7029 7039...
- Page 21 7042 7043 Option: CAULK / SILICON 7043 7043 7042 7029 7039 7042 7029 7039...
- Page 22 7508 7029 7508 7039...
- Page 23 7027 7028 8708 7042 7028 DETAIL A 7043 8708 7027 7042 7027 Option: CAULK / SILICON...
- Page 24 7290 4010 4010 7290 10mm 5/16” 120 mm ”...
- Page 25 7039 7335 4000 7039 13mm 7290 7039 7288 7290 7335 4000 7290...
- Page 26 7288 4010 7288 7290 7288 10mm 5/16” 7288 4010 120 mm ”...
- Page 27 7335 4000 7335 7288 4000...
- Page 28 7291 7291 7291 7291...
- Page 29 7293 7334 7291 7293 7291 7334 7334 7293...
- Page 30 7509 7334 7039 7510 7509 7509 7510 7510 7039 7509 7334 7510...
- Page 32 7295 7294 8708 7295 7294 7295 7294...
- Page 34 7286 7286 7286 7286...
- Page 35 7286 7286 7286 7286...
- Page 36 14 24 7287 7287 7287 7287 7287 7287 7287 7287 7287...
- Page 37 7298...
- Page 38 7298 7298 7298...
- Page 39 7298 7298 7298...
- Page 40 7298 7298 7298 7298 7298 7298 7298...
- Page 41 7038 7038 7038 7038 7038 7038 7038 7038...
- Page 42 7038 7038...
- Page 45 0 - 54cm 0 - 54cm 0 - 21.2'' 0 - 21.2'' 310cm -370cm 122’ ’ -145.6”...
- Page 46 max- 60cm 23.6'' 0 - 54cm 0 - 21.2''...
- Page 47 4000 5000 4010 13mm 5000 4000 4010...
Need help?
Do you have a question about the Feria 4x4.2 and is the answer not in the manual?
Questions and answers