Table of Contents
Advertisement
Quick Links
Advertisement
Table of Contents

Related Manuals for SunFounder 7-inch Touch Screen

Summary of Contents for SunFounder 7-inch Touch Screen
- Page 1 7-inch Touch Screen www.sunfounder.com Jul 15, 2021...
-
Page 3: Table Of Contents
CONTENTS 1 Packing List 2 Install the Raspberry Pi OS 3 Quick Guide 4 Button & Port 5 Fixed 6 On-Screen Settings Menu Item Descriptions ......... 7 Settings for Raspberry Pi Adjust the Resolution . - Page 5 7) No adjustable components for users in the device. For nonprofessionals, do not try to open or repair this product by yourself in case of unwanted damages. If you have any questions, please send an email to service@sunfounder.com and we’ll reply as soon as possible. CONTENTS...
- Page 6 7-inch Touch Screen CONTENTS...
-
Page 8: Packing List
7-inch Touch Screen CHAPTER PACKING LIST Chapter 1. Packing List... -
Page 9: Install The Raspberry Pi Os
CHAPTER INSTALL THE RASPBERRY PI OS In this chapter, we firstly learn to write the Raspberry Pi OS to your Micro SD card. You can check the complete tutorial on the official website of the Raspberry Pi: https://projects.raspberrypi.org/en/projects/raspberry-pi-setting-up. Note: If you have already done it, you can skip this chapter. Required Components 1 * Micro SD Card 1 * Personal Computer... - Page 10 7-inch Touch Screen Step 3 Insert your SD card into the computer or laptop SD card slot. Step 4 In the Raspberry Pi Imager, select the OS that you want to install and the SD card you would like to install it on.
- Page 11 7-inch Touch Screen Step 6 Press Ctrl+Shift+X to open the Advanced options page to enable SSH and configure wifi, these 2 items must be set, the others depend on your choice . You can choose to always use this image customization options.
- Page 12 7-inch Touch Screen Step 7 Click the WRITE button. Step 8 If your SD card currently has any files on it, you may wish to back up these files first to prevent you from permanently losing them. If there is no file to be backed up, click Yes.
- Page 13 7-inch Touch Screen Step 9 After waiting for a period of time, the following window will appear to represent the completion of writing.
- Page 14 7-inch Touch Screen Chapter 2. Install the Raspberry Pi OS...
-
Page 15: Quick Guide
CHAPTER THREE QUICK GUIDE 1. Plug the HDMI cable. 2. Wire up the USB cable. - Page 16 7-inch Touch Screen 3. Get the two devices connected to their own corresponding power supplys. 4. Have a good time! Chapter 3. Quick Guide...
- Page 17 7-inch Touch Screen...
- Page 18 7-inch Touch Screen Chapter 3. Quick Guide...
-
Page 19: Button & Port
CHAPTER FOUR BUTTON & PORT... - Page 20 7-inch Touch Screen Chapter 4. Button & Port...
-
Page 21: Fixed
CHAPTER FIVE FIXED There is a screw thread at one side of the screen, and you can assemble the screen on the camera tripod. - Page 22 7-inch Touch Screen On the back of the touch screen are 4 screw holes (M4) with a 75mm spacing. They are used to help to hang the screen on the wall. Chapter 5. Fixed...
-
Page 23: On-Screen Settings
CHAPTER ON-SCREEN SETTINGS... -
Page 24: Menu Item Descriptions
7-inch Touch Screen 6.1 Menu Item Descriptions Chapter 6. On-Screen Settings... -
Page 25: Settings For Raspberry Pi
CHAPTER SEVEN SETTINGS FOR RASPBERRY PI 7.1 Adjust the Resolution For the Raspberry Pi 3 and the lower versions, you need reset the resolution ratio as follows. As for Raspberry Pi 4, when you start up it, the resolution is optimum. If you want to change its resolution, please refer to the next part. For Raspberry Pi 3 or Lower Version Step 1: Open config.txt. - Page 26 7-inch Touch Screen Reboot the Raspberry pi with the command sudo reboot. sudo reboot For Raspberry Pi 4 1) Click the Raspberry Pi icon -> Preferences -> Screen Configuration. 2) Then choose Configure -> Screens -> HDMI-1 -> Resolution -> choose the resolution that you want.
-
Page 27: Install Virtual Keyboard On Raspberry Pi
7-inch Touch Screen 7.2 Install Virtual Keyboard on Raspberry Pi When you use a touch panel, you can connect an external keyboard to help you do a text input operation, but it is best to install a virtual keyboard. Install the required software with the following command. - Page 28 7-inch Touch Screen In the General option, check the following 2 items. When you check Automatically display when editing text, you will be prompted to reboot, you can reboot after all settings are complete. Chapter 7. Settings for Raspberry Pi...
- Page 29 7-inch Touch Screen In the Window option, check Dock to screen edge. And in Auto-show option, check Auto-show when editing text again. 7.2. Install Virtual Keyboard on Raspberry Pi...
- Page 30 7-inch Touch Screen The next 2 items are optional, the ones checked in the picture are recommended by us, you can also check other ones. In Layout option, Small is recommanded. In Theme option, DarkRoom is recommanded. Chapter 7. Settings for Raspberry Pi...
- Page 31 7-inch Touch Screen After the setting is complete, restart Raspberry pi. Every time you restart Raspberry pi, you need to click General Access -> Onboard to enable the virtual keyboard. 7.2. Install Virtual Keyboard on Raspberry Pi...
- Page 32 7-inch Touch Screen Now you can use this keyboard to edit your files or codes. Chapter 7. Settings for Raspberry Pi...
-
Page 33: Right Click On Raspberry Pi
7-inch Touch Screen 7.3 Right Click on Raspberry Pi Touchscreen tablets and displays make it easy for you to perform simple navigation tasks with your fingers or stylus, but at some point, you may want to use right-click commands to quickly access context-specific shortcuts. - Page 34 7-inch Touch Screen After entering rc.local, add the following command before exit 0. sudo /usr/local/bin/evdev-rce & After restarting, you can long press on the desktop and see if the right click function appears. sudo reboot Chapter 7. Settings for Raspberry Pi...
-
Page 35: Product Features
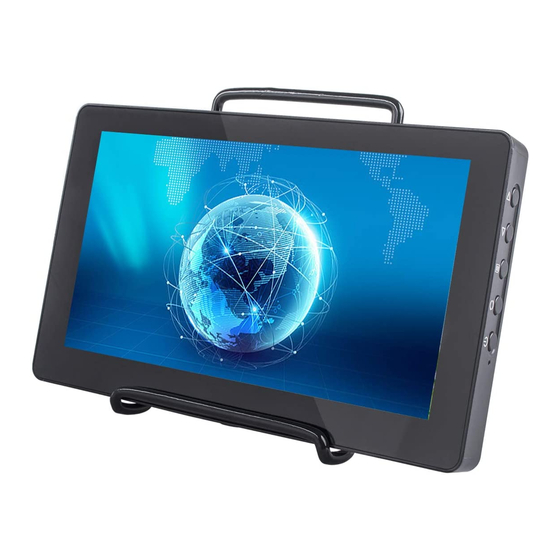
CHAPTER EIGHT PRODUCT FEATURES · Screen Size: 7 inch Display · External Dimensions: 182×114×15mm (L×W×D) · Visual Area: 154.21(H)×85.92(V) · Resolution: 1024×600 Pixels · Panel Type IPS: 45% color gamut. HD full view screen. · Response Time: 5ms · Contrast Ratio: 800:1 ·... - Page 36 7-inch Touch Screen Chapter 8. Product Features...
-
Page 37: Faq
CHAPTER NINE 1. The colored picture appears in black and white. A: Please check whether the saturation, brightness and contrast under the Color menu are adjusted properly. 2. No picture is displayed on the screen after the device powers on. A: Please check whether the HDMI output port is plugged properly. - Page 38 7-inch Touch Screen Chapter 9. FAQ...
-
Page 39: Copyright Notice
CHAPTER COPYRIGHT NOTICE All contents including but not limited to texts, images, and code in this manual are owned by the SunFounder Company. You should only use it for personal study,investigation, enjoyment, or other non-commercial or nonprofit purposes, under therelated regulations and copyrights laws, without infringing the legal rights of the author and relevant right holders.
Need help?
Do you have a question about the 7-inch Touch Screen and is the answer not in the manual?
Questions and answers