Table of Contents
Advertisement
Quick Links
Y O T S U B A M O T O
Electric bike for kids
Instruction manual and warranty information
Thank you for purchasing Yotsubamoto "Meow".
Please store this instruction manual and warranty form in a safe place
for the duration of possession of the product, as this manual describes
the setup, method of use, storage method of the product, etc.
Advertisement
Table of Contents

Summary of Contents for DIRT FREAK Yotsuba Moto Meow 12
- Page 1 Y O T S U B A M O T O Electric bike for kids Instruction manual and warranty information Thank you for purchasing Yotsubamoto "Meow". Please store this instruction manual and warranty form in a safe place for the duration of possession of the product, as this manual describes the setup, method of use, storage method of the product, etc.
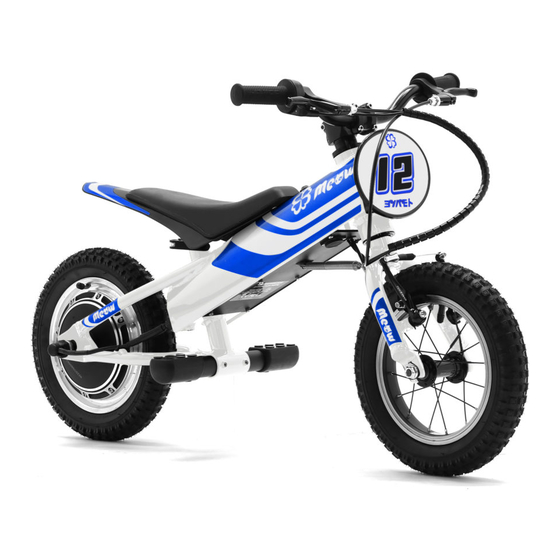
- Page 2 1. About Yotsubamoto "Yotsubamoto" is an electric motorcycle designed for children is a sister bike to our bicycle "Yotsuba cycle". This product "Meow" is designed especially first time riders of motorcycles, assuming the riders can ride kick bikes (run bike, push bike). As for bicycle riders there is no problem with an inexperienced rider.
- Page 3 2. Check included items Components required for assembly are contained in the box. *Fig, Meow12 ① ② ④ ⑤ ⑦ ③ ⑨ ⑧ ⑥ ⑩ ⑪ ① Body ⑥ Seat ⑪ Decal ② Handle ⑦ Front locking nut and bracket ③...
-
Page 4: Parts Description
3. Parts description *Fig, Meow12 ③ ⑤ ④ ⑨ ⑩ ① ⑪ ⑥ ⑫ ⑧ ② ⑭ ⑬ ⑦ ⑮ ⑯ ⑰ ⑱ ① Frame ⑨ Handle stem ② Fork ⑩ Seat ③ Throttle ⑪ Seat base ④ Front brake lever ⑫... - Page 5 4. Assembly Installation requires special knowledge and technique. Haphazard installation may cause accidents or failure. Be sure to hand over to the customer after assembling and adjusting at the dealer. Also, this manual contains descriptions for daily inspection and adjustment, please read through with a guardian or adult.
- Page 6 ③ Tire pressure DRC air valve extension Pump air into the tires of the front with hose wheel and the rear wheel. Part number:D58-12-110 Use a small air inlet of the tip, or use Hose length:150mm an adapter like the one on the right side for easy operation.
- Page 7 ⑥ Adjust front brake Loosen the wire locking nut, pull the Loosen nut A and rotate B to fine tune Hold the lever and check that the wire, adjust the distance between the brake position. Turn clockwise brake arm moves equally evenly on the brake shoe and the rim to about to bring the brake closer to the rim, both sides.
- Page 8 ⑧ Installation of seat *The rider straddles the seat without the cushion at the lowest seat height ( ⑨ reference) on the 12-inch model, when the height of the rider is 90 cm or less, or when the height of the rider is 100 cm or less in the 16 inch model. Please straddle the bike in this situation and check your feet, if your feet are just right in this position, the seat cushion cannot be used, please install at a later date according to the rider's physical growth.
- Page 9 5. Attach decal Please attach the decal with reference to the numbers in the figure below. Those with without numbers are can be attached freely. For the larger decal such as ② ③, spray adhesive side with water detegent mixture, and squeeze out water and air bubbles with squeegee or spatula while attaching to surface.
-
Page 10: Charge The Battery
6. Charge the battery *Please turn the power off before charging. ① ② ③ Rotate the lid of the charging port First connect the charger connector The indicator light of the charger on the bottom of the frame to open to the charge port, then plug the lights orange and charging begins. - Page 11 8. Speed level key By turning the key you can adjust the maximum speed and motor output in 3 levels. Always make sure that a parent or guardian set the adjustments. The explanation of the key position is as follows. Numbers in parenthesis ( ) is the highest speed for Meow 16.
-
Page 12: Inspection Before Riding
9. Inspection before riding Before riding, the guardian should check the bike and check the safety. Check ① Front and rear brake work ② Power mode appropriate ③ Key unplugged ④ Key cover attached ⑤ Tire pressure ok ⑥ Seat secure enough ⑦... -
Page 13: How To Operate
10. How to operate ① Push the main switch and turn on the power. The main switch lights up. ② Insert driving mode key, select driving mode, then remove key. ③ When the throttle is turned toward the rider, the rear wheels will engage. ④... -
Page 14: Gyro Sensor
11. Gyro Sensor Yotsubamoto Meow has a sensor that automatically cuts power off on falling. Specifically, if it is inclined by about 45 degrees in the horizontal direction, it is judged to be in a falling state and electric power is cut. At that time, the indicator flashes on and off to indicate sensor operation. -
Page 15: Storage And Care
12. Storage and care ① When rinsing the bike with a shower, please do so with the bike standing. Please avoid washing bike in a state where the bike is laid down or upside down, and avoid high pressure washing. ②... - Page 16 13. If you think that there is a problem Will not power on - Battery low level……Please charge. Charging does not start (the lamp does not turn red) - Charger cable missing plug……Please check the insertion of the connector on each cable.
-
Page 17: Repair Parts
14. Repair parts Prices, specifications etc. of each part may be subject to change, so please check with your authorized dealer or us. Parts in bold, are parts that require replacement at a authorized dealer or our company. Frame Decal Kit YELLOW YB65-00A1 YB65-00A4... -
Page 18: Specification
15. Specification Model Meow12 Meow16 Length 1000 mm 1200 mm Width 470 mm 490 mm Height 590 mm 690 mm Wheel base 710 mm 810 mm Lowest seat height 375 mm 435 mm Minimum under clearance 110 mm 175 mm Caster angle and trail 25° 45 mm 25° 60 mm... -
Page 19: Product Warranty
16. Product warranty The manufacturer's warranty period of Yotsubamoto Meow is one year from the date of purchase. Frame, fork, motor, wheel, sensor, switch, charging port, throttle, wiring, connector are subject to warranty. *Battery and initial malfunction of charger will be subject to warranty, please contact authorized dealer. - Page 20 Y O T S U B A M O T O www.yotsubakids.jp 2-30 Nakamizuno, Seto, Aichi 489-0005 JAPAN TEL : 81-561-86-8390 FAX : 81-561-86-8302...
Need help?
Do you have a question about the Yotsuba Moto Meow 12 and is the answer not in the manual?
Questions and answers