Table of Contents
Advertisement
Available languages
Available languages
Quick Links
Decorative radiators
Comfortable indoor ventilation
Heating and cooling ceiling systems
Clean air solutions
Installatiehandleiding
Installation manual
Installationsanleitung
Manuel d'installation
Manuale di installazione
Instrukcja montażu
Manual de instalación
Zehnder ComfoConnect
Splitter 5x 0-10V
Advertisement
Chapters
Table of Contents

Subscribe to Our Youtube Channel
Summary of Contents for Zehnder Rittling ComfoConnect
- Page 1 Decorative radiators Comfortable indoor ventilation Heating and cooling ceiling systems Clean air solutions Installatiehandleiding Installation manual Installationsanleitung Manuel d’installation Manuale di installazione Instrukcja montażu Manual de instalación Zehnder ComfoConnect Splitter 5x 0-10V...
-
Page 2: Voorwoord
ComfoConnect Splitter 5x 0-10V. van informatie in dit document. Raak vertrouwd met de installatie en voorkom zo persoonlijk letsel of Leeswijzer materiële schade. -
Page 3: Table Of Contents
Demontage en verwijdering ..................7 Montage en Installatie ....................8 6.1 Aansluitschema ....................8 6.2 Maatschets ......................8 6.3 Montage van de ComfoConnect Splitter 5x 0-10V ..........9 6.4 Aansluiten van CO Sensoren ................9 6.5 Aansluiten op de ventilatieunit ................9... -
Page 4: Beschrijving
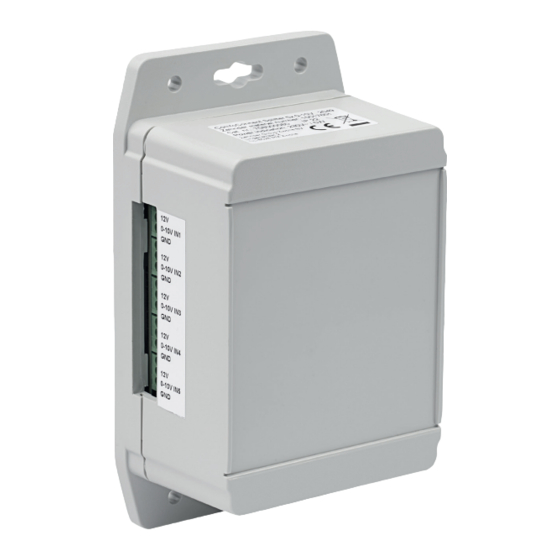
1. Beschrijving 1.3 Controle van de levering Controleer bij ontvangst het 1.1 Algemeen volgende: De ComfoConnect Splitter 5x 0-10V 1. Controleer of de verpakking niet maakt het mogelijk om meerdere beschadigd is. Sensoren 0-10V aan te sluiten 2. Controleer of de onderdelen niet op de ventilatieunit (ComfoAir E, beschadigd zijn. -
Page 5: Veiligheid
2. Veiligheid ■ Houd de ComfoConnect Splitter 5x 0-10V uit ■ Installatie, inwerkstelling de buurt van water en en onderhoud moeten vochtige omgevingen. worden uitgevoerd door een erkende Gevaarlijke elektrische installateur, tenzij spanning! Levens- of anders aangegeven. letselgevaar door Installatie door een niet... -
Page 6: Montagevoorschriften
Sensoren aangesloten worden (op de ingangen IN 1 t/m IN 5). Het maximale vermogen dat de ComfoConnect Splitter 5x 0-10 V Gebruik voor het aansluiten kan leveren is 50 mA bij 12 V per met de ventilatieunit alleen de aangesloten CO Sensor. -
Page 7: Garantie
4. Garantie 5. Demontage en Zehnder biedt 24 maanden garantie verwijdering op de ComfoConnect Splitter 5x Als de ComfoConnect Splitter 5x 0-10V. Deze periode geldt vanaf de 0-10V wordt gedemonteerd, dan datum van installatie tot maximaal moeten de voorschriften voor... -
Page 8: Montage En Installatie
6. Montage en Installatie 6.1 Aansluitschema 0-10V 0-10V IN 1 Sensor AC IN 100-240V 0-10V 0-10V IN 2 Sensor 0-10V 0-10V IN 3 Sensor 0-10V 0-10V IN 4 0-10V COMFOFAN S Sensor 0-10V 0-10V IN 5 Sensor 0-10V OUT 0-10V OPTION BOX COMFOAIR Q 0-10V COMFOAIR E 6.2 Maatschets... -
Page 9: Montage Van De Comfoconnect Splitter 5X 0-10V
6.5 Aansluiten op de ComfoConnect Splitter 5x ventilatieunit Sluit de 0-10V uitgang van de 0-10V ComfoConnect Splitter 5x 0-10V Bevestig de ComfoConnect Splitter aan op de 0-10V ingang van de 5x 0-10V met vier pluggen en ventilatieunit. schroeven aan de wand. Gebruik... -
Page 10: Foreword
Zehnder regularly makes performance or damage to the new developments or improvements ventilation system to the ComfoConnect Splitter 5x Risk of injury 0-10V. As a result, operation of the system may be different from the description in this manual. In... - Page 11 Removal and disposal ....................15 Installation and Connection ..................16 6.1 Wiring diagram ....................16 6.2 Dimensions ...................... 16 6.3 Installing the ComfoConnect Splitter 5x 0-10V ........... 17 6.4 Connecting CO Sensors .................. 17 6.5 Connecting to the ventilation unit ............... 17...
-
Page 12: Description
(0-10V) is transmitted to the ventilation unit. 1.2 Contents of the box Figure 1.1 - Contents of the box ■ ComfoConnect Splitter 5x 0-10V ■ Power cable ■ Installer manual... -
Page 13: Safety
■ Make sure there is no voltage on the ComfoConnect Splitter 5x 0-10V when you begin installation or removal. ■ Make sure the connection cables are not damaged. ■ Keep the ComfoConnect Splitter 5x 0-10V away from water and humid environments. -
Page 14: Installation Instructions
ComfoConnect the ventilation unit. Splitter 5x 0-10V to an analogue input of a ventilation unit. Do not install the ComfoConnect (ComfoAir Q with Option Box has Splitter 5x 0-10V in a room with 4 analogue inputs that can be condensation. -
Page 15: Warranty
4. Warranty 5. Removal and disposal Zehnder offers a 24-month warranty When you remove the on the ComfoConnect Splitter 5x ComfoConnect Splitter 5x 0-10V, 0-10V. This period applies from obey the waste disposal regulations the date of installation up to a... -
Page 16: Installation And Connection
6. Installation and Connection 6.1 Wiring diagram 0-10V 0-10V IN 1 Sensor AC IN 100-240V 0-10V 0-10V IN 2 Sensor 0-10V 0-10V IN 3 Sensor 0-10V 0-10V IN 4 0-10V COMFOFAN S Sensor 0-10V 0-10V IN 5 Sensor 0-10V OUT 0-10V OPTION BOX COMFOAIR Q 0-10V COMFOAIR E... -
Page 17: Installing The Comfoconnect Splitter 5X 0-10V
6.3 Installing the ComfoConnect 6.5 Connecting to the ventilation Splitter 5x 0-10V unit Attach the ComfoConnect Splitter Connect the 0-10V output of the 5x 0-10V to the wall with four plugs ComfoConnect Splitter 5x 0-10V and screws. Use plugs and screws to the 0-10V input of the ventilation that are suitable for the wall. -
Page 18: Vorwort
Informationen, die zur sicheren und durch die fehlende oder falsche optimalen Montage, Einstellung Wiedergabe von Informationen in und Bedienung des ComfoConnect diesem Dokument entstehen. Splitters 5x 0-10V erforderlich sind. Machen Sie sich mit der Anlage Lesehinweis vertraut und verhüten Sie Personen-... - Page 19 Demontage und Entsorgung ..................23 Montage und Installation ................... 24 6.1 Schaltbild ......................24 6.2 Maßskizze ......................24 6.3 Montage des ComfoConnect Splitters 5x 0-10V ..........25 6.4 Anschluss der CO -Sensoren ................25 6.5 Anschluss an das Lüftungsgerät ................ 25...
-
Page 20: Beschreibung
Teile oder falsche Lieferungen direkt Ihrer Zehnder- 1.2 Inhalt des Kartons Niederlassung. Die Kontaktdaten befi nden sich auf der Rückseite dieses Dokuments. Abb. 1.1 - Inhalt des Kartons ■ ComfoConnect Splitter 5x 0-10V ■ Netzkabel ■ Handbuch für den Installateur... -
Page 21: Sicherheit
2. Sicherheit ■ Den ComfoConnect Splitter 5x 0-10V von ■ Installation, Wasser und feuchter Inbetriebnahme und Umgebung fernhalten. Instandhaltung müssen von einem zugelassenen Gefährliche elektrische Installateur durchgeführt Spannung! Lebens- und werden, wenn nichts Verletzungsgefahr durch anderes angegeben ist. elektrische Spannung Die Installation durch von 230 V. -
Page 22: Montagevorschriften
3. Montagevorschriften Zum Anschluss der CO Sensoren und dem Lüftungsgerät Den ComfoConnect Splitter 5x ein massives Kabel mit einem 0-10V so nah wie möglich am Durchmesser von mindestens 0,6 Lüftungsgerät montieren. mm verwenden. Den ComfoConnect Splitter Zwischen Wandsteckdose 5x 0-10V nicht in Räumen mit... -
Page 23: Garantie
4. Garantie 5. Demontage und Zehnder leistet 24 Monate Entsorgung Garantie auf den ComfoConnect Bei Demontage des ComfoConnect Splitter 5x 0-10V. Dieser Zeitraum Splitters 5x 0-10V die Vorschriften gilt ab Installationsdatum bis für die Abfallentsorgung maximal 30 Monate nach dem beachten, die vor Ort und zum Herstellungsdatum des Gerätes. -
Page 24: Montage Und Installation
6. Montage und Installation 6.1 Schaltbild 0-10V 0-10V IN 1 Sensor AC IN 100-240V 0-10V 0-10V IN 2 Sensor 0-10V 0-10V IN 3 Sensor 0-10V 0-10V IN 4 0-10V COMFOFAN S Sensor 0-10V 0-10V IN 5 Sensor 0-10V OUT 0-10V OPTION BOX COMFOAIR Q 0-10V COMFOAIR E 6.2 Maßskizze... -
Page 25: Montage Des Comfoconnect Splitters 5X 0-10V
6.3 Montage des ComfoConnect 6.5 Anschluss an das Splitters 5x 0-10V Lüftungsgerät Befestigen Sie den ComfoConnect Den 0-10V-Ausgang des Splitter 5x 0-10V mit vier Dübeln ComfoConnect Splitters 5x und Schrauben an der Wand. 0-10V am 0-10V-Eingang des Bitte Dübel und Schrauben Lüftungsgerätes anschließen. -
Page 26: Avant-Propos
ComfoConnect Splitter présent document. 5x 0-10V. En vous imprégnant de ce manuel d'installation, vous Guide de lecture éviterez des blessures corporelles Dans ce manuel, les symboles ou des dommages matériels. - Page 27 Montage et installation ....................32 6.1 Schéma de câblage ..................32 6.2 Croquis coté ....................32 6.3 Montage du ComfoConnect Splitter 5x 0-10V............ 33 6.4 Raccordement des capteurs de CO ..............33 6.5 Raccordement à l‘unité de ventilation ..............33...
-
Page 28: Description
1. Description 1.3 Contrôle de réception À la réception, effectuez les 1.1 Informations générales vérifi cations suivantes : Le ComfoConnect Splitter 5x 0-10V 1. Vérifi ez que l‘emballage n‘est pas permet de connecter plusieurs endommagé. capteurs de CO 0 - 10 V à 2. Vérifi ez que les composants ne l‘unité... - Page 29 ■ Utilisez exclusivement des câbles de ■ L‘installation, la mise en raccordement non service et la maintenance endommagés. doivent être effectuées ■ Tenez le ComfoConnect par un installateur Splitter 5x 0-10V à agréé, sauf indication l‘écart de l‘eau et contraire. L‘installation d‘environnements par un installateur non humides.
-
Page 30: Consignes De Montage
Ne raccordez jamais plusieurs pour monter le ComfoConnect ComfoConnect Splitter 5x 0-10V Splitter 5x 0-10V. entre eux. Un seul ComfoConnect Splitter 5x 0-10V maximum doit Pour connecter les capteurs être connecté à une entrée de CO 0 - 10 V, utilisez les... -
Page 31: Garantie
5. Démontage et mise au Zehnder offre une garantie de rebut 24 mois sur le ComfoConnect Si le ComfoConnect Splitter 5x Splitter 5x 0-10V. Cette période 0-10V est démonté, les consignes est valable à partir de la date d‘élimination des déchets en d‘installation jusqu‘à... -
Page 32: Montage Et Installation
6. Montage et installation 6.1 Schéma de câblage 0-10V 0-10V IN 1 Sensor AC IN 100-240V 0-10V 0-10V IN 2 Sensor 0-10V 0-10V IN 3 Sensor 0-10V 0-10V IN 4 0-10V COMFOFAN S Sensor 0-10V 0-10V IN 5 Sensor 0-10V OUT 0-10V OPTION BOX COMFOAIR Q 0-10V COMFOAIR E... -
Page 33: Montage Du Comfoconnect Splitter 5X 0-10V
6.3 Montage du ComfoConnect 6.5 Raccordement à l‘unité de Splitter 5x 0-10V ventilation Fixez le ComfoConnect Splitter 5x Raccordez la sortie 0 - 10 V du 0-10V au mur à l‘aide de quatre ComfoConnect Splitter 5x 0-10V chevilles et vis. Utilisez des chevilles à... -
Page 34: Introduzione
ComfoConnect Splitter contenute nel presente manuale. 5x 0-10V. Per evitare danni o lesioni, imparare a conoscere il sistema. Guida alla lettura... - Page 35 Smontaggio e smaltimento ..................39 Installazione e collegamento ..................40 6.1 Schema dei collegamenti .................. 40 6.2 Disegno quotato ....................40 6.3 Installazione del ComfoConnect Splitter 5x 0-10V ..........41 6.4 Collegamento dei Sensori CO ................41 6.5 Collegamento all’unità di ventilazione ..............41...
-
Page 36: Descrizione
1. Descrizione 1.3 Controllo della fornitura Alla consegna, controllare quanto 1.1 Informazioni generali segue: Il ComfoConnect Splitter 5x 0-10V 1. La confezione è intatta? consente di collegare all’unità di 2. Ci sono parti danneggiate? ventilazione (ComfoAir E, ComfoAir 3. Il contenuto della scatola è... - Page 37 2. Sicurezza danneggiati. ■ Tenere il ComfoConnect ■ L’installazione, la Splitter 5x 0-10V lontano messa in servizio e la da acqua e ambienti manutenzione devono umidi. essere eseguite da un installatore qualificato Pericolo di tensione se non diversamente elettrica! Pericolo di specificato.
-
Page 38: Istruzioni Per L'installazione
0,6 mm. Splitter 5x 0-10V il più possibile vicino all’unità di ventilazione. Non utilizzare una prolunga tra il ComfoConnect Splitter 5x 0-10V e Non installare il ComfoConnect la presa a muro. Splitter 5x 0-10V in una stanza soggetta a condensa. -
Page 39: Garanzia
4. Garanzia 5. Smontaggio e Sul ComfoConnect Splitter 5x smaltimento 0-10V Zehnder offre una garanzia Per smontare il ComfoConnect di 24 mesi. La validità della Splitter 5x 0-10V, seguire la garanzia decorre a partire dalla normativa sullo smaltimento data dell’installazione fi no a un dei rifi uti valida per la località... -
Page 40: Installazione E Collegamento
6. Installazione e collegamento 6.1 Schema dei collegamenti 0-10V 0-10V IN 1 Sensor AC IN 100-240V 0-10V 0-10V IN 2 Sensor 0-10V 0-10V IN 3 Sensor 0-10V 0-10V IN 4 0-10V COMFOFAN S Sensor 0-10V 0-10V IN 5 Sensor 0-10V OUT 0-10V OPTION BOX COMFOAIR Q 0-10V COMFOAIR E... -
Page 41: Installazione Del Comfoconnect Splitter 5X 0-10V
6.5 Collegamento all’unità di ComfoConnect Splitter 5x ventilazione Collegare l’uscita 0- 10V del 0-10V ComfoConnect Splitter 5x 0- 10V Attaccare il ComfoConnect Splitter all’ingresso analogico 0- 10V 5x 0-10V alla parete con quattro dell’unità di ventilazione. tasselli e viti. Utilizzare viti e tasselli adatti al materiale di cui è... -
Page 42: Przedmowa
ComfoConnect Splitter 5x 0-10V. Wskazówki do instrukcji Aby zapobiec urazom lub stratom W niniejszej instrukcji zastosowano materialnym, należy zapoznać się następujące symbole i terminy, z systemem. - Page 43 Demontaż i utylizacja ....................47 Instalacja i podłączenie ..................... 48 6.1 Schemat połączeń .................... 48 6.2 Szkic wymiarowy ....................48 6.3 Instalowanie rozdzielacza ComfoConnect Splitter 5x 0-10V ........ 49 6.4 Podłączanie czujników CO ................49 6.5 Podłączanie do urządzenia wentylacyjnego ............49...
-
Page 44: Opis
1. Opis 1.3 Kontrola dostawy Po otrzymaniu należy sprawdzić: 1.1 Informacje ogólne 1. czy opakowanie jest Rozdzielacz ComfoConnect Splitter nienaruszone, 5x 0-10V umożliwia podłączenie 2. czy części są nieuszkodzone, kilku czujników CO 0-10V do 3. czy zawartość opakowania jest urządzenia wentylacyjnego kompletna. -
Page 45: Bezpieczeństwo
■ Należy się upewnić, że przewody połączeniowe ■ Jeżeli nie wskazano są nieuszkodzone. inaczej montaż, ■ Rozdzielacz uruchomienie i ComfoConnect 5x 0-10V obsługę techniczną należy przechowywać z musi wykonywać dala od wody i chronić uprawniony instalator. przed wilgocią. Wykonanie instalacji przez instalatora bez Niebezpieczne napięcie... -
Page 46: Instrukcje Instalacji
ComfoConnect ściennym. Splitter 5x 0-10V w pomieszczeniu, w którym Do jednego złącza rozdzielacza dochodzi do skraplania pary ComfoConnect Splitter 5x 0-10V wodnej. należy podłączać nie więcej niż jeden czujnik CO Nieprawidłowe podłączenie może skutkować uszkodzeniem Nie wolno łączyć ze sobą wielu urządzenia. -
Page 47: Gwarancja
4. Gwarancja 5. Demontaż i utylizacja Firma Zehnder oferuje Podczas demontażu rozdzielacza 24-miesięczną gwarancję na ComfoConnect Splitter 5x 0-10V rozdzielacz ComfoConnect Splitter należy przestrzegać przepisów 5x 0-10V. Okres ten obowiązuje dotyczących usuwania odpadów, od daty instalacji do maksymalnie obowiązujących w danym miejscu 30 miesięcy od daty produkcji... -
Page 48: Instalacja I Podłączenie
6. Instalacja i podłączenie 6.1 Schemat połączeń 0-10V 0-10V IN 1 Sensor AC IN 100-240V 0-10V 0-10V IN 2 Sensor 0-10V 0-10V IN 3 Sensor 0-10V 0-10V IN 4 0-10V COMFOFAN S Sensor 0-10V 0-10V IN 5 Sensor 0-10V OUT 0-10V OPTION BOX COMFOAIR Q 0-10V COMFOAIR E... -
Page 49: Instalowanie Rozdzielacza Comfoconnect Splitter 5X 0-10V
0-10V rozdzielacza ComfoConnect Czterema kołkami rozporowymi i Splitter 5x 0-10V do wejścia 0-10V wkrętami zamocować rozdzielacz urządzenia wentylacyjnego. ComfoConnect Splitter 5x 0-10V do ściany. Użyć kołków rozporowych i Sposób podłączenia do wkrętów odpowiednich do materiału urządzenia wentylacyjnego ściany. opisano w instrukcji obsługi urządzenia wentylacyjnego. -
Page 50: Prólogo
ComfoConnect de documento. 5 tomas y 0-10 V. Familiarícese con el sistema para evitar lesiones Guía de lectura y daños. - Page 51 Instalación y conexión ....................56 6.1 Diagrama de conexiones .................. 56 6.2 Dimensiones de la unidad ................. 56 6.3 Instalación del repartidor ComfoConnect 5 x 0-10 V ........... 57 6.4 Conexión de los sensores de CO ..............57 6.5 Conexión a la unidad de ventilación ..............57...
-
Page 52: Descripción
1. Descripción 1.3 Comprobación de la entrega Cuando reciba el producto, 1.1 General compruebe lo siguiente: El repartidor ComfoConnect 5 x 1. ¿Está intacta la caja? 0-10 V permite conectar varios 2. ¿Presentan daños las piezas? sensores de CO de 0-10 V a la 3. -
Page 53: Seguridad
■ Las tareas de dañados. instalación, puesta en ■ Mantenga el repartidor marcha y mantenimiento ComfoConnect 5 x 0-10 deben ser realizadas por V alejado del agua y de un instalador acreditado, ambientes húmedos. a menos que se indique otra cosa. -
Page 54: Instrucciones De Instalación
Instale el repartidor 0,6 mm de diámetro. ComfoConnect 5 x 0-10 V lo más cerca posible de la unidad de No utilice un cable alargador ventilación. entre el repartidor ComfoConnect... -
Page 55: Garantía
5. Retirada y eliminación Zehnder ofrece una garantía Cuando vaya a retirar el repartidor de 24 meses para el repartidor ComfoConnect 5 x 0-10 V, observe ComfoConnect 5 x 0-10 V. Este las normas de eliminación de plazo empieza a contar a partir de residuos aplicables en la localidad y la fecha de instalación, hasta un... -
Page 56: Instalación Y Conexión
6. Instalación y conexión 6.1 Diagrama de conexiones 0-10V 0-10V IN 1 Sensor AC IN 100-240V 0-10V 0-10V IN 2 Sensor 0-10V 0-10V IN 3 Sensor 0-10V 0-10V IN 4 0-10V COMFOFAN S Sensor 0-10V 0-10V IN 5 Sensor 0-10V OUT 0-10V OPTION BOX COMFOAIR Q 0-10V COMFOAIR E... -
Page 57: Instalación Del Repartidor Comfoconnect 5 X 0-10 V
ComfoConnect 5 x 0-10 V ventilación Cuelgue el repartidor Conecte la salida de 0-10 V del ComfoConnect 5 x 0-10 V en la repartidor ComfoConnect 5 x 0-10 pared con cuatro tacos y tornillos. V a la entrada de 0-10 V de la Utilice tacos y tornillos adecuados unidad de ventilación. - Page 60 Nederland (The Netherlands) Österreich (Austria) Zehnder Group Nederland B.V. Wernig kunststoff- und lüftungstechnik Lingenstraat 2, 8028 PM Zwolle Tel.: 04227.22130 Postbus 621, 8000 AP Zwolle Internet: www.wernig.at Tel.: 0900 555 19 37 E-mail: office@wernig.at (€ 0.10 a minute, NL only) Polska (Poland) Internet: www.zehnder.nl E-mail: ventilatie@zehnder.nl...
Need help?
Do you have a question about the ComfoConnect and is the answer not in the manual?
Questions and answers