Table of Contents
Advertisement
Quick Links
Advertisement
Table of Contents

Subscribe to Our Youtube Channel
Related Manuals for Litter box Sauder Cat Shelf

Summary of Contents for Litter box Sauder Cat Shelf
- Page 1 LITTER BOX CaT shelf support@litterbox.com | 1.877.250.7729 | Mon-Fri, 9am-5pm EST If you have assembly questions or need a replacement part, please contact Sauder directly at www.sauder.com or 800-445-1527. Customer Service is available Monday-Friday - 9 a.m. to 5:30 p.m. EST (except holidays)
- Page 2 THANK YOU FOR PURCHASING THE LITTER BOX caT shelf! I am thrilled that Litterbox.com and Sauder furniture have partnered together to bring you the highest-quality cat furniture. At Litterbox.com, we believe in offering products that are thoughtfully designed and carefully curated to best meet your needs.
-
Page 3: Part Identification
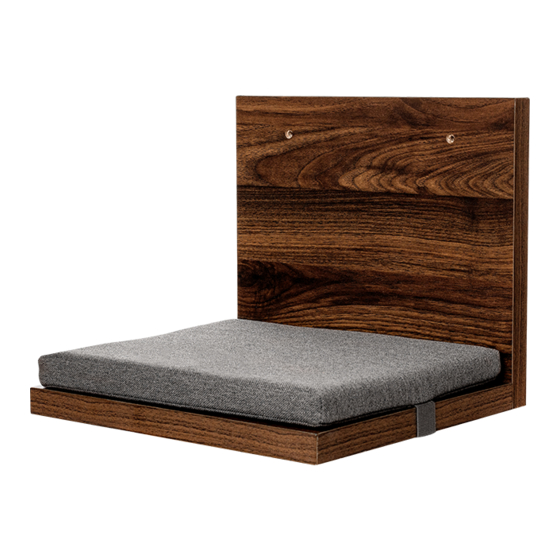
Now you know Part IdentificATION our ABCs. While not all parts are labeled, some of the parts will have a label or an inked letter on the edge å to help distinguish similar parts from each other. Use this part identifi cation to help identify similar parts. BACK (2) SHELF (2) CUSHION (2) - Page 4 Step 1 View our assembly video at www.litterbox.com/support You have the option to mount your units as shown in å Option #1 and #2. Steps 1-3 show the assembly with the SHELF above and steps 4-6 show the assembly with the Go on, spoil ' e m a little.
- Page 5 Step 2 1st-Hold your unit level against the wall in its fi nal location. Strike a mark through the holes onto the wall. å 2nd-Place your unit onto the fl oor and drill a 5/16" hole on each mark. å 3rd-While you squeeze the wings together, gently tap four WALL ANCHORS (2) into the holes until they are even with å...
- Page 6 Step 3 Slide the CUSHION (C) onto the SHELF (B) by wrapping the å strap of the cushion around the SHELF. Peel APPLIQUES from the APPLIQUE CARD (3) and stick å them on the screw heads. Option #1 Steps 1-3 Page 6 427331 www.litterbox.com/support...
- Page 7 Fasten the SHELF (B) to the BACK (A). Tighten three 2-3/8" å HEX HEAD SCREWS (6) with the L-WRENCH (4). Option #2 Steps 4-6 2-3/8" HEX HEAD SCREW (3 used in this step) Thinking outside the litter box. www.litterbox.com/support 427331 Page 7...
- Page 8 Step 5 1st-Hold your unit level against the wall in its fi nal location. Strike a mark through the holes onto the wall. å 2nd-Place your unit onto the fl oor and drill a 5/16" hole on each mark. å 3rd-While you squeeze the wings together, gently tap four WALL ANCHORS (2) into the holes until they are even with å...
- Page 9 Step 6 Slide the CUSHION (C) onto the SHELF (B) by wrapping the strap å of the cushion around the SHELF. Peel APPLIQUES from the APPLIQUE CARD (3) and stick them on å Option #2 the screw heads. Steps 4-6 NOTE: Please read the back pages of the instruction booklet for å...
-
Page 10: Liste De Pièces
Modèle 427331 LITIÈRE - TABLETTE POUR CHAT Utilisez les instructions d’ a ssemblage en français avec les NOUS CONTACTER EN PREMIER schémas étape par étape du manuel d’instruction en anglais. AVANT D'EFFECTUER TOUT RETOUR AU MAGASIN. Chaque étape en français correspond à la même étape en Nous faisons de notre mieux pour nous assurer que votre meuble anglais. - Page 11 ÉTAPE 1 ÉTAPE 4 Il est possible de monter vos unités comme indiqué dans les Insérer deux CHEVILLES EN BOIS (1) dans la TABLETTE (B). options # 1 et # 2. Les étapes 1 à 3 montrent l'assemblage avec Fixer la TABLETTE (B) à l' A RRIÈRE (A). Serrer trois VIS TÊTE HEX la TABLETTE ci-dessus et les étapes 4 à...
-
Page 12: Lista De Partes
CAJA DE ARENA - ESTANTE Modelo 427331 PARA GATOS Use estas instrucciones de ensamblaje en español junto con las CONTÁCTENOS PRIMERO fi guras paso-a-paso provistas en el folleto inglés. Cada paso en ANTES DE HACER DEVOLUCIONES A LA TIENDA. español corresponde al mismo paso en inglés. Compare la “Lista Tratamos de asegurar que su mueble llega en condición excelente. - Page 13 PASO 1 PASO 4 Usted tiene la opción de montar sus unidades como se muestra Inserte dos PASADORES DE MADERA (1) en el ESTANTE (B). en la opción # 1 y # 2. Los pasos 1-3 muestran el ensamblaje con Fij e el ESTANTE (B) al DORSO (A).
- Page 14 WARNING Please use your furniture correctly and safely. Improper use can cause safety hazards, or damage to your furniture or household items. Carefully read the following chart. Look out for: What can happen: How to avoid the problem: • Properly mounting the cabinet to the wall. •...
-
Page 15: Year Limited Warranty
1-YEAR LIMITED WARRANTY 1. Sauder Woodworking Co. (Sauder®) provides limited warranty coverage to the original 4. This Warranty applies only to warranted defects that fi rst arise and are reported purchaser of this product for a period of one year from the date of purchase against to Sauder within the warranty coverage period. - Page 16 If you need assistance, please contact our Michigan-based Customer Service team support@litterbox.com | 1.877.250.7729 | Mon-Fri, 9am- pm EST (except holidays) Learn more at www.litterbox.com/support General Conformity Certificate This certificate applies to the Sauder Woodworking Product identified by this Instruction Book. This certificate applies to compliance of this product with the CPSC Ban on Lead-Containing Paint (16 CFR 1303).
Need help?
Do you have a question about the Sauder Cat Shelf and is the answer not in the manual?
Questions and answers