Advertisement
Quick Links
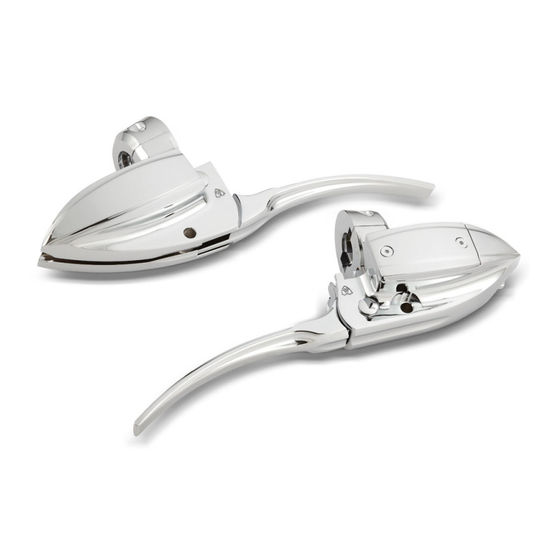
RAD III HANDLEBAR CONTROLS
Thank you for purchasing this Arlen Ness product. We believe that our products are the very best available and are engineered
to provide a lifetime of use. Basic hand tools and a service manual for your year and model motorcycle are all you need to com‐
plete this installation.
Parts:
1‐ Brake master cylinder assembly
1‐ Clutch perch assembly
1‐ Switch housing set
1‐ lower left switch housing (for audio only 08‐748 kit only)
1‐ Hardware kit
1‐ Instructions
1. Disconnect negative battery cable. Confirm the bike has no power.
2. Remove OEM mirrors and turn signals from clutch perch and brake master cylinder. (if so equipped)
3. Start with the throttle side:
(All models except 08‐up touring) Slack throttle cable all the way. Remove upper and lower switch housing
screws. Lift the upper switch housing up and rotate it forward to gain access to the throttle cable ends. Remove
the cable ends from the grip and remove grip.
(08‐up touring) Remove upper and lower switch housing screws. Lift the upper switch housing up and rotate it for‐
ward, push the lower housing down and carefully remove grip.
IMPORTANT NOTE: During the next step it's important not to get brake fluid on any painted surfaces. It will dam‐
age paint! If you get brake fluid on the paint wash it off immediately.
4. Break banjo bolt loose at the master cylinder then snug it back down so it does not leak. Remove master cylinder
from handle bar and remove brake line. Secure brake line pointing straight up so it does not drip.
5. (All models except 08‐up touring) Remove throttle cables from lower switch housing.
6. NOTE: During this step pay close attention to how the wires are routed, how the wires are secured and basically
how everything fits inside of the housings before disassembly. This will help during reassembly. Remove OEM
switches and buttons from OEM switch housings then install them into the RAD III housings in reverse order of re‐
moval.
7. (All models except 08‐up touring) After all the switches and buttons are installed into new switch housings install
throttle cables into lower switch housing. Install the throttle grip then attach cables to it.
(08‐up touring) After all the switches and buttons are installed into new switch housings install the throttle grip.
8. Position switch housings around grip and start screws but do not tighten. NOTE: Be sure not to pinch any wires.
9. Attach brake line to new master cylinder using new banjo bolt and seal washers (provided). Snug for now. Attach
new master cylinder to handlebars making sure to engage tab on lower switch housing in groove in master cylin‐
der. Rotate control to desired position then starting with top, torque bolts to 6‐7 ft.lbs.
6050 Dublin Boulevard, Dublin, Ca. 94568 ‐ Technical assistance: 925.479.6379 ‐ www.arlenness.com
For 96‐up Harley Davidson models
Advertisement

Summary of Contents for Arlen Ness RAD III
- Page 1 RAD III HANDLEBAR CONTROLS For 96‐up Harley Davidson models Thank you for purchasing this Arlen Ness product. We believe that our products are the very best available and are engineered to provide a lifetime of use. Basic hand tools and a service manual for your year and model motorcycle are all you need to com‐ plete this installation. Parts: 1‐ Brake master cylinder assembly 1‐ Clutch perch assembly 1‐ Switch housing set 1‐ lower left switch housing (for audio only 08‐748 kit only) 1‐ Hardware kit 1‐ Instructions 1. Disconnect negative battery cable. Confirm the bike has no power. 2. Remove OEM mirrors and turn signals from clutch perch and brake master cylinder. (if so equipped) 3. Start with the throttle side: (All models except 08‐up touring) Slack throttle cable all the way. Remove upper and lower switch housing ...
- Page 2 RAD III HANDLEBAR CONTROLS For 96‐up Harley Davidson models 12. Torque upper and lower switch housing screws to 35‐45 in‐lbs. 13. Torque banjo bolt to 13‐15 ft‐lbs. 14. (All models except 08‐up touring) Adjust throttle cables as per OEM pro‐ cedure. 15. Fill the master cylinder reservoir with the appropriate type of brake fluid then bleed system. 16. Move to clutch side: Pic 1 Slack clutch cable all the way. Remove clutch lever pivot pin then remove lever and cable from perch. Remove clutch cable anchor pin from lever Lever then remove cable from lever. 17. Remove upper and lower switch housing screws then remove clutch perch Anchor pin assembly from handlebars. 18. NOTE: During this step pay close attention to how the wires are routed, Cable end how the wires are secured and basically how everything fits inside of the housings before disassembly. This will help during reassembly. Remove OEM switches and buttons from OEM switch housings then install them into the RAD III housings in reverse order of removal. Pic 2 Cable housing 19. Position switch housings around grip and start screws but do not tighten. NOTE: Be sure not to pinch any wires. ...
Need help?
Do you have a question about the RAD III and is the answer not in the manual?
Questions and answers