
Summary of Contents for ARTHUR MARTIN AMM25GX
- Page 1 AMM25GX Microwave Oven User Manual Four à micro-ondes Notice d'utilisation Mikrowellenofen Benutzerinformation...
-
Page 2: Table Of Contents
CONTENTS Safety information Additional functions Safety instructions Hints and tips Product description Care and cleaning Before first use Troubleshooting Daily use Installation Automatic programmes Technical data Using the accessories Subject to change without notice. SAFETY INFORMATION Before the installation and use of the appliance, carefully read the supplied instructions. - Page 3 Keep the appliance and its cord out of reach of children less • than 8 years. General Safety This appliance is intended to be used in household and • similar applications such as: Farm houses; staff kitchen areas in shops, offices and –...
-
Page 4: Safety Instructions
slippers, sponges, damp cloth and similar may lead to risk of injury, ignition or fire. If smoke is emitted, switch off or unplug the appliance and • keep the door closed in order to stifle any flames. Microwave heating of beverages can result in delayed •... - Page 5 • Always take care when moving the • Do not let the appliance stay unattended appliance as it is heavy. Always use during operation. safety gloves and enclosed footwear. • Do not apply pressure on the open door. • Do not pull the appliance by the handle. •...
-
Page 6: Product Description
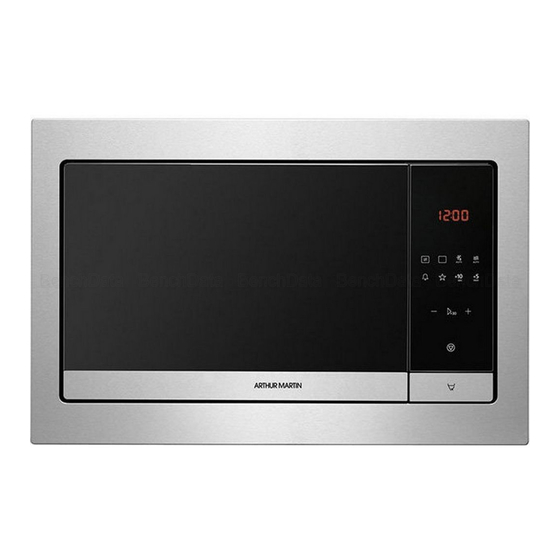
PRODUCT DESCRIPTION General overview Lamp Safety interlock system Display Control panel Door opener Waveguide cover Grill Turntable shaft Control Panel Symbol Function Description Display Shows the settings and current — time. Function pads To set the microwave / combi / grill / auto defrost and auto cooking function. -
Page 7: Before First Use
Symbol Function Description Time Set pads To set the desired time. Start / +30 sec To start the appliance or in- crease the cooking time for 30 seconds at full power. Setting pads To set the time, weight or tem- perature. -
Page 8: Daily Use
4. Press the Setting pads to set the If you do not want the clock to be shown minutes. when the microwave is in standby mode 5. Press to confirm. press and set OFF. Press The display shows ON and the clock is confirm. - Page 9 Suitable cookware and materials Cookware / Material Microwave Grilling Defrost- Heating Cook- Ovenproof glass and porcelain (with no metal components, e. g. Pyrex, heat- proof glass) Non-ovenproof glass and porcelain Glass and glass ceramic made of oven- proof/frost-proof material (e. g. Arcoflam), grill shelf Ceramic , earthenware...
- Page 10 • wait until the microwave deactivates • press automatically, when the time comes to When the microwave an end. The display shows End. deactivates automatically, an • open the door. The microwave stops acoustic signal sounds. automatically. Close the door and press to continue to cook.
-
Page 11: Automatic Programmes
Grilling and Combi Cooking To defrost less than 200g of food place it on the edge of the 1. Repeatedly press to set the Grilling turntable. or Combi Cooking function. 2. Press the Setting pads to set the time. 1. Repeatedly press to set the weight 3. -
Page 12: Using The Accessories
Display Menu Weight Meat 150 g 300 g 450 g 600 g Potato 230 g 460 g 690 g Vegetable 150 g 350 g 500 g Fish 150 g 250 g 350 g 450 g 650 g Pasta 50 g (add 450 ml of water) 100 g (add 800 ml of water) 150 g (add 1200 ml of water) Favourite... -
Page 13: Additional Functions
Inserting the grill rack Place the grill rack on the turntable set. ADDITIONAL FUNCTIONS Child Safety Lock The Kitchen Timer activates automatically after a few seconds. The Child Safety Lock prevents an When the set time is reached, an accidental operation of the microwave. acoustic signal sounds. -
Page 14: Care And Cleaning
Reheating To get better results for rice use a flat, wide dish. When you reheat packed ready meals always follow the instruction written on the Defrosting packaging. Always defrost roast with the fat side down. Grilling Do not defrost covered meat because this may cause cooking instead of defrosting. - Page 15 What to do if... Problem Possible cause Remedy The appliance does The appliance is deactivated. Activate the appliance. not operate. The appliance does The appliance is not plugged in. Plug in the appliance. not operate. The appliance does The fuse in the fuse box is blown. Check the fuse.
-
Page 16: Installation
INSTALLATION circuit, earthing reduces the risk of electric WARNING! Refer to Safety shock. chapters. Installing the microwave General Information 1. Check if the dimensions of the furniture CAUTION! Do not block the air meet the installation distances. vents. If you do that, the appliance can overheat. -
Page 17: Technical Data
4. Open the door and fix the microwave to the cabinet with screw. 3. Install the microwave. If you fixed the bracket, make sure it locks the back of the appliance. TECHNICAL DATA Technical data Power supply 230 V, 50 Hz Maximum power consumption 1.45 kW Microwave... - Page 18 Cavity Dimensions 328 mm (W) x 226 mm (H) x 368 mm (D) Microwave Capacity 25 l Turntable Diameter 315 mm Weight 20.26 kg Lamp 25 W ENVIRONMENT CONCERNS Please recycle all materials marked with the general house hold waste. Dispose all electrical goods via applicable local symbol .
-
Page 19: Informations De Sécurité
TABLE DES MATIÈRES Informations de sécurité Fonctions supplémentaires Consignes de sécurité Conseils Description de l'appareil Entretien et nettoyage Avant la première utilisation En cas d'anomalie de fonctionnement Utilisation quotidienne Installation Programmes automatiques Caractéristiques techniques Utilisation des accessoires Sous réserve de modifications. INFORMATIONS DE SÉCURITÉ... - Page 20 Les enfants ne doivent pas nettoyer ni entreprendre une • opération de maintenance sur l'appareil sans surveillance. L'appareil et son cordon d'alimentation doivent être • conservés hors de portée des enfants âgés de moins de 8 ans. Consignes générales de sécurité Cet appareil est conçu uniquement pour un usage •...
- Page 21 N'utilisez que des ustensiles adaptés à une utilisation dans • un four à micro-ondes. Lorsque vous faites cuire des aliments dans des récipients • en plastique ou en papier, surveillez toujours l'appareil car ces matières peuvent s'enflammer. Cet appareil est uniquement destiné à chauffer des aliments •...
-
Page 22: Consignes De Sécurité
Faites attention aux dimensions minimales du meuble (le cas • échéant). Reportez-vous au chapitre « Installation ». L'appareil doit être mis en marche avec la porte décorative • du meuble ouverte (si présente). CONSIGNES DE SÉCURITÉ Instructions d’installation • Veillez à ne pas endommager la fiche secteur ni le câble d'alimentation. -
Page 23: Description De L'appareil
Mise au rebut • Les résidus de graisse et d'aliments dans l'appareil peuvent provoquer un AVERTISSEMENT! Risque de incendie et un arc électrique lorsque la blessure ou d'asphyxie. fonction micro-ondes est en cours. • Nettoyez l'appareil avec un chiffon doux •... - Page 24 Bandeau de commande Symbole Fonction Description — Affichage Affiche les réglages et l'heure. Touches de fonc- Pour sélectionner les fonctions tion micro-ondes / combi / gril / dé- congélation automatique et cuis- son automatique. Touches de régla- Pour régler la durée souhaitée. ges du temps Départ / +30 s Pour mettre l'appareil en marche...
-
Page 25: Avant La Première Utilisation
Accessoires Plateau de cuisson en verre et support à roulettes. Ensemble du plateau tournant Grille Utilisez toujours l'ensemble du plateau tournant pour cuire des aliments dans le micro-ondes. Utilisez-la pour : • faire griller des aliments • cuisson combinée AVANT LA PREMIÈRE UTILISATION AVERTISSEMENT! Reportez- Vous pouvez sélectionner le vous aux chapitres concernant... - Page 26 Faites cuire • Le plateau de cuisson en verre permet • Si possible, cuisinez les aliments en les de chauffer des aliments ou des liquides. couvrant avec un ustensile d'une matière Il est nécessaire au fonctionnement du adaptée à l'utilisation au micro-ondes. four à...
- Page 27 Ustensiles de cuisine et matériaux compatibles Ustensile de cuisine/matériaux Micro-ondes Gril Dégivrer Résis- Faites tance cuire Verre et porcelaine allant au four (ne con- tenant aucun composant métallique, par exemple le Pyrex, le verre résistant à la chaleur) Verre et porcelaine n'allant pas au four Verre et vitrocéramique composés d'un matériau allant au four/résistant au gel (par exemple l'Arcoflam), grille...
- Page 28 1. Appuyez sur la touche de la fonction • ouvrir la porte. Le micro-ondes s'arrête souhaitée pour l'activer. automatiquement. Refermez la porte et 2. Appuyez à plusieurs reprises sur la appuyez sur pour poursuivre la touche de la fonction choisie pour régler cuisson.
-
Page 29: Programmes Automatiques
Décongélation 2. Pour régler la durée ou le poids, appuyez sur les touches de réglage. Vous pouvez choisir 2 modes de Pour la décongélation selon le poids, la décongélation : durée est automatiquement réglée. • Décongélation selon le poids 3. Appuyez sur pour confirmer et •... - Page 30 Affichage Menu Poids Pizza 200 g 300 g 400 g Pop-corn 50 g 100 g Poulet 500 g 750 g 1 000 g 1 200 g Viande 150 g 300 g 450 g 600 g Pomme(s) de terre 230 g 460 g 690 g Légumes...
-
Page 31: Utilisation Des Accessoires
UTILISATION DES ACCESSOIRES Installation de la grille AVERTISSEMENT! Reportez- vous aux chapitres concernant Placez la grille sur le plateau tournant. la sécurité. Installation de l'ensemble du plateau tournant ATTENTION! Ne cuisez pas les aliments sans l'ensemble du plateau tournant. N'utilisez que l'ensemble du plateau tournant fourni avec le micro-ondes. -
Page 32: Conseils
Lorsque le minuteur est activé, Le minuteur continue de la fonction active s'affiche. Pour fonctionner lorsque vous ouvrez voir le temps restant, appuyez la porte ou mettez le micro- ondes en pause. sur la touche CONSEILS AVERTISSEMENT! Reportez- vous aux chapitres concernant la sécurité. -
Page 33: Entretien Et Nettoyage
Retournez les aliments à la moitié du temps À la moitié du temps de cuisson, retournez programmé et continuez à les faire griller. les aliments puis poursuivez la cuisson. Il existe 2 modes de cuisson combinée. Cuisson combinée Chaque mode associe les fonctions micro- ondes et gril à... -
Page 34: Installation
Problème Cause probable Solution L'affichage indique La Sécurité enfants est activée. Désactivez la sécurité enfants. Appuyez sur pendant 3 se- condes. Des étincelles jaillis- Vous avez placé des plats en Retirez le plat de l'appareil. sent dans la cavité. métal ou ayant des éléments en métal dans l'appareil. - Page 35 • Ce micro-ondes est uniquement destiné à être utilisé encastré. Il doit être installé sur une surface plate et stable. • Le meuble ne doit comporter aucune paroi arrière à l'endroit où est installé le micro-ondes. • Éloignez le plus possible le micro-ondes de la vapeur, de l'air chaud et des projections d'eau.
-
Page 36: Caractéristiques Techniques
3. Installez le micro-ondes. Si vous avez 4. Ouvrez la porte et fixez le micro-ondes vissé le support, veillez à ce qu'il bloque au meuble à l'aide d'une vis. l'arrière de l'appareil pour l'empêcher de reculer. CARACTÉRISTIQUES TECHNIQUES Caractéristiques techniques Alimentation électrique 230 V, + 50 Hz Consommation électrique maximale... - Page 37 collecte mis à disposition par les autorités locales ou dans les centres de recyclage commerciaux.
-
Page 38: Sicherheitshinweise
INHALTSVERZEICHNIS Sicherheitshinweise Zusatzfunktionen Sicherheitsanweisungen Tipps und Hinweise Gerätebeschreibung Reinigung und Pflege Vor der ersten Inbetriebnahme Fehlersuche Täglicher Gebrauch Montage Automatikprogramme Technische Daten Verwendung des Zubehörs Änderungen vorbehalten. SICHERHEITSHINWEISE Lesen Sie die mitgelieferte Gebrauchsanleitung sorgfältig vor Montage und Inbetriebnahme des Geräts. Bei Verletzungen oder Schäden infolge nicht ordnungsgemäßer Montage oder Verwendung des Geräts übernimmt der Hersteller keine Haftung. - Page 39 Kinder dürfen keine Reinigung und Wartung ohne • Beaufsichtigung durchführen. Halten Sie Kinder unter 8 Jahren vom Gerät und dem • Netzkabel fern. Allgemeine Sicherheit Dieses Gerät ist für die Verwendung im Haushalt und • ähnliche Zwecke vorgesehen, wie z. B.: Bauernhöfe, Personalküchenbereiche in Geschäften, –...
- Page 40 Wenn Sie Lebensmittel in Behältern aus Kunststoff oder • Papier erwärmen, beobachten Sie das Gerät aufmerksam, da die Möglichkeit einer Entflammung besteht. Das Gerät ist zum Erwärmen von Speisen und Getränken • vorgesehen. Das Trocknen von Kleidungsstücken und das Erwärmen von Wärmekissen, Hausschuhen, Schwämmen, feuchten Tüchern o.
-
Page 41: Sicherheitsanweisungen
die Glasfläche verkratzen und zum Zersplittern der Scheibe führen. Achten Sie auf die Mindestabmessungen des • Einbauschranks (falls vorhanden). Siehe hierzu Kapitel „Montage“. Das Gerät muss mit geöffneter Dekortür betrieben werden • (falls vorhanden). SICHERHEITSANWEISUNGEN Montage Wenden Sie sich anderenfalls an eine Elektrofachkraft. -
Page 42: Gerätebeschreibung
• Vor Wartungsarbeiten das Gerät scharfe Reinigungsmittel oder deaktivieren und den Stecker des Metallobjekte für die Reinigung Anschlusskabels aus der Steckdose verwenden. ziehen. • Falls Sie ein Backofenspray verwenden, • Das Gerät regelmäßig reinigen, um eine befolgen Sie bitte unbedingt die Verschlechterung des Anweisungen auf der Verpackung. - Page 43 Bedienfeld Symbol Funktion Beschreibung Display Anzeige der Einstellungen und — der aktuellen Uhrzeit. Touchpads „Funk- Einstellen der Funktionen Mikro- tionen“ welle / Kombi-Garen / Grill / Au- tomatisches Auftauen und Auto- Kochen Touchpads „Zeit- Einstellen der gewünschten Zeit. einstellung“ Start / +30 Sek. Einschalten des Geräts oder Verlängerung der Gardauer um 30 Sekunden bei voller Leistung.
-
Page 44: Vor Der Ersten Inbetriebnahme
Zubehör Glasteller und Rollenführung Grillrost Drehteller-Set Verwenden Sie beim Zubereiten von Speisen in der Mikrowelle stets das Drehteller-Set. Verwendung: • Grillen • Kombi-Garen VOR DER ERSTEN INBETRIEBNAHME 1. Drücken Sie zweimal. WARNUNG! Siehe Kapitel 2. Drücken Sie die Touchpads "Sicherheitshinweise". „Einstellungen“, um die Stunden einzustellen. - Page 45 • Vor der Zubereitung Löcher eingedrungene Feuchtigkeit kann Aluminiumverpackungen, Metallbehälter das Kochgeschirr beim Erhitzen Risse usw. von den Lebensmitteln entfernen. bekommen. Garen • Der Glasteller ist eine Unterlage zum • Lebensmittel nach Möglichkeit mit einem Erhitzen von Speisen und Flüssigkeiten. mikrowellengeeigneten Material Es ist wichtiger Bestandteil der abdecken.
- Page 46 Geeignetes Kochgeschirr und Materialen Kochgeschirr/Material Mikrowelle Grillen Auftauen Auf- Garen wär- Ofenfestes Glas und Porzellan (ohne Me- tallteile, z. B. Pyrex, feuerfestes Glas) Nicht feuerfestes Glas und Porzellan Glas und Glaskeramik aus feuerfestem/ frostbeständigem Material (z. B. Arcof- lam), Grillrost Keramik , Steingut Hitzebeständiger Kunststoff bis 200 °C...
- Page 47 Ausschalten der Mikrowelle: Weitergaren. Verwenden Sie diese Option, um den Garfortschritt der Speise • Warten Sie, bis die Mikrowelle nach zu überprüfen. Ablauf der eingestellten Gardauer • Drücken Sie automatisch ausgeschaltet wird. Das Display zeigt End an. Wenn die Mikrowelle •...
-
Page 48: Automatikprogramme
Beim Auftauen nach Gewicht wird die Auftauen nach Gewicht sollte Zeit automatisch eingestellt. nicht für tiefgekühlte 3. Drücken Sie , um Ihre Auswahl zu Fertiggerichte oder für bestätigen und die Mikrowelle Lebensmittel verwendet werden, einzuschalten. die vor mehr als 20 Minuten aus dem Gefrierfach genommen Grillen und Garen im Kombi- wurden. - Page 49 Display Menü Gewicht Getränke 1 Tasse Blechpizza 200 g 300 g 400 g Popcorn 50 g 100 g Hähnchen 500 g 750 g 1000 g 1200 g Fleisch 150 g 300 g 450 g 600 g Kartoffeln 230 g 460 g 690 g Gemüse 150 g...
-
Page 50: Verwendung Des Zubehörs
VERWENDUNG DES ZUBEHÖRS Einsetzen des Grillrostes WARNUNG! Siehe Kapitel "Sicherheitshinweise". Legen Sie den Grillrost auf das Drehteller- Set. Einsetzen des Drehteller-Sets VORSICHT! Lebensmittel nicht ohne das Drehteller-Set garen. Verwenden Sie ausschließlich das mit der Mikrowelle gelieferte Drehteller-Set. Lebensmittel niemals direkt auf dem Glasteller garen. -
Page 51: Tipps Und Hinweise
TIPPS UND HINWEISE WARNUNG! Siehe Kapitel "Sicherheitshinweise". Tipps für die Mikrowelle Problem Abhilfe Sie finden keine Angaben für die vorbe- Orientieren Sie sich an einem ähnlichen Lebensmit- reitete Speisemenge. tel. Verlängern oder verkürzen Sie die Garzeiten nach folgender Regel: Doppelte Menge = fast doppelte Zeit, Halbe Menge = halbe Zeit Die Speise wurde zu trocken. -
Page 52: Reinigung Und Pflege
Wenden Sie das Gargut nach der Hälfte der Mikrowellen- und Grillfunktion bei Garzeit, und setzen Sie den Garvorgang variierenden Garzeiten und Leistungsstufen. dann fort. Für das Kombi-Garen stehen Ihnen 2 Modi zur Verfügung. Jeder Modus kombiniert die REINIGUNG UND PFLEGE •... -
Page 53: Montage
Störung Mögliche Ursache Abhilfe Die Beleuchtung Die Lampe ist defekt. Die Lampe muss ausgewechselt funktioniert nicht. werden. Im Display erscheint Die Kindersicherung ist einge- Schalten Sie die Kindersicherung schaltet. aus. Halten Sie 3 Sekunden gedrückt. Im Garraum bilden Im Garraum befindet sich Koch- Nehmen Sie das Kochgeschirr sich Funken. - Page 54 Montage der Mikrowelle VORSICHT! Das Gerät nicht an Adapter oder 1. Prüfen Sie, ob der Einbauschrank die Verlängerungskabel geforderten Montageabstände anschließen. Dies kann zu ermöglicht. Überlast führen und es besteht Brandgefahr. VORSICHT! Die Mindesteinbauhöhe beträgt 85 • Die Mikrowelle ist ausschließlich zur Verwendung als Einbaugerät vorgesehen.
-
Page 55: Technische Daten
4. Öffnen Sie die Tür und befestigen Sie die Mikrowelle mit einer Schraube am Schrank. 3. Setzen Sie die Mikrowelle ein. Wenn Sie den Winkel angebracht haben, achten Sie darauf, dass er die Geräterückseite festklemmt. TECHNISCHE DATEN Technische Daten Versorgungsspannung 230 V, 50 Hz Maximale Leistungsaufnahme 1,45 kW... - Page 56 Abmessungen des Garraums 328 mm (B) x 226 mm (H) x 368 mm (T) Fassungsvermögen der Mikrowelle 25 l Durchmesser des Drehtellers 315 mm Gewicht 20,26 kg Lampe 25 W UMWELTTIPPS Bitte recyceln Sie alle Materialien, die mit gekennzeichnete elektrische Geräte nicht im Haushaltsabfall.
Need help?
Do you have a question about the AMM25GX and is the answer not in the manual?
Questions and answers