Advertisement
Portable Kerosene
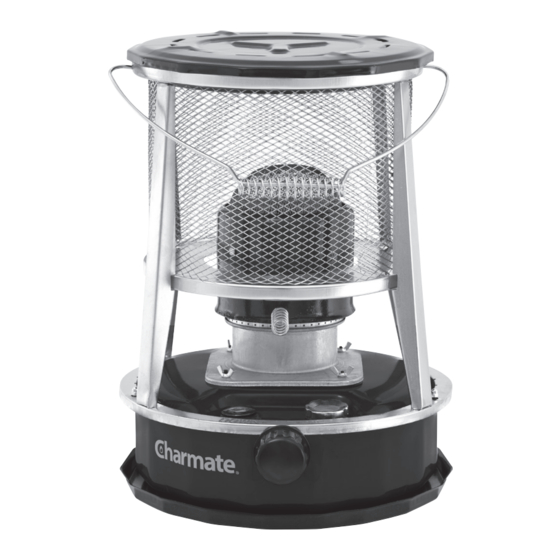
Steel construction for durability and long life
Fuel tank capacity 4.6L
Burns Kerosene
Assembled dimensions (mm): 325 Ø x 435 H
FOR OUTDOOR USE ONLY
DO NOT OPERATE THIS APPLIANCE BEFORE READING THE INSTRUCTION BOOKLET
DO NOT PLACE ARTICLES ON OR AGAINST THIS APPLIANCE
DO NOT STORE CHEMICALS OR FLAMMABLE MATERIALS OR SPRAY AEROSOLS NEAR THIS APPLIANCE
DO NOT OPERATE THE APPLIANCE INDOORS
DO NOT OPERATE IN AN ENCLOSED AREA. ACCESSIBLE PARTS MAY BE VERY HOT. KEEP YOUNG CHILDREN AWAY
MINIMUM CLEARANCES FROM COMBUSTIBLE MATERIALS: 3 METRES
is a registered trademark of: Sitro Group Australia Pty Ltd - www.charmate.com.au & Aber Living, N.Z - www.charmate.co.nz
04260 12/20
Heater
Model No. CMK302
Important: Retain these instructions for future use.
@CHARMATENATION
CHARMATENZ
CHARMATE
Advertisement
Table of Contents

Summary of Contents for Charmate CMK302
- Page 1 DO NOT OPERATE IN AN ENCLOSED AREA. ACCESSIBLE PARTS MAY BE VERY HOT. KEEP YOUNG CHILDREN AWAY MINIMUM CLEARANCES FROM COMBUSTIBLE MATERIALS: 3 METRES is a registered trademark of: Sitro Group Australia Pty Ltd - www.charmate.com.au & Aber Living, N.Z - www.charmate.co.nz Important: Retain these instructions for future use.
- Page 2 IMPORTANT SAFETY WARNINGS READ ALL SAFETY WARNINGS AND INSTRUCTIONS CAREFULLY BEFORE ASSEMBLING AND OPERATING YOUR BRAZIER. WARNING • Only use this Kerosene Heater on a hard, level, non- • Store the Kerosene Heater out of reach of children and in a dry combustible, stable surface (concrete, ground etc.) capable of location when not in use.
- Page 3 Assembly Instructions For Easiest Assembly: Filling The Reservoir: Your Kerosene Heater come fully assembled. 1. Ensure that the Kerosene Heater is OFF and cooled before filling up the fuel tank. Please dispose of all packaging material in an environmentally responsible manner. 2.
- Page 4 Wick Replacement Note: When replacing the wick it is recommended that you wear gloves and change it in an outdoor area. 1. Loosen the 3 dome 6. Place the wick in the head nuts of the heater and position guard and remove. the control system.
Need help?
Do you have a question about the CMK302 and is the answer not in the manual?
Questions and answers