Table of Contents
Advertisement
E.H. Wachs
600 Knightsbridge Parkway
Lincolnshire, IL 60069
www.turnvalves.com
Vitals Reference Manual
E.H. Wachs Part No. 79-MAN-04
Rev. I, August 2021
Revision History:
Original
Rev. B, October 2014
Rev. C, June 2015
Rev. D, July 2017
Rev. E, November 2018
Rev. F, September 2019
Rev. G, September 2020
Rev. H, April 2021
Copyright © 2021 E.H. Wachs. All rights reserved.
This manual may not be reproduced in whole or in part
without the written consent of E.H. Wachs.
December 2012
BC
Advertisement
Table of Contents

Summary of Contents for Wachs Vitals
- Page 1 Rev. E, November 2018 Rev. F, September 2019 Rev. G, September 2020 Rev. H, April 2021 Copyright © 2021 E.H. Wachs. All rights reserved. This manual may not be reproduced in whole or in part without the written consent of E.H. Wachs.
- Page 2 Vitals Reference Manual Part No. 79-MAN-04, Rev. I E.H. Wachs...
-
Page 3: Table Of Contents
California Energy Commission Compliance ........14 HC-100 Handheld Controller with Vitals Mobile-HC ....... . 14 Connection Options . - Page 4 Using the Diagnostics Cable ..........72 Chapter 6: Using Vitals Mobile-HC (HC-100 Controller) ......75 Starting Vitals Mobile .
- Page 5 Chapter 10: Vitals Valve Exercising Program ........
- Page 6 Chapter 11: Vitals Database Reference ........
-
Page 7: Chapter 1: About This Manual
Chapter 3 describes the Vitals 3.8.1 hardware and software in detail. When using Vitals version 3.8.1 for the first time, be sure to follow the procedures in Chapter 4, “Starting Up with Vitals”. The setup procedure requires that you have a Win- dows (version 7, 8, or 10) PC on which you can install Vitals Desktop 3.8.1. -
Page 8: How To Use The Manual
Each chapter describes a specific topic on and notices with supplemen- using the Vitals controller and software. tary information. This symbol indi- Each page is designed with two columns. This large column cates a user notice. -
Page 9: Chapter 2: Safety
Chapter 2, Safety Chapter 2 Safety In This Chapter E.H. Wachs takes great pride in designing and manufactur- ing safe, high-quality products. We make user safety a top PERATOR AFETY priority in the design of all our products. ITALS IAGNOSTICS Read this chapter carefully before operating the valve equipment using the Vitals controller (TC-100 or HC-100). -
Page 10: Safety Symbols
Vitals Reference Manual Always turn machine off before doing any adjustments or service. • SECURE LOOSE CLOTHING AND JEWELRY. Secure or remove loose-fitting clothing and jewelry, and securely bind long hair, to prevent them from getting caught in moving parts of the machine. -
Page 11: Protective Equipment Requirements
1910.95, Occupational Noise Exposure and ANSI S12.6 Hearing Protectors. ITALS IAGNOSTICS The Diagnostics module of Vitals Mobile lets you test elec- tronic and mechanical functions of the valve operator. Vitals Diagnostics operates the valve operator; use the same safety precautions and procedures that you use when performing valve operations. - Page 12 Vitals Reference Manual Do not use Vitals Diagnostics with the valve operator attached to a valve. Run Diagnostics only in the following circumstances: • the valve operator is powered on and in operating posi- tion; the valve operator is not attached to a valve;...
- Page 13 Follow all safety proce- dures for using the valve operator. Figure 2-2. The Warning screen appears when you start Vitals Mobile Diagnostics. Read all safety instructions in the valve operator manual and verify by clicking the checkbox before you continue. E.H. Wachs...
- Page 14 Vitals Reference Manual Part No. 79-MAN-04, Rev. I E.H. Wachs...
-
Page 15: Chapter 3: Vitals Hardware And Software
In This Chapter ITALS YSTEM RCHITECTURE ITALS YSTEM RCHITECTURE TC-100 T ABLET ONTROLLER Figure 3-1 illustrates the Vitals 3.8.1 hardware and software WITH ITALS OBILE architecture. HC-100 H ANDHELD ONTROLLER WITH ITALS The Vitals hardware is a handheld control computer that OBILE operates E.H. - Page 16 1. The master database resides in Vitals Desktop. Data is transferred between Vitals Mobile and Vitals Desktop during a data transfer. 2. The master database is replicated in Vitals Mobile during a data transfer. Any new valve data created in Vitals Mobile is downloaded into the master database during a data transfer.
-
Page 17: System Requirements
Bluetooth module on valve operator) Vitals Mobile Diagnostics Yes** Yes** * May require board upgrade on older valve operators; contact E.H. Wachs with serial number for information. ** Not applicable for older TM-7/TM-6 units with silver/yellow controller boxes. E.H. Wachs... -
Page 18: Tablet Controller With Vitals Mobile-Tc
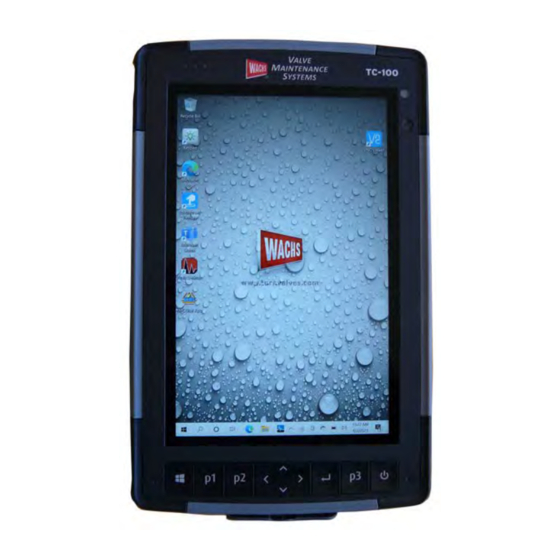
You can use an external GPS unit for higher-resolution mapping. Input requires NMEA-0183 data format, using Bluetooth. Figure 3-2. The TC-100 handheld controller is a fully functional Windows 10 Pro computer, running Vitals Mobile software. Connection Options Connection between the TC-100 and E.H. Wachs valve... -
Page 19: Specifications
Chapter 3, Vitals Hardware and Software: TC-100 Tablet Controller with Vitals Mobile-TC You can transfer valve and activity data between the TC- 100 and your PC running Vitals Desktop using a USB flash drive. You can also set up the TC-100 on your network; see your IT person/department for assistance. -
Page 20: California Energy Commission Compliance
Bluetooth module installed, and may require board upgrade on older TM machines). The HC-100 connects to the PC running Vitals Desktop using a USB connection. You can connect the HC-100 directly to the PC USB port (using Windows Mobile Device Center), or transfer data using a USB flash drive. -
Page 21: Specifications
Chapter 3, Vitals Hardware and Software: HC-100 Handheld Controller with Vitals Mobile-HC An optional desktop dock (79-110-09), shown in the photo, is available to provide power and USB connection to the HC-100. The dock also has an Ethernet jack for con- necting to a network. -
Page 22: California Energy Commission Compliance
Vitals Reference Manual Table 3-3: HC-100 Hardware Specifications Operating System Microsoft Windows Embedded Handheld Operating: -22°F to +140°F (-30°C to +60°C) Temperature Storage: -22°F to +158°F (-30°C to +70°C) Environmental IP68 waterproof and dustproof Shockproof: multiple drops from 5’ (1.5 m) -
Page 23: Chapter 4: Starting Up With Vitals
You will also need a USB port to connect to the NCLUDED HC-100 controller. NSTALLING ITALS ESKTOP There are two steps to start up the Vitals 3.8.1 software. ITALS OBILE You must perform them in this order: ITALS OBILE 1. -
Page 24: Installing Vitals Desktop
Vitals Reference Manual NCLUDED The Vitals Desktop 3.8.1 installer includes the following files: • Vitals Desktop application • Vitals Reference Manual PDF • Language pack files • Windows Mobile Device Center installation files • Vitals Mobile-HC installation CAB file •... - Page 25 Chapter 4, Starting Up with Vitals: Installing Vitals Desktop window appears, showing the Ready to Install location of the Vitals Desktop Start Menu shortcut. (Another Vitals Desktop shortcut will be provided on the user's desktop.) Click Next window appears, showing the progress...
- Page 26 Once the installation is complete, the Setup Wizard will confirm that the installation has completed and Vitals Desktop has been installed. Click . The Finish Vitals Desktop software is now ready to use. Part No. 79-MAN-04, Rev. I E.H. Wachs...
-
Page 27: Vitals Mobile-Tc
As newer versions of Vitals Mobile-HC become available, they can be installed using the following proce- dure. (When there is a newer version of Vitals Mobile-HC, you will be prompted to install it on the HC-100 during a Data Transfer.) It is recommended to have the same versions of Vitals Mobile-HC and Vitals Desktop software. - Page 28 The HC-100 screen shows the installation progress. Vitals. You could lose activity IMPORTANT: Do not quit Vitals Desktop on the PC, data. or turn off the HC-100, during installation. Part No. 79-MAN-04, Rev. I...
- Page 29 Figure 4-3. The HC-100 screen displays the installa- tion progress. A message confirms that the installation was success- ful. Figure 4-4. The HC-100 shows when the Vitals instal- lation is complete. After Vitals Mobile successfully installs on the con- NOTE troller, click the button in Vitals Desktop.
-
Page 30: Foreign Language Support
ANGUAGE UPPORT Foreign languages are supported by first installing the lan- NOTE guage file on the Vitals Desktop PC. During a Data Trans- fer, the available languages are pushed out to the Vitals Vitals Mobile-TC does not Mobile. currently include foreign lan- guage support. - Page 31 Chapter 4, Starting Up with Vitals: Foreign Language Support • In Vitals Desktop, some languages will require a change to the Administrative System Locale under the Region and Language settings on your Windows system in order to view special characters properly.
- Page 32 Vitals Reference Manual Part No. 79-MAN-04, Rev. I E.H. Wachs...
-
Page 33: Chapter 5: Using Vitals Mobile-Tc (Tc-100 Controller)
Vitals Mobile-TC operates the valve exerciser TARTING and stores valve exercising data. You can transfer valve ISPLAYING AND EARCHING records from your PC running Vitals Desktop to the con- ALVE NFORMATION troller, or enter valve records using Vitals Mobile-TC while ALVE PERATION in the field. - Page 34 Vitals Reference Manual Attach holding strap (either side of TC-100) Docking port on Power side on/off Power and Direction keys and USB ports Windows back button (not used menu in Vitals Mobile) P1/P2/P3 are programmable functions Figure 5-1. TC-100 connections and control buttons An optional dock is available.
-
Page 35: Tablet Settings
Chapter 5, Using Vitals Mobile-TC (TC-100 Controller): Starting Up Tablet Settings Swipe from the right edge of the screen toward the middle to display the Notifications and Device Settings menu. Switch device mode between tablet and PC Set screen brightness... - Page 36 Vitals Reference Manual The TC-100 can be used as a non-networked, standalone device with a single user account for running the Vitals soft- ware. However, you will probably want to set up network- ing features such as wi-fi, file sharing, email, etc, to incorporate it into your office network.
- Page 37 Chapter 5, Using Vitals Mobile-TC (TC-100 Controller): Starting Up Figure 5-4. TC-100 initial screen in tablet mode. Scroll down to locate the Vitals Mobile icon. Figure 5-5. TC-100 initial screen in PC mode (left). Tap the Windows icon (right) and scroll down to locate the Vitals Mobile icon.
-
Page 38: Vitals Mobile-Tc Reference
Vitals Reference Manual Vitals Mobile-TC Reference Tap the Vitals Mobile-TC icon. The app appears with NOTE the home page and All Activities Query results dis- played. On a new TC-100 with no Vitals data, the Query results will be blank. -
Page 39: Settings
Flash transfer, for transferring activity data to Vitals Desktop. • Settings, for changing program defaults. Settings Tap the Settings icon to open the Vitals Mobile-TC settings screen. The default view is the tab. Connection Touch any of the tabs to view that Settings screen. - Page 40 Vitals Reference Manual You can set the default torque limit under MY CONNEC- . (This sets the torque limit for Vitals Mobile-TC, TION not for the selected valve operator. The torque level you select will be saved for all valve operations until you change it again.)
- Page 41 Chapter 5, Using Vitals Mobile-TC (TC-100 Controller): Starting Up Figure 5-9. Pair and unpair machines under the list. MANAGE EQUIPMENT E.H. Wachs Part No. 79-MAN-04, Rev. I...
- Page 42 Vitals Reference Manual GPS Tab See “Adding External GPS” on page 43. Tap the tab. to search for an available Auto-discover serial port GPS device, or manually select a device with the Serial drop-down. port Figure 5-10. Use the GPS tab to connect to an exter- nal GPS device.
- Page 43 Chapter 5, Using Vitals Mobile-TC (TC-100 Controller): Starting Up Dashboard Tab Tap the tab. Dashboard Tap the drop-down to select any of the Select Query Home Screen data queries. Then tap to select the fields you want to list on the Home Screen.
- Page 44 Vitals Reference Manual Help Tab Tap the tab. Help The Help reference screen for Vitals Mobile-TC appears. to access this manual from the Vitals Manual website. The manual is in PDF format. turnvalves.com You can save it to your TC-100 device after down- loading it.
- Page 45 Chapter 5, Using Vitals Mobile-TC (TC-100 Controller): Starting Up About Tab Tap the tab. About tab displays device and software version About information. You can tap to see if a Check for Update newer version of Vitals Mobile-TC is available.
-
Page 46: Adding A Valve Operator
Adding a Valve Operator Add a connection to a valve operator in Settings, under the Connection tab. Before connecting to a valve operator, turn its power on. Tap the Vitals Mobile-TC Settings icon. The Connec- tab appears by default. tion... - Page 47 Chapter 5, Using Vitals Mobile-TC (TC-100 Controller): Starting Up The MANAGE EQUIPMENT sec- tion displays paired and unpaired valve operators within range. Figure 5-15. Display available valve operators under MANAGE EQUIPMENT Tap the button for the valve operator you want to PAIR connect to.
- Page 48 Vitals Reference Manual Figure 5-16. When you pair a new valve operator, connection information is updated. The updated connections are listed. To change the active connection, select the new valve operator under MY EQUIPMENT Part No. 79-MAN-04, Rev. I E.H. Wachs...
-
Page 49: Adding External Gps
Chapter 5, Using Vitals Mobile-TC (TC-100 Controller): Starting Up Figure 5-17. To change the connection, tap the new valve operator under MY EQUIPMENT Adding External GPS Before this procedure, make a Bluetooth connection from the TC-100 to the GPS device, as described above. -
Page 50: Displaying And Searching Valve Information
You can sort and display valve and activity data on the NOTE Home screen. You can hide the Dashboard When you open Vitals Mobile-TC, the Home screen to create more room to dis- appears with Query results for All Activities. play valve data. - Page 51 Chapter 5, Using Vitals Mobile-TC (TC-100 Controller): Displaying and Searching Valve Information Tap if you want to hide Dashboard to see more results Query menu— tap to select search type Tap to go to Dashboard Settings and change what fields are dis-...
- Page 52 Vitals Reference Manual To change the Query type, tap on the Query menu and select the type of search. Figure 5-20. Tap the Query menu to select the data search (left). You can move the columns in the list by dragging the column headers left or right (right).
- Page 53 Chapter 5, Using Vitals Mobile-TC (TC-100 Controller): Displaying and Searching Valve Information Tap on an activity to highlight it. The Valve Details icon will highlight to show valve information is avail- able. To return to the search results Highlighted to show screen, tap the Home icon.
- Page 54 Vitals Reference Manual Tap on the headings to expand the data records. Figure 5-22. Tap the heading to display the available data. to display the torque chart, if one is More Info available. Figure 5-23. More Info displays the torque chart.
- Page 55 Chapter 5, Using Vitals Mobile-TC (TC-100 Controller): Displaying and Searching Valve Information You can group data by any of the displayed fields. Drag the field heading up into the Sort box. Tap the Reset icon to remove the sort fields Figure 5-24.
- Page 56 Vitals Reference Manual You can search within your query results by typing in the Full Text Search box. All displayed fields are searched. Results are updated as you search. Figure 5-26. Type in the Full Text Search box to search the displayed results.
- Page 57 Chapter 5, Using Vitals Mobile-TC (TC-100 Controller): Displaying and Searching Valve Information When you select an activity or valve with GPS data, the Maps icon is highlighted. Tap the icon to open Maps and display the valve location. Figure 5-27. When the Maps icon is highlighted, you can tap it to display the valve location in Maps.
-
Page 58: Valve Operation
Vitals Reference Manual ALVE PERATION Vitals Mobile Controller The Vitals Controller is the program for operating E.H. E.H. Wachs "No-Assump- tion" Valve Exercising Wachs valve operators. If using a cable connection, make When you run the valve oper- sure the control cable is connected to the USB or serial port ator in EXER mode, it uses on the controller and to the port on the valve exerciser. - Page 59 Chapter 5, Using Vitals Mobile-TC (TC-100 Controller): Valve Operation field displays the current operating torque. If connection is not detected Torque when the Vitals controller field displays the highest torque level Highest screen opens, a message will during the current operation.
-
Page 60: Starting A New Activity With Existing Valve
Starting a New Activity with Existing Valve Before starting new activities, perform a data transfer with Vitals Desktop to sync any changes from the Vitals data- base to the controller. Find the valve you want to operate by searching on the Home screen, using the Query and search functions. -
Page 61: Finding Valves On The Map
Chapter 5, Using Vitals Mobile-TC (TC-100 Controller): Valve Operation Figure 5-29. Start the valve activity for a selected valve. Start the activity. See “Vitals Mobile Controller” on page 52. Finding Valves on the Map You can list valves that have GPS data by location, and NOTE show them using Maps. -
Page 62: Starting A New Activity With A New Valve
Mobile-TC to continue. Starting a New Activity with a New Valve Before starting new activities, perform a data transfer with Vitals Desktop to sync any changes from the Vitals data- base to the controller. Tap the New Valve icon. The... - Page 63 Chapter 5, Using Vitals Mobile-TC (TC-100 Controller): Valve Operation Tap the Cancel button to can- cel the New valve creation Tap in the fields to display the keyboard and enter informa- tion Tap the Save icon to save the valve Figure 5-31.
-
Page 64: Transducer Errors
TM-7 or ERV-750, the transducer readings from the valve operator are out of normal range. This indicates a problem with either the transducers or cables. Caution: Vitals uses transducer readings to calculate operating torque. Oper- ating with incorrect readings can cause the machine to break a valve. - Page 65 Chapter 5, Using Vitals Mobile-TC (TC-100 Controller): Valve Operation Figure 5-33. Example screen. If you Transducer Error , the valve operation will continue. If you tap , the valve operation will stop. Figure 5-34. If you selected to continue (left), the valve operation will continue.
-
Page 66: Vitals Mobile Diagnostics
Vitals Diagnostics operates the valve operator; use the same safety precautions and procedures that you use when performing valve operations. Do not use Vitals Diagnostics with the valve operator installed on a valve. Run Diagnostics only in the following circumstances: •... - Page 67 Chapter 5, Using Vitals Mobile-TC (TC-100 Controller): Vitals Mobile Diagnostics Do not use diagnostics with the valve operator mounted on a valve. Tap Agree and Continue screen appears. SELECT TEST E.H. Wachs Part No. 79-MAN-04, Rev. I...
- Page 68 Diagnostic Control Cable (for the TC- 100, p/n 79-302-40). See “Using the Diagnostics Cable” on page 72. (Vitals Mobile is not particular in establishing a machine connection. If Vitals Mobile connects, but Vitals Diagnos- tics does not, it indicates a connection issue.)
-
Page 69: Brake Test
Chapter 5, Using Vitals Mobile-TC (TC-100 Controller): Vitals Mobile Diagnostics Figure 5-35. The red bars below the Throughput graph indicate data connection errors. If connecting with Bluetooth, try moving closer to the valve opera- tor. You can also use the optional Diagnostics Cable. - Page 70 Vitals Reference Manual The button turns yellow and the status changes to . Take your finger off the button to lock the RELEASED brake again. Part No. 79-MAN-04, Rev. I E.H. Wachs...
-
Page 71: Counter Test
Chapter 5, Using Vitals Mobile-TC (TC-100 Controller): Vitals Mobile Diagnostics To exit the brake test, tap the button. Back Counter Test The direction button reads either (right-hand) or (left-hand). Tap the direction button to change the test direction. E.H. Wachs... - Page 72 Vitals Reference Manual Tap the button to start the test. The test for the selected direction starts. The button changes to read STOP Part No. 79-MAN-04, Rev. I E.H. Wachs...
- Page 73 Chapter 5, Using Vitals Mobile-TC (TC-100 Controller): Vitals Mobile Diagnostics The status changes as the test is conducted. When the message at the bottom reads , the test is com- Finished plete. If you want to test in the opposite direction, tap the...
-
Page 74: Hydraulics Test
Vitals Reference Manual To exit the counter test, tap the button. Back Hydraulics Test Tap to select the FLOW PRESSURE NOTE ), and DIRECTION When you start the Hydrau- lics Test, an error message appears if there is a trans- ducer error. - Page 75 Chapter 5, Using Vitals Mobile-TC (TC-100 Controller): Vitals Mobile Diagnostics Tap the button to start the test. The test for the selected parameters begins, and the button changes to read STOP E.H. Wachs Part No. 79-MAN-04, Rev. I...
-
Page 76: Transducer Zero Torque Error
Vitals Reference Manual The status changes as the test is conducted. Press the button to end the test. STOP If desired, you can change the test parameters and run additional tests. To exit the hydraulics test, tap the button. Back... - Page 77 Chapter 5, Using Vitals Mobile-TC (TC-100 Controller): Vitals Mobile Diagnostics Figure 5-36. Open the control box to adjust the trans- ducer potentiometer. Locate the potentiometer on the control board. You will need a jeweler’s screwdriver to adjust it. Potentiometer adjustment screw Figure 5-37.
-
Page 78: Using The Diagnostics Cable
Vitals Reference Manual Figure 5-38. Turn the adjustment screw until the readings on the Hydraulics Test screen are equal. When the readings are equal, replace the cover on the control box. Continue with the Hydraulics Test by tapping the button. - Page 79 Chapter 5, Using Vitals Mobile-TC (TC-100 Controller): Vitals Mobile Diagnostics Remove the internal cable from the circuit board, and plug in the diagnostics cable Figure 5-39. Plug the diagnostics cable directly into the circuit board in the valve operator control box.
- Page 80 Vitals Reference Manual Part No. 79-MAN-04, Rev. I E.H. Wachs...
-
Page 81: Chapter 6: Using Vitals Mobile-Hc (Hc-100 Controller)
Vitals Mobile operates the valve exerciser and LUETOOTH stores valve exercising data. You can transfer valve records ITALS OBILE ONTROLLER from your PC running Vitals Desktop to the controller, or PERATION enter valve records using Vitals Mobile while in the field. ITALS OBILE IAGNOSTICS... - Page 82 Vitals Reference Manual Vitals Mobile icon Home button Figure 6-1. HC-100 home screen. Press the Home button on the keypad at any time to return to the home screen. main screen appears. Vitals Mobile Part No. 79-MAN-04, Rev. I E.H. Wachs...
-
Page 83: Main Screen Reference
Chapter 6, Using Vitals Mobile-HC (HC-100 Controller): Starting Vitals Mobile Battery status (shown Machine connection status (shown Charging) Cable connected to machine). Touch icon to go to Settings screen. Battery low status: USB flash drive status. Battery charged status: Valve Database Status —number of valve... - Page 84 GPS, and the default torque limit. (See “Changing Settings” below.) • The command lets you transfer valve Data Transfer data to Vitals Desktop using a USB flash drive. • The command displays the Vitals Mobile About screen, with version information.
- Page 85 Chapter 6, Using Vitals Mobile-HC (HC-100 Controller): Starting Vitals Mobile Figure 6-4. The About screen displays version infor- mation. Figure 6-5. Tap the Show valves with no activities checkbox to display a list of valve in the database that have no activity records. Tap the Valve ID you want.
-
Page 86: Changing Controller Settings
Vitals Reference Manual Changing Controller Settings You can select the valve operator controller, the GPS (embedded or external), and USB data connection. Tap the icon at the top of the Vitals Controller Settings home screen. Controller Settings Figure 6-6. Tap the icon. - Page 87 Chapter 6, Using Vitals Mobile-HC (HC-100 Controller): Starting Vitals Mobile Figure 6-7. Tap the button to display the connections CONNECT menu. E.H. Wachs Part No. 79-MAN-04, Rev. I...
- Page 88 Vitals Reference Manual Figure 6-8. Connections menu. to check all COM ports for Auto Detect Controller a valid machine connection (either cable or Blue- tooth). To make a cable connection to a device, tap Cable Con- nection • If there is no device connected, a Not Connected...
- Page 89 Chapter 6, Using Vitals Mobile-HC (HC-100 Controller): Starting Vitals Mobile Figure 6-9. Controller Settings screen showing message. Connected • If the cable is connected to a device, a Connected message will appear. with... Figure 6-10. The images show the controller con- nected to the TM-7 (left) and ERV-750 (right).
- Page 90 Vitals Reference Manual Figure 6-11. • If the device is not connected, a Not Connected... message will appear. Part No. 79-MAN-04, Rev. I E.H. Wachs...
- Page 91 Chapter 6, Using Vitals Mobile-HC (HC-100 Controller): Starting Vitals Mobile Figure 6-12. • If the device is connected, a mes- Connected with... sage will appear. E.H. Wachs Part No. 79-MAN-04, Rev. I...
- Page 92 Vitals Reference Manual Figure 6-13. Tap the button to save the settings. The but- Save Save ton will gray out when settings are saved. Part No. 79-MAN-04, Rev. I E.H. Wachs...
- Page 93 Chapter 6, Using Vitals Mobile-HC (HC-100 Controller): Starting Vitals Mobile NOTE To go back without saving settings, click No, then Back. Figure 6-14. Tap to save settings, or Save Back leave them unchanged. To change default torque settings, tap the...
-
Page 94: Changing Gps Settings
Figure 6-15. Select the desired torque limit and then Save Changing GPS Settings To change GPS settings, tap GPS status at the top NOTE right of the Vitals screen. HC-100 internal GPS: • If the internal GPS is connected, the Connected Inter- GPS COM Port: COM8 message appears. - Page 95 Chapter 6, Using Vitals Mobile-HC (HC-100 Controller): Starting Vitals Mobile • If the external GPS is connected, the Connected message appears. External GPS Figure 6-17. Connected External GPS Tap the CONNECT icon to select other GPS options. Figure 6-18. E.H. Wachs...
-
Page 96: Or Tm-7
Vitals Reference Manual AIRING EVICES SING LUETOOTH ERV-750 or TM-7 In the Home window, tap and go to Settings Connec- . Tap tions Bluetooth Add new device… Tap the device and tap WACHS MACHINE Next Part No. 79-MAN-04, Rev. I... - Page 97 Chapter 6, Using Vitals Mobile-HC (HC-100 Controller): Starting Vitals Mobile Tap the box and type “1234”. Tap Passcode Next Done E.H. Wachs Part No. 79-MAN-04, Rev. I...
- Page 98 Vitals Reference Manual device again. WACHS MACHINE Check the box and tap . (NOTE: You Serial Port Save can customize the . Be sure to include the Display Name string “ , “ , or “ in the dis- ERV”...
- Page 99 Chapter 6, Using Vitals Mobile-HC (HC-100 Controller): Starting Vitals Mobile Tab the device and tab WACHS MACHINE Next E.H. Wachs Part No. 79-MAN-04, Rev. I...
-
Page 100: Changing Bluetooth Device Names
If you change the name of a Bluetooth device, include the text “ERV”, “TM”, or “Wachs Machine” in the Display name. Vitals Mobile will only display devices with one of those text strings in the name. (This is to prevent connecting to any other, non-Wachs, Bluetooth devices.) - Page 101 Chapter 6, Using Vitals Mobile-HC (HC-100 Controller): Starting Vitals Mobile Figure 6-19. Tap the Settings button. screen appears. Tap the Settings Connections folder icon. Figure 6-20. screen appears. Tap the Connections Bluetooth icon. E.H. Wachs Part No. 79-MAN-04, Rev. I...
- Page 102 Vitals Reference Manual Figure 6-21. screen appears, with a list of Bluetooth Devices Tap the Device name you want to change. Figure 6-22. screen appears, with the cur- Partnership Settings rent Device Name in the field. Display Name Part No. 79-MAN-04, Rev. I...
- Page 103 Chapter 6, Using Vitals Mobile-HC (HC-100 Controller): Starting Vitals Mobile Figure 6-23. Type the new . Tap at the bottom of Display Name Save NOTE the screen. The Display Name must include one of the following text strings: “ERV”, “TM7”, or “Wachs Machine”.
-
Page 104: External Gps
Vitals Reference Manual Figure 6-25. External GPS In the Home window, turn Bluetooth ON by tapping the Bluetooth icon. (The icon is blue when Bluetooth is ON.) Tap Settings Go to Connections Part No. 79-MAN-04, Rev. I E.H. Wachs... - Page 105 Chapter 6, Using Vitals Mobile-HC (HC-100 Controller): Starting Vitals Mobile Go to and tap Bluetooth Add new device… Click and tap Pro device Next E.H. Wachs Part No. 79-MAN-04, Rev. I...
- Page 106 Vitals Reference Manual Tap the field and enter “0000”. Tap Passcode Next NOTE E.H. Wachs’ external Blue- tooth GPS uses passcode 0000; other devices might have a different passcode. Done Part No. 79-MAN-04, Rev. I E.H. Wachs...
- Page 107 Chapter 6, Using Vitals Mobile-HC (HC-100 Controller): Starting Vitals Mobile again. Pro device You have the option to change the Display Name. Check the box and tap Serial Port Save Tap on the tab and tap COM Ports New Outgoing Port E.H.
- Page 108 Vitals Reference Manual Tap the and tap Pro device Next Select the . Uncheck the COM Port Secure Connection NOTE box. Tap Finish Select any unused COM port except COM0 or COM8. Refer to BlueTooth Pairing & Setup Instructions (79-419-23).
-
Page 109: Vitals Mobile Controller Operation
Chapter 6, Using Vitals Mobile-HC (HC-100 Controller): Vitals Mobile Controller Operation ITALS OBILE ONTROLLER PERATION Vitals Controller The Vitals Controller is the program for operating E.H. E.H. Wachs "No-Assump- tion" Valve Exercising Wachs valve operators. If using a cable connection, make... - Page 110 Vitals Reference Manual screen appears. If connection is not detected Vitals Controller when the Vitals controller screen opens, a message will ask if you want to autocon- nect. Tap Yes. Red torque line is a scale displaying The Machine Con-...
- Page 111 Chapter 6, Using Vitals Mobile-HC (HC-100 Controller): Vitals Mobile Controller Operation Press to begin the valve operation. The valve START exerciser will run in the selected mode. The button CAUTION will turn red and the text will change to STOP...
-
Page 112: Transducer Errors
TM-7 or ERV-750, the transducer readings from the valve operator are out of normal range. This indicates a problem with either the transducers or cables. Caution: Vitals uses transducer readings to calculate operating torque. Oper- ating with incorrect readings can cause the machine to break a valve. - Page 113 Chapter 6, Using Vitals Mobile-HC (HC-100 Controller): Vitals Mobile Controller Operation Figure 6-27. Example screen. If you Transducer Error , the valve operation will continue. If you tap , the valve operation will stop. Figure 6-28. If you selected to continue (left), the valve operation will continue.
-
Page 114: Valve Operation With Data Logging
Starting a New Valve Activity NOTE Before starting new activities, perform a data transfer with Vitals Desktop to sync any changes from the Vitals data- You can list valves that have base to the controller. no activities by displaying the About screen (Menu->About) - Page 115 Chapter 6, Using Vitals Mobile-HC (HC-100 Controller): Vitals Mobile Controller Operation Tap the button. The Tap to select Valve ID Enter Valve ID screen appears, with a keypad at the bottom. • Type in the ID of the valve you are exercising. Tap button to enter letters.
- Page 116 Vitals Reference Manual • You can tap the button to search the data- GPS Search NOTE base for nearby valves (within a 50-foot radius). See “Using GPS Search” at the end of this section. You can change the GPS If the ID of the valve is not in the database, the screen...
- Page 117 Chapter 6, Using Vitals Mobile-HC (HC-100 Controller): Vitals Mobile Controller Operation Enter the data and tap the button to return to the NOTE Valve Record screen. To continue to the next or previ- ous field, tap the button. Next Prev...
-
Page 118: Using Gps Search
Vitals Reference Manual Using GPS Search The GPS Search function allows you to find valves close to your current location. GPS Search uses valve location data from the valve record. If the valve record does not have location data, GPS Search uses data from activity records, if available. - Page 119 Chapter 6, Using Vitals Mobile-HC (HC-100 Controller): Vitals Mobile Controller Operation • is the currently set search radius. Search Radius (ft) (You can change this on the Vitals Mobile Settings screen.) • is the latitude of the controller Current Lat.
-
Page 120: Accessing Saved Activities
ID to select it and tap the button. The screen appears with that valve selected. Activity Accessing Saved Activities To access previously saved activities, tap the Activities button on the Vitals Mobile main screen. Part No. 79-MAN-04, Rev. I E.H. Wachs... - Page 121 Chapter 6, Using Vitals Mobile-HC (HC-100 Controller): Vitals Mobile Controller Operation A screen appears with all of the activities that have been saved within Vitals Mobile since the last Data Transfer. E.H. Wachs Part No. 79-MAN-04, Rev. I...
- Page 122 Vitals Reference Manual To edit a saved activity, highlight the desired valve and tap the button. The valve record screen will Open appear. To edit the activity information, tap a field and update the information, as described above in “Starting a New Valve Activity”.
-
Page 123: Enabling And Using Gps
Chapter 6, Using Vitals Mobile-HC (HC-100 Controller): Vitals Mobile Controller Operation NOTE Vitals Mobile will only save 999 torque charts. If 999 torque charts are saved and you start a new activity, you will get a message saying that no torque chart will be saved. -
Page 124: Logging Gps Positions
To do this, tap the com- Tap to connect GPS satellite positions. The mand in the top right corner of the Vitals Mobile screen. smaller the number, the bet- ter the signal. A “ ” GPS status message will appear, such as... -
Page 125: Vitals Mobile Diagnostics
Chapter 6, Using Vitals Mobile-HC (HC-100 Controller): Vitals Mobile Diagnostics to close the notification window. See “Transferring Data Between Vitals Desktop and Vitals Mobile” in Chap- ter 6 to transfer the activities. You can edit the notification settings or turn this notifica- tion off within Vitals Desktop. - Page 126 Before using the Diagnostics program, make sure you are familiar with the safety instructions for your valve operator. Refer to the valve operator user manual. Tap the Diagnostics button on the Vitals Mobile main screen. The Diagnostics screen appears. WARNING...
-
Page 127: Brake Test
Chapter 6, Using Vitals Mobile-HC (HC-100 Controller): Vitals Mobile Diagnostics NOTE Vitals Diagnostics is designed to thoroughly check the data connection between the control board and the controller. Noise, incorrect data packets, etc. will prevent a connection. To check for wiring/connec-... - Page 128 Vitals Reference Manual The button turns yellow and the status changes to . Take your finger off the button to BRAKES: RELEASED lock the brake again. To exit the brake test, tap the button. Back Part No. 79-MAN-04, Rev. I...
-
Page 129: Counter Test
Chapter 6, Using Vitals Mobile-HC (HC-100 Controller): Vitals Mobile Diagnostics Counter Test The direction button reads either (right-hand) or (left-hand). Tap the direction button to change the test direction. Tap the button to start the test. The test for the selected direction starts. - Page 130 Vitals Reference Manual The status changes as the test is conducted. When the message at the bottom reads , the test is com- Finished plete. If you want to test in the opposite direction, tap the direction button ( ) to change it and tap To exit the counter test, tap the button.
-
Page 131: Gps Test
Chapter 6, Using Vitals Mobile-HC (HC-100 Controller): Vitals Mobile Diagnostics GPS Test Tap the button to start the test. START The test begins and the button changes to read STOP The status changes as the test is conducted. Press the button to end the test. -
Page 132: Hydraulics Test
Vitals Reference Manual To exit the GPS test, tap the button. Back Hydraulics Test Tap to select the FLOW PRESSURE NOTE ), and DIRECTION When you start the Hydrau- lics Test, an error message appears if there is a trans- ducer error. - Page 133 Chapter 6, Using Vitals Mobile-HC (HC-100 Controller): Vitals Mobile Diagnostics The status changes as the test is conducted. Press the button to end the test. STOP If desired, you can change the test parameters and run additional tests. To exit the hydraulics test, tap the button.
-
Page 134: Transducer Zero Torque Error
Vitals Reference Manual Transducer Zero Torque Error A transducer error may cause a error Transducer Zero Torque NOTE message when you start the Hydraulics Test. To correct the error, adjust the transducer potentiometer in the valve opera- Do NOT run the Hydraulics tor control box. - Page 135 Chapter 6, Using Vitals Mobile-HC (HC-100 Controller): Vitals Mobile Diagnostics Locate the potentiometer on the control board. You will need a jeweler’s screwdriver to adjust it. Potentiometer adjustment screw Figure 6-30. Locate the adjustment screw on the potentiometer. Turn the adjustment screw on the potentiometer while...
-
Page 136: Using The Diagnostics Cable
Vitals Reference Manual A and B values should be equal. (Valve operator must be in stopped condi- tion—not running.) Figure 6-32. Adjust the potentiometer until the values for A and B are equal. When the readings are equal, replace the cover on the control box. -
Page 137: Diagnostics Logs
Diagnostics Logs Vitals Mobile creates a log file any time Vitals Diagnostics is run, or any errors are detected while using Vitals Mobile. Error logs are transferred to the Vitals Desktop folder during a data transfer. - Page 138 Vitals Reference Manual Part No. 79-MAN-04, Rev. I E.H. Wachs...
-
Page 139: Chapter 7: Using Vitals Desktop
Instructions for installing Vitals Desktop are in Chapter 4. ETTINGS PTIONS NITIAL TART When you start Vitals Desktop for the first time, you will NOTE be prompted to Select a Default Language You will also be prompted to Select a Default Language if a default language file is not present. -
Page 140: Database File Location
The language you select will be automatically set on the handheld controller when you set it up with Vitals Desktop. When you install Vitals for the first time on a computer, you will be asked to create a new database or locate an existing database the first time you start the program. - Page 141 Chapter 7, Using Vitals Desktop: Database File Location Vitals Desktop will display the following dialog when launched. Figure 7-3. Vitals Desktop displays this notification if the database file is missing. • To create a new database, click . The Save As NOTE dialog appears.
-
Page 142: Screen Reference
Open CREEN EFERENCE This section describes the functions available on the Vitals Desktop 3.8.1 screens. Main Screen The Main Screen is displayed when Vitals Desktop 3.8.1 is first opened. Part No. 79-MAN-04, Rev. I E.H. Wachs... - Page 143 Chapter 7, Using Vitals Desktop: Screen Reference Figure 7-6. Vitals Desktop Main Screen Figure 7-7. Vitals Desktop Screen Sections E.H. Wachs Part No. 79-MAN-04, Rev. I...
- Page 144 • starts a data transfer between Vitals Data Transfer Desktop and Vitals Mobile. You can transfer data by using a direct cable connection (to the HC-100, or older “Yellow Box” and “Silver Box” valve opera- tor contollers); by using a USB flash drive; or by opening another database file on the Vitals Desktop computer.
-
Page 145: Creating And Editing Valves And Activities
Chapter 7, Using Vitals Desktop: Creating and Editing Valves and Activities REATING AND DITING ALVES AND CTIVITIES If you need details about the structure of the Vitals valve database (for instance, for importing/exporting data to or from an external database), see Appendix B, “Vitals Data- base Reference”. -
Page 146: Activity Record
You can also access this form and create a new valve record by clicking the button in the Menu New Valve Section on the left-hand side of Vitals Desktop. Activity Record Double click on any activity in the Activities section to dis- play the activity record window. -
Page 147: Remarks List Window
Chapter 7, Using Vitals Desktop: Creating and Editing Valves and Activities Figure 7-9. Create/Edit Activity • You can edit the information in the activity record, and click the button to save changes. • Click the button to delete the activity record. You Delete will be prompted to confirm that you want to delete it. -
Page 148: Analyzing Valve Data
To display all the valve or activity records in the cur- rently open database, click either the Browse Valves button in the Menu Section on the Browse Activities left-hand side of Vitals Desktop. Part No. 79-MAN-04, Rev. I E.H. Wachs... - Page 149 Chapter 7, Using Vitals Desktop: Analyzing Valve Data Figure 7-11. Browse Valves • To display the torque chart for an activity, click on the activity in the Activities section of the screen. The torque chart appears below. • To view a larger version of a torque chart animation in its own window, double-click the torque chart graphic in the Torque Chart display section.
- Page 150 Vitals Reference Manual Figure 7-12. Valve Record Search To select which fields appear on the valve/activity record screen, click the button to bring up the Columns Select Report Fields screen. Figure 7-13. Select Report Fields Part No. 79-MAN-04, Rev. I...
-
Page 151: Printing
Chapter 7, Using Vitals Desktop: Printing RINTING Print Detail When you click , the dialog Print Detail Print Detail appears. Figure 7-14. Print Detail • Click a radio button titled , or Screen Printer choose a location to print. •... -
Page 152: Activity Report
Vitals Reference Manual Figure 7-15. Sample Print Detail Activity Report When you click , the dia- Activity Report Activity Report log appears. Part No. 79-MAN-04, Rev. I E.H. Wachs... - Page 153 Chapter 7, Using Vitals Desktop: Printing Figure 7-16. Activity Report • Click the dropdown boxes next to Start Date and End Date to choose a date range of valves or activities for which you would like to produce a report.
-
Page 154: Transferring Data Between Vitals Desktop And Vitals Mobile
185. • Local Transfer—If you have the optional TC-100 Office Dock and are running Vitals Desktop 3.8 on the TC- 100, you can transfer data directly using Local Transfer. You must be running Vitals Desktop version 3.8 (or later) to do data transfers with the TC-100. Update your Vitals Desktop version before transferring data. -
Page 155: Tc-100 Flash Transfer
Chapter 7, Using Vitals Desktop: Transferring Data Between Vitals Desktop and Vitals Mobile TC-100 Flash Transfer Use a USB flash drive to transfer data between Vitals Desk- NOTE top and Vitals Mobile-TC. The flash transfer process will automatically synchronize all valve and activity data The USB flash drive must be between Desktop and Mobile. - Page 156 Figure 7-18. Tap the Flash Transfer icon to bring up the transfer screen. Tap the version switch to set it for the version of Vitals Desktop you have on your database PC. Figure 7-19. Select your Vitals Desktop version by tapping the version switch.
- Page 157 Chapter 7, Using Vitals Desktop: Transferring Data Between Vitals Desktop and Vitals Mobile Insert a USB flash drive into the port on the bottom of the TC-100. The Start button appears on the screen. Figure 7-20. Tap Start when you see the USB Flash Ready message.
- Page 158 Vitals Reference Manual Figure 7-21. Data transfer in progress. Part No. 79-MAN-04, Rev. I E.H. Wachs...
- Page 159 Chapter 7, Using Vitals Desktop: Transferring Data Between Vitals Desktop and Vitals Mobile Remove the flash drive. A Pending Desktop Data Trans- message appears. (You will transfer the updated database back to the controller at the end of this proce- dure.)
- Page 160 Vitals Reference Manual Figure 7-23. Use the Flash Transfer connection. Click on the folder name for the transfer. The folder NOTE name is the same as the shown on the Transfer ID Vitals Mobile screen. If there are data transfers...
- Page 161 Chapter 7, Using Vitals Desktop: Transferring Data Between Vitals Desktop and Vitals Mobile Figure 7-24. Select the name of the folder in the win- dow. (Multiple folders will appear if there are trans- fers from multiple handheld controllers on the USB flash drive.)
- Page 162 This ensures that all valve data on both Desktop and Mobile is synchronized. Figure 7-26. Export Valve Records screen. message will appear. Data has been exported Remove the flash drive from the Vitals Desktop com- puter. Part No. 79-MAN-04, Rev. I E.H. Wachs...
- Page 163 Chapter 7, Using Vitals Desktop: Transferring Data Between Vitals Desktop and Vitals Mobile Insert the flash drive into the tablet controller. An IMPORTANT message appears. Updating Vitals Mobile Files You must complete the final step of re-inserting the USB flash drive into the handheld controller.
-
Page 164: Tc-100 Local Transfer
Dock and you are running Vitals Desktop on the TC-100. (In this usage scenario, you are running Vitals Mobile-TC in the field for data logging, and running Vitals Desktop on the same TC-100 when in the office. To run Vitals Desktop on... - Page 165 Chapter 7, Using Vitals Desktop: Transferring Data Between Vitals Desktop and Vitals Mobile Figure 7-29. With selected, click Local Start Figure 7-30. E.H. Wachs Part No. 79-MAN-04, Rev. I...
- Page 166 • If the database in Vitals Desktop is blank or does not have any valves, you can click Import Activities + All valves. This will add all the valves from the controller to the local database.
- Page 167 Chapter 7, Using Vitals Desktop: Transferring Data Between Vitals Desktop and Vitals Mobile Figure 7-32. tab on the screen New Activities Data Import allows you to review new activity data from Vitals Mobile-TC. Figure 7-33. When you have reviewed the data for import, click to continue.
- Page 168 Vitals Reference Manual Figure 7-34. message will appear. Data has been exported Figure 7-35. Exit Vitals Mobile-TC. Part No. 79-MAN-04, Rev. I E.H. Wachs...
-
Page 169: Usb Flash Transfer With Hc-100 Controller
Chapter 7, Using Vitals Desktop: Transferring Data Between Vitals Desktop and Vitals Mobile HC-100 Data Transfer For the HC-100 controller, there are two data transfer meth- ods: • Flash Transfer—Uses a USB flash drive that you share between the devices. See “Database Options” on page 185. - Page 170 Vitals Reference Manual automatically select ActiveSync Windows Mobile Device Center Figure 7-36. Data Transfer Start Screen for Vitals Mobile. When you plug the flash drive into the controller, the USB flash drive status icon shows the drive is inserted. Part No. 79-MAN-04, Rev. I...
- Page 171 Chapter 7, Using Vitals Desktop: Transferring Data Between Vitals Desktop and Vitals Mobile USB flash drive status icon Figure 7-37. The USB flash drive status icon shows when a flash drive is inserted. The Vitals Mobile button has a Menu Data Transfer command.
- Page 172 Vitals Reference Manual Figure 7-38. The Menu has a Data Transfer com- mand. If you try to start a data transfer with no flash drive inserted, an error screen appears. Part No. 79-MAN-04, Rev. I E.H. Wachs...
- Page 173 Chapter 7, Using Vitals Desktop: Transferring Data Between Vitals Desktop and Vitals Mobile Figure 7-39. Error message if no flash drive is inserted. With the flash drive inserted, select Data Transfer bring up the button. Start E.H. Wachs Part No. 79-MAN-04, Rev. I...
- Page 174 Vitals Reference Manual Figure 7-40. The button appears when you select Start command. Data Transfer to begin the transfer. Start The transfer status is displayed, and a FILES COPIED message appears when it is complete. Part No. 79-MAN-04, Rev. I...
- Page 175 Chapter 7, Using Vitals Desktop: Transferring Data Between Vitals Desktop and Vitals Mobile Figure 7-41. The data transfer status is displayed. Remove the flash drive. A Pending Desktop Data Trans- message appears. (You will transfer the updated database back to the controller at the end of this proce- dure.)
- Page 176 Vitals Reference Manual Insert the flash drive into the Vitals Desktop com- puter. Open Vitals Desktop and click the but- Data Transfer ton. Select from the drop- Flash Transfer Connect To down menu. The screen will display a series of START messages.
- Page 177 Chapter 7, Using Vitals Desktop: Transferring Data Between Vitals Desktop and Vitals Mobile Figure 7-44. Select the name of the folder in the win- dow. (Multiple folders will appear if there are trans- fers from multiple handheld controllers on the USB flash drive.)
- Page 178 This ensures that all valve data on both Desktop and Mobile is synchronized. Figure 7-46. Export Valve Records screen. message will appear. Data has been exported Remove the flash drive from the Vitals Desktop com- puter. Part No. 79-MAN-04, Rev. I E.H. Wachs...
- Page 179 Chapter 7, Using Vitals Desktop: Transferring Data Between Vitals Desktop and Vitals Mobile Figure 7-47. Insert the flash drive into the handheld controller. An IMPORTANT message appears. Updating Vitals Mobile Files You must complete the final step of re-inserting the USB flash drive into the handheld controller.
- Page 180 Vitals Reference Manual Figure 7-48. A status message appears while data is transferred back to Vitals Mobile. When the update is complete, a Data Transfer Finished message appears. Tap the button. Exit Vitals Part No. 79-MAN-04, Rev. I E.H. Wachs...
-
Page 181: Other Controllers Data Transfer
Chapter 7, Using Vitals Desktop: Transferring Data Between Vitals Desktop and Vitals Mobile Figure 7-49. When the data transfer is finished, exit Vitals and restart. Restart Vitals Mobile-HC. Other Controllers Data Transfer For P-2 or RS-2 machines using the Silver Box Controller/ Data Logger, or TM machines using TMC-DT1 Controller, there is one Data Transfer option for each. - Page 182 Vitals Reference Manual • If connecting to a Silver Box controller, connect the Sil- ver Box cable connection to the Silver Box controller and the RS232 connection to an RS232 port on your PC. In the dropdown box, select Connect To Controller/Data .
-
Page 183: Data Transfer Review
Chapter 7, Using Vitals Desktop: Transferring Data Between Vitals Desktop and Vitals Mobile • If connecting to a Yellow Box controller, connect the Yellow Box cable connection to the Yellow Box con- troller and the RS232 connection to an RS232 port on your PC. - Page 184 Vitals Reference Manual Figure 7-52. Data Import Screen NOTE: If you get a screen, refer to Database Mismatch “Symptom: Database mismatch message after performing a Data Transfer.” on page 204. Part No. 79-MAN-04, Rev. I E.H. Wachs...
- Page 185 Chapter 7, Using Vitals Desktop: Transferring Data Between Vitals Desktop and Vitals Mobile Figure 7-53. The Database Mismatch screen appears if there is a database error. If there are activities you don’t want to import, uncheck the box in the column.
- Page 186 Vitals Reference Manual Figure 7-54. You can edit data on the Data Import screen, as shown in the columns. Turns HighTorque Part No. 79-MAN-04, Rev. I E.H. Wachs...
- Page 187 Chapter 7, Using Vitals Desktop: Transferring Data Between Vitals Desktop and Vitals Mobile Click on the Updated Valves tab to review valve data that has been changed. Text in red indicates differences between data from Vitals Mobile and the data in the Vitals Desktop database.
-
Page 188: Uploading Large Databases
Updated Valves Any additions or changes will be saved to the Vitals data- base. The Import Summary highlights the changes. After you have reviewed the activity and valve data, click the Import button to import it. All valves are displayed. - Page 189 Chapter 7, Using Vitals Desktop: Transferring Data Between Vitals Desktop and Vitals Mobile Figure 7-57. Over 50,000 Valve Record Message To split your database into smaller sections for upload, per- form the following steps. Create a new field in your Valves table to identify dis- tinct sections of your valve record structure, such as Grid.
- Page 190 Vitals Reference Manual Figure 7-58. Select Valves to Export Click the radio button . Select Specify valve records Grid in the dropdown and choose the grid(s) contain- Field ing the valves you wish to upload. Notice that the number of valve records being transferred has been reduced to only those that meet the specified require- ments.
-
Page 191: Database Options
Chapter 7, Using Vitals Desktop: Database Options ATABASE PTIONS Database Setup This section describes the actions you can perform with the currently open database. Click the button and select Settings command to see the database options. Database Setup Figure 7-60. Database Setup Options •... -
Page 192: Customize Data Fields
Vitals Reference Manual • lets you remove password protec- Clear Admin Password tion from the database. It will prompt you for the pass- word when changing this setting. • allows you to create or edit a com- Set Company Name pany name associated with the currently open database. -
Page 193: Queries
• displays the familiar name of each data field, Caption which is seen by the user in Vitals Desktop and Vitals Mobile. • displays the type of data that can be entered Data Type into each field. -
Page 194: Settings
Edit • Click the button to delete the highlighted query. Delete • Click the button to create a new query using SQL. ETTINGS menu lets you configure Vitals Desktop Settings options. Part No. 79-MAN-04, Rev. I E.H. Wachs... - Page 195 Chapter 7, Using Vitals Desktop: Settings • has commands for configuring the Vitals Database Setup Desktop database. E.H. Wachs Part No. 79-MAN-04, Rev. I...
-
Page 196: Notifications
Vitals Desktop. See the following section. Notifications Vitals 3.8 no longer includes the Notifications feature in earlier versions of the software. (Explain why? Alternative required or not?) PTIONS This section describes the options available through the help dropdown menu in Vitals Desktop 3.8.1. - Page 197 Chapter 7, Using Vitals Desktop: Help Options • displays an about screen with the About Vitals Desktop software version number and the location where the cur- rently open database is stored. • opens a PDF of this reference manual Reference Manual for helpful information regarding the HC-100 controller, Vitals Desktop 3.8.1, and Vitals Mobile 3.8.1.
- Page 198 Vitals Reference Manual Part No. 79-MAN-04, Rev. I E.H. Wachs...
-
Page 199: Chapter 8: Troubleshooting Guide
Center through the Control Panel. ii. Re-install Windows Mobile Device Center from the Microsoft website. (32 and 64 bit installers can be found in C:\Program Files\Vitals Desk- top\wm. • Firewall settings may prevent drivers from loading • Check Mobile Device Settings: E.H. - Page 200 Vitals Reference Manual 3. ActiveSync settings on HC-100 • Start Screen > Tap ActiveSync icon > Menu > Con- nections... 4. USB to PC setting on HC-100 • HC-100 Home Screen > Tap Settings icon > Tap Connections icon > Tap USB to PC icon: Part No.
- Page 201 1. Open Task Manager on the HC-100 to stop applications or end tasks. (Task Manager is on the HC-100 Home screen - Tap on Home button) 2. Tap on Menu > End All Tasks E.H. Wachs Part No. 79-MAN-04, Rev. I...
- Page 202 Vitals Reference Manual Soft Reset 1. Try soft resetting the device by pressing and holding the Power (On/Off) key for 5-10 seconds until the Power Button menu appears. Tap Reset. Restoring to Factory State (Clean Boot) CAUTION: Restoring the HC-100 to its original factory...
- Page 203 Symptom: Vitals Mobile Controller Stops responding Faulty machine connection 1. Soft reset HC-100 Check connection with Vitals Diagnostics Vitals Diagnostics will not connect to machine • with faulty connection. Vitals Mobile accepts an intermittent connection problem. i. Diagnose source of faulty connection: control cable, wiring, connector corrosion, faulty equip- ment ground, faulty control board.
- Page 204 The transducer readings from the valve operator are out of normal range. This indicates a problem with either the transducers or cables. Caution: Vitals uses transducer readings to calculate operating torque. Operating with incorrect readings can cause the machine to break a valve.
- Page 205 Chapter 8, Troubleshooting Guide: 1. Contact E.H. Wachs for service if your valve operator is generating messages. Transducer Error Symptom: A “Transducer Zero Torque Error” mes- sage appears starting the Vitals Diagnostics Hydrau- lics Test. E.H. Wachs Part No. 79-MAN-04, Rev. I...
- Page 206 • Lacking user account privileges • Log in to computer as Administrator 2. Vitals desktop related • Did not install correctly. Reinstall Vitals Desktop Symptom: Runtime error shows up after doing a data transfer: Runtime error 53: File not found: rapi.dll.
- Page 207 Chapter 8, Troubleshooting Guide: • Allow Full Control to user running Vitals Desktop i. Right click in the Vitals Desktop folder (C:\Pro- gram Files\Vitals Desktop) and click Proper- ties. ii. Select the Security tab and then click Advanced. iii. Click Change Permissions and then select the users that will be using Vitals Desktop.
- Page 208 Vitals Reference Manual Symptom: “Database could not be located” message appears when Vitals Desktop is launched. 1. Directory related • This message will appear if the database is deleted or moved to another location. Part No. 79-MAN-04, Rev. I E.H. Wachs...
- Page 209 Save ii. To locate the existing database, click . The Open Open File dialog appears; browse to the location of the database file, click on the file to select it, and click Open E.H. Wachs Part No. 79-MAN-04, Rev. I...
- Page 210 Windows UNC with an absolute path • To eliminate this message, reinstall Vitals Mobile. i. Uninstall Vitals Mobile on the handheld. ii. Remove the Vitals Mobile folder from the File Explorer menu on the handheld. iii. Reinstall Vitals Mobile from the PC running Vitals desktop.
- Page 211 Chapter 8, Troubleshooting Guide: Symptom: “Error validating database” appears after trying to open a database in Vitals Desktop. 1. Database table was changed with MS Access. • One of the tables in the database was renamed using MS Access. In this example, the Activities table was renamed to Activitie (note the missing “s”...
- Page 212 Symptom: “Mobile database is locked” message appears when performing a Data Transfer. 1. User Error • This error message pops up when Vitals Mobile is not on the main screen. i. Make sure Vitals Mobile is at the following screen, and then click on...
- Page 213 Perform a computer search by typing “*.vcd” in the search bar. (This is the extension for the data- base file when it is transferred to Vitals Desk- top.) ii. Click on Open Database under Database Setup and point to the directory containing vitalsdb.vcd.
- Page 214 Vitals Reference Manual i. Tap the icon to start the app. BT Clean ii. When the app opens, tap the button. Clean Reg Part No. 79-MAN-04, Rev. I E.H. Wachs...
- Page 215 Tap the button to reset the ports and restart the handheld controller. iv. When the ports have been cleared, you can re- establish the Bluetooth link to the valve operator. Add new device E.H. Wachs Part No. 79-MAN-04, Rev. I...
- Page 216 Vitals Reference Manual Symptom: Error message saying “Cannot find E. H. Wachs equipment. 1. Valve operator may not be powered on. i. Turn on the valve operator. 2. Bluetooth not connected. i. Make sure the equipment is paired. See “Adding a Valve Operator”...
-
Page 217: Chapter 9: Ordering Information
Chapter 9, Ordering Information Chapter 9 Ordering Information To place an order, request service, or get more detailed In This Chapter information on any E.H. Wachs Company products, call us RDERING EPLACEMENT at one of the following numbers: ARTS EPAIR NFORMATION U.S. -
Page 218: Warranty Information
ARRANTY NFORMATION Enclosed with the manual is a warranty card. Please fill out the registration card and return to E.H. Wachs Company. Retain the owner’s registration record and warranty card for your information. ETURN OODS DDRESS Return equipment for repair to the following address. -
Page 219: Chapter 10: Vitals Valve Exercising Program
Appendix A, Vitals Valve Exercising Program Appendix A Vitals Valve Exercising Program Vitals provides two modes of valve operation. • The ‘EXERCISE’ mode is designed to close and open (exercise) a valve as part of a maintenance routine, with minimal risk of damage to the valve. -
Page 220: Jogging
Vitals Reference Manual to turn the valve up to the torque set by the SETPOINT. If it is not successful, the machine changes directions and tries again. The SETPOINT is then increased by a value depen- dent on the operating mode (EXERCISE or EMER- GENCY), then the machine tries again. - Page 221 Appendix B, Vitals Database Reference Appendix B Vitals Database Reference The Vitals database is stored in MS Access format. Vitals has its own file type, with a file extension. .vcd There are 6 tables in the database. Four of them store the valve and activity data: •...
- Page 222 Text Close Dir* Text Field names marked with an Condition* Text asterisk (*) must not be Type* Text deleted from the Vitals data- Depth* Integer 2 bytes base structure. If you are Street* Text editing the database struc- Cross Street*...
- Page 223 Data Type Size RemarkID* Text Description* Text NOTE: Fields in the Remarks table appear as checkboxes in Vitals Mobile. The user can select these checkboxes to add the remarks to the activity record. Fields Table Field Name Data Type Size FieldName*...
- Page 224 Vitals Reference Manual Part No. 79-MAN-04, Rev. I E.H. Wachs...
Need help?
Do you have a question about the Vitals and is the answer not in the manual?
Questions and answers