Table of Contents
Advertisement
Quick Links
Advertisement
Table of Contents

Subscribe to Our Youtube Channel
Related Manuals for BRADY Worldwide BradyPrinter i5300

Summary of Contents for BRADY Worldwide BradyPrinter i5300
- Page 1 User Manual...
- Page 2 Copyright and Trademarks Disclaimer This manual is proprietary to Brady Worldwide, Inc. (hereafter “Brady”), and may be revised from time to time without notice. Brady disclaims any understanding to provide you with such revisions, if any. This manual is copyrighted with all rights reserved. No portion of this manual may be copied or reproduced by any means without the prior written consent of Brady.
- Page 3 Brady Warranty Our products are sold with the understanding that the buyer will test them in actual use and determine for themself the adaptability to their intended uses. Brady warrants to the buyer that its products are free from defects in material and workmanship, but limits its obligation under this warranty to replacement of the product shown to Brady’s satisfaction to have been defective at the time Brady sold it.
- Page 4 Technical Support and Registration Contact Information For repair or technical assistance, locate your regional Brady Technical Support office by going to: • United States: bradyid.com/techsupport • Canada: bradycanada.ca/contact-us • Mexico: bradyid.com.mx/es-mx/contacto • Latin America: bradylatinamerica.com/es-mx/soporte-técnico • Europe: bradyeurope.com/services • Australia: bradyid.com.au/technical-support •...
-
Page 5: Table Of Contents
Contents 1 • Introduction Features and Functions .................... 1 Compatible Software ....................2 System Specifications....................2 2 • Setup Unpacking the Printer ....................3 What’s in the Box ....................3 Registration ......................3 Printer Components ....................4 Exterior ........................4 Interior ........................5 Power .......................... 6 Setup ........................6 Power Save Mode ....................6 Put the Printer into Sleep Mode ................7... - Page 6 Recycling Components ................24 3 • General Operation Using the Touchscreen ................... 25 Navigation and Status Bar ..................26 Material Details ....................26 Creating Labels......................26 Storing Files on the Printer..................27 Printing Labels......................27 Printing from Software ..................27 Printing from the Printer ..................28 Feeding and Cutting Labels ................28 Printing Double-Sided Sleeves ................28 Using the Print Screen ....................
- Page 7 Cleaning the Cutter Blade ...................45 Cleaning the Cutter Blade Exit Area ..............47 Cleaning the Display ...................48 Clearing Jams ......................48 Printer Jam ......................48 Cutter Jam ......................49 Replacing the Supply Wiper ................... 51 Replacing the Printhead..................52 Replacing the Print Roller..................54 6 •...
-
Page 8: Introduction
1 Introduction Use the BradyPrinter™ i5300 Sign and Label Printer to create and print professional-looking industrial labels and signs. All you have to do is: • Insert a ribbon cartridge. You can choose from a wide range of single-color ribbons. •... -
Page 9: Compatible Software
Introduction Compatible Software Compatible Software ® The BradyPrinter™ i5300 printer is compatible with Brady Workstation desktop label creation software and other Windows-based label creation software. When used with Brady Workstation software, no driver installation is required and the software automatically recognizes the installed label supply and ribbon making label creation easier and faster. The printer driver is required if using third-party software. -
Page 10: Setup
2 Setup Unpacking the Printer Carefully unpack and inspect the printer surfaces (interior and exterior) and the labeling system for possible damage during shipping. Note: Be sure to remove any transportation protection from around the printhead and inside the enclosure cover. What’s in the Box •... -
Page 11: Printer Components
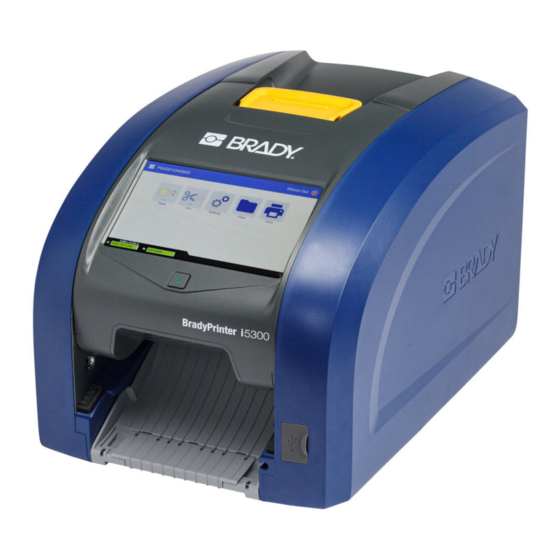
Setup Printer Components Printer Components Exterior Roller access hatch (for print Exit chute (with label catcher) roller replacement) Rear cover Ethernet port Latch for ribbon door USB-B port (to computer) Ribbon door USB-A ports Touchscreen Power switch Sleep button AC power cord port USB-A port IO port Stylus storage slot... -
Page 12: Interior
Setup Printer Components Interior Supply wiper arm (shown raised) 5 Printhead Label supply guides Ribbon holder Rubber print roller Label well Cutter BradyPrinter™ i5300 User Manual... -
Page 13: Power
Setup Power Power Setup To connect power and turn on the printer: 1. Plug the power cord into the printer at the location shown. 2. Plug the other end of the power cord into an AC power outlet. 3. Turn the power switch on. The printer turns on and displays the home screen. The first time you turn on the printer it walks you through configuring the settings. -
Page 14: Put The Printer Into Sleep Mode
Setup Power 5. Slide the time indicator dot left (decrease) or right (increase) for the amount of inactive time that can elapse before the printer automatically shuts down. Alternatively you can press the minus (-) button to decrease or the plus (+) button to increase the time. 6. -
Page 15: Software For Creating Labels
Setup Software for Creating Labels Software for Creating Labels Install labeling software on your computer, set up the connection to the printer, then use the software to design labels and send them to the printer. Brady Workstation software provides a variety of apps to simplify label creation for specific purposes. It also provides easy-to-use apps for custom label design. -
Page 16: Wi-Fi
Setup Connecting the Printer 4. Tap Ethernet. 5. Tap IP Settings, and then choose either DHCP or Static. • DHCP: DHCP addressing is dynamic and the system uses a DNS server in the printer IP address for you. No additional fields need to be entered. •... -
Page 17: Manually Enter Settings
Setup Connecting the Printer • If the network is locked, as indicated by a lock symbol, tap the network and a key pad opens. Enter the password and tap Note: If your network uses WEP authentication, a menu displays instead so that you can enter both the password and the WEP index (key). -
Page 18: Installing The Windows Driver (Optional)
Setup Installing the Windows Driver (Optional) Installing the Windows Driver (Optional) If you are using Brady Workstation software, you do not need to install the windows driver. You must install the Windows driver if you are using any of the following. •... - Page 19 Setup Install or Change Supplies 2. Press the tab to release the ribbon cartridge, and lift the cartridge up and out. 3. Place the ribbon cartridge so that the ribbon is over the printhead and the embossed Brady logo is facing upward. Snap the cartridge into place. You’ll hear a click when it is seated properly.
-
Page 20: Label Supplies
Setup Install or Change Supplies Label Supplies For information on compatible supplies see “Compatible Label Supplies and Ribbons” on page 11. To change or load the label roll: 1. Lift the latch to open the ribbon door and swing it open. 2. - Page 21 Setup Install or Change Supplies 4. Pinch together the yellow and black tabs on the label supply guides and slide them to the fully open position. 5. Remove the existing supply, if installed. Grasp the label roll and gently pull up out of the label well.
- Page 22 Setup Install or Change Supplies 7. Pinch together the yellow and black tabs on the label supply guides and slide the guides apart. 8. Pull the leading edge of the labels from the top of the roll until it sits just past the black rubber roller, but no further.
-
Page 23: Printer Settings
Setup Printer Settings 10. If using a continuous label supply, move the supply wiper into position so it rests on the label. Do not position the wiper on the labels if using a die cut supply. 11. Close and latch the ribbon door, then close the rear cover. 12. -
Page 24: Keyboards
Setup Printer Settings 3. Tap the desired language. You may need to scroll to see all available languages. Touch the screen and drag your finger up or down to scroll. 4. Tap to go back to the previous screen. Keyboards The printer displays a keyboard on the screen when you have to type data, such as when you name the printer. -
Page 25: Date And Time
Setup Printer Settings Date and Time Set the printer’s clock to the current date and time. To set the date and time: 1. From the home screen, tap Settings. 2. Tap System Configuration, then Date and Time. The left side of the screen displays the current settings. -
Page 26: Printer Name
Setup Printer Settings To enable print on demand: 1. From the home screen, tap Settings. 1. Tap Print Adjustments. 2. To the right of Print on Demand, tap the switch to change the setting. If the switch is red, it is off. -
Page 27: Recycling The Label And Ribbon Cartridges
Setup Recycling the Label and Ribbon Cartridges The printer name can only contain the characters A-Z, a-z, 0-9, and -. Regardless of the keyboards you have enabled for your printer, the printer displays a keyboard with the allowed characters. 3. Use the keyboard on the touchscreen to type a name for the printer. 4. -
Page 28: Dismantling The Ribbon Cartridge
Setup Recycling the Label and Ribbon Cartridges Dismantling the Ribbon Cartridge To dismantle the ribbon: 1. Using your thumbnail or the blade of the screwdriver, apply pressure to push the clear plastic locking tabs up until the cartridge unlocks. Lock Tabs 2. -
Page 29: Recycling Components
Setup Recycling the Label and Ribbon Cartridges Recycling Components These components should be removed from the cartridge and recycled according to the following guidelines. Component Material Recycle Bin Ribbon Cartridge (opaque) #5 PP Smart Cell Electronic Electronic Waste Cardboard Core Cardboard #20 C PAP Ribbon Spools (white) -
Page 30: Dismantling The Label Cartridge
Setup Recycling the Label and Ribbon Cartridges Dismantling the Label Cartridge To dismantle the label cartridge: 1. Using your thumbs, simultaneously apply pressure to the release tabs while pushing the center cylinder forward until the tabs release and unlock the center cylinder. 2. -
Page 31: Recycling Components
Setup Recycling the Label and Ribbon Cartridges Recycling Components These components should be removed from the cartridge and recycled according to the following guidelines. Component Material Recycle Bin Cardboard Tube Cardboard #20 C PAP Cartridge Guides #7 PC Center Cylinder #7 POM Smart Cell Holder #7 POM... -
Page 32: General Operation
3 General Operation Using the Touchscreen Use the printer’s touchscreen to configure settings, check status, and print labels, among other functions. Touch the screen with your finger to make a selection. Note: Do not use a writing pen or other sharp object. Doing so may mar the touchscreen surface. If you choose to use a stylus (part number STYLUS-CAP) be sure to use only the soft rubber end. -
Page 33: Navigation And Status Bar
General Operation Creating Labels Navigation and Status Bar Tap the home button at any time to return to the home screen. While navigating the menus, tap the back button to go back to the previous screen. The printer and material status icons in the status bar at the bottom of the home screen provide the following information. -
Page 34: Storing Files On The Printer
General Operation Storing Files on the Printer Storing Files on the Printer Using Brady Workstation software, you can either send files to be printed immediately, or you can store them on the printer so they can be printed when needed even if the operator does not have access to Brady Workstation software. -
Page 35: Printing From The Printer
General Operation Printing Labels To print: 1. Make sure Print on Demand is turned off in the printer settings. See “Print on Demand” on page 18. 2. Open the file in Brady Workstation and initiate printing. All labels in the file print without input from an operator. - Page 36 General Operation Printing Labels To print double-sided sleeves: 1. Initiate printing. See “Printing from Software” on page 27 or “Printing from the Printer” on page 28. 2. When side one is done, the printer displays a message. Tap Cut on the message to cut the printed sleeves.
-
Page 37: Using The Print Screen
General Operation Using the Print Screen Using the Print Screen The print screen is displayed while a file is printing. To start printing, see “Printing from Software” on page 27 or “Printing from the Printer” on page 28. When printing starts, the touch screen displays an image of the label being printed, a counter, and a pause button. -
Page 38: Using The File List
General Operation Using the File List Button Description Goes to the first label in the file. (Not available if the print file contains only one label.) Print. Start or resume printing. Pause printing. label Displays the current position in the label file as well as the total number of labels. number Tap the current label number (within a rectangle) to jump to a particular label. -
Page 39: Searching, Sorting, And Filtering
General Operation Using the File List • Only visible when a single file is selected. Tap to display file information which consists of the following. You can also delete or print the file from the information screen. • An image of the first label in the file. •... -
Page 40: Using The Print Queue
General Operation Using the Print Queue 2. Tap the menu button 3. Tap Filter and then tap Documents, Images, or Fonts. Documents are label files. Graphics and fonts are used in scripts. Using the Print Queue The print queue is available from the print screen when files are being printed. Use it to add more files to the queue, delete files from the queue, or change the print order. -
Page 41: Change The Print Order
General Operation Adjusting Print Settings Change the Print Order To change the print order: 1. While printing, tap the QUEUE tab on the print screen. 2. Tap the file that you want to move up or down in the queue. You cannot move the first file in the list. -
Page 42: Print Position
General Operation Adjusting Print Settings make sure more of the ribbon ink transfers to the label. However, if your ribbon is sticking or tearing during printing, the heat energy may be too high and should be reduced. CAUTION! Constantly printing at high energy levels may cause printer jams or other printing errors and may reduce the overall life of your printhead. -
Page 43: Mirror Print
General Operation External Hardware Sample Rotated Feed Direction Mirror Print Print labels suitable for reading in a mirror or through the back of the label. For example, use this if printing on a clear label supply that will be applied to glass so that the label will be readable from the other side of the glass. -
Page 44: Using Scripts
4 Using Scripts The BradyPrinter™ i5300 printer supports the following scripting languages. • BPL (Brady Programming Language) • • jScript • Programming is beyond the scope of this manual. Refer to the programming manual for the scripting language that you choose to use. •... -
Page 45: Delete
Using Scripts Running a Script 6. In the list of files, tap on each file that you want to import. 7. Tap . The files begin importing. A progress bar will display while the import is taking place. Note: The printer displays a low memory message if it runs out of space. Delete To delete graphics and fonts imported to the printer, follow these steps: 1. -
Page 46: Maintenance
5 Maintenance Displaying System Information The About screen displays version numbers for various components of the system. Check the Firmware driver version when considering a firmware upgrade. To view system information: 1. From the home screen, tap Settings. 2. Tap About. Additional information available by tapping Details is primarily for use when instructed by Brady Support. -
Page 47: Updating Y And B Values
Maintenance Updating Y and B Values Updating Y and B Values Y and B values are included in a database of label and ribbon part information that enables the printer to work optimally with various supplies. Update Y and B values periodically to make sure the printer has data for any new label supplies. Also, update if you have ordered a custom label supply from Brady and it came with new Y and B values. -
Page 48: Cleaning The Printhead
Maintenance Cleaning the Printer • Pre-moistened cleaning swabs (PCK-6). We recommend using these swabs because they are lint free and the isopropyl alcohol contains no additives. You can use your own swabs and isopropyl alcohol. To clean debris from within the printer: 1. -
Page 49: Cleaning The Print Roller
Maintenance Cleaning the Printer 2. Gently rub a new pre-moistened foam swab across the green and black area of the printhead. Use as many swabs as necessary to thoroughly clean the surface. Clean here. CAUTION! Do not rub the swab over the bronze-colored area of the printhead. This may short the circuit. -
Page 50: Cleaning The Sensors
Maintenance Cleaning the Printer 2. Open a new pre-moistened foam swab and use it to clean the rubber roller. Use as many swabs as necessary to thoroughly clean the surface. Turn the roller to access the entire surface. Push the top of the roller firmly toward the back of the printer, which will offer some resistance. - Page 51 Maintenance Cleaning the Printer 2. Squeeze the two yellow cutter tabs to release the cutter. The cutter mechanism falls forward to expose the cutter sensor, and the exit chute drops down a little to accommodate the motion. cutter tabs 3. With a clean pre-moistened foam swab, gently wipe the surface of each sensor. •...
-
Page 52: Cleaning The Cutter Blade
Maintenance Cleaning the Printer 4. Lift the enclosed side of the cutter housing until it snaps into its original position as shown below. 5. Replace the ribbon and label cartridges. 6. Dispose of the swabs. 7. Close all covers and plug in the power cord. Cleaning the Cutter Blade Note: When cleaning the cutter, you should also clean the supply and cutter sensors as discussed in “Cleaning the Sensors”... - Page 53 Maintenance Cleaning the Printer 2. Squeeze the two yellow cutter tabs to release the cutter. The cutter mechanism falls forward to expose the blade, and the exit chute drops down a little to accommodate the motion. cutter tabs 3. Clean the metal cutting blade. a.
-
Page 54: Cleaning The Cutter Blade Exit Area
Maintenance Cleaning the Printer 4. Lift the enclosed side of the cutter housing until it snaps into its original position as shown below. 5. Replace the ribbon and label cartridges. 6. Dispose of the swabs. 7. Close all covers and plug in the power cord. Cleaning the Cutter Blade Exit Area This procedure cleans the cutter blade exit area and the exit chute. -
Page 55: Cleaning The Display
Maintenance Clearing Jams 3. With a pre-moistened foam swab, clean the exit chute entrance and exit chute ramp. 4. Replace the ribbon and label cartridges. 5. Close all covers and plug in the power cord. Cleaning the Display Materials Required •... -
Page 56: Cutter Jam
Maintenance Clearing Jams 4. Reload ribbon and labels and clear all error messages. Cutter Jam To clear a jam from the cutter: 1. Cut the supply as shown below. 2. Squeeze the tabs to release and tilt the cutter module forward and down. BradyPrinter™... - Page 57 Maintenance Clearing Jams 3. Rotate the cutter gear counter-clockwise to lower the blade. 4. Remove the supply. 5. Rotate the gear clock-wise until the blade is no longer visible. 6. Lift the enclosed side of the cutter housing until it snaps into its original position as shown below.
-
Page 58: Replacing The Supply Wiper
Maintenance Replacing the Supply Wiper Replacing the Supply Wiper Replace the supply wiper pad when it has become soiled or the print quality is poor. Materials Required • Replacement wiper pad (part number B31-WIPER) To replace the foam wiper in the wiper arm: 1. -
Page 59: Replacing The Printhead
Maintenance Replacing the Printhead 4. To replace the wiper pad, insert the ridge on the new wiper pad into the slot in the wiper arm so that the tab is toward the left side of the cutout in the wiper arm, as shown below. Slide the new pad to the right until it snaps into place. - Page 60 Maintenance Replacing the Printhead 3. Pull on the locking pin and lift up the printhead. heating element 4. Rotate the printhead to expose the cables. Note the orientation of the cables so that you attach them to the new printhead in the same orientation. Squeeze tab to release.
-
Page 61: Replacing The Print Roller
Maintenance Replacing the Print Roller 7. While pulling the pin out, set the new printhead on its mounting. 8. Release the pin to lock the printhead in place. 9. Reinstall the label supply and ribbon, the close the ribbon door and rear cover. See “Install or Change Supplies”... - Page 62 Maintenance Replacing the Print Roller 2. Using a T10 torx screwdriver, loosen the screw that secures the coupling holding the roller in place. You may need to manually rotate the print roller to align the screw with the opening for access.
- Page 63 Maintenance Replacing the Print Roller 4. Using a T10 torx screwdriver, remove the two screws. 5. Pull the print roller out. 6. Insert the new print roller into the printer. 7. Insert the shaft into the coupling so that the flat side on the end of the shaft aligns with the flat part of the coupling.
- Page 64 Maintenance Replacing the Print Roller 8. Tighten the screw on the coupling to secure the roller in place. 9. Reinstall the two screws on the yellow disk in the access hatch. Take care not to overtighten the screws. 10. Replace the cover on the hatch and turn counter-clockwise to lock it in place. BradyPrinter™...
-
Page 65: Troubleshooting
6 Troubleshooting Use the following table to troubleshoot problems. In situations where the printer displays an error message, follow the instructions on the touchscreen. Problem Cause Corrective Action Printer does not power up when Power cord has been pulled out of Check power cord. - Page 66 Troubleshooting Problem Cause Corrective Action • Tension the ribbon by rotating the Void areas or lines appear on Ribbon wrinkling. rewind spool (spool closest to the printed text. printer with the ribbon door open) in a downward direction until all slack is removed.
-
Page 67: A Regulatory Compliance
A Regulatory Compliance Agency Compliance and Approvals United States FCC Notice Note: This equipment has been tested and found to comply with the limits for a Class A digital device, pursuant to part 15 of the FCC Rules. These limits are designed to provide reasonable protection against harmful interference when the equipment is operated in a commercial environment. -
Page 68: Europe
Regulatory Compliance Agency Compliance and Approvals Europe WARNING! This is a Class A product. In a domestic environment, this product may cause radio interference in which case the user may be required to take adequate measures. Waste Electrical and Electronic Equipment Directive In accordance with the European WEEE Directive, this device needs to be recycled in accordance with local regulations. -
Page 69: China
Regulatory Compliance Wireless Regulatory Information China China RoHS Hazardous Substance Table related to this product is available at www.BradyID.com/i5300compliance 警 告 此为 级产品。在生活环境中,该产品可能会造成无线电干扰。在这种情况下,可能需要用户对干扰 采取切实可行的措施。 仅适用于非热带气候条件下安全使用 Taiwan Class A Statement 警告使用者 這是甲類的資訊產品,在居住的環境中使用時,可能會造成射頻干擾,在這種情況下,使用者會被要求 採取某些適當的對策。 Taiwan Restricted Substances Containment Status (RoHS Declaration) related to this product is available at www.BradyID.com/i5300compliance. -
Page 70: United States
Regulatory Compliance Wireless Regulatory Information United States Note: This equipment has been tested and found to comply with the limits for a Class A digital device, pursuant to part 15 of the FCC Rules. These limits are designed to provide reasonable protection against harmful interference when the equipment is operated in a commercial environment. -
Page 71: Mexico
Regulatory Compliance Wireless Regulatory Information Mexico IFETEL notice: "La operación de este equipo está sujeta a las siguientes dos condiciones: (1) es posible que este equipo o dispositivo no cause interferencia perjudicial y (2) este equipo o dispositivo debe aceptar cualquier interferencia, incluyendo la que pueda causar su operación no deseada."... -
Page 72: B Licensing
End User License Agreement for Microsoft Windows CE © You have acquired a device that includes software licensed by Brady Worldwide, Inc. from Microsoft Licensing or its affiliates (“MS”). Those installed software products of Microsoft origin, as well as associated media, printed materials, and “online” or electronic documentation (“SOFTWARE”) are protected by international intellectual property laws and treaties. - Page 73 Licensing End User License Agreement for Microsoft Windows CE© NO EVENT SHALL MS BE LIABLE FOR ANY AMOUNT IN EXCESS OF U.S. TWO HUNDRED FIFTY DOLLARS (U.S.$250.00). Limitations on Reverse Engineering, Decompilation, and Disassembly. You may not reverse engineer, decompile, or disassemble the SOFTWARE, except and only to the extent that such activity is expressly permitted by applicable law not withstanding this limitation.
Need help?
Do you have a question about the BradyPrinter i5300 and is the answer not in the manual?
Questions and answers