Table of Contents
Advertisement
Quick Links
USE AND CARE MANUAL
Models covered: SCGH5500 / SCGH8500 / SCGH8500E
READ THIS MANUAL CAREFULLY BEFORE OPERATION
Failure to follow the instructions and safety precautions in this manual can result
in property damage, serious injury and/or death.
SAVE THIS MANUAL FOR FUTURE REFERENCE
NOTE: Photographs and line drawings used in this manual are for
reference only and may not represent your specific model.
Part Number 7115316 / ENGLISH
GENERATOR
REV F - 07/22/2021
Advertisement
Table of Contents

Related Manuals for Simpson SCGH5500

Summary of Contents for Simpson SCGH5500
- Page 1 GENERATOR USE AND CARE MANUAL Models covered: SCGH5500 / SCGH8500 / SCGH8500E READ THIS MANUAL CAREFULLY BEFORE OPERATION Failure to follow the instructions and safety precautions in this manual can result in property damage, serious injury and/or death. SAVE THIS MANUAL FOR FUTURE REFERENCE NOTE: Photographs and line drawings used in this manual are for reference only and may not represent your specific model.
- Page 2 NOTES CALIFORNIA PROPOSITION 65 WARNING This product and the engine exhaust can expose you to chemicals which are known to the state of California to cause cancer, birth defects, or other reproductive harm. For more information on California Proposition 65, go to www.P65Warnings.ca.gov. POLYCYCLIC AROMATIC HYDROCARBON WARNING The air filter element and air box assembly may contain polycyclic aromatic hydrocarbons (PAHs).
- Page 3 SAVE THIS MANUAL FOR FUTURE USE Keep this manual for future reference. This manual should be considered a permanent part of the product and stay with it. This manual should be available to anyone operating the product(s) it covers. This manual should remain with the product(s) it covers if sold to a new owner.
-
Page 4: Table Of Contents
Unpacking .........................6 Installing the Wheels ......................6 Assembling and Installing the Support Bracket ..............7 Connecting Battery (Electric Start Models Only)...............8 COMPONENT LOCATION ...............9 CONTROL PANELS ..............11 SCGH5500........................11 SCGH8500........................11 SCGH8500E ........................11 HOUR METER ................12 Hour Meter ........................12 IDLE CONTROL ................12 Idle Control........................12 OPERATING CHECKLIST .............13... - Page 5 WIRING DIAGRAMS ..............28 SCGH5500........................28 SCGH8500........................29 SCGH8500E ........................30 SPECIFICATIONS ................31 Model Number: SCGH5500 / Item Number: 70053 ............31 Model Number: SCGH8500 / Item Number: 70054 ............31 Model Number: SCGH8500E / Item Number: 70055 ............32 Page 3 Part Number 7115316 / ENGLISH...
-
Page 6: Safety Instructions
SAFETY INSTRUCTIONS READ THIS MANUAL BEFORE OPERATING This manual contains important safety information and instructions. Do not operate this product until you have read, and completely understand all safety, operation, and maintenance instructions listed in this manual. Failure to follow the information contained in this manual will result in property damage, injury, and/or death. -
Page 7: Emission Information
Emission Information The Environmental Protection Agency (and California Air Resource Board of generators certified to CA standards) requires that this generator comply with exhaust and evaporative emission standards. Locate the emissions compliance decal on the engine to determine what standards the generator meets and which warranty applies. This generator is certified to operate on gasoline. -
Page 8: Assembly
ASSEMBLY Follow the steps outlined in this section to unpack and assemble your generator. If you have any questions regarding the unpacking or assembly of your generator, please have your model number and serial number ready, then contact customer support at 1-877-362-4271 or email cservice@fna-group.com. -
Page 9: Assembling And Installing The Support Bracket
Assembling and Installing the Support Bracket Assembling bracket: If rubber feet are not already installed on the onto the support bracket, slide both M6x18 bolts through the rubber feet then through the support bracket, and tighten M6 nuts onto the bolts to secure the assemblies. Installing assembled bracket: Slide both M8x16 bolts through the support bracket and frame, then tighten the M8 nuts onto the bolts to secure the assembly. -
Page 10: Connecting Battery (Electric Start Models Only)
Connecting Battery (Electric Start Models Only) NOTE: A battery is not included with the generator. A 12-volt, 14-amp, garden tractor style battery is recommended. Please reference the engine manual for specific battery cranking amp requirements. To connect the battery, you will need to install the battery cables by following the steps outlined below. -
Page 11: Component Location
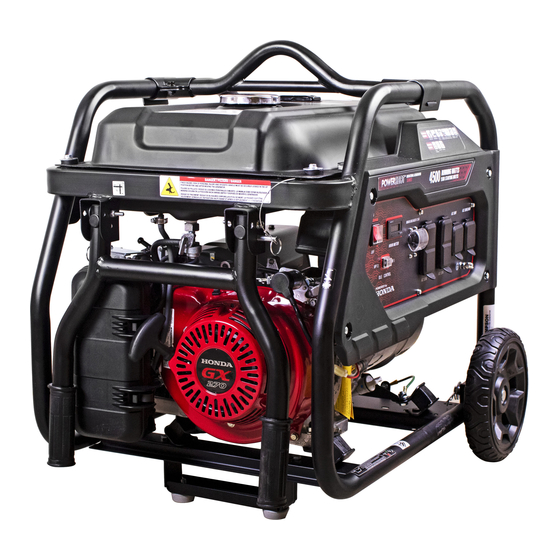
COMPONENT LOCATION 1. Frame 7. EVAP / carbon canister 2. Fuel level indicator 8. Spark plug 3. Fuel tank cap 9. Engine cylinder head 4. Fuel tank 10. Wheels 5. Handle 11. Exhaust heat shield 6. Air filter box NOTE: Line drawings used in this manual may not represent your specific model. Page 9 Part Number 7115316 / ENGLISH REV F - 07/22/2021... - Page 12 12. Handle stop pin 13. Choke 14. Fuel valve 15. Starter recoil 16. Support bracket 17. Engine oil drain plug 18. Oil dipstick 19. Battery tray (electric start models only) 20. Control panel 21. Frame ground terminal 22. Spark arrestor (if equipped) NOTE: Line drawings used in this manual may not represent your specific model.
-
Page 13: Control Panels
1. Engine control switch 2. Idle control switch 3. Hour meter 4. Main breakers SCGH5500 17.5 amp, SCGH8500 & SCGH8500E 30 amp 5. Circuit breakers 20 amp 6. 120v AC, single phase, 60hz duplex receptacle (5-20R) 7. 120v AC, single phase, 60hz receptacle (L5-30R) 8. -
Page 14: Hour Meter
HOUR METER Hour Meter The hour meter keeps track of the time the generator is running. The hour glass icon flashes when the engine is running to signify the meter is tracking the hours of operation. The digital time display shows the recorded hours of operation. For hour meter location see the COMPONENT LOCATION section of this manual. -
Page 15: Operating Checklist
OPERATING CHECKLIST Location Only use the generator outside in a well-ventilated area and always carefully consider wind and air currents when running. Place the generator on a level surface before any operation and provide two (2) feet clearance on all sides of the engine while operating. ●... -
Page 16: Operating Conditions
Operating Conditions Before starting engine, remove any excessive dirt and debris from cooling vents, exhaust, and starter recoil areas. Then, check for loose or damaged parts, oil or fuel leaks, and/ or any other condition that may affect proper operation. Repair or replace all damaged or defective parts immediately. -
Page 17: Grounding
Grounding Grounding the generator helps prevent electrical shock if a ground fault condition develops in the generator or in connected electrical devices. Proper grounding also helps dissipate static electricity, which often builds up in ungrounded devices. Grounding a generator with a wheel kit installed is especially important. The generators covered in this manual have two ground terminals, one on the frame and one on the control panels. -
Page 18: Checking Fuel
Checking Fuel REFUELING Gasoline is highly flammable and gasoline vapors are extremely explosive. Fire and explosions can cause severe burns and/or death. Keep gasoline away from flames, sparks, and other ignition sources. Refuel outdoors in a well-ventilated area with the engine stopped and cool. - Page 19 GASOLINE STORAGE It is important to prevent gum deposits from forming in essential fuel system parts, such as the carburetor, fuel filter, fuel hose or tank during storage. Alcohol-blended fuels (also called gasohol, ethanol, or methanol) attract moisture, which leads to separation and formation of acids during storage.
-
Page 20: Starting
STARTING Starting the Generator 1. Follow the steps in the OPERATING CHECKLIST section of this manual. OPERATING CHECKLIST Attempting to start the engine incorrectly or using the generator incorrectly can result in engine and/or generator damage, and may cause serious injury or death. To avoid engine and/or generator damage and serious injury or death be sure to read, understand, and follow the steps outlined in the OPERATING CHECKLIST section of this manual before starting the engine, and follow all the guidelines for proper use of the generator. - Page 21 6. Start the engine. NOTE: This manual covers generator models that feature both electric and manual start. Refer to the CONTROL PANELS section of this manual to determine if your model is electric or manual start, then follow the sequence below that is relevant to your model. RAPID RETRACTION Rapid retraction (also known as kickback) of the engine recoil starter cord will pull your hand and arm towards the engine faster than you can let go of the handle resulting in...
-
Page 22: Connecting Devices
CONNECTING DEVICES ELECTROCUTION Do not connect devices with worn, frayed, bare, or otherwise damaged electrical cords to the generator. Electrical shorts caused by damaged wiring can damage the generator, and touching live damaged electrical cords or bare wires will cause serious injury or death. -
Page 23: Generator Load Chart
Generator Load Chart Do not overload the generator. Overloading the generator may damage the generator and/ or the devices plugged into the generator. Refer to the chart below to understand the loads electrical devices create when running. Device Running Watts Device Running Watts Air Conditioner... -
Page 24: Shutting Off Generator
SHUTTING OFF GENERATOR 1. Turn off and unplug all devices from the generator outlets. 2. Turn off the engine. NOTE: This manual covers generator models that feature both electric and manual start. Refer to the CONTROL PANELS section of this manual to determine if your model is electric or manual start, then follow the sequence below that is relevant to your model. -
Page 25: Maintenance
MAINTENANCE MAINTENANCE Improper engine and generator maintenance and failing to correct problems before operation could void the warranty and may result in property damage and injury. To prevent these hazards, follow the maintenance procedures and timelines listed in this manual and any other manual that came with this product. Generator Maintenance For safety reasons, the manufacturer recommends all generator service and repairs be performed by a qualified service center. -
Page 26: Battery Maintenance (Electric Start Models Only)
Battery Maintenance (Electric Start Models Only) Batteries slowly lose strength when sitting idle through a process called self-discharge. If a battery is allowed to discharge past a certain point, it cannot be recharged and must be replaced. Therefore, it is best to keep the battery fully charged at all times to achieve maximum service life. -
Page 27: Troubleshooting
TROUBLESHOOTING Generator Troubleshooting Chart Problem Possible Causes Solutions Unplug all devices and reset all the circuit Circuit breakers are off breakers to the ON position Unplug device and check Generator has no output the cord and the device Device or cord failure for damage or lose connections. -
Page 28: Storage And Transportation
STORAGE AND TRANSPORTATION GASOLINE STORAGE It is important to prevent gum deposits from forming in essential fuel system parts. Alcohol-blended fuels (also called gasohol, ethanol, or methanol) attract moisture, which leads to fuel separation and the formation of acids during storage. Acidic fuel and gum deposits can damage the engine’s fuel system. -
Page 29: Storing For More Than Two Months
Storing for More Than Two Months 1. Make sure the engine is completely cool. 2. Turn the fuel valve to the ON position. 3. Remove all the fuel from fuel tank, fuel lines, and carburetor by loosening the drain screw at the bottom of the carburetor, then drain fuel into an appropriate container. 4. -
Page 30: Wiring Diagrams
WIRING DIAGRAMS SCGH5500 Page 28 Part Number 7115316 / ENGLISH REV F - 07/22/2021... -
Page 31: Scgh8500
SCGH8500 Page 29 Part Number 7115316 / ENGLISH REV F - 07/22/2021... -
Page 32: Scgh8500E
SCGH8500E Page 30 Part Number 7115316 / ENGLISH REV F - 07/22/2021... -
Page 33: Specifications
SPECIFICATIONS Model Number: SCGH5500 / Item Number: 70053 Generator Set Frequency 60hz Voltage 120v / 240v Phase Single Running Watts* 4500 watts Starting Watts 5500 watts Power Factor Insulation Rate Class “F” (105°C / 40°C) Fuel Capacity 7.9 Gallons / 30 Liters... -
Page 34: Model Number: Scgh8500E / Item Number: 70055
Model Number: SCGH8500E / Item Number: 70055 Generator Set Frequency 60hz Voltage 120v / 240v Phase Single Running Watts* 7000 Starting Watts 8500 Power Factor Insulation Rate Class “F” (105°C / 40°C) Fuel Capacity 7.9 Gallons / 30 Liters Engine Engine Model Honda GX390 Specifications... - Page 35 THIS PAGE WAS INTENTIONALLY LEFT BLANK Page 33 Part Number 7115316 / ENGLISH REV F - 07/22/2021...
- Page 36 READ THIS MANUAL CAREFULLY BEFORE OPERATION Failure to follow the instructions and safety precautions in this manual can result in property damage, serious injury and/or death. SAVE THIS MANUAL FOR FUTURE REFERENCE Part Number 7115316 / ENGLISH REV F - 07/22/2021...
Need help?
Do you have a question about the SCGH5500 and is the answer not in the manual?
Questions and answers