Table of Contents
Advertisement
Quick Links
Advertisement
Table of Contents

Subscribe to Our Youtube Channel
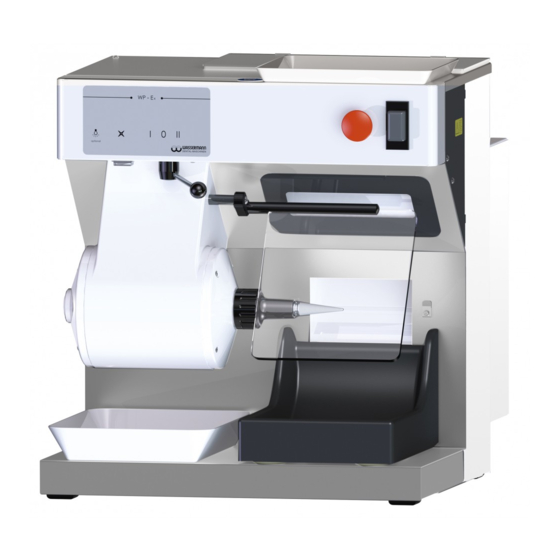
Summary of Contents for Wassermann WP-Ex 10 II
- Page 1 Polishing Compact Unit WP-Ex 10 II USER MANUAL...
- Page 2 Dear customer, Thank you for choosing a product from the Wassermann range. Wassermann Dental- Maschinen incorporates the highest standards of quality and the latest technology. In order to enjoy maximum performance and years of trouble-free operation, please read this user manual carefully before you connect this device and start work, and operate the device according to the recommended guidelines.
-
Page 3: Table Of Contents
10.2.1 Filter and Changing the Filter................12 10.2.2 Changing the Integrated LEDs.................13 10.2.3 Changing the Fuse...................14 The fuse of the WP-Ex 10 II is located next to the socket of the supply line plug..14 10.3 Repairs........................14 10.4 Spare Parts......................14 10.5 Service Hotline 0049 (0)40 730 926 -20/ -24............14 10.6 Scope of Delivery/ Accessories................15... -
Page 4: Features
Features Compact and powerful polisher for daily use in the laboratory in the smallest space • Shaft end has 9 mm standard taper for mounting the brush spindle (right) • Powerful, long-life and maintenance-free squirrel-cage motor • 2 switching steps, 1,500 resp. 3,000 min •... -
Page 5: Safety Symbols Used In This Manual
The fuse of the WP-Ex 10 II is located next to the socket of the supply line •... -
Page 6: Responsibility For Operation Or Damage
The unit has to be maintained and operated in accordance with this user manual. Wassermann Dental-Maschinen GmbH is not responsible for damage arising from the nonobservance of these instructions. -
Page 7: Before Starting
Before Starting Transport Before transporting the unit, ensure that it has been unplugged from the power socket. Make sure that it is packed correctly in order to avoid accidental damage. Be sure to check for any transport damage when unpacking the goods. Note down any damage if found. -
Page 8: Installation/ Start-Up
Installation/ Start-up Before starting the unit: Installing and Removing the Brush Spindles Use compressed air to blow away dust and dirt from the brush spindle. Remove the disassembly nut by turning it clockwise (left hand thread). Remove grease from the shaft extension and re-mount the disassembly nut by turning it counter-clockwise. When doing so make sure the disassembly nut is fully tightened. -
Page 9: Operation
Operation General Operating Instructions All instructions for using the unit, whether in verbal or written form, are based on our own experience and experimentation and can only be regarded as guidelines. Handling of the Unit Main / Protection switch: The device is powered. The lighting is on. Emergency off: After pushing the emergency off [2] and a check of all facts, the unit can be restarted... -
Page 10: Troubleshooting
The WP-Ex 10 II is powered by switching on the main switch [1]. The main / protection switch[1] prevent a unwanted „start-up“ for example after a power outage. The suction can be turned on or off manually with a toggle switch [3]. -
Page 11: Care And Maintenance
Care and Maintenance 10.1 Cleaning Disconnect the power plug before starting any maintenance work. The identification plate has always to be kept in easily legible condition and has not to be removed. Remove external dirt from time to time with some form of cold cleaner. Use only cold cleaners to avoid damaging the paintwork or removing the lettering. -
Page 12: Maintenance
10.2 Maintenance The unit does not require any servicing. Just make sure that the device is kept clean and a matched filter change should take place according to the needs. The unit is equipped with a extra large micro fine dust filterbag. If the suction power decreases, please change the filter! 10.2.1 Filter and Changing the Filter... -
Page 13: Changing The Integrated Leds
10.2.2 Changing the Integrated LEDs Disconnect the power plug before starting any maintenance work. To open the service covers [A] on the right and left side of the unit unscrew the four • screws [B] by using an Allen wrench. Then loose the four knurled screws [C] of the cover [D] inside the unit . -
Page 14: Changing The Fuse
10.2.3 Changing the Fuse The fuse of the WP-Ex 10 II is located next to the socket of the supply line plug. Remove the damaged fuse and insert a new one. 10.3 Repairs Servicing or repairs to the unit has only to be carried out by qualified technicians. -
Page 15: Scope Of Delivery/ Accessories
Micro fine dust filterbag, 1 set =2 pieces 611005 Suction protective grid, 1 piece 146396 Daylight LED spot 146390 Fuse 6.3 A M 582013 Technical Data WP-Ex 10 II Item no.: 146971 Voltage 220–240 V / 50/60 Hz Power consumption 2.2 A Output 500 W Fan capacity... -
Page 16: Disposing Of The Unit
Disposing of the Unit The unit has to be disposed by an authorized recycling operation. The selected company has to be informed of all possibly health-hazardous residues in the unit. 12.1 Information on Disposal for Countries within the EU To conserve and protect the environment, prevent environmental pollution and improve the recycling of raw materials, the European Commission adopted a directive that requires the manufacturer to accept the return of electrical and electronic units for proper disposal or recycling. -
Page 17: Eu Declaration Of Conformity
Polishing Dental-Maschinen GmbH Compact Unit for Rudorffweg 15-17 dental 21031 Hamburg applications Germany Model: WP-Ex 10 II Item no. 146971 Applicable DIN EN 61010-1 standards: DIN EN 61000-6-3 DIN EN 61000-6-1 DIN 45635-1 DIN EN 60335-1 Hiermit wird bestätigt, dass die oben bezeichnete Maschine den genannten EU-Richtlinien entspricht. - Page 18 Notes:...
Need help?
Do you have a question about the WP-Ex 10 II and is the answer not in the manual?
Questions and answers