Table of Contents
Advertisement
Quick Links
Advertisement
Table of Contents

Related Manuals for HEADRUSH MX5


Summary of Contents for HEADRUSH MX5
- Page 1 User Guide (English) Manual Version 1.2...
-
Page 2: Table Of Contents
Table of Contents Introduction .................... 4 Box Contents ..................4 Support ....................4 Features ....................5 Top Panel ..................... 5 Rear Panel ................... 6 Setup ...................... 7 Operation ....................8 Main Screen..................8 Overview ..........................8 Basic Operations ......................8 Reverb/Delay Tail Spillover ..................... - Page 3 Adjusting Settings ................16 Overview ........................... 16 Parameters ........................17 Saving a Block Preset ....................20 Hardware Assign ................21 Footswitches ........................22 Scenes ..........................22 Expression Pedal ......................23 Setlists ....................24 Hands-Free Mode ................25 Tuner/Tempo ..................25 Looper ....................
-
Page 4: Introduction
Introduction Box Contents HeadRush MX5 USB Cable (2) 1/8” (3.5mm) to MIDI Adapters Power Adapter Software Download Card Quickstart Guide Safety & Warranty Manual Support For the latest information about this product (documentation, technical specifications, system requirements, compatibility information, etc.) and product registration, visit headrushfx.com. -
Page 5: Features
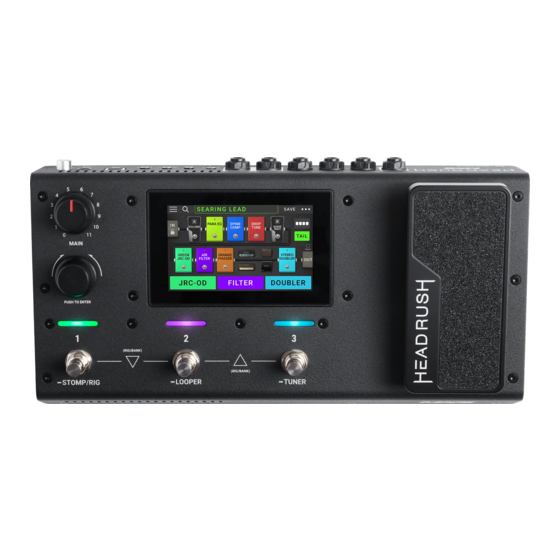
Features Top Panel 1. Display: This full-color multi-touch display shows information relevant to HeadRush MX5’s current operation. Touch the display (and use the hardware controls) to control the interface. See Operation to learn how it works. 2. Main Volume: Turn this knob to adjust the volume level of the outputs. -
Page 6: Rear Panel
10. USB Port: Connect this USB port to a computer using a standard USB cable. This connection allows HeadRush MX5 to send and receive the digital audio signal to and from your computer. You can also use this connection to import or export rigs, model presets, setlists and impulse responses. -
Page 7: Setup
Setup Items not listed under Introduction > Box Contents are sold separately. IMPORTANT! In the Global Settings Menu, make sure you set the Outputs to send signal at amp level if you are using a traditional guitar amplifier, or line level (default) if you are using a full-range flat-response amplifier, mixer, PA speaker or audio interface. -
Page 8: Operation
Operation This chapter describes some of HeadRush MX5’s basic functions. Main Screen Overview Tap and drag this bar downward to view list of rigs. Tap to view setlists. Rig name. Turn encoder to move Tap to save rig. through selectable items onscreen or to adjust parameters. - Page 9 • Tap the name of the rig on the screen and then turn the encoder. • Press footswitches 1 and 2 (), or footswitches 2 and 3 () simultaneously when MX5 is in Stomp Mode. • Press a footswitch assigned to a preset when MX5 is in Rig Mode.
-
Page 10: Reverb/Delay Tail Spillover
Reverb/Delay Tail Spillover The MX5 features two types of Reverb/Delay Tail Spillover: • If you have reverb and/or delay effect(s) active on your rig and then switch to a different rig, the effect(s) will continue to decay after switching to the second rig. -
Page 11: Signal Path
Signal Path You can easily reconfigure the path of your signal chain to split, which will create more complex routings. To reconfigure the signal path, tap toward the top right of the main screen. The icon will change to match one three possible signal paths (as shown below). -
Page 12: Stereo Vs. Mono
Stereo vs. Mono The outgoing signal from the HeadRush MX5 can be mono or stereo, depending on the models in your rig, the signal path, and which outputs you are using. An indicator near the end of the signal path indicates the current configuration. -
Page 13: Footswitch Modes
Footswitch Modes The three footswitches can be used to activate or bypass models (amps, cabs, impulse responses, or effects) as well as select scenes, rigs, or setlists. These footswitches are always in one of four modes: Stomp, Rig, Hybrid, or Setlist. To change the mode, hold footswitch 1, then: •... -
Page 14: Rigs
The signal chain is the path that the audio signal follows from your guitar through your selected models and ends at the outputs of HeadRush MX5. You can use the touchscreen to arrange your selected models in any sequence, but you may find that some configurations will sound better than others. -
Page 15: Saving A Rig
Saving a Rig If you have made certain changes to the rig at all since loading it, you will see an asterisk () next to its name at the top of the screen. You will see an asterisk if you have done any of the following: •... -
Page 16: Adjusting Settings
Adjusting Settings To adjust the settings of an item in your rig, double-tap it to open its settings screen. You can adjust the settings of any model (amp, cab, or effect), the input (the In/Lock icon), the output (the Out icon), or mix (the Mix icon). Overview Tap ... -
Page 17: Parameters
The Cab category is a list of popular amp cabinets, which contain the speakers. The HeadRush MX5 recreates not only the sound of the cabinet but also the type of microphone recording it. - Page 18 The IR category contains factory-loaded and user-loaded impulse response files. The HeadRush MX5 supports all .WAV format impulse response files with sample rates up to 192 kHz, bit depths up to 32-bit, and sample lengths up to 2,048 samples. Preset: This is the current IR preset, which includes the impulse response, all its settings, and its color assignment.
- Page 19 The available range is 1–3000 ms. USB Level: This setting controls the level of the audio signal sent from your computer to the HeadRush MX5 over a USB connection. The available range is -60.0 to 12.0 dB.
-
Page 20: Saving A Block Preset
These settings control mix of a split signal path. This is available only for rigs with split signal paths (see Main Screen > Signal Path to learn more): Preset: This is the current mix preset, which includes its settings on the right edge of the display. A Lev / B Lev (Level): These settings control the volume levels the upper (A) and lower (B) branches of the signal path. -
Page 21: Hardware Assign
It will also be the color of the corresponding footswitch indicator when the HeadRush MX5 is in Rig Mode. To set the tempo of the rig’s time-based effects (delays, modulation, etc.), tap the button under Tempo to select Current or Fixed. -
Page 22: Footswitches
Footswitches The 3 boxes in the lower-left corner represent the 3 footswitches of HeadRush MX5. You can assign any switch- based parameters (ones with only two states) to any of the footswitches—regardless of their location in the signal chain. To assign a parameter to a footswitch: 1. -
Page 23: Expression Pedal
The expression pedal can control two parameters (in Classic Mode) or two sets of parameters (in Advanced Mode). Use the toe switch to switch between them—Expression Pedal A or B. To activate the toe switch, move the “toe end” of the expression pedal so it touches the MX5, and then press down. -
Page 24: Setlists
Setlists You can use setlists to organize your rigs. A setlist is a saved collection of rigs, which you can save and recall at a later time. This is useful, for instance, if you only need some of your rigs for a performance; you can save a setlist of just those rigs so you don’t have to spend time searching through all of your rigs before playing the next song. -
Page 25: Hands-Free Mode
Hands-Free Mode Hands-Free Mode enables you to adjust any of the settings on your models by using just the footswitches and expression pedal. To enter Hands-Free Mode, press and hold footswitch 1 to enter the mode select page, and then press and hold footswitch 1 again. -
Page 26: Looper
Looper The HeadRush MX5 has a built-in looper that you can use to layer your performances. While the looper’s operation is shown in the display, you can control most of it conveniently with the footswitches. The looper can hold up to 20 minutes of audio at a time across a maximum of 50 layers. The first layer of your loop can be up to 5 minutes long. - Page 27 Import to load the loop, or tap Cancel to return to the Looper screen without deleting it. Tip: You can import .WAV and .MP3 audio files and load them into the looper by placing the files in the /LOOPS/ directory of the HeadRush MX5 while using the USB Transfer feature.
-
Page 28: External Midi Control
External MIDI Control The HeadRush MX5 can be controlled by incoming MIDI CC (control change) messages from external MIDI gear. These MIDI messages can be received from hardware connected to 1/8” (3.5 mm) MIDI Input only. The chart below lists the available parameters that can be controlled by external MIDI hardware:... -
Page 29: Global Settings
Main Out Level: This setting determines the signal level sent to the main Outputs (1/4"/6.35 mm, TRS). When set to Line, the output level will be +18 dBu. Use this setting if you are connecting the HeadRush MX5 to a full-range, flat-response amplifier, PA speaker, mixer, or audio interface. - Page 30 Prog Change: Tap Send to enable or disable the HeadRush MX5’s transmission of MIDI program change messages when you load a rig. Tap Recv to enable or disable the HeadRush MX5’s reception of MIDI program change messages from an external MIDI device.
- Page 31 Color Mod: If you have trouble distinguishing certain colors on your MX5’s display or if you just want to further customize the color scheme, you can use the color mod parameters to adjust their default settings. While experimenting with the settings, a sample of your adjustments will be shown in real time. If you want to return to the default color...
-
Page 32: Usb
Recording When the HeadRush MX5’s USB port is connected to your computer, you can select and use the HeadRush MX5 as a 24-bit audio interface, enabling you to play audio through it or to send its audio signal to the computer. It can use sample rates of 48 kHz or 96 kHz. -
Page 33: Reamping
7. On the HeadRush MX5, select the rig, models, or other parameters to achieve the sound you want. 8. In your DAW, start audio recording. The track you want to reamp will be sent through the HeadRush MX5 and recorded into the audio track you created earlier. -
Page 34: Transferring Files & Settings
5. Open the HeadRush drive. You can now freely click and drag contents between HeadRush and your computer. Note that any changes you make to the contents of your HeadRush are immediate and cannot be cancelled. -
Page 35: Screen Lock
File corruption may occur if the drive is not properly ejected before continuing. 8. After the drive has been ejected, tap Sync on your HeadRush MX5 to "commit" any changes you made to the contents of the HeadRush drive. An additional prompt will appear to confirm you have ejected the drive. Tap Proceed to continue or Cancel to continue accessing files on your computer. -
Page 36: Firmware Update Instructions
6. When the update is completed, the updater window will display Done, and your HeadRush MX5 will restart. Click Done to close the updater window. 7. Confirm your Headrush MX5 is using the latest firmware—tap the ••• icon in the upper-right corner, and tap Global Settings. The firmware version will appear at the bottom of the screen. -
Page 37: Appendix
Specifications are subject to change without notice. Trademarks & Licenses HeadRush is a trademark of inMusic Brands, Inc., registered in the U.S. and other countries. Windows is a registered trademark of Microsoft Corporation in the United States and other countries. - Page 38 Manual Version 1.2...
Need help?
Do you have a question about the MX5 and is the answer not in the manual?
Questions and answers