
Related Manuals for ProSoft inRax MVI94-GSC-E


Summary of Contents for ProSoft inRax MVI94-GSC-E
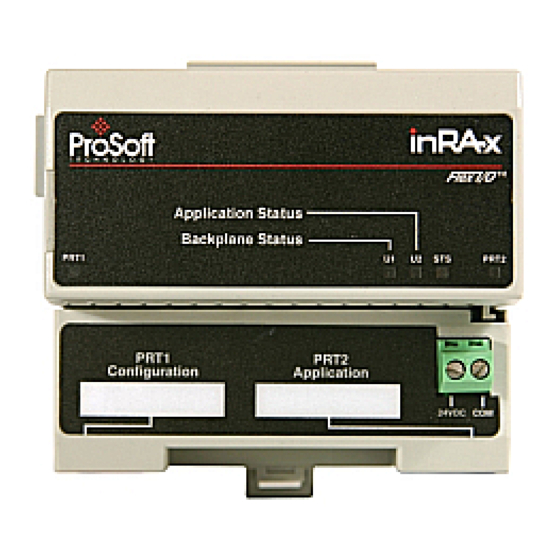
- Page 1 MVI94-GSC-E FLEX Platform Generic ASCII Comunication Module July 06, 2009 USER MANUAL...
-
Page 2: Important Installation Instructions
Important Installation Instructions Power, Input and Output (I/O) wiring must be in accordance with Class I, Division 2 wiring methods, Article 501-4 (b) of the National Electrical Code, NFPA 70 for installation in the U.S., or as specified in Section 18-1J2 of the Canadian Electrical Code for installations in Canada, and in accordance with the authority having jurisdiction. -
Page 3: Your Feedback Please
ProSoft Technology® Product Documentation In an effort to conserve paper, ProSoft Technology no longer includes printed manuals with our product shipments. User Manuals, Datasheets, Sample Ladder Files, and Configuration Files are provided on the enclosed CD, and are available at no charge from our web site: www.prosoft-technology.com... -
Page 5: Table Of Contents
Important Installation Instructions ....................... 2 MVI (Multi Vendor Interface) Modules ....................2 Warnings ............................. 2 Your Feedback Please........................3 ProSoft Technology® Product Documentation ...................3 Hardware Installation Verify Package Contents...................7 Mounting the MVI 94 Flex I/O Base ................8 Setting Jumpers ......................9 Installing the Module onto the Base ................10... - Page 6 MVI94-GSC-E ♦ FLEX Platform Contents Generic ASCII Comunication Module User Manual Page 6 of 60 ProSoft Technology, Inc. July 6, 2009...
-
Page 7: Hardware Installation
Make sure that you verify the contents of the product before you discard the packing material. The following components should be included with the product: A MVI94 Flex I/O Base A MVI94 Module with 3 jumpers installed One Serial Adapter Cable ProSoft Technology, Inc. Page 7 of 60 July 6, 2009... -
Page 8: Mounting The Mvi 94 Flex I/O Base
Base flush with the DIN-rail and release the locking tab to lock the base in place. Gently push the female flexbus C connector into the adjacent base or adapter male connector to complete the flexbus connections. Page 8 of 60 ProSoft Technology, Inc. July 6, 2009... -
Page 9: Setting Jumpers
SETUP: To place the module in SETUP mode, install the jumper in the Selected position (DOS default). To prevent the module from being in Setup mode, leave the jumper in the disabled position. ProSoft Technology, Inc. Page 9 of 60 July 6, 2009... -
Page 10: Installing The Module Onto The Base
Position the Module with its alignment bar 5 aligned with the groove 6 on the Base. Press firmly and evenly to seat the Module in the Base. The Module is seated when the latch 7 on the Base is locked into the Module. Page 10 of 60 ProSoft Technology, Inc. July 6, 2009... -
Page 11: Installing The Serial Adapter Cables
24Vdc or 12Vdc, and should be located in close proximity of the base. Connect dc common to the COM terminal Connect +24V dc or +12V dc to the 24VDC terminal ProSoft Technology, Inc. Page 11 of 60 July 6, 2009... - Page 12 MVI94-GSC-E ♦ FLEX Platform Hardware Installation Generic ASCII Comunication Module User Manual Page 12 of 60 ProSoft Technology, Inc. July 6, 2009...
-
Page 13: Configuration
You can get a sample configuration file for the module in the following places: Copy (page 17) the configuration from the module's flash memory to your PC Copy the configuration from the ProSoft Solutions CD-ROM supplied with the module Download the configuration from the ProSoft Technology web site at www.prosoft-technology.com... - Page 14 In Notepad, open the File menu, and then choose Open In the Open dialog box, select "All Files" in the Files of Type: dropdown list. Tip: Sample configuration files are stored under the LadderLogic folder on the ProSoft Solutions CD-ROM.
-
Page 15: Mvi94-Gsc-E Configuration File
Stop Bits: 1 or 2 This parameter sets the number of stop bits to be used with each data value sent. Valid entries for this field are 1 and 2. ProSoft Technology, Inc. Page 15 of 60 July 6, 2009... - Page 16 Tx Swap Bytes: Yes or No This parameter specifies if the data to be transmitted out the port will have the bytes swapped from the data presented across the backplane. Page 16 of 60 ProSoft Technology, Inc. July 6, 2009...
-
Page 17: Uploading And Downloading The Configuration File
Generic ASCII Comunication Module Uploading and Downloading the Configuration File ProSoft modules are shipped with a pre-loaded configuration file. In order to edit this file, you must transfer the file from the module to your PC. After editing, you must transfer the file back to the module. - Page 18 Press [S] (Send Module Configuration). The message "Press Y key to confirm configuration send!" is displayed at the bottom of the screen. Press [Y]. The screen now indicates that the module is ready to send. Page 18 of 60 ProSoft Technology, Inc. July 6, 2009...
- Page 19 Use the Browse button to choose a folder on your computer to save the file. Note: ProSoft Technology suggests that you upload the configuration file pre-loaded on your module. However, configuration files are also available on the ProSoft CD as well as the ProSoft Technology web site at www.prosoft-technology.com.
- Page 20 Perform the following steps to transfer a configuration file from your PC to the module. Connect your PC to the Configuration/Debug port of the module using a terminal program such as HyperTerminal. Press [?] to display the main menu. Page 20 of 60 ProSoft Technology, Inc. July 6, 2009...
- Page 21 Press [Y]. The screen now indicates that the PC is ready to send. From the Transfer menu in HyperTerminal, select Send File. ProSoft Technology, Inc. Page 21 of 60 July 6, 2009...
- Page 22 Use the Browse button to locate the configuration file your computer. Note: This procedure assumes that you are uploading a newly edited configuration file from your PC to the module. However, configuration files are also available on the ProSoft CD as well as the ProSoft Technology web site at www.prosoft-technology.com.
-
Page 23: Diagnostics & Troubleshooting
LED should turn on and off at a vary rapid rate. If the LED never turns on, check your ladder logic to verify that the data transfer is set up correctly. ProSoft Technology, Inc. Page 23 of 60 July 6, 2009... - Page 24 You can always return from a sub-menu to the next higher menu by pressing [M] on your keyboard. The organization of the menu structure is represented in simplified form in the following illustration: Page 24 of 60 ProSoft Technology, Inc. July 6, 2009...
- Page 25 You can connect directly from your computer’s serial port to the serial port on the module to view configuration information, perform maintenance, and send (upload) or receive (download) configuration files. ProSoft Technology recommends the following minimum hardware to connect your computer to the module: 80486 based processor (Pentium preferred) 1 megabyte of memory At least one UART hardware-based serial communications port available.
- Page 26 On computers with more than one serial port, verify that your communication program is connected to the same port that is connected to the module. If you are still not able to establish a connection, you can contact ProSoft Technology Technical Support for further assistance.
- Page 27 Only use these commands if you are specifically directed to do so by ProSoft Technology Technical Support staff. Some of these command keys are not listed on the menu, but are active nevertheless. Please be careful when pressing keys so that you do not accidentally execute an unwanted command.
- Page 28 Only use these commands if you are specifically directed to do so by ProSoft Technology Technical Support staff. Some of these command keys are not listed on the menu, but are active nevertheless. Please be careful when pressing keys so that you do not accidentally execute an unwanted command.
- Page 29 Only use these commands if you are specifically directed to do so by ProSoft Technology Technical Support staff. Some of these command keys are not listed on the menu, but are active nevertheless. Please be careful when pressing keys so that you do not accidentally execute an unwanted command.
- Page 30 Press [B] to start the data analyzer. After the key is pressed, all data transmitted and received on the currently selected port will be displayed. The following illustration shows an example. The Data Analyzer displays the following special characters: Page 30 of 60 ProSoft Technology, Inc. July 6, 2009...
- Page 31 From the main menu, press [A] for the "Data Analyzer". You should see the following text appear on the screen: After the "Data Analyzer" mode has been selected, press [?] to view the Data Analyzer menu. You will see the following menu: ProSoft Technology, Inc. Page 31 of 60 July 6, 2009...
- Page 32 Now you have everything that shows up on the HyperTerminal screen being logged to a file called ProSoft.txt. This is the file that you will then be able to email to ProSoft Technical Support to assist with issues on the communications network.
- Page 33 You have now captured, and saved the file to your PC. This file can now be used in analyzing the communications traffic on the line, and assist in determining communication errors. ProSoft Technology, Inc. Page 33 of 60 July 6, 2009...
- Page 34 MVI94-GSC-E ♦ FLEX Platform Diagnostics & Troubleshooting Generic ASCII Comunication Module User Manual Page 34 of 60 ProSoft Technology, Inc. July 6, 2009...
-
Page 35: Reference
Cable Connections ................48 Product Specifications The ProSoft Technology Generic ASCII Serial Single Port Interface Module is a fast and easy way to add a fully configurable ASCII communication port to the FLEX platform without consuming the front port of the processor. - Page 36 RTS On and Off Timing 0 to 65535 milliseconds Minimum Response Delay 0 to 65535 milliseconds Hardware or Software Handshaking RTS/CTS, DTR/DSR or XON/XOFF Byte Swapping Swap bytes received or to transmit Page 36 of 60 ProSoft Technology, Inc. July 6, 2009...
-
Page 37: Functional Overview
Rx and Tx buffer routines are interrupt driven. Call to Drivers Cfg/Dbg port routines check to see if there is any data in the buffer, and depending on the value, will either service the buffer or immediately return. ProSoft Technology, Inc. Page 37 of 60 July 6, 2009... - Page 38 The output image allowed for data to the module is set at 14 bytes. The following illustration shows the data transfer method used to move data between the Flex processor, the MVI94-GSC-E module and the serial devices. Page 38 of 60 ProSoft Technology, Inc. July 6, 2009...
- Page 39 Bytes 2 to 15 contain the data received on the port. If the receive byte swapping option is enabled, the bytes received will be swapped before being placed in the input image. ProSoft Technology, Inc. Page 39 of 60 July 6, 2009...
- Page 40 Cfg_DataBits Bit 3 The number of data bits for the protocol is not valid. Values between 5 and 8 are accepted. The module assumes a value of 8 data bits. Page 40 of 60 ProSoft Technology, Inc. July 6, 2009...
- Page 41 6 to 7 Application Port receive character count 8 to 9 Application Port receive block count 10 to 11 Application Port transmit character count 12 to 13 Application Port transmit block count ProSoft Technology, Inc. Page 41 of 60 July 6, 2009...
- Page 42 The data to transmit is held in bytes 4 to 13 of the block. Page 42 of 60 ProSoft Technology, Inc. July 6, 2009...
- Page 43 The format of the output image to perform this task is as follows: Byte Offset Description Block Sequence Number set to 255 (0xFF) 1 to 13 Not Used ProSoft Technology, Inc. Page 43 of 60 July 6, 2009...
- Page 44 (read data) has been processed. This is accomplished by copying the byte 0 in the input image to byte 0 of the output image. The data flow diagram for a write-only device is shown below: Page 44 of 60 ProSoft Technology, Inc. July 6, 2009...
- Page 45 If the Port 2 transmit state has a value other than zero, the port is busy. If the Port 2 transmit state has a value of zero, the port is ready for a new message to transmit. ProSoft Technology, Inc. Page 45 of 60 July 6, 2009...
- Page 46 4096 bytes) to the processor using the input image. This termination type is set in the bit mapped, Type field of the module object. The following illustration shows the bit map used for this parameter. Page 46 of 60 ProSoft Technology, Inc. July 6, 2009...
- Page 47 After the 'A' character is received on the port, the message timeout is started. The characters "ABCDE" will be sent to the controller in one block. The characters "FG" will follow in the second block one second later. ProSoft Technology, Inc. Page 47 of 60 July 6, 2009...
-
Page 48: Cable Connections
Note: When using RS-232 with radio modem applications, some radios or modems require hardware handshaking (control and monitoring of modem signal lines). Enable this in the configuration of the module by setting the UseCTS parameter to 1. Page 48 of 60 ProSoft Technology, Inc. July 6, 2009... - Page 49 This type of connection is required between the module and a modem or other communication device. The "Use CTS Line" parameter for the port configuration should be set to 'Y' for most modem applications. ProSoft Technology, Inc. Page 49 of 60 July 6, 2009...
- Page 50 Note: If the port is configured with the "Use CTS Line" set to 'Y', then a jumper is required between the RTS and the CTS line on the module connection. Page 50 of 60 ProSoft Technology, Inc. July 6, 2009...
- Page 51 Note: Terminating resistors are generally not required on the RS-485 network, unless you are experiencing communication problems that can be attributed to signal echoes or reflections. In this case, install a 120-ohm terminating resistor on the RS-485 line. ProSoft Technology, Inc. Page 51 of 60 July 6, 2009...
- Page 52 If communication in the RS-422/RS-485 mode does not work at first, despite all attempts, try switching termination polarities. Some manufacturers interpret +/- and A/B polarities differently. 4.3.5 DB9 to Mini-DIN Adaptor (Cable 09) Page 52 of 60 ProSoft Technology, Inc. July 6, 2009...
-
Page 53: Support, Service & Warranty
How to Contact Us: Technical Support..........53 Return Material Authorization (RMA) Policies and Conditions....54 LIMITED WARRANTY................55 ProSoft Technology, Inc. (ProSoft) is committed to providing the most efficient and effective support possible. Before calling, please gather the following information to assist in expediting this process:... -
Page 54: Return Material Authorization (Rma) Policies And Conditions
Return Material Authorization (RMA) Policies and Conditions The following RMA Policies and Conditions (collectively, "RMA Policies") apply to any returned Product. These RMA Policies are subject to change by ProSoft without notice. For warranty information, see "Limited Warranty". In the event of any inconsistency between the RMA Policies and the Warranty, the Warranty shall govern. -
Page 55: Limited Warranty
Product that is the subject of the sale will (1) conform to and perform in accordance with published specifications prepared, approved and issued by ProSoft, and (2) will be free from defects in material or workmanship; provided these warranties only cover Product that is sold as new. - Page 56 (including, but not limited to, programs developed with any IEC 61131-3, "C" or any variant of "C" programming languages) not furnished by ProSoft; (v) use of the Product for purposes other than those for which it was designed; (vi) any other abuse, misapplication, neglect or misuse by the Customer;...
- Page 57 (whether or not ProSoft is a party) which arises or is alleged to arise from Buyer’s acts or omissions under these Terms or in any way with respect to the Products.
- Page 58 User Manual 5.3.6 Limitation of Remedies ** In no event will ProSoft or its Dealer be liable for any special, incidental or consequential damages based on breach of warranty, breach of contract, negligence, strict tort or any other legal theory. Damages that ProSoft or its Dealer will not be responsible for included, but are not limited to: Loss of profits;...
- Page 59 Procedures for Return of Units Under Warranty: • 54 Disclaimer Regarding High Risk Activities • 56 Product Specifications • 35 Displaying Timing Marks in the Data Analyzer • 30 ProSoft Technology® Product Documentation • 3 PRT1 • 23 PRT2 • 24 Editing the Configuration File • 14 Exiting the Program •...
- Page 60 What Is Covered By This Warranty • 55, 57 What Is Not Covered By This Warranty • 56 Wiring the Power Connections • 11 Write Block • 42 Write-Only Devices • 44 Your Feedback Please • 3 Page 60 of 60 ProSoft Technology, Inc. July 6, 2009...
Need help?
Do you have a question about the inRax MVI94-GSC-E and is the answer not in the manual?
Questions and answers