Table of Contents
Advertisement
Quick Links
Advertisement
Table of Contents

Related Manuals for Nivona Cafe Romatica


Summary of Contents for Nivona Cafe Romatica
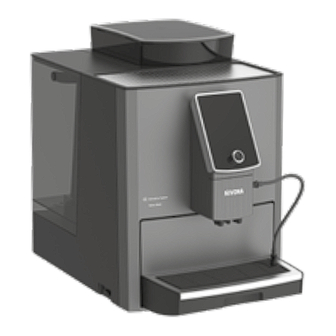
- Page 1 Cafe Romatica User manual...
- Page 2 This symbol draws your attention to special infor- reference or pass it on to any subsequent owner. mation. We hope you enjoy your NIVONA product and, with it, a good, flavour- ful cup of coffee. Best wishes to you from the NIVONA team! This symbol indicates helpful advice on how to use the machine.
-
Page 3: Table Of Contents
1.2. General instructions for the user ...........4 7.3. Aroma Balance System ............19 1.3. Limits to the range of users ............5 7.4. NIVONA app ..................20 2. CONTROL ELEMENTS ............6 8. CLEANING & MAINTENANCE ........20 OPERATION OF THE MACHINE ........7 8.1. -
Page 4: Safety Instructions
Safety instructions 1.2. General instructions for the user SAFETY INSTRUCTIONS Set the machine on a dry, level and stable surface, and use it only indoors. Never place this machine on a hot CAUTION surface, near other appliances which become very hot Repairs to electrical appliances must be carried out when in use (e.g. -
Page 5: Limits To The Range Of Users
If repair of the machine is required (including replace- ment of the mains cable!), please first contact the NIVONA service telephone or the dealer from which the machine was purchased, and, after consultation... -
Page 6: Control Elements
Control elements CONTROL ELEMENTS Cover for coffee bean holder Milk container Coffee bean holder Water tank with cover Coffee grounds container (inside) Rear rollers (in back) Connection for milk tube Cable compartment (in back) (in the drip tray) On/off switch Drip tray Type plate (Remove drip tray) -
Page 7: Operation Of The Machine
Operation of the machine OPERATION OF THE MACHINE 3.1. Function switches The NIVONA machine can be operated with the following switches: Rotary dial Touchscreen navigate / select / change / navigate / select / change / confirm by turning and pressing confirm by touching 3.2. -
Page 8: Operation With The Touchscreen
Operation of the machine 3.3. Operation with the touchscreen Using the touchscreen, the menu and function selection can be made directly by touching the symbols and buttons. 3.4. Functions of the buttons The buttons can be selected either by touching (directly) or with the rotary dial (by turn- ing and pressing). -
Page 9: Initial Startup
Initial startup INITIAL STARTUP 4.1. Preparation NOTE Remove the machine and other supplied parts from the packaging Details on Operation of the machine are contained in Chapter 3, starting at page 7. Place the machine on a level, dry work surface (ventilation slots must not be covered) Connect the mains supply cable to a power socket which has been correctly installed (any unnecessary length of cable remains inside the cable compartment) Switch on the machine... - Page 10 Initial startup Operation with filter Operation without filter (factory setting) Set the menu to INSERT FILTER? Set YES and confirm with NEXT Set the menu to INSERT FILTER? Set NO and confirm with NEXT NOTE When using the machine without a If used with a filter, the machine does not need filter, the water hardness must be to be descaled as often.
-
Page 11: Menu Navigation
All settings that were determined during initial startup can be changed at any time in the SETTINGS menu. MENU NAVIGATION In the NIVONA machine, you can select the main menus SETTINGS, SPECIALTY COFFEES, and MAINTENANCE. All available functions of the machine can be carried out within these main menus. -
Page 12: Prepare Specialty Coffees
Prepare specialty coffees PREPARE SPECIALTY COFFEES NOTE At first preparation, the grinding chamber is 6.1. Draw specialty coffee still empty. After the first grinding, it is pos- sible that FILL BEANS is displayed and the Select the desired specialty coffee in the SPECIALTY COFFEES menu machine does not make coffee. -
Page 13: 2-Cup Function
Prepare specialty coffees If the double milk tube is used, the frother does not need to be rinsed immediately, because Single milk tube – connected to drip tray the easyclean rinsing program rinses it automatically after the set time (see Chapter 7.1. on page 17). -
Page 14: Cappuccino Connaisseur
CONSTANT INTENSE 6.6. My Coffee (for individual specialty coffees) Up to 20 different beverages can be individually set, named, and stored with the NIVONA machine. To do this, in the SETTINGS menu select the menu option BEVERAGE RECIPES and MY COFFEE... -
Page 15: Permanent Recipe Settings
Prepare specialty coffees 6.7. Permanent recipe settings NOTE The following parameters for the individual specialty coffees can be permanently set in the Detailed information for setting a perma- SETTINGS menu under the item BEVERAGE RECIPES: nent TEMPERATURE and for the general setting of an FLAVOUR PROFILE is given STRENGTH FLAVOUR*... -
Page 16: Prepare Ground Coffee
Prepare specialty coffees 6.8. Prepare ground coffee CAUTION Open the lid of the ground coffee shaft (top centre on the right-hand side of the The ground coffee shaft is not a storage machine) container. Therefore, never add more than one portion to the shaft and use only fresh The display alternately shows FILL COFFEE POWDER and CLOSE GROUND COFFEE or vacuum-packed ground coffee from SHAFT... -
Page 17: Basic Settings
Basic settings BASIC SETTINGS 7.1. General settings SETTINGS All parameters displayed in the SETTINGS menu can be changed using the rotary dial / by touching. BEVERAGE RECIPES FILTER WATER HARDNESS – Permanent recipe setting of the individual Set operation with / without filter –... - Page 18 NIVONA app. After disconnection from the power network, the time of day must be reset. ** If the rotary dial has not been actuated for a longer period of time, the machine switches automatically into the ECO mode.
-
Page 19: Set Grind Fineness
7.3. Aroma Balance System NOTE The NIVONA machine is equipped with the Aroma Balance System, which brings out the best When changing the grind fineness, we of the bean for every taste. The three flavour profiles DYNAMIC, CONSTANT and INTENSE recommend: create a different taste with the same bean, same coffee strength, and same water amount. -
Page 20: Nivona App
Basic settings 7.4. NIVONA app The NIVONA machine can be controlled and operated through the NIVONA app, as it is NOTE equipped with a Bluetooth interface. The NIVONA machine supports only one Download the NIVONA app from the Google Play Store (Android) or from the Apple... -
Page 21: Rinse Frother
Cleaning & maintenance When a message / instruction for cleaning or maintenance activities appears on the display: Select and confirm the instruction with the rotary dial / by touching The machine starts the corresponding cleaning or maintenance process and displays instructions for additional actions. -
Page 22: Clean Frother
Cleaning & maintenance If the double milk tube is used, the frother does not need to be rinsed manually, because the easyclean rinsing program rinses it automatically after the set time (see Chapter 7.1. on page 17) without having to remove the double milk tube from the milk source. However, manual flushing is possible. -
Page 23: Rinse System
Cleaning & maintenance Put some detergent (recommendation: NIVONA CreamClean milk system cleaner) and water into a container (min. 0.3 l) Please observe the instructions of the detergent manufacturer for the mix ratio CONNECT TUBE TO CLEANING Follow the instructions on the display up to the end of the program and confirm each... -
Page 24: Descale System
Both the single milk tube and the double milk tube can be used for the descaling program. Never use vinegar or vinegar-based material for descaling, but always use commercially availa- NOTE ble liquid products recommended for fully automatic coffee machines (recommendation: NIVONA A message / instruction is shown on the PREMIUM liquid descaler). -
Page 25: Remove & Clean Brewing Unit
Cleaning & maintenance Select and confirm the instruction with the rotary dial / by touching or In the MAINTENANCE menu, select the menu option DESCALE SYSTEM Put a sufficiently large container (≥ 0.7 l) under the height-adjustable outlet DESCALING Follow the instructions on the display up to the end of the program and confirm each SYSTEM time with the rotary dial / by touching The machine then heats up and is ready for operation again. -
Page 26: Clean Regularly By Hand
Cleaning & maintenance 8.7. Clean regularly by hand CAUTION Never immerse the machine in water! NOTE Do not use scouring agents for cleaning. Please follow these cleaning instructions. Maximum cleanliness is required, especially when handling Dried milk residue is hard to remove. food and beverages. -
Page 27: Disassemble And Clean Frother
Cleaning & maintenance To clean the display during operation, the display can be locked in the MAINTENANCE menu under the item SCREEN MAINTENANCE. Pressing the rotary dial once releases the lock. Cover plate on the 8.8. Disassemble and clean frother height-adjustable outlet Remove the cover plate at the height-adjustable outlet, gently pull the frother down... -
Page 28: Maintenance Status
Cleaning & maintenance Empty the water tank; carefully unscrew the old filter from its holder using the mounting CAUTION aid at the end of the measuring spoon, and throw the filter away Insert the filter straight and do not over- Carefully screw the new filter into its intended holder in the water tank using the mount- turn! ing aid at the end of the measuring spoon... -
Page 29: Solving Problems Yourself
If a fault occurs, or you cannot fix a problem yourself, please contact your selling dealer or visit the service area at www.nivona.com. The following information is important for fast, competent processing of the matter Type plate (example) Model of the NIVONA product Model Serial number If available:... - Page 30 Solving problems yourself Problem Cause Remedy NOTE No hot water or System might need descaling Perform high-dosage descaling To avoid problems, the following should drawing of milk foam / (Chapter 8.5.) be observed: steam possible Frother is plugged Disassemble the frother com- Always remove the water tank pletely and clean it thoroughly from the machine to fill it...
- Page 31 Grind fineness not adapted to Optimise the grind fineness grinder coffee beans (chapter 7.2.) Foreign matter in the grinder, Call the NIVONA service e.g. small stones telephone; ground coffee can still be used The display shows The drive cannot properly...
-
Page 32: Accessories & Coffee Assortment
Packaging & disposal 10. ACCESSORIES & COFFEE ASSORTMENT Our current assortment of accessories and coffee can be found at www.nivona.com. 11. CUSTOMER SERVICE & WARRANTY If you have to send in the machine due to a defect, first evaporate it out so that no water remains in the system. -
Page 33: Technical Data
Max. transmission output: 10 mW * Depending on the amount of beans used ** NIVONA Apparate GmbH hereby declares that the radio system complies with the Directive 2014/53/EU. The complete text of the EU conformity declaration is available at the internet address www.nivona.com... - Page 34 NIVONA Apparate GmbH Südwestpark 49 D-90449 Nürnberg www.nivona.com 2020 © Copyright NIVONA Apparate GmbH, Germany ANR 000129888 All rights reserved BDA NICR 1040 GB Rev.01 22.09.2020...
Need help?
Do you have a question about the Cafe Romatica and is the answer not in the manual?
Questions and answers