Table of Contents
Advertisement
Quick Links
Version 2, May 2021
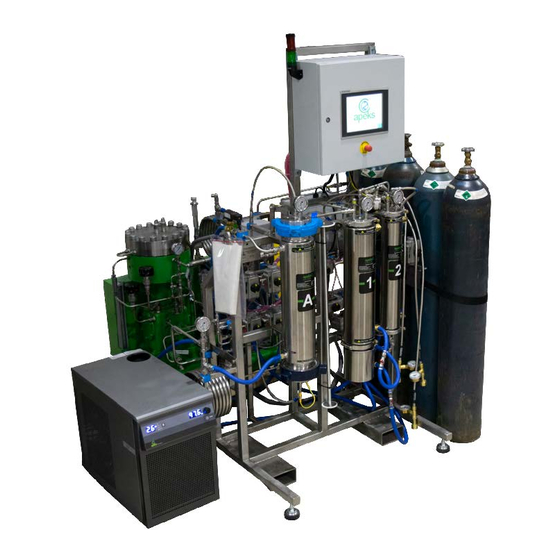
THE BAMBINO® 2000psi and
THE TRANSFORMER® 2000psi
Botanical Oil Extraction System
Operation Manual
WARNING
FAILURE TO FOLLOW THE SET UP AND OPERATION PROCEDURE PROVIDED IN WITHIN
THIS MANUAL MAY VOID THE EXTRACTION SYSTEM'S WARRANTY
Apeks Supercritical, now known as Prospiant
150 Commerce Blvd.
Johnstown OH 43031
740 809-1160 opt 2
service@prospiant.com
www.apekssupercritical.com
Scan this QR code to get the most recent
version of the operating instructions.
Updated 5/4/2021
© Apeks LLC, 2021
Advertisement
Table of Contents

Related Manuals for Apeks Prospiant BAMBINO

Summary of Contents for Apeks Prospiant BAMBINO
- Page 1 Operation Manual WARNING FAILURE TO FOLLOW THE SET UP AND OPERATION PROCEDURE PROVIDED IN WITHIN THIS MANUAL MAY VOID THE EXTRACTION SYSTEM’S WARRANTY Apeks Supercritical, now known as Prospiant 150 Commerce Blvd. Johnstown OH 43031 740 809-1160 opt 2 service@prospiant.com www.apekssupercritical.com...
-
Page 2: Table Of Contents
C: Check Valve Cleaning ............................29 6.4. C: Piping and Instrumentation Diagram ......................32 6.5. D: CO Phase Diagram ............................34 6.6. E: Pre-Training Checklist ............................35 6.7. F: Electrical Screw Torque Requirements ......................37 Updated 5/4/2021 © Apeks LLC, 2019... -
Page 3: Critical Safety Overview
Extraction system components can weigh in excess of 2000 lbs and need to be moved carefully. Never attempt to move system pieces without the proper equipment, failure to do so could result in serious injury or death. WARNING Always wear safety glasses when operating and servicing the system. Updated 5/4/2021 © Apeks LLC, 2019... -
Page 4: System Operation
The HMI has two functions: 1) to provide information and 2) to accept inputs from the operator. Description of some of the interaction is here: 2.2.2.1. If a display value or message is colored orange, an operator must take action before moving forward. Updated 5/4/2021 © Apeks LLC, 2019... - Page 5 2.2.6. The primary operating valves on the Apeks system are air actuated valves controlled by the systems controller. In the event of an air compressor failure or a power failure all air actuated valves will return to their normal resting state.
-
Page 6: Screen Shots
The manual screen is used quite often, and is where to go to perform any operations other than normal operation such as clearing a clogged orifice, recovering CO before the entered run time is complete, opening the extractor vessel, or changing a CO bottle. Figure 5. Manual Screen Updated 5/4/2021 © Apeks LLC, 2019... - Page 7 The Logo Screen shows the system software revision number which is located in the bottom left of this screen. The reason for the logo screen is to hide any potentially secret parameters on the home screen. Figure 7. Logo Screen Updated 5/4/2021 © Apeks LLC, 2019...
- Page 8 By looking at the alarm screen you can see all the previous faults in the order that they occurred. Figure 9. Alarm Screen Updated 5/4/2021 © Apeks LLC, 2019...
-
Page 9: Pre-Cleaning
2.4. Pre-Cleaning 2.4.1. The Apeks system is constructed from 304 and 316 stainless steel and can be cleaned with any cleaner that is compatible with both stainless steel and your extracted product. Alcohol (200 proof) works well for most applications. -
Page 10: Remaining Oil From Separator #1
Remove the flexible metal line and connection pipe from the top of the separators. Use two wrenches to prevent the bending tubes or NPT fittings from loosening in the separator cap (see Figure 11). Figure 11. Illustration of using two wrenches to remove lines Updated 5/4/2021 © Apeks LLC, 2019... - Page 11 When reassembling, check gaskets for integrity and groove seals for cleanliness. 2.6.20. Prior to reassembling separator #1 cap, check orifice for clog and orientation. 2.6.21. Reconnect the collector cup water lines with quick connect to original configuration before turning on the chiller/heater. Updated 5/4/2021 © Apeks LLC, 2019...
-
Page 12: Closing Separation Vessels
If the evacuation button is not present this means there is entrained pressure somewhere in the system still and you may need to reassemble the vessels and finish the recovery. Check for pressure on the I/O Screen. Figure 14. Valve 11 open Updated 5/4/2021 © Apeks LLC, 2019... - Page 13 2.8.3.3. Remove the filter housing and filter on the back of the system. Inspect filter and housing for oil. Clean housing and clean/replace filter as necessary. See Figures 16 and 17. Disconnect Here Figure 16. Filter Housing Updated 5/4/2021 © Apeks LLC, 2019...
- Page 14 After no color appears in solvent, use compressed air to blow out the line to ensure that NO residual alcohol remains in the line between the separator and the pump. 2.8.3.5. Reconnect the separator outlet lines and reassemble filter. 2.8.3.6. The separator outlet line must be cleaned after every extraction. Updated 5/4/2021 © Apeks LLC, 2019...
-
Page 15: Opening Extraction Vessel
2.9.6.1. Use caution not to scratch or otherwise damage the sealing surfaces on the flanges. Figure 18. Appearance of extractor vessel in open condition Updated 5/4/2021 © Apeks LLC, 2019... -
Page 16: Removing Spent Material From Extraction Vessel
Check the cup seal or O-ring for any visible damage or defects. Replace if necessary. 2.12.3. Ensure the threads of the extractor are free of debris and greased with the supplied bottle of anti-seize as shown in Figure 19. Figure 19. Supplied bottle of Anti-Seize and threads Updated 5/4/2021 © Apeks LLC, 2019... -
Page 17: Evacuating System (Pulling Vacuum)
2.14.10. Turn off the vacuum pump. 2.14.11. Disconnect the pump assembly (vacuum gauge, blue vacuum hose and pump). 2.14.12. Press the message button acknowledging that the evacuation is complete. 2.14.13. Return to the Home Screen. Updated 5/4/2021 © Apeks LLC, 2019... -
Page 18: Chiller Start Up
“Running”. An additional information box will appear indicating the direction of the flow, either “Forward Flow” or “Reverse Flow”. 2.15.7.1. Forward flow refers to CO entering the top of the vessel and exiting the bottom. Reverse flow enters the bottom and leaves the top. Updated 5/4/2021 © Apeks LLC, 2019... -
Page 19: Recommended Operating Parameters
Resultant Separator Pressure: ....350-400psi Resultant Separator Temperatures: ..20-30 Extraction Time: ........2-3 hours per pound Supercritical: Target Pressure: ........1,800psi Chiller setting: ......... 105-110 Propylene Glycol Percentage: ....10% Orifice Size: ..........29 Updated 5/4/2021 © Apeks LLC, 2019... -
Page 20: System Maintenance
• Run the system “empty of plant material” for 1 hour to clean the high pressure side of the system and extraction vessel(s). Hours Yearly • Check torque on all screws in electrical panels (see Appendix G). • Apeks online store http://apeksonlinestore.com/ Resource Updated 5/4/2021 © Apeks LLC, 2019... -
Page 21: Diaphragm Compressor Maintenance
• Listen for abnormal noise or vibration. • Check for any leaks. • Clean condenser filter (air filter) on front bottom of chiller. Every Month • Check/Clean fluid diffuser. Every 6 • Replace cooling fluid. months Updated 5/4/2021 © Apeks LLC, 2019... -
Page 22: Troubleshooting
Use the 5/8″ ratchet wrench to remove the high pressure sanitary clamps from the top of Separator x. Remove the cap from the top of Separator #1. xi. Ensure you are using the correct size orifice and inspect for clogs. Updated 5/4/2021 © Apeks LLC, 2019... -
Page 23: Low Separator Pressure
For both cases check water line connections, chiller settings and water to propylene glycol percentages. Updated 5/4/2021 © Apeks LLC, 2019... -
Page 24: References
The Bambino® and The Transformer® Operation Manual 5. References YouTube Instructional Videos https://www.youtube.com/user/ApeksSupercritical Apeks online store (740) 809-1160 option 2 http://apeksonlinestore.com/ Software Updates and E-mail Alerts (740) 809-1160 option 2 http://www.apekssupercritical.com/service/ Updated 5/4/2021 © Apeks LLC, 2019... -
Page 25: Appendices
Check belt(s) tension with belt tension tester. PDC-4 (The Transformer®) belts should be tensioned to 10 lbs and PDC-3 (The Bambino®) belts should be tensioned to 6-7 lbs. i. If you need help using your tension tester tool please watch the following video: https://www.youtube.com/watch?v=bYEHvfo8t6A Figure A2 Updated 5/4/2021 © Apeks LLC, 2019... - Page 26 Adjust the set screws on the motor base in or out to tighten or loosen the bolt as necessary. Figure A4. Bolts holding motor to base, loosened 6.1.5.1. Be sure to check motor shaft alignment (note: can be up to 1/8″ difference from side to side). Figure A5. Checking alignment Updated 5/4/2021 © Apeks LLC, 2019...
- Page 27 The Bambino® and The Transformer® Operation Manual 6.1.6. Retighten motor bolts. 6.1.7. Rotate the belt by hand around one turn (failure to do so could result in an incorrect reading). 6.1.8. Check belt tension again and repeat as necessary. Updated 5/4/2021 © Apeks LLC, 2019...
-
Page 28: B: Diaphragm Pump Priming Instruction
Begin to close over pump bypass valve slowly, one full turn every five to ten seconds, until fully closed. From the “Manual Screen” hit the “Stop Prime Compressor” button. Start the system to see if pump is pumping properly. Updated 5/4/2021 © Apeks LLC, 2019... -
Page 29: C: Check Valve Cleaning
Dissemble check and clean thoroughly with alcohol or acetone. For heavily soiled valves us an ultrasonic cleaner on metal pieces to help remove soil. Do not clean the poppet (brown donut) in the ultrasonic cleaner. If poppet is beyond cleaning or damaged contact Apeks for a replacement. Updated 5/4/2021... - Page 30 The Bambino® and The Transformer® Operation Manual Poppet Springs Components of check valve Figure C2. Suction check valve Figure C3. Updated 5/4/2021 © Apeks LLC, 2019...
- Page 31 The Bambino® and The Transformer® Operation Manual Discharge check valve Figure C4. e) Reassemble checks when cleaned and assemble in pump f) Torque the retaining bolts to 15 ft-lbs after reassembly. Updated 5/4/2021 © Apeks LLC, 2019...
-
Page 32: C: Piping And Instrumentation Diagram
The Bambino® and The Transformer® Operation Manual 6.4. Appendix D: Piping and Instrumentation Diagram Updated 5/4/2021 © Apeks LLC, 2019... - Page 33 The Bambino® and The Transformer® Operation Manual Updated 5/4/2021 © Apeks LLC, 2019...
-
Page 34: Phase Diagram
The Bambino® and The Transformer® Operation Manual 6.5. Appendix E: CO Diagram Phase 6.6. Appendix F: Pre-Training Checklist Updated 5/4/2021 © Apeks LLC, 2019... -
Page 35: E: Pre-Training Checklist
Must be complete before scheduling training: Print complete operation manual and have on site the day of training, along with the chiller manual. o Must be complete before scheduling training: Apeks system and diaphragm compressor are unpacked and set up in location of operation. Refer to unpacking instructions in the installation manual. - Page 36 After completing the pre-training checklist, request scheduling of onsite training via our website: http://www.apekssupercritical.com/training/ o Onsite training is generally a four hour block of instruction that will cover the fundamentals of operation and maintenance of each component of the system. Updated 5/4/2021 © Apeks LLC, 2019...
-
Page 37: F: Electrical Screw Torque Requirements
28. 10A Circuit Breaker (14 AWG) = 17.7 lb-in 29. 10A Circuit Breaker (8 AWG) = 39.9 lb-in 30. Ewon Flexy Power Connector = 7 lb-in 31. Ewon Cosy Power Connector = 7 lb-in 32. 125V Plug = 12 lb-in Updated 5/4/2021 © Apeks LLC, 2019...
Need help?
Do you have a question about the Prospiant BAMBINO and is the answer not in the manual?
Questions and answers