Table of Contents
Advertisement
Available languages
Available languages
Quick Links
Advertisement
Table of Contents

Summary of Contents for Yoer SILENT INTENSE VC01BK
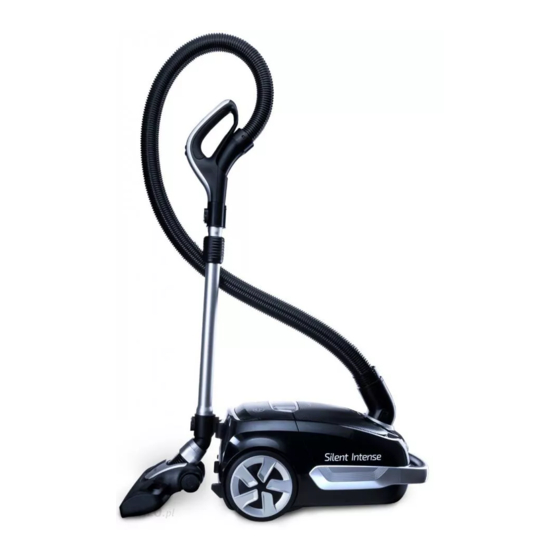
- Page 1 Odkurzacz workowy Bagged vacuum cleaner VC01BK SILENT INTENSE PL ● EN...
-
Page 2: Warunki Bezpieczeństwa
POLSKI WARUNKI BEZPIECZEŃSTWA Podczas korzystania z urządzeń elektrycznych należy przestrzegać podstawowych zasad bezpieczeństwa w tym następujących: Przed przystąpieniem do użytkowania dokładnie zapoznaj się z niniejszą instrukcją i zachowaj ją na przyszłość. Upewnij się, że napięcie w gniazdku elektrycznym odpowiada napięciu podanemu na tabliczce znamionowej. By zapobiec pożarowi, porażeniu prądem elektrycznym, bądź... - Page 3 POLSKI POZNAJ SWÓJ ODKURZACZ Rękojeść z regulacją mocy pracy Elastyczny wąż Rura teleskopowa Wyświetlacz Schowek na ssawki Nasadka Worek materiałowy Uchwyt AKCESORIA Urządzenie posiada 4 nasadki oraz 2 dodatkowe ssawki umieszczone w schowku. Każda z nich spełnia osobną funkcję. Ssawka szczelinowa Nasadka do podłóg twardych przeznaczona do grzejników, kątów, Szczotka do kurzu...
-
Page 4: Dane Techniczne
POLSKI DANE TECHNICZNE 800W Moc ssania 200W Napięcie / Częstotliwość 230V~50Hz Poziom hałasu 68dB MONTAŻ URZĄDZENIA 1. Upewnij się że odkurzacz jest odłączony od prądu przed przystąpieniem do montażu lub wymiany akcesoriów. 2. Zamontuj wąż w gnieździe poprzez wciśnięcie. Charakterystyczne kliknięcie informuje że element jest osadzony prawidłowo. -
Page 5: Demontaż Urządzenia
POLSKI 4. Aby dostosować długość rury teleskopowej, przesuń czarny uchwyt na rurze w dół lub w górę, w zależności od tego, czy chcesz skrócić czy przedłużyć rurę, a następnie, trzymając za rękojeść, przesuń węższą część rury teleskopowej w pożądane położenie. Puść uchwyt by zachować ustawioną... -
Page 6: Korzystanie Z Urządzenia
POLSKI KORZYSTANIE Z URZĄDZENIA Przycisk otwierania schowka Przycisk zwiększania Przycisk zmniejszania mocy mocy Włącznik / wyłącznik Zwijacz przewodu Przycisk zwiększania mocy Przycisk zmniejszania mocy Włącznik / wyłącznik... -
Page 7: Regulacja Mocy
POLSKI 1. Po odpowiednim montażu odkurzacza wyciągnij pożądaną długość przewodu zasilającego ze zwijacza umieszczonego w tylnej części urządzenia. Optymalna ilość rozwiniętego przewodu zaznaczona jest na żółto, a maksymalna na czerwono. Nie przekraczaj maksymalnej długości przewodu. Po podłączeniu do prądu urządzenie jest gotowe do pracy 2. - Page 8 POLSKI PARKOWANIE W tylnej części obudowy oraz pod spodem odkurzacza znajdują się zaczepy służące do zamocowania rury teleskopowej. Ustaw urządzenie w pożądanej pozycji, a następnie wsuń hak nasadki w wyżłobienie. Pionowe Poziome SCHOWEK NA SSAWKI W przedniej pokrywie odkurzacza znajduje się schowek na szczotkę do kurzu oraz ssawkę szczelinową. Aby wyjąć...
-
Page 9: Czyszczenie I Konserwacja
POLSKI CZYSZCZENIE I KONSERWACJA Przed przystąpieniem do którejkolwiek z poniższych czynności odłącz urządzenie od zasilania. Należy używać wyłącznie filtrów i worków rekomendowanych dla tego modelu odkurzacza przez producenta. I. WYMIANA WORKA NA KURZ 1. Po odłączeniu węża, otwórz przednią pokrywę obudowy poprzez naciśnięcie zatrzasku znajdującego się... - Page 10 POLSKI III. WYMIANA FILTRA WYLOTOWEGO 1. Zdejmij pokrywę znajdującą się w tylnej części odkurzacza 2. Odchyl pokrywę i wyciągnij filtr HEPA. 3. Zainstaluj nowy filtr. Filtry należy regularnie czyścić oraz wymieniać co najmniej raz na 12 miesięcy, bądź częściej gdy staną...
-
Page 11: Czyszczenie Ssawek
POLSKI V. CZYSZCZENIE SSAWEK Regularnie czyść nasadki odkurzacza z zalegających w nich zanieczyszczeń. Włosy oraz włókna nawinięte na rolkę turboszczotki możesz usunąć przy pomocy tradycyjnych nożyczek, uważając przy tym, by nie uszkodzić włosia szczotki. ROZWIĄZYWANIE PROBLEMÓW Możliwa przyczyna Rozwiązanie Problem Wtyczka jest odłączona od gniazdka... - Page 12 Niniejsza gwarancja nie ogranicza ustawowych praw konsumenta ani innych praw, jakie konsument posiada zgodnie z obowiązującymi przepisami, które dotyczą zakupu przedmiotów użytkowych. W przypadku roszczenia gwarancyjnego należy zwrócić się do specjalistycznego punktu sprzedaży lub bezpośrednio do autoryzowanego serwisu YOER. W momencie składania reklamacji należy podać rodzaj usterki oraz dołączyć kopię dowodu zakupu.
-
Page 13: Important Safeguards
ENGLISH IMPORTANT SAFEGUARDS When using electrical appliances, basic safety precautions should always be followed, including the following: Read all instructions before using and keep for future reference. Make sure that your outlet voltage corresponds to the voltage stated on the rating label. To protect against fire, electrical shock and injury do not immerse cord, plug or unit in water or other liquid. -
Page 14: Know Your Vacuum Cleaner
ENGLISH KNOW YOUR VACUUM CLEANER Handgrip with power regulation Flexible hose Telescopic tube Display Nozzle storage Attachment Fabric dust Handle ACCESSORIES The device comes with 4 attachments and 2 additional nozzles located in the compartment. Each is intended for a different application. Crevice tool Dusting brush Hard floor and carpet attachment... -
Page 15: Technical Specification
ENGLISH TECHNICAL SPECIFICATION Power 800W Suction power 200W Voltage / Frequency 230V~50Hz Noise level 68dB ASSEMBLY 1. Make sure the device is unplugged 2. Push the hose connector into the mount. A characteristic “click” sound assures proper installation. 3. Connect the wide end of the telescopic tube to a selected attachment, and the narrow end to the handle. - Page 16 ENGLISH 4. To adjust the height of the telescopic tube, move the black grip upwards or downwards, depending on whether you want to lengthen or shorten the tube, then move the narrow part of the tube into the desired position, while holding by the handle. Let go of the grip to save the position. DISASSEMBLY Before commencing any of the activities described below, unplug the device.
- Page 17 ENGLISH OPERATION INSTRUCTIONS Nozzle storage opening button Power decrease Power increase button button ON / OFF button Power cord rewind button Power increase button Power decrease button ON / OFF button...
-
Page 18: Power Adjustment
ENGLISH 1. After having assembled the device properly, pull a desired cord length from the roller located in the back of the device. A yellow marking points to the optimal length, while the red marking points to the maximum length. Do not exceed the maximum cord length. After plugging in, the device is ready to begin operation. - Page 19 ENGLISH PARKING On the bottom part of the vacuum cleaner, as well as on the underside, tube mounting hitches are located. Put the device in a desired position and slide the attachment hook into the hitch. Vertical Horizontal NOZZLE STORAGE A compartment for the dusting brush and the crevice tool is located under the front cover of the vacuum cleaner.
-
Page 20: Cleaning And Maintenance
ENGLISH CLEANING AND MAINTENANCE Before commencing any of the activities described below, unplug the device. Only use filters and dust bags recommended for this vacuum cleaner by the manufacturer. I. DUST BAG REPLACEMENT 1. After having disconnected the hose, open the front lid by pushing on the latch located under the handle. -
Page 21: Device Cleaning
ENGLISH III. OUTLET FILTER REPLACEMENT 1. Remove the cover located at the back of the vacuum cleaner. 2. Fold back the cover and remove the HEPA filter. 3. Install the new filter. The filters need to be cleaned regularly, and need to be replaced at least every 12 months, or more often if they get visibly dirty in order to retain optimal vacuuming performance. -
Page 22: Attachment Cleaning
ENGLISH V. ATTACHMENT CLEANING Regularly clean the attachments of accumulated contaminants. Hair and lint collected around the roller of the turbo-brush can be removed with regular scissors, while exercising caution not to cut the bristles of the brush. TROUBLESHOOTING Problem Possible cause... -
Page 23: Warranty And Repair
This warranty does not limit the customer’s basic or any other rights granted by laws regarding appliance purchase. In the event of a warranty claim please contact the verified vendor or YOER Service. While submitting the claim please attach information on the nature of the malfunction and a proof of purchase. - Page 24 Producent: Yoer Bernardyńska 2 64-000 Kościan, Polska www.yoer.pl VC01BK SILENT INTENSE...